
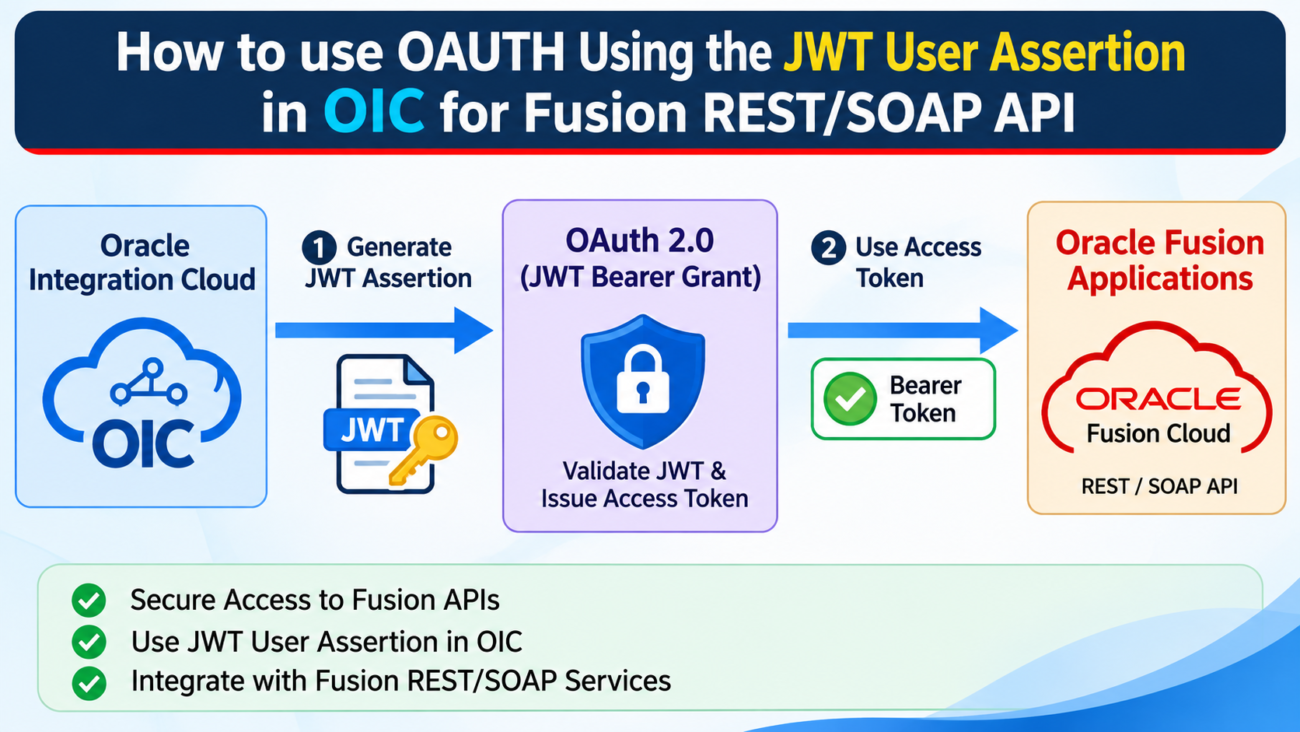
This article will demonstrate how to use OAUTH using JWT User Assertion in OIC for Fusion REST/SOAP API.
What is JWT User Assertion?
- JWT User Assertion is a security token that represents a user’s identity and is issued by a trusted identity provider.
- It is digitally signed and includes claims such as User ID (sub), issuer (iss), audience(aud) and expiration(exp)
- Used in Oauth2.0 flows. It allows security identity propagation and token exchange without direct user interaction.
Step1: Generate the key
- Generate the self-Signed key pair
Open command prompt and run below command to generate self-signed key pair
keytool -genkey -keyalg RSA -alias demojwtkey -keystore sampleKeystore.jks -storepass Oracle@123 -validity 365 -keysize 2048
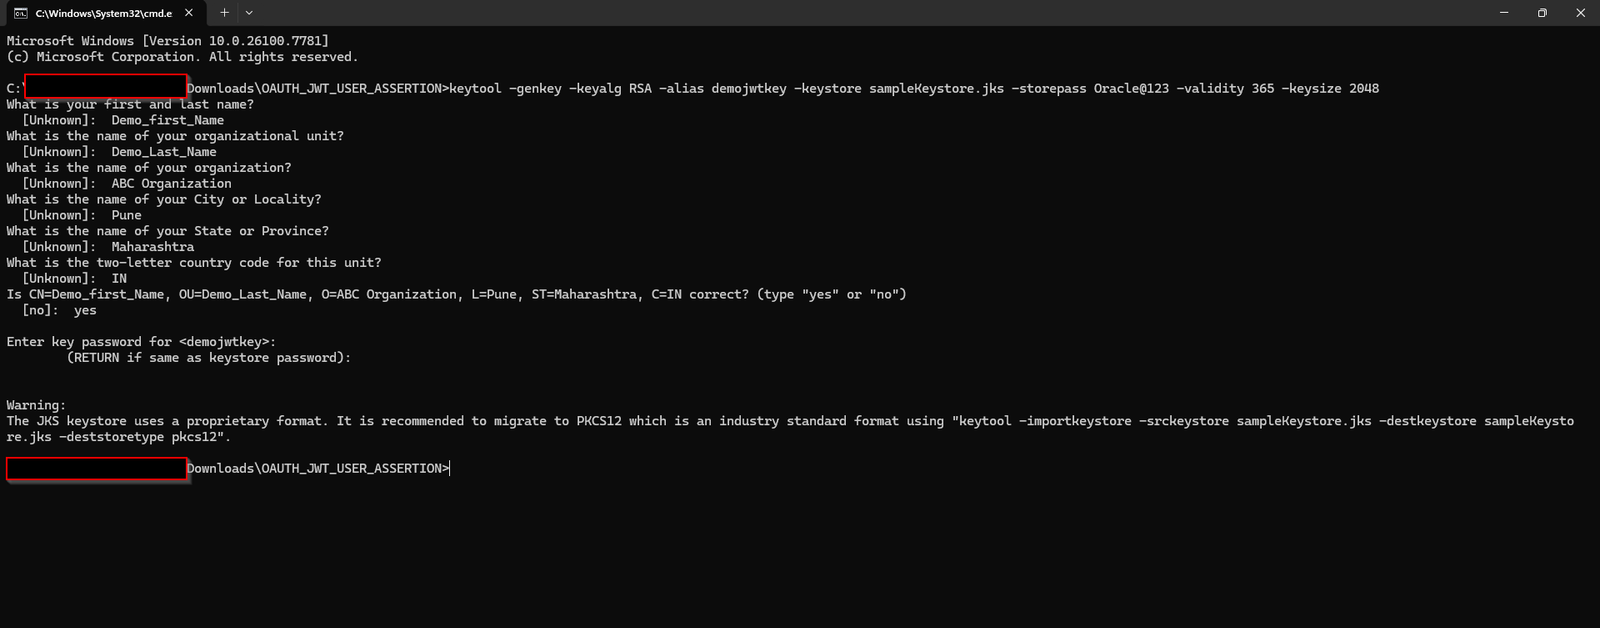
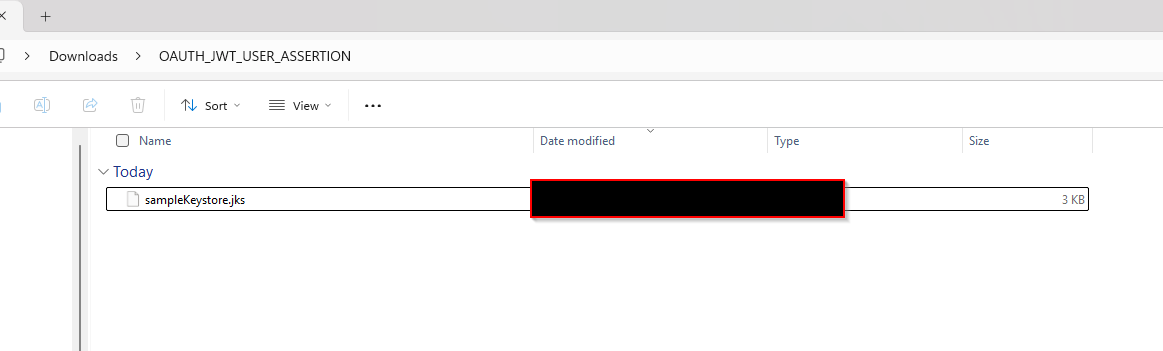
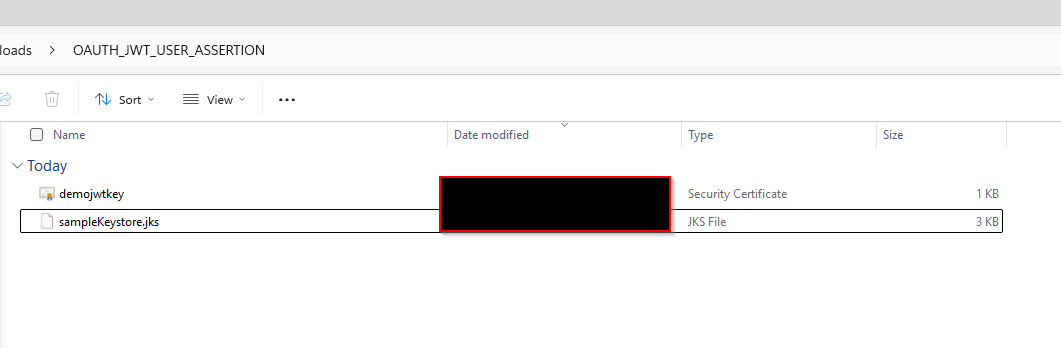
This will generate sampleKeystore.jks file as shown below:
2. Export the public key for signing the JWT assertion
keytool -exportcert -alias demojwtkey -file demojwtkey.cer -keystore sampleKeystore.jks -storepass Oracle@123

3. Convert the keystore to P12 format:
keytool -importkeystore -srckeystore sampleKeystore.jks -srcstorepass Oracle@123 -srckeypass Oracle@123 -srcalias demojwtkey -destalias demojwtkey -destkeystore demojwtkey.p12 -deststoretype PKCS12 -deststorepass Oracle@123 -destkeypass Oracle@123

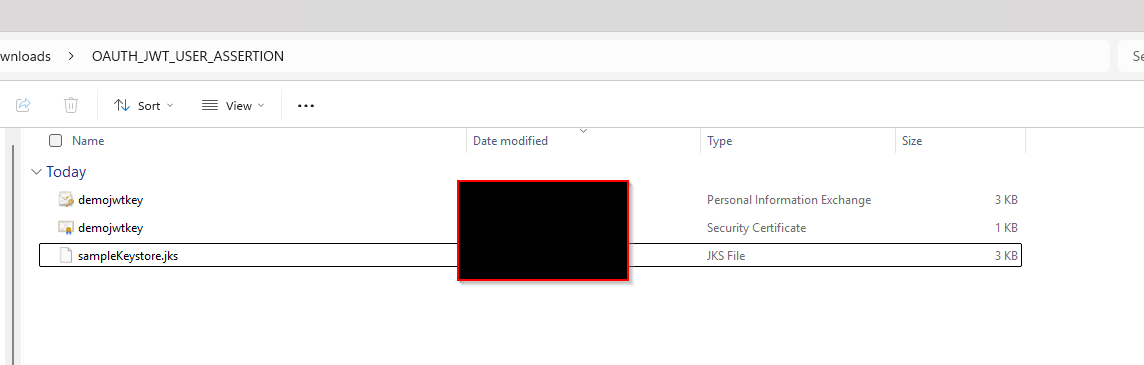
4. Export the private key from the P12 key store:
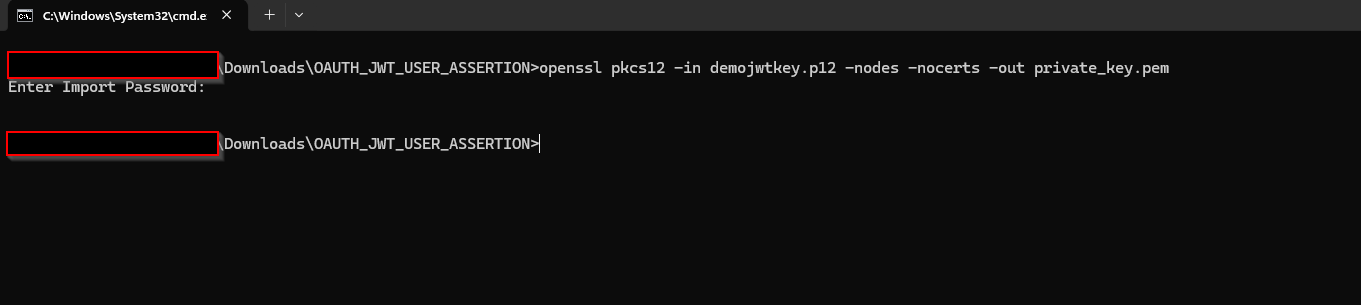
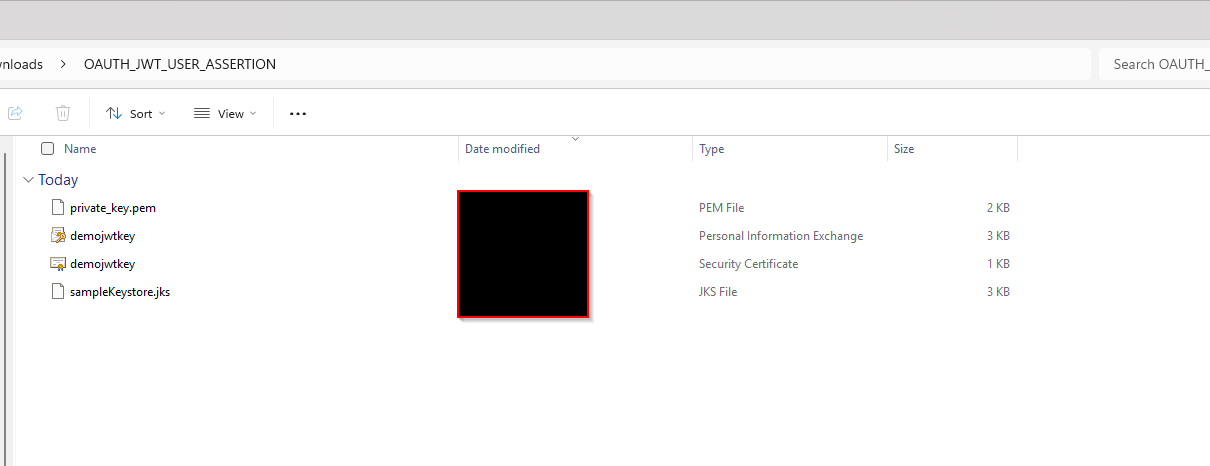
openssl pkcs12 -in demojwtkey.p12 -nodes -nocerts -out private_key.pem
****Install open ssl before running this command.
Step2: Crate Confidential Application in IDCS under fusion Domain.
Login to OCI console.
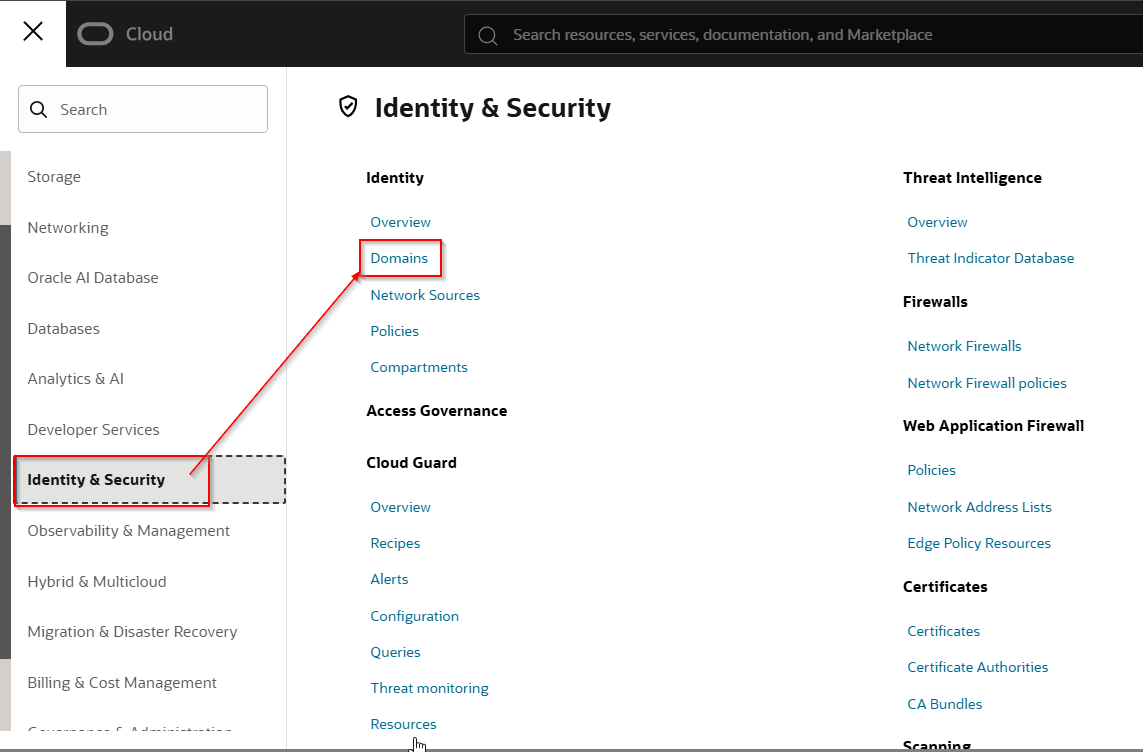
Navigate to Identity & Security —>Domains
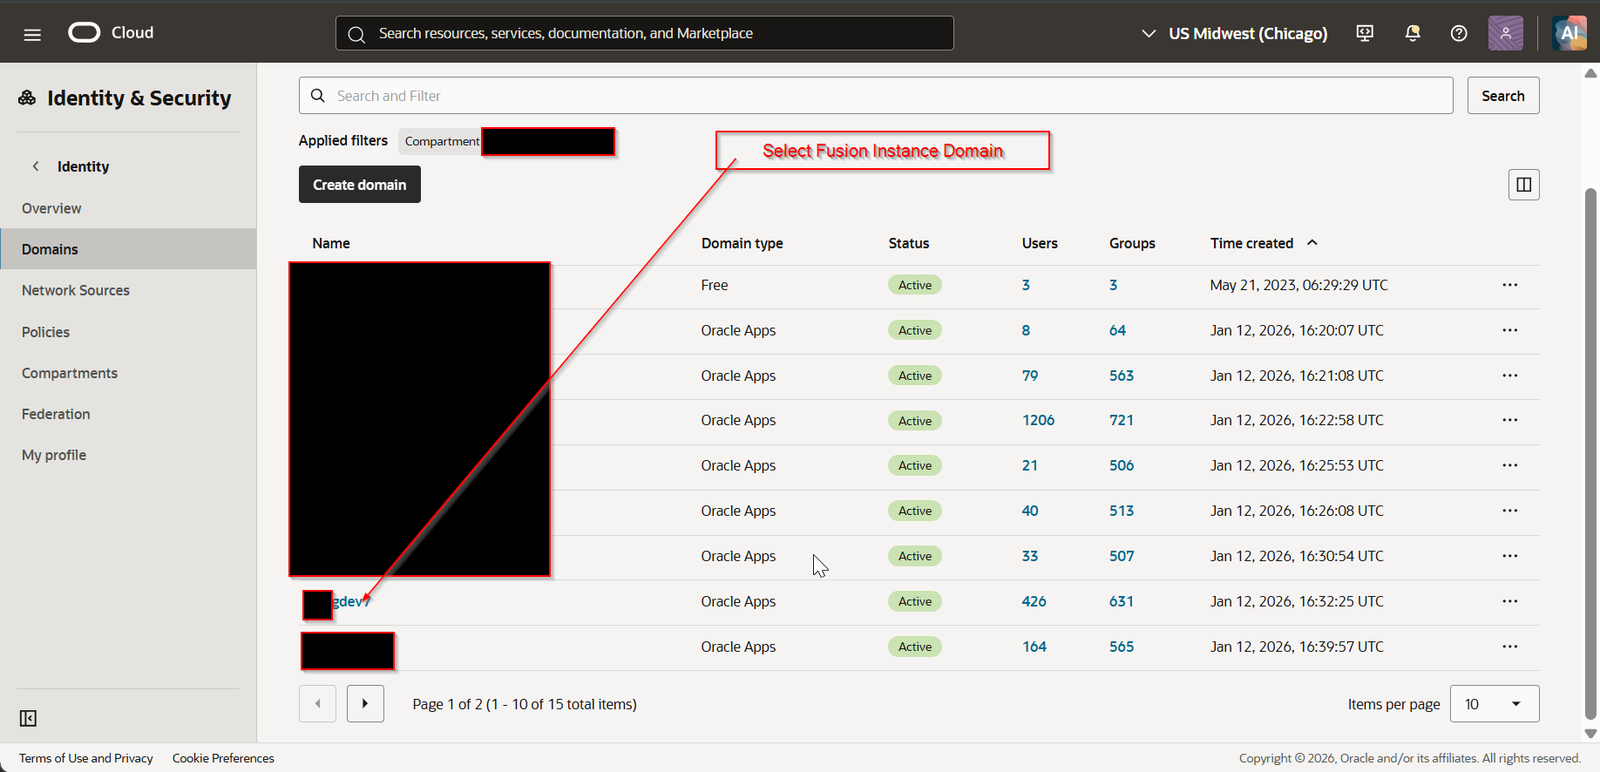
Select the fusion domain.
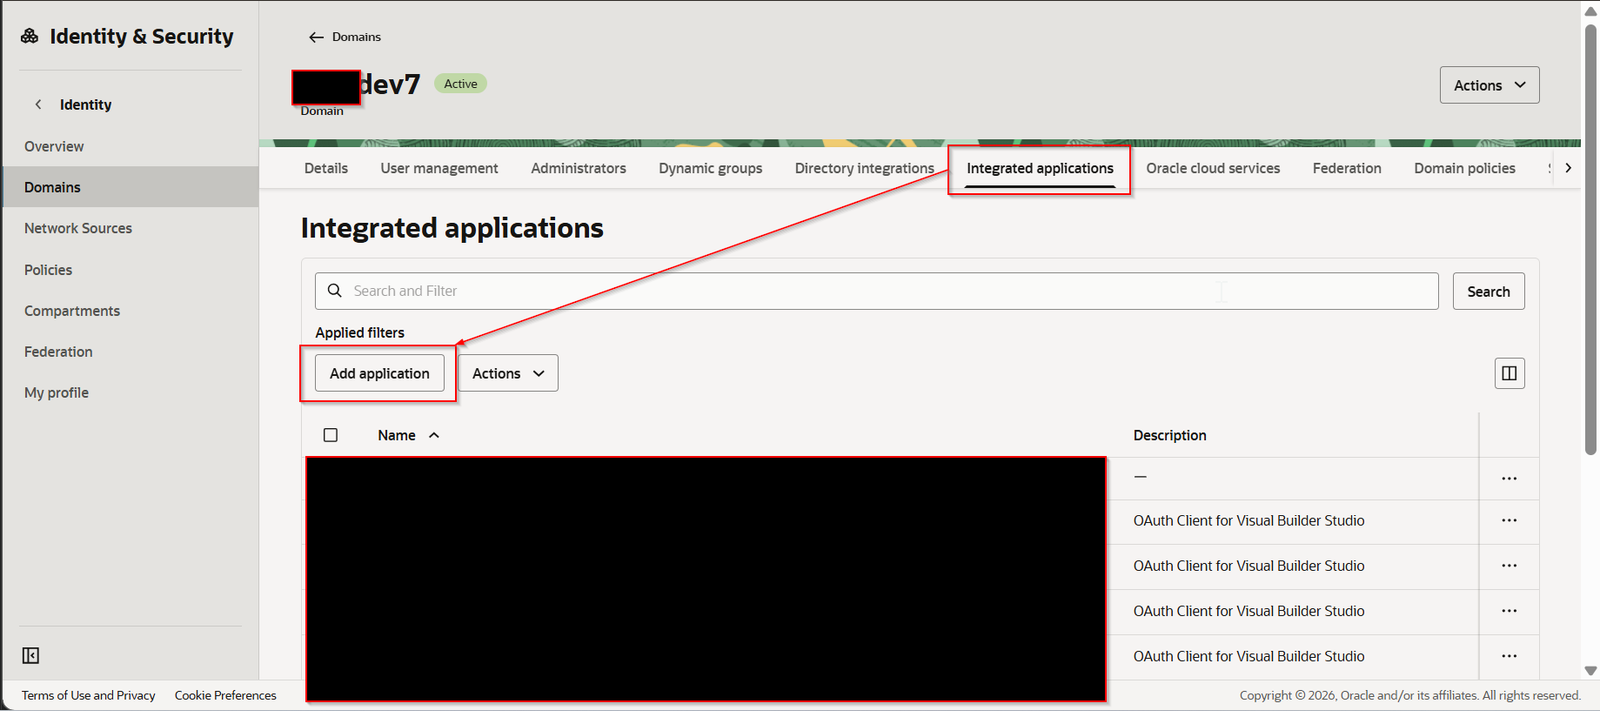
Navigate to Integrated applications —> Add Application.
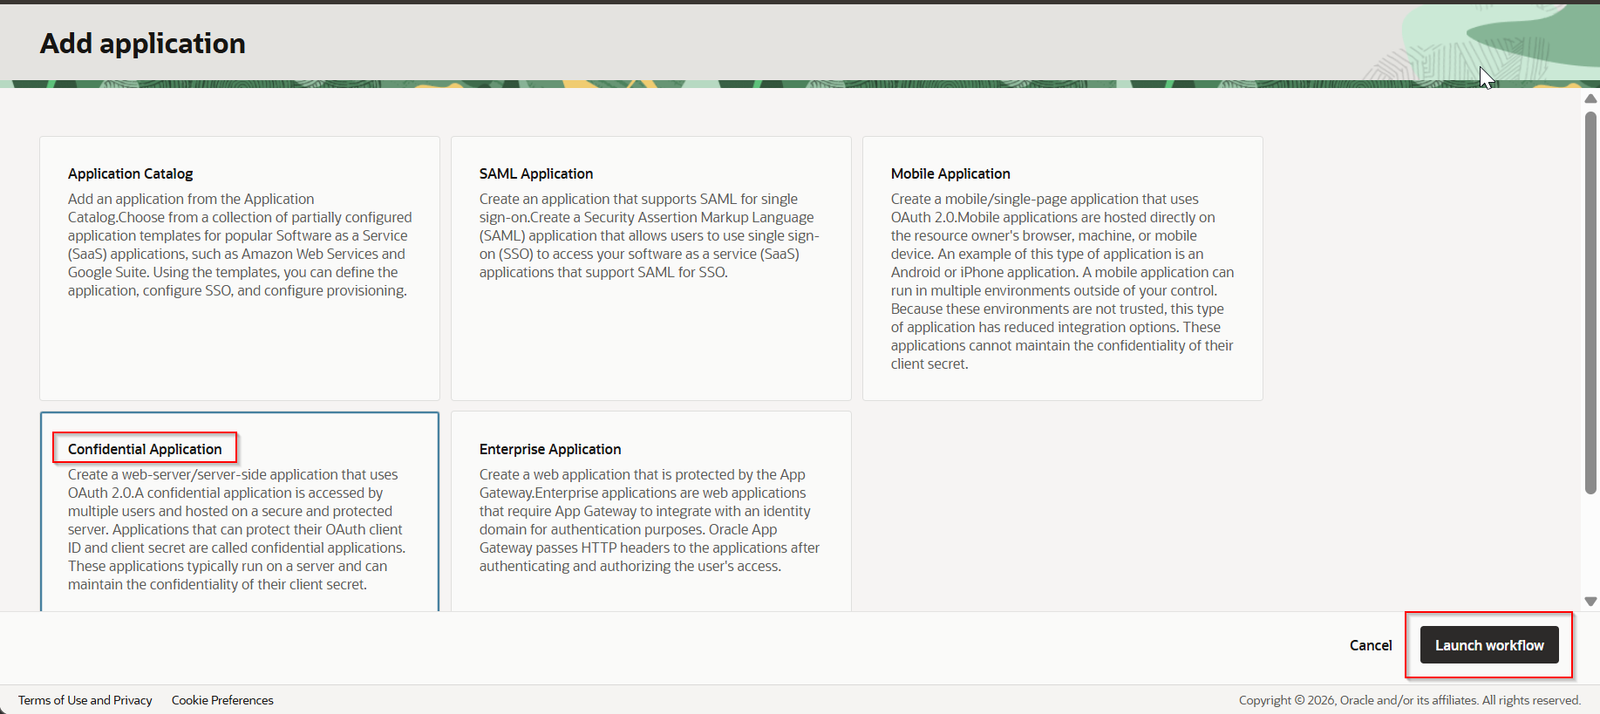
Select “Confidential Application” and click Launch workflow.
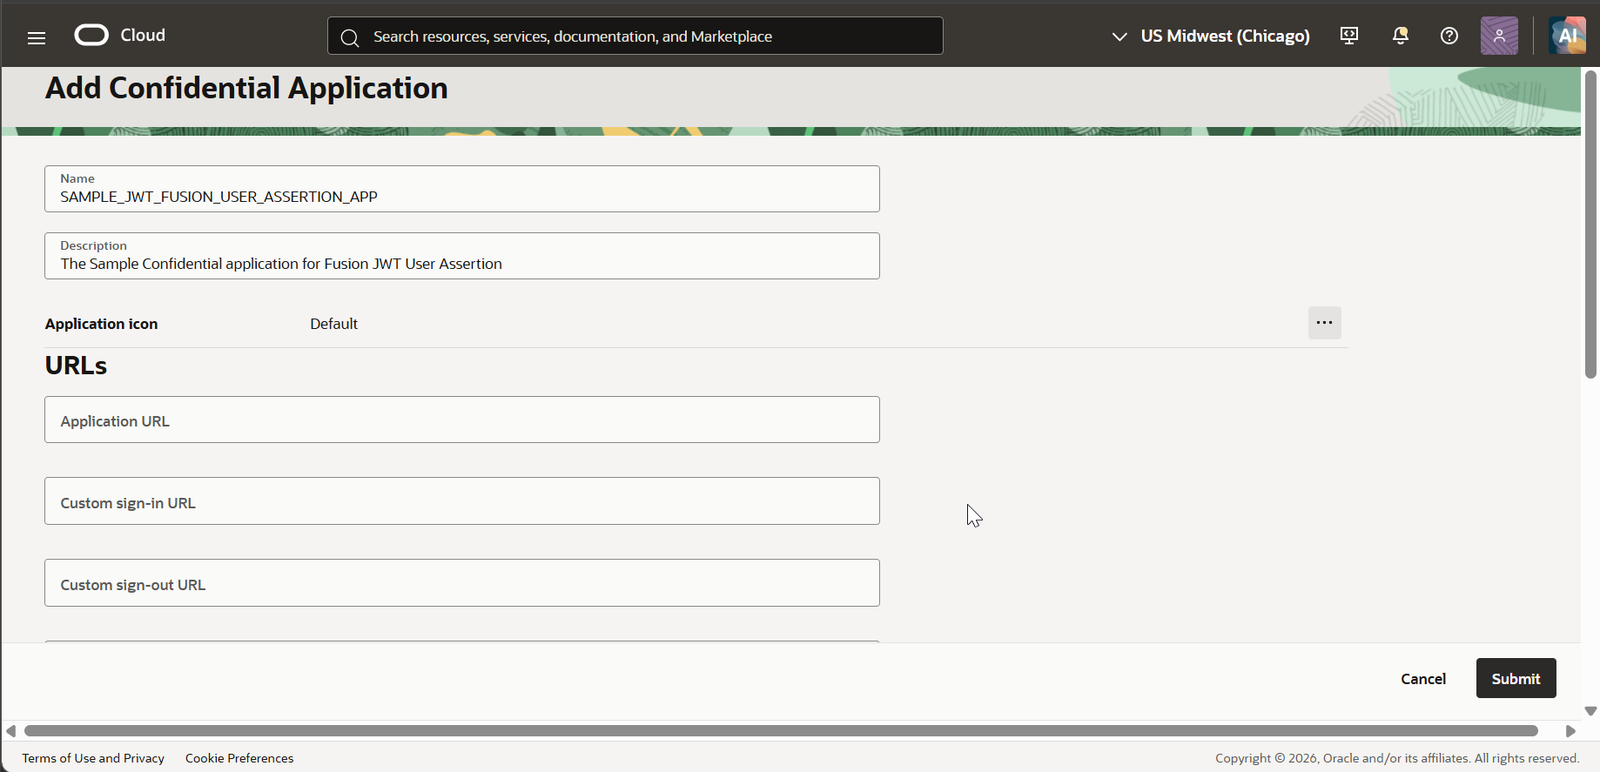
Provide the name and description to application and click Submit.
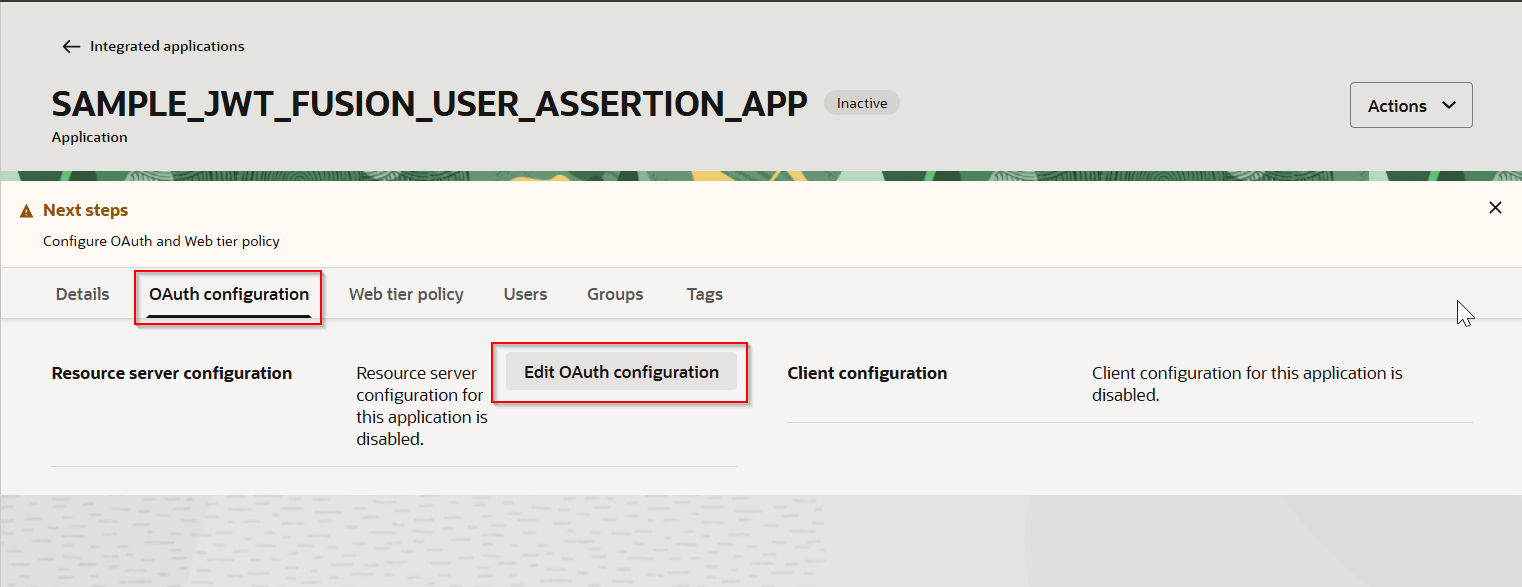
Navigate to OAuth configuration —>Edit OAuth configuration
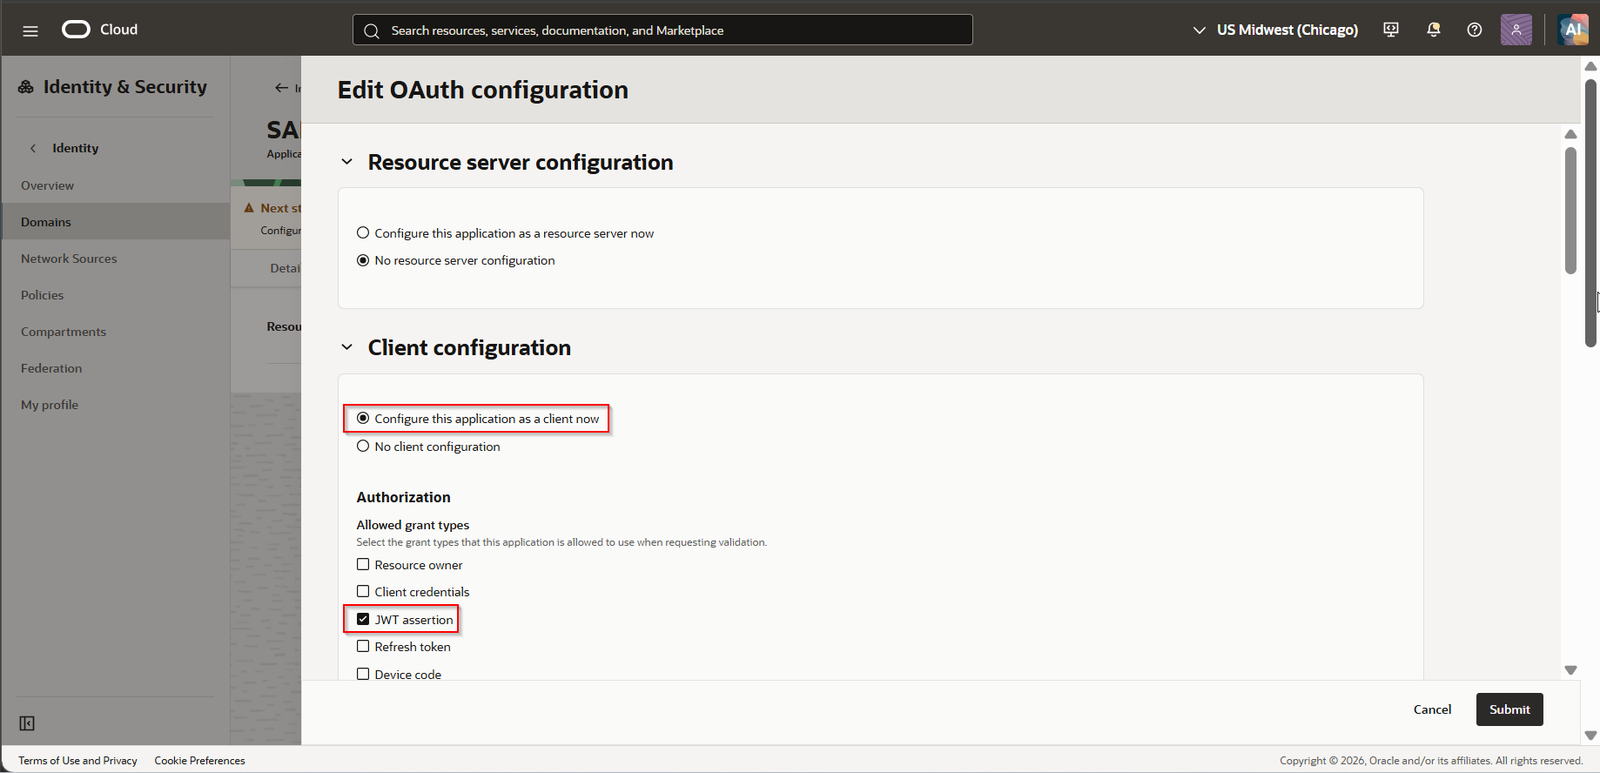
Select “Configure this application as a client now”
Also select checkbox for “JWT assertion”.
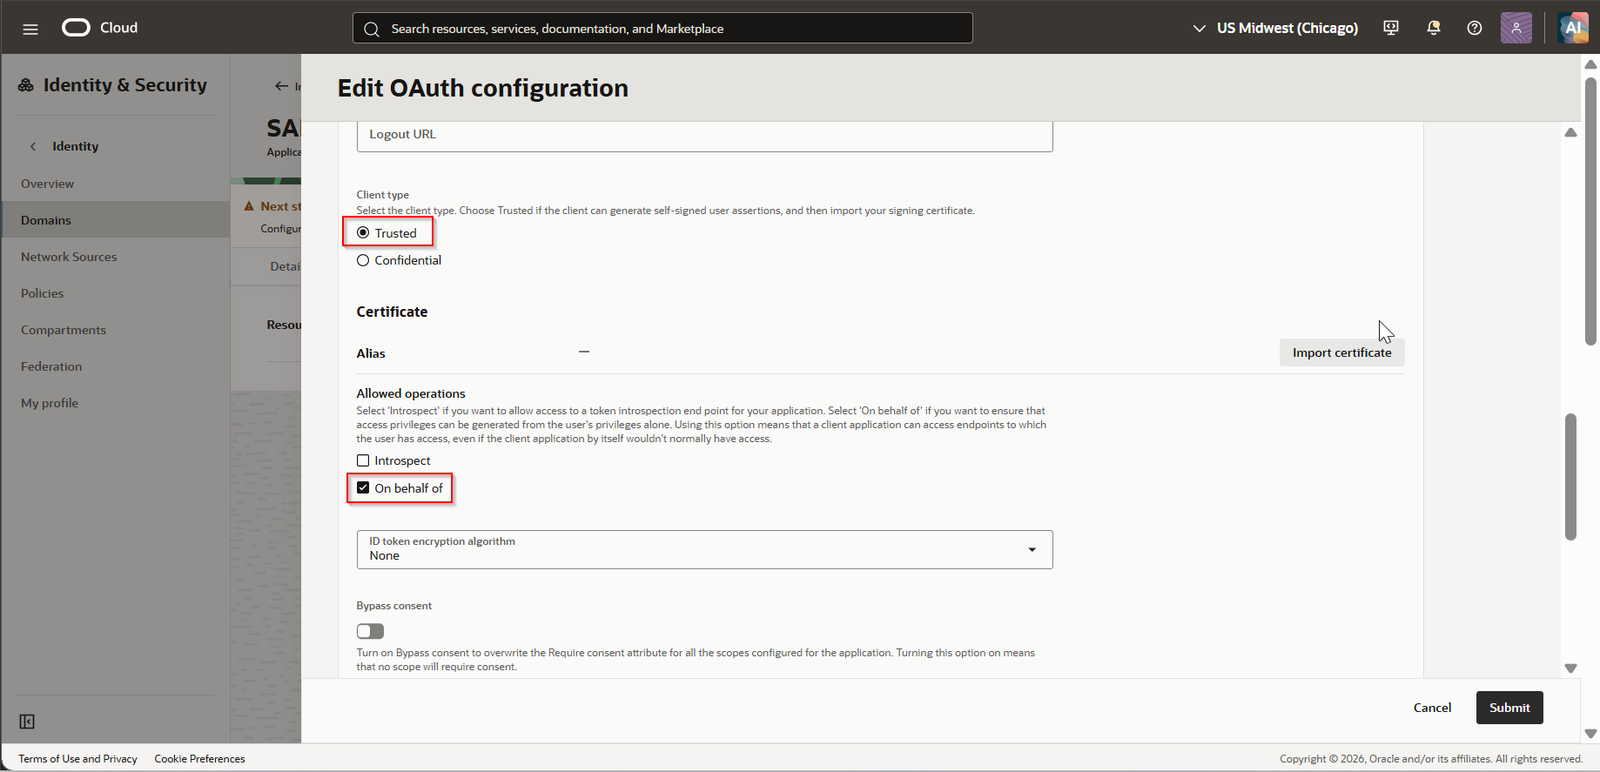
Select checkbox for Trusted and on Behalf of.
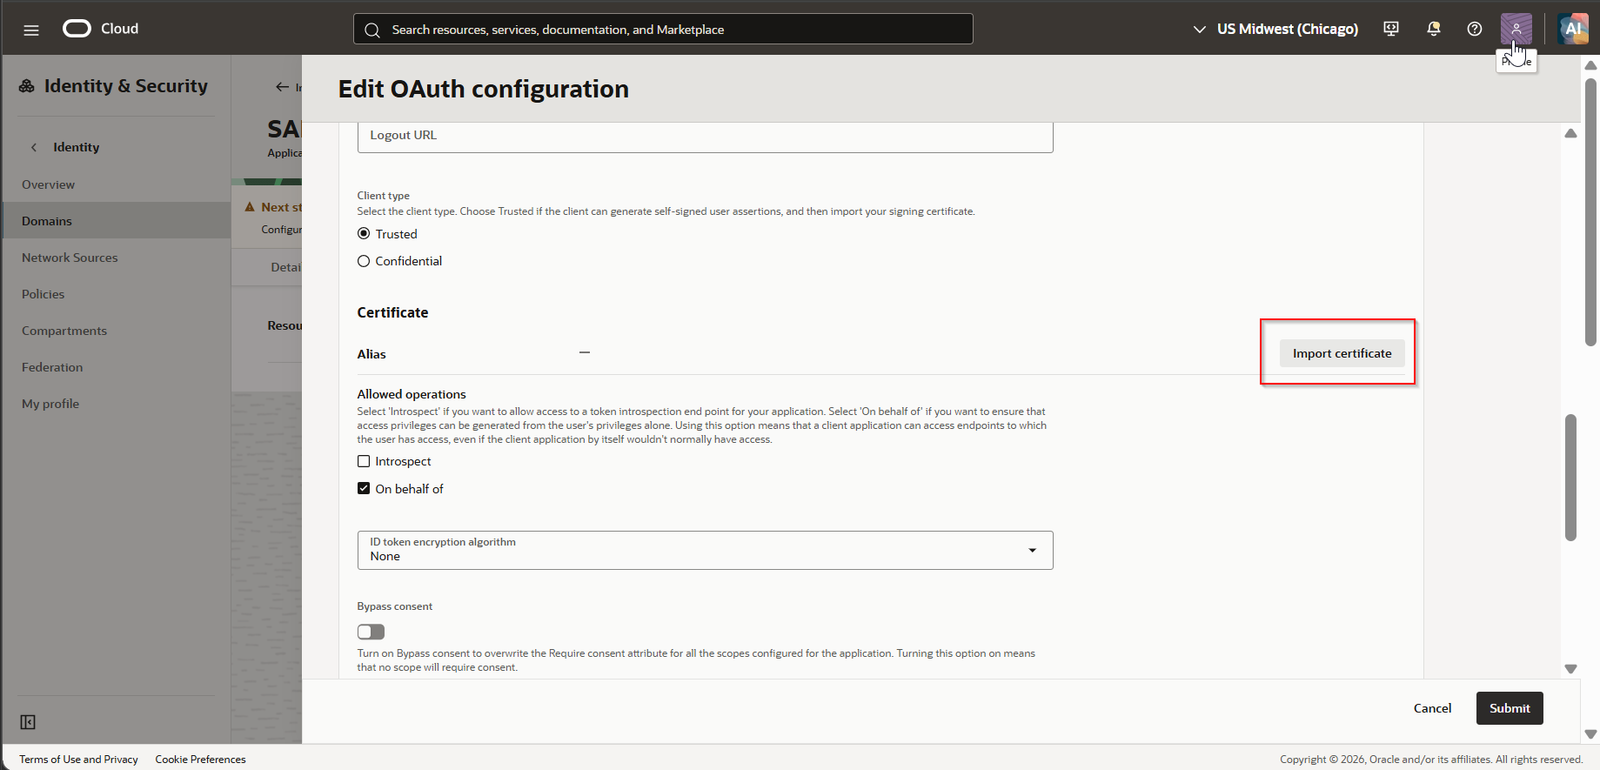
Click on Import certificate to upload certificate which we have created in earlier step.
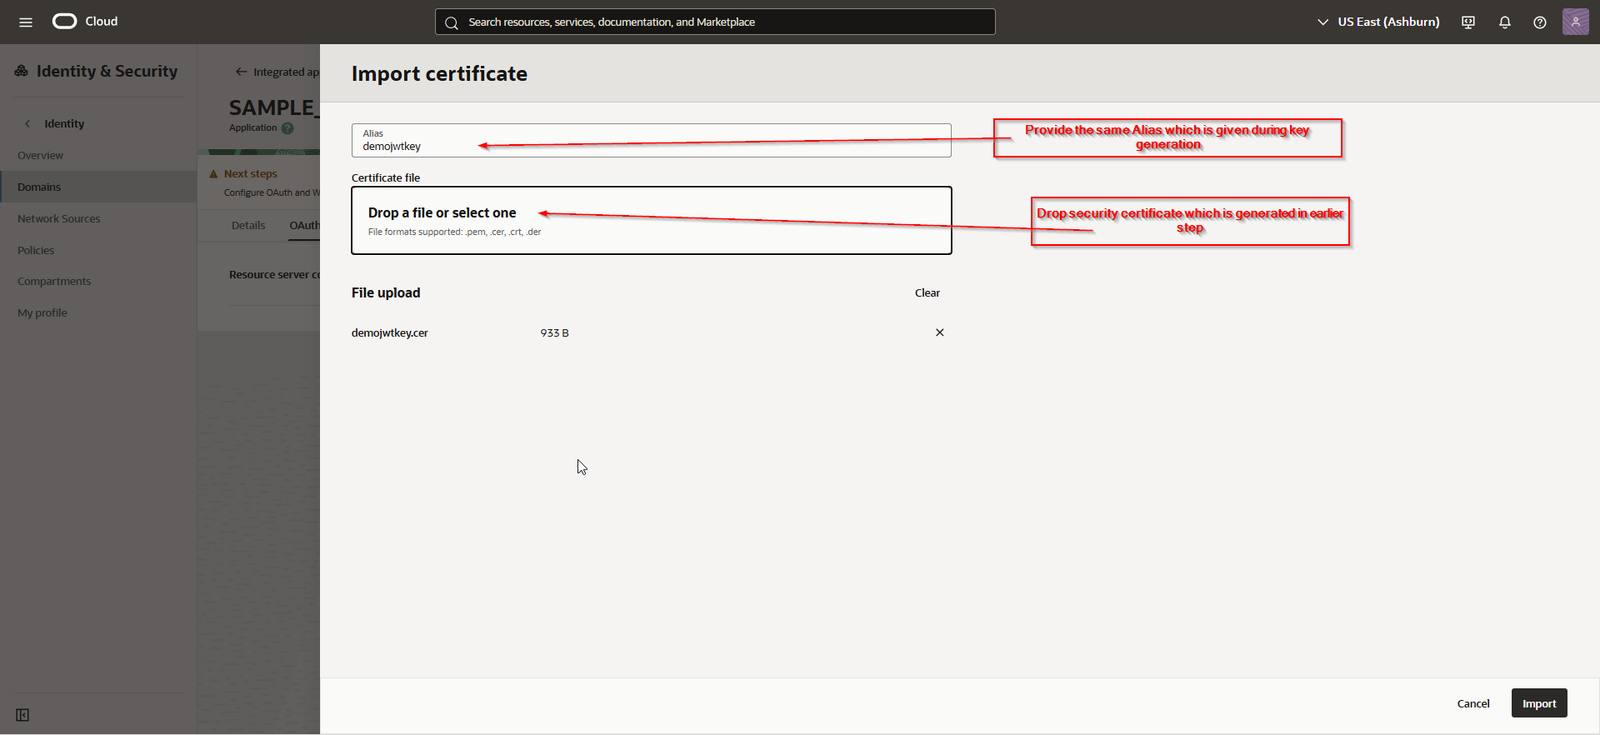
Provide Alias (Any Valid Name but make note of this Alias) and upload certificate fileen.
Click on Import.
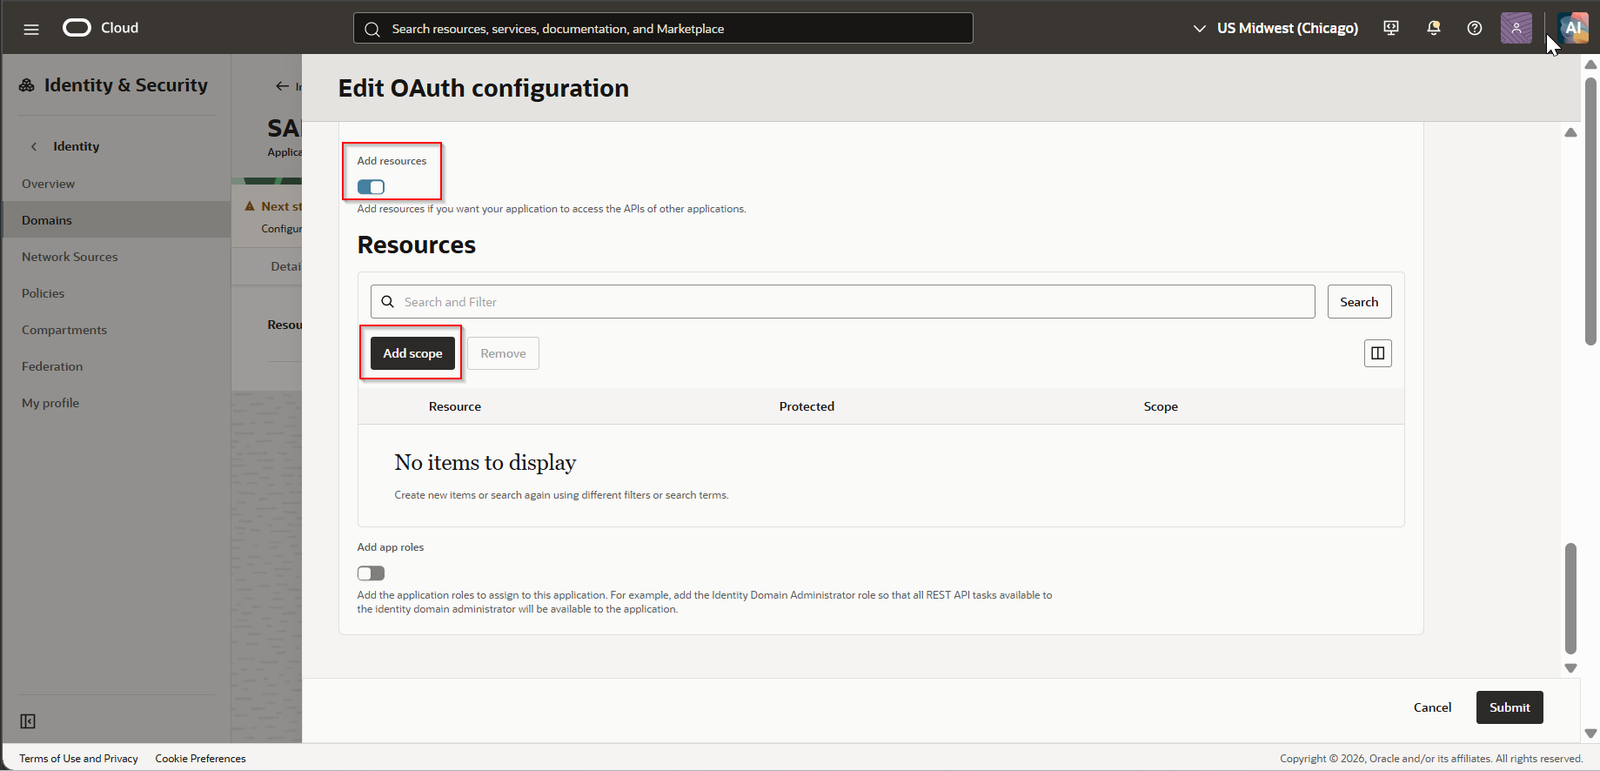
Enable “Add resources” and Click on Add Scope.
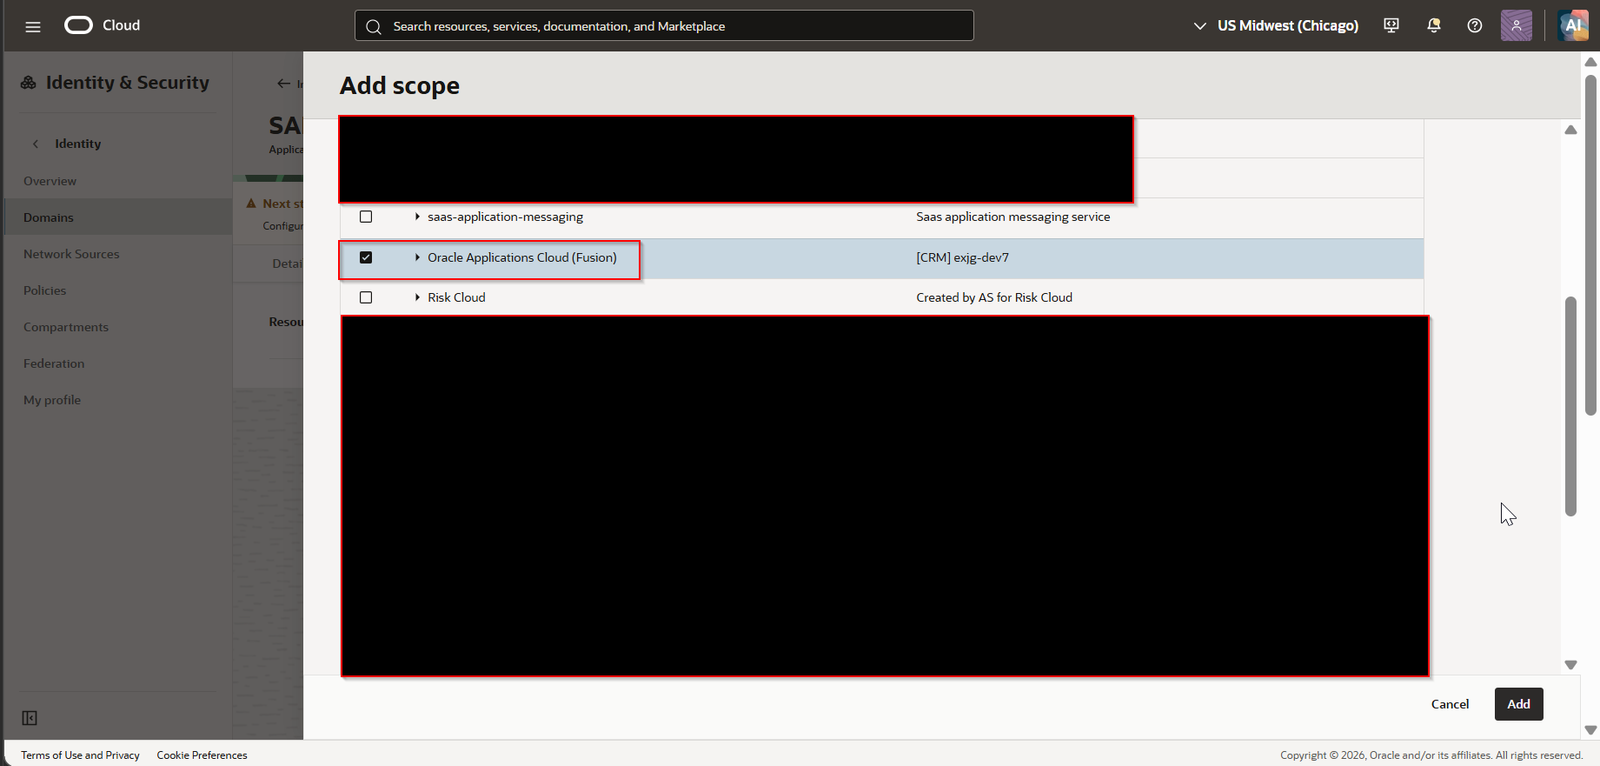
Select scope as Oracle Application Cloud (Fusion) and click on Add.
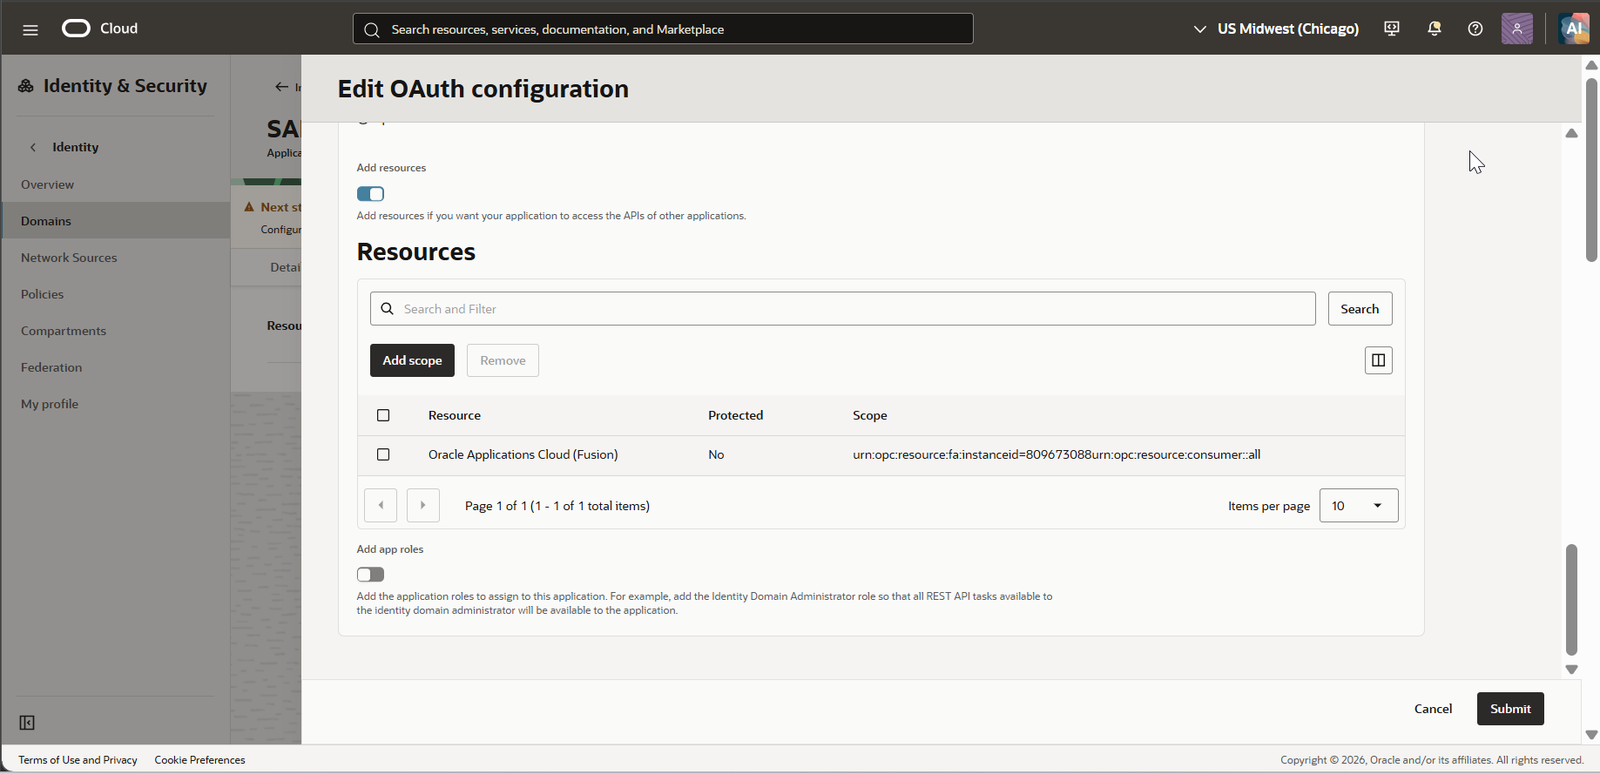
Click on Submit.
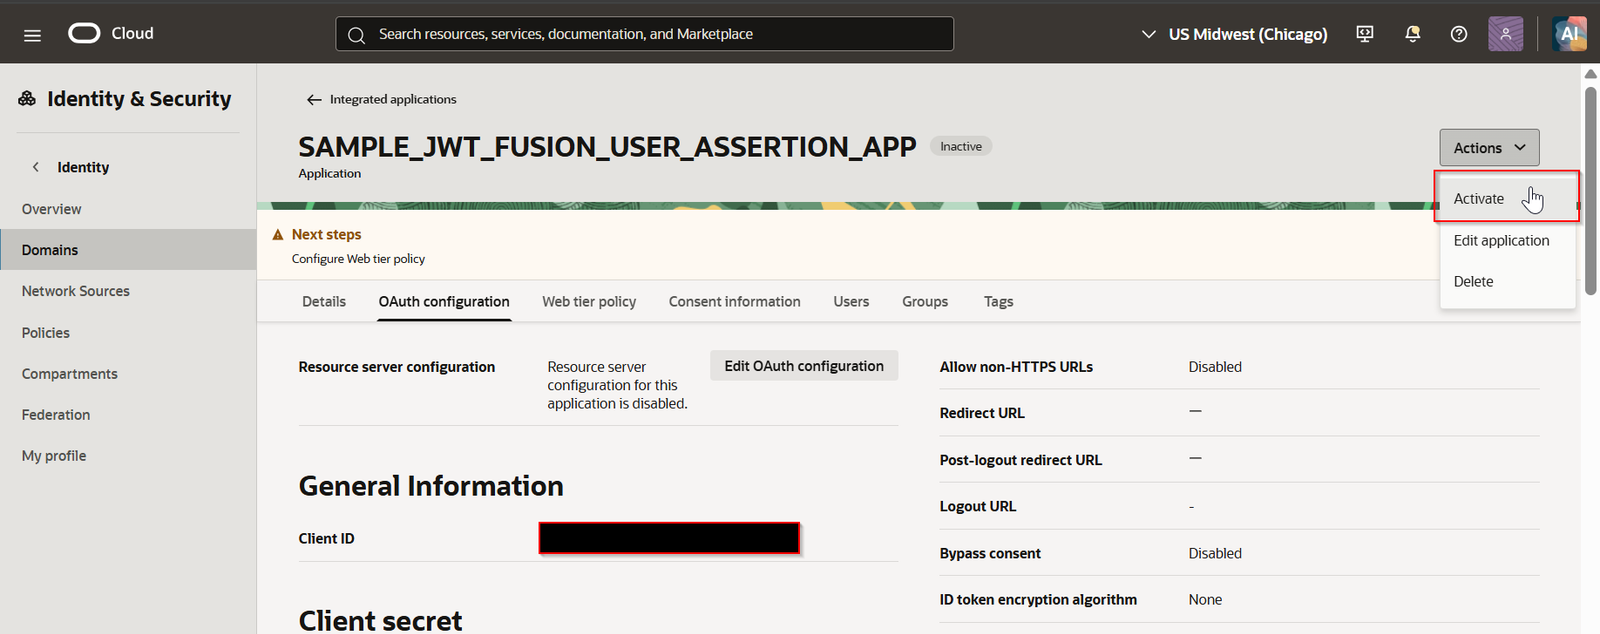
Click on Activate to Activate the application.
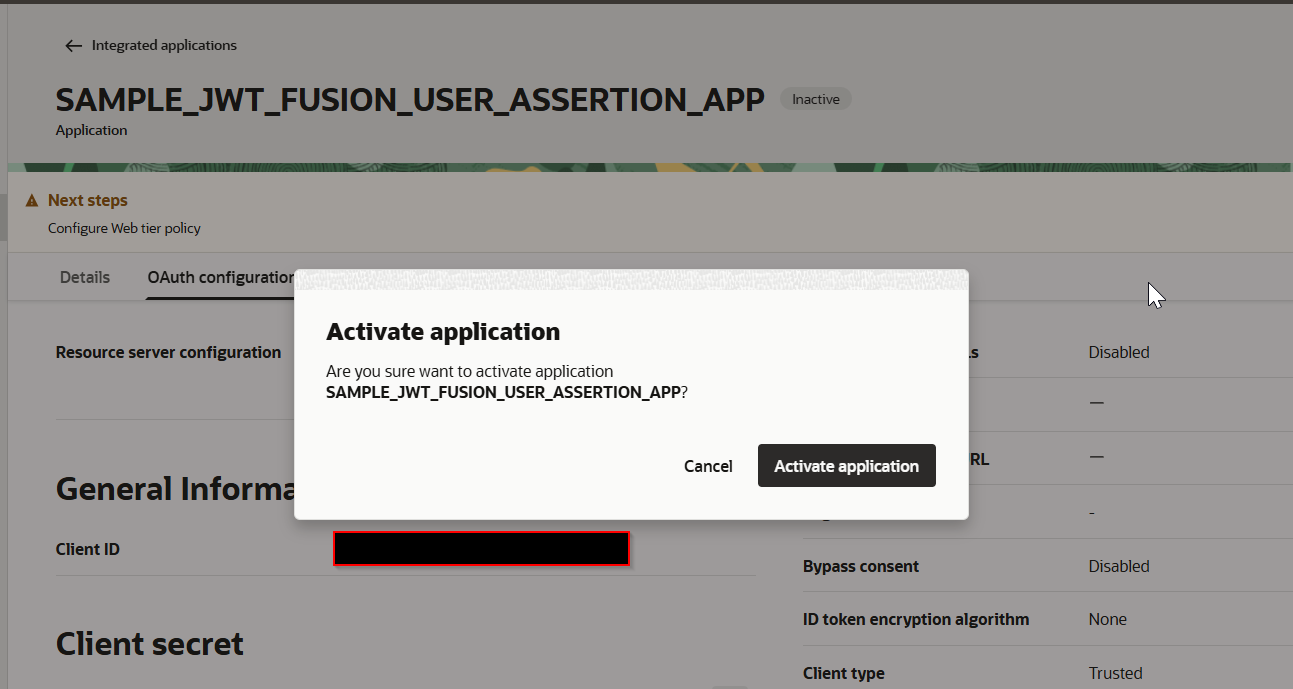
Click on Activate application.
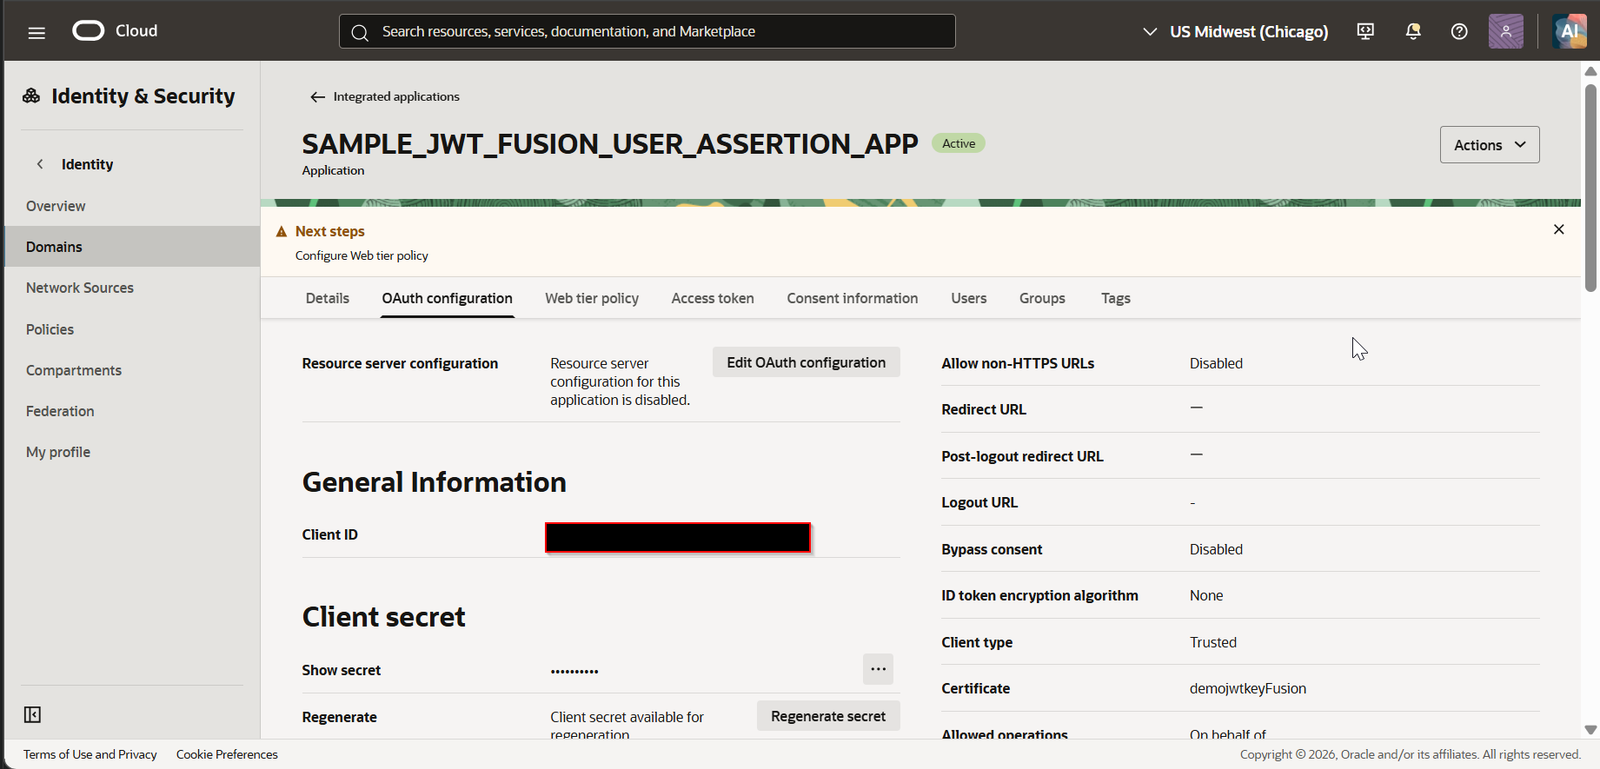
The confidential app is created successfully now.
Note the client ID, client secret as well Trusted certificate alias and scope which is provided in confidential application.
Step3: Upload Certificate as Trusted Partner Certificate.
Navigate to fusion domain —>Security —>Trusted partner certificates —>Import certificate.
Import same certificate which is uploaded in earlier step.
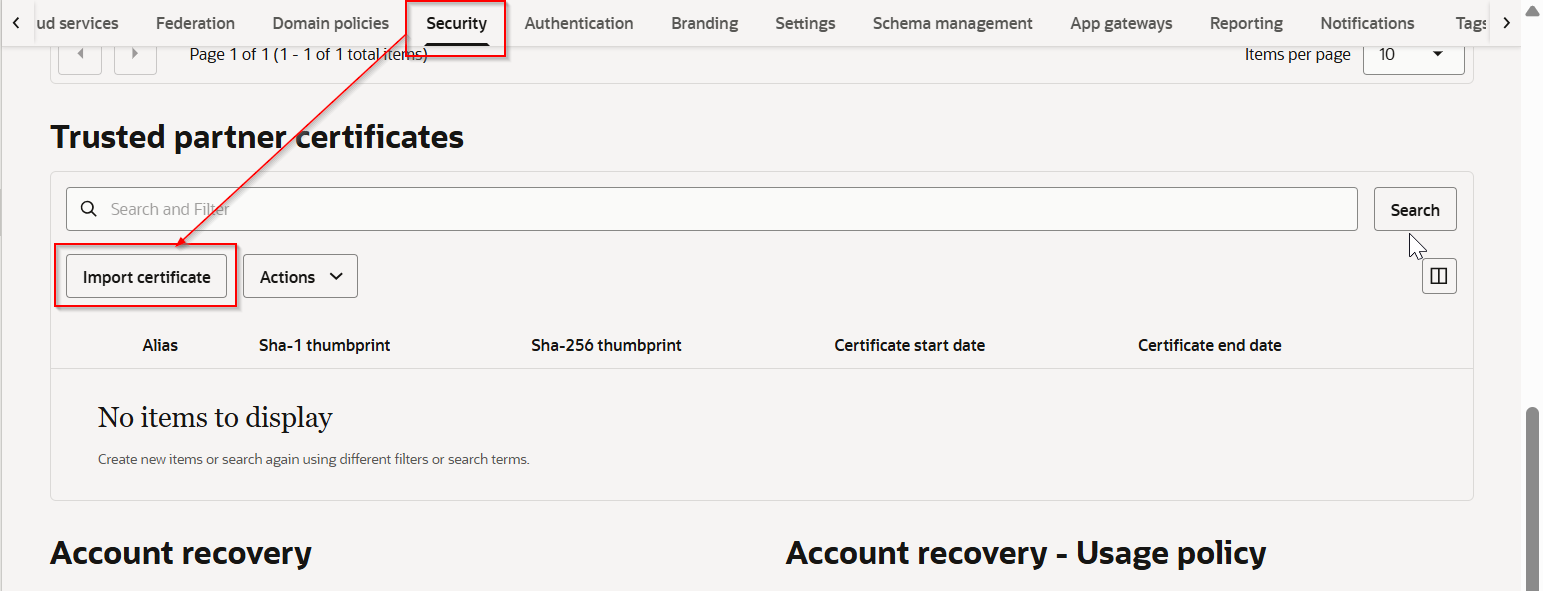
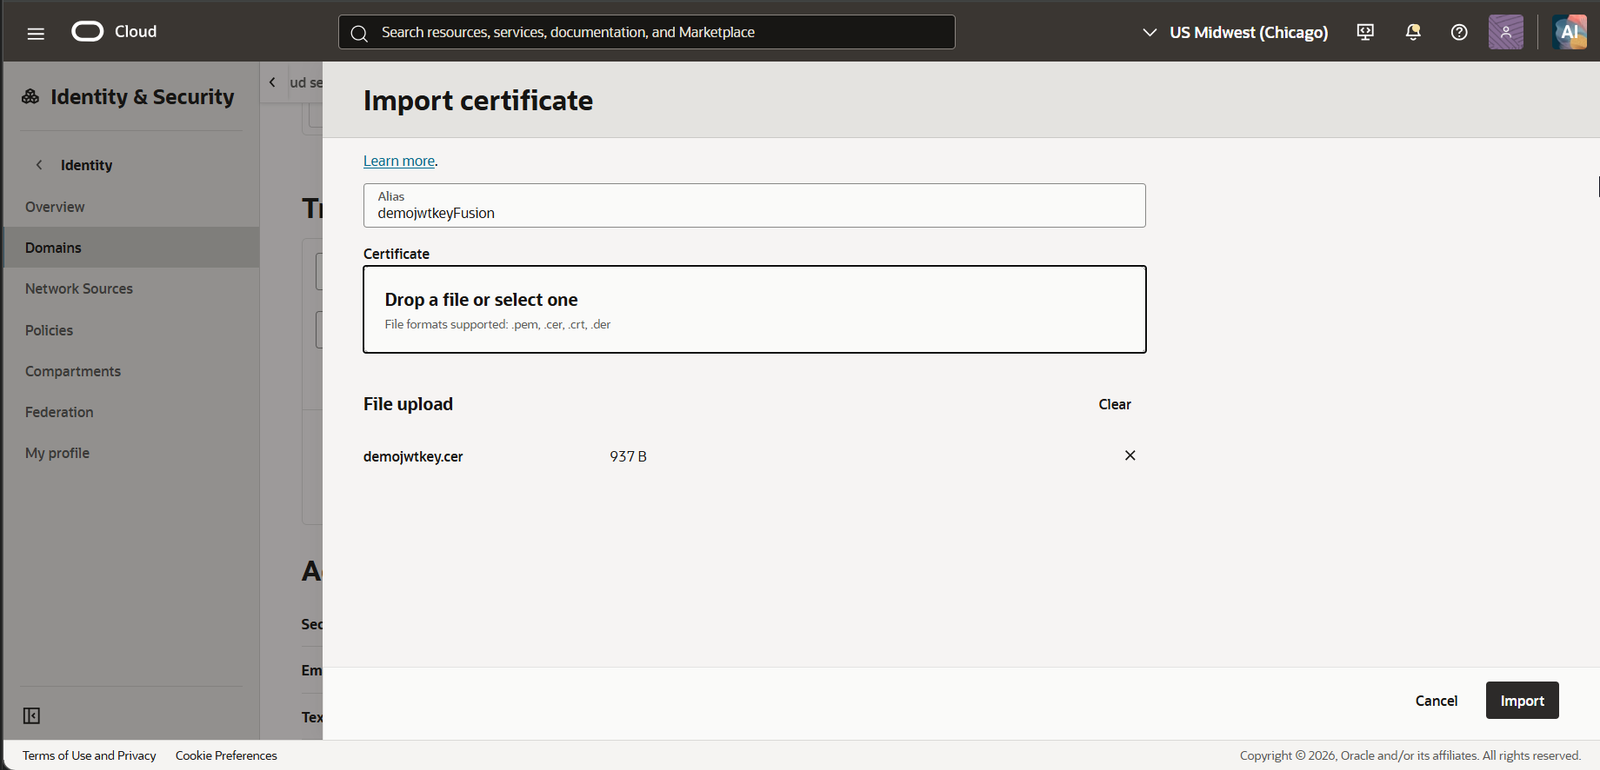
Provide same Alias which is provided in confidential application and upload same certificate.
Click Import.
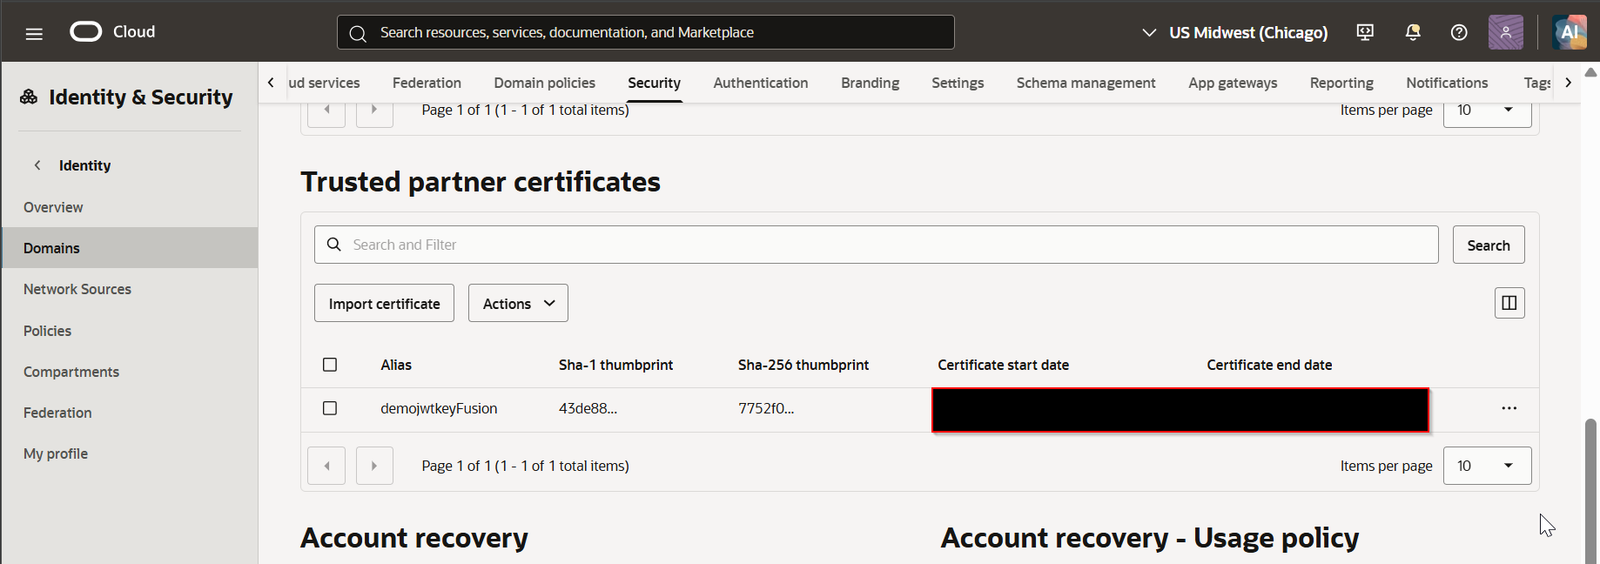
Step4: Upload Private key to OIC.
Login to OIC.
Navigate to Settings —>Certificates
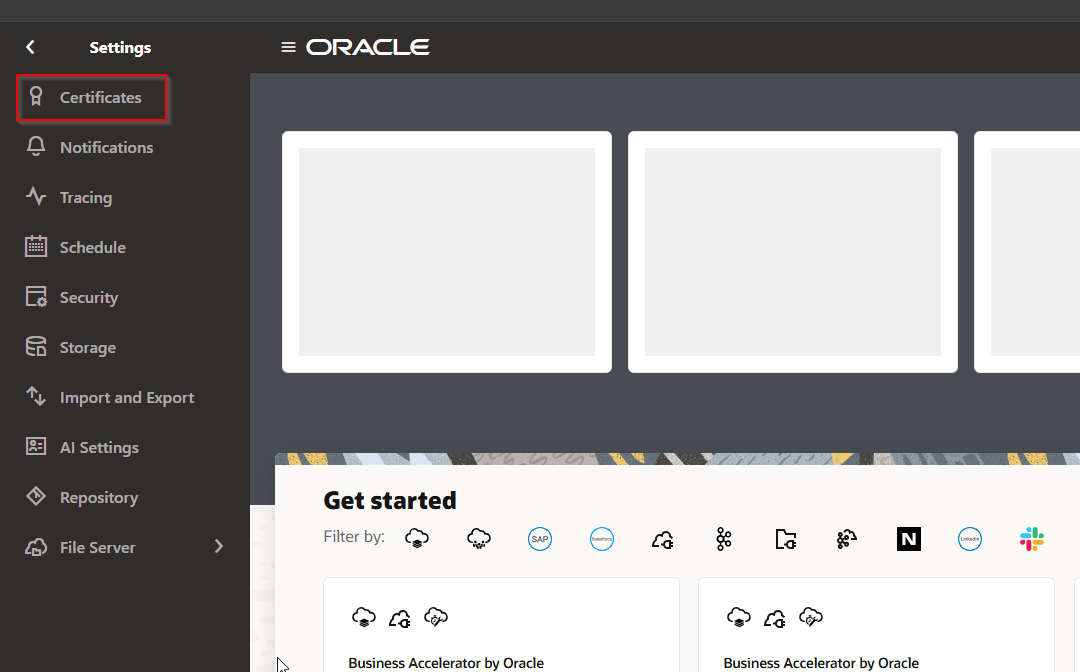
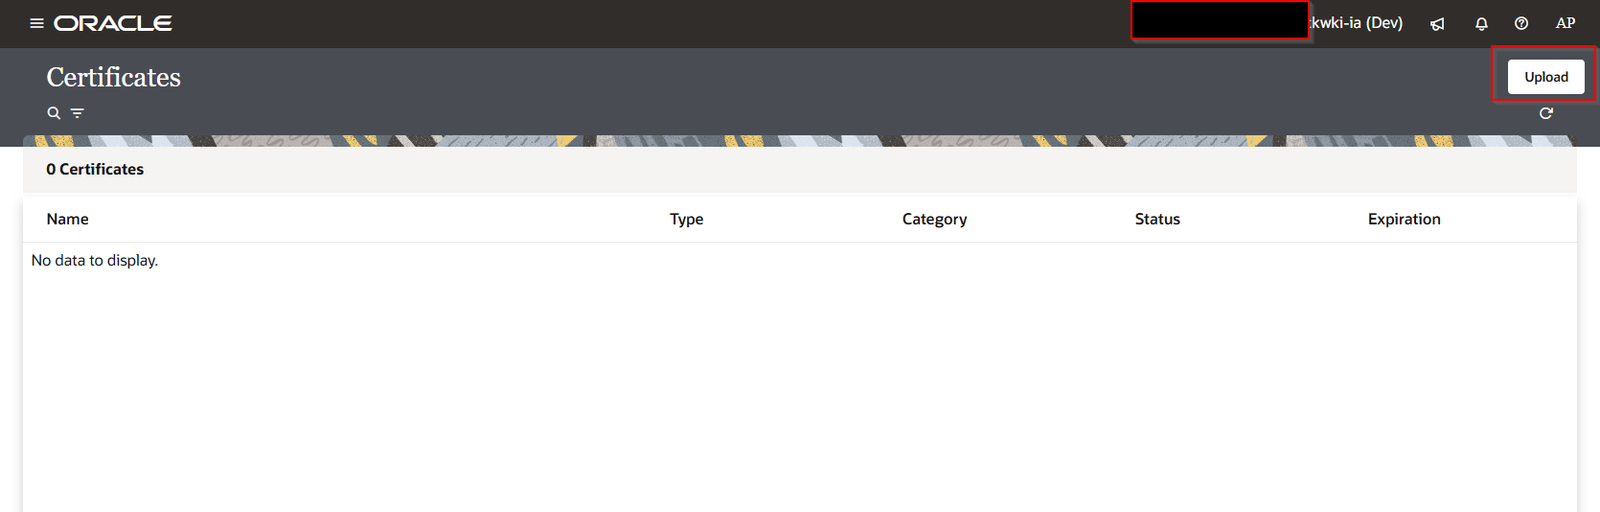 click Upload.
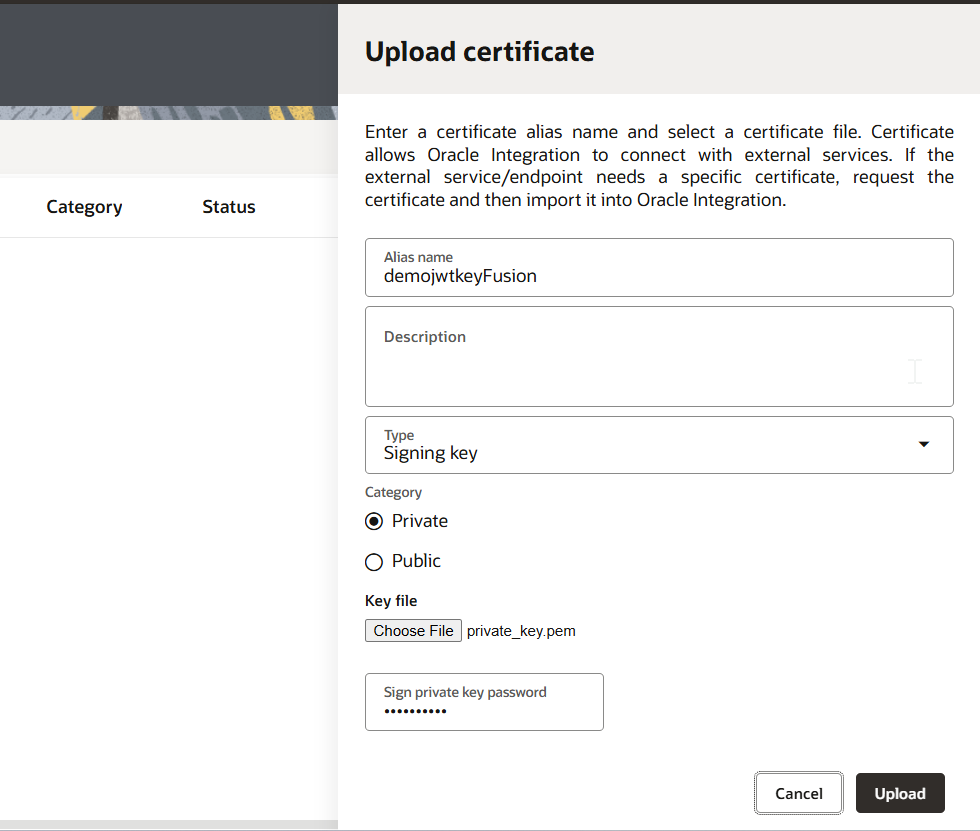
Provide Alias Name as any valid Name.
For Best practice, provide same Alias Name which we have given in confidential application.
Upload private_key.pem and provide signing key password which is generated in earlier steps.
Click Upload.
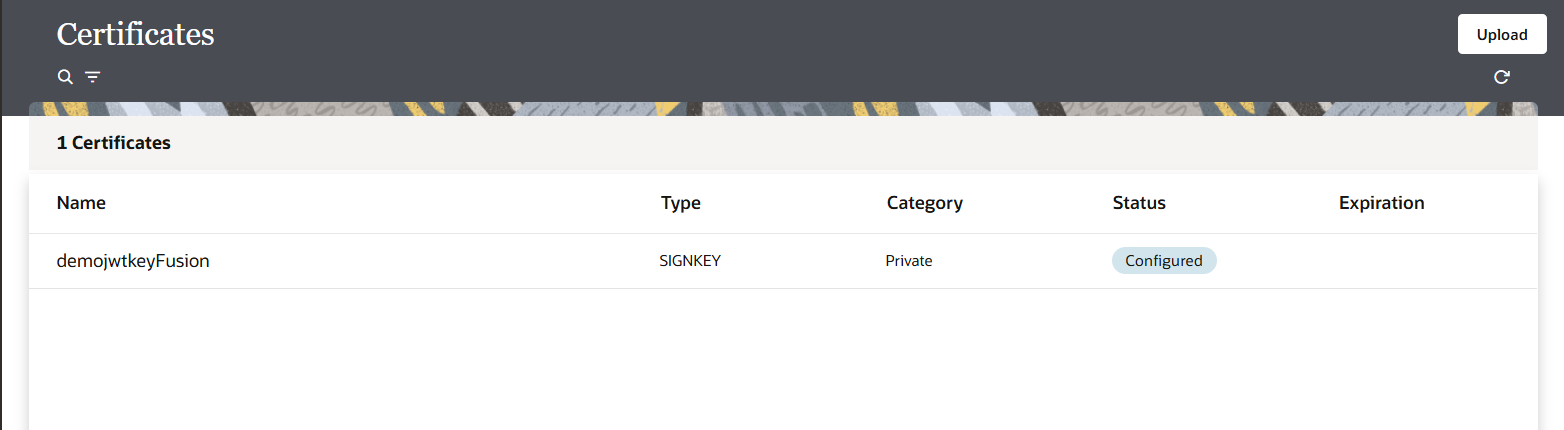
Step5: Create JWT header and JWT payload.
Create new Json file with below content and save this file as demojwtkeyheader.json
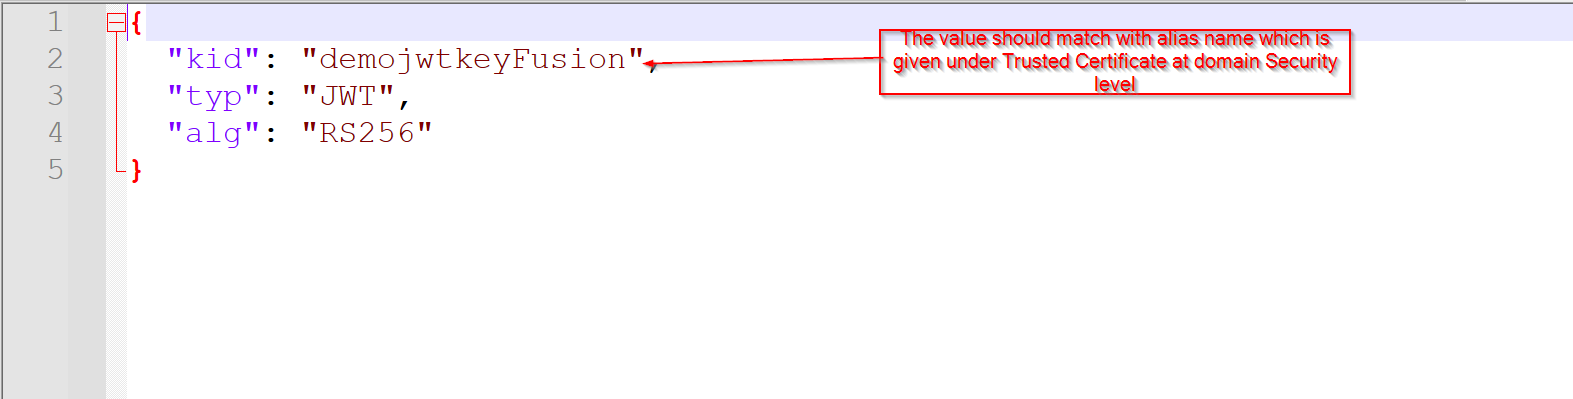
Create another Json file with below content and save this as demojwtkeypayload.json
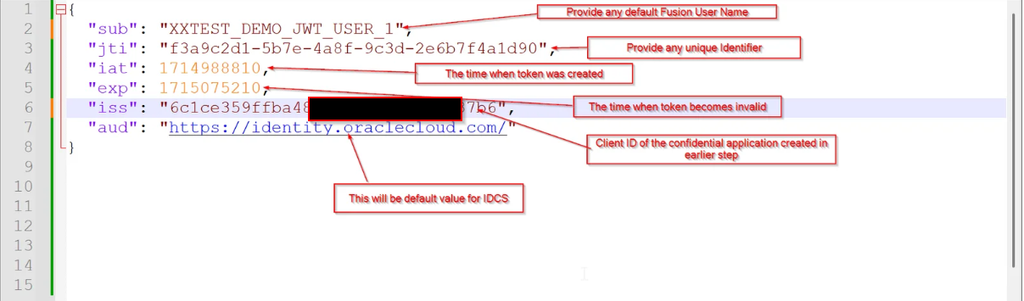
Step5: Create new REST Connection.
Create new REST Connection for OPA as shown below:
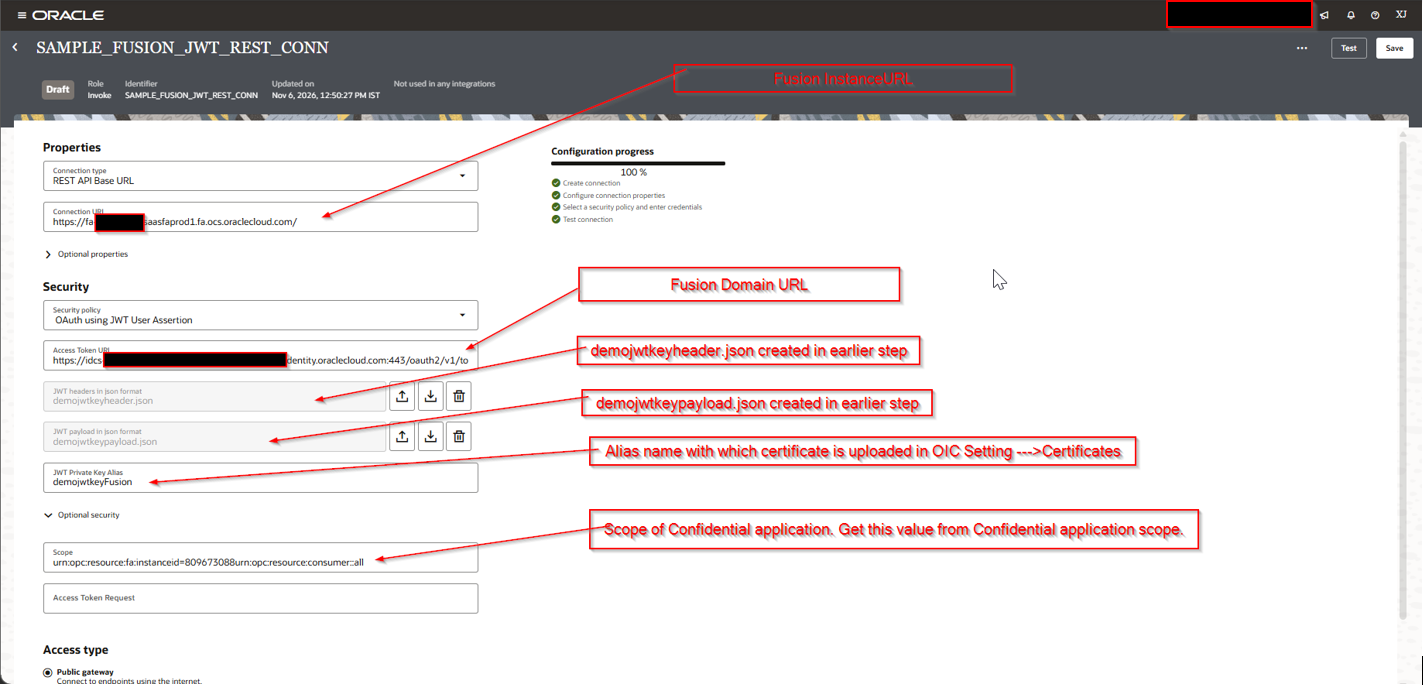
Save the connection.
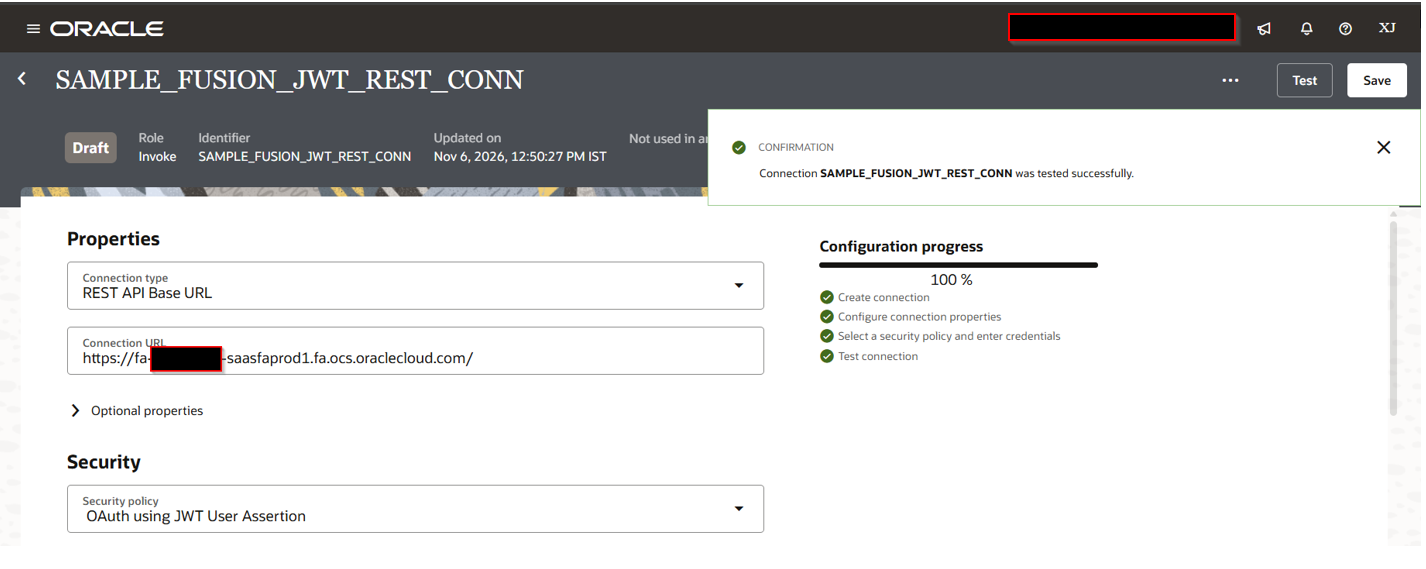
The connection is tested and saved successfully.
Step6: Create Simple OIC Integration.
Let us create simple OIC integration to create AP Invoice in fusion using above created JWT REST connection.
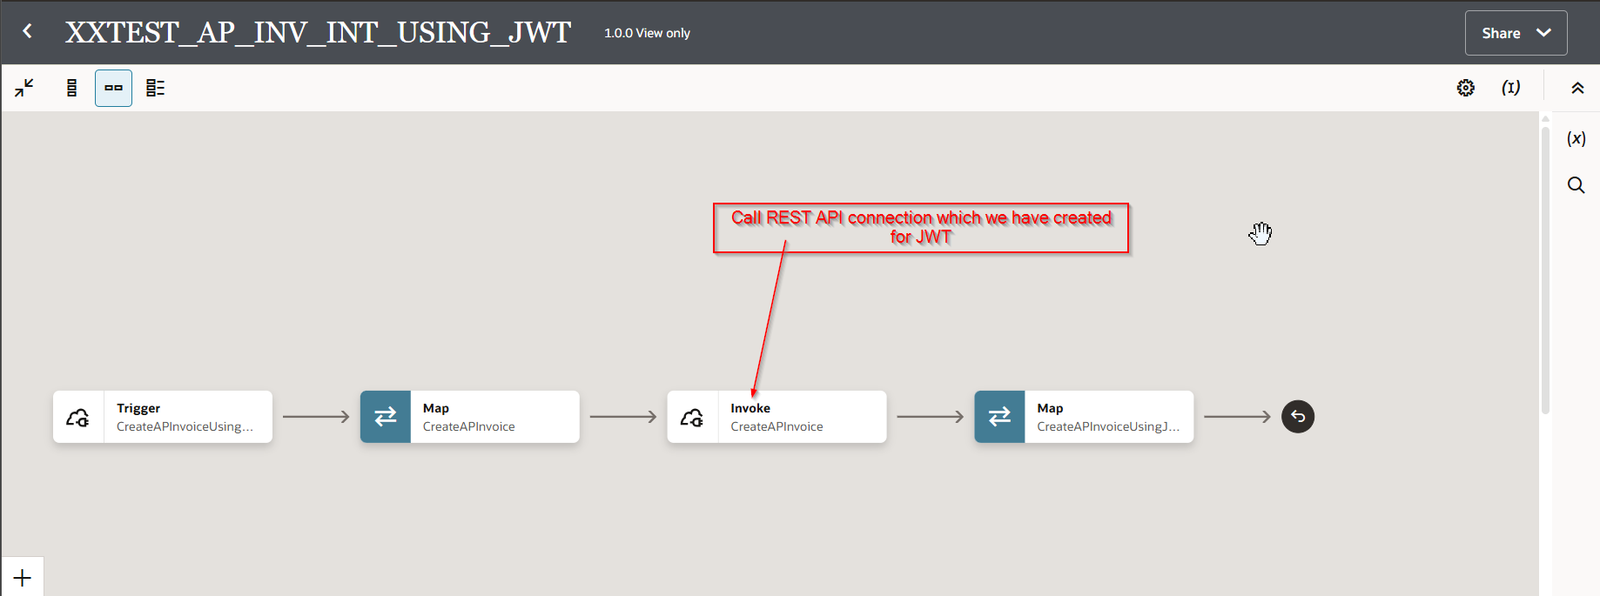
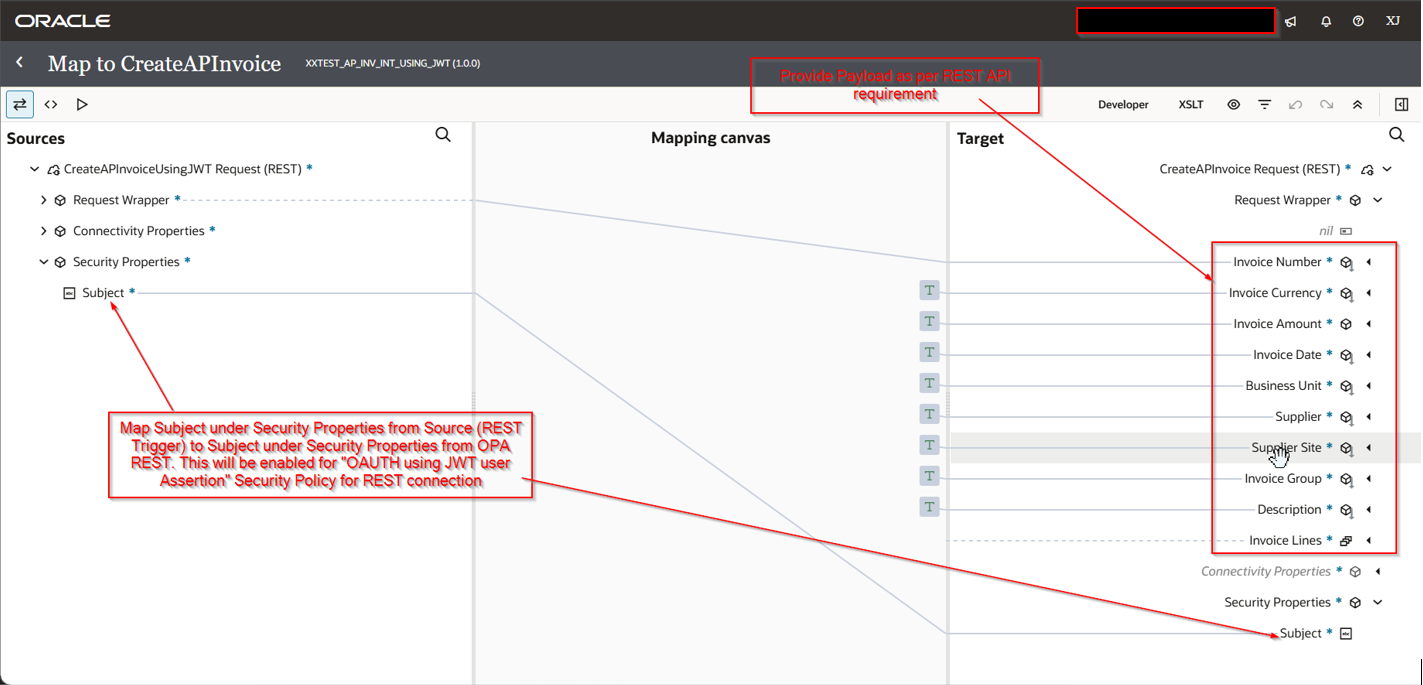
Step7: Test the integration.
Login to OIC with XXTEST_DEMO_JWT_USER_1 and run the integration.
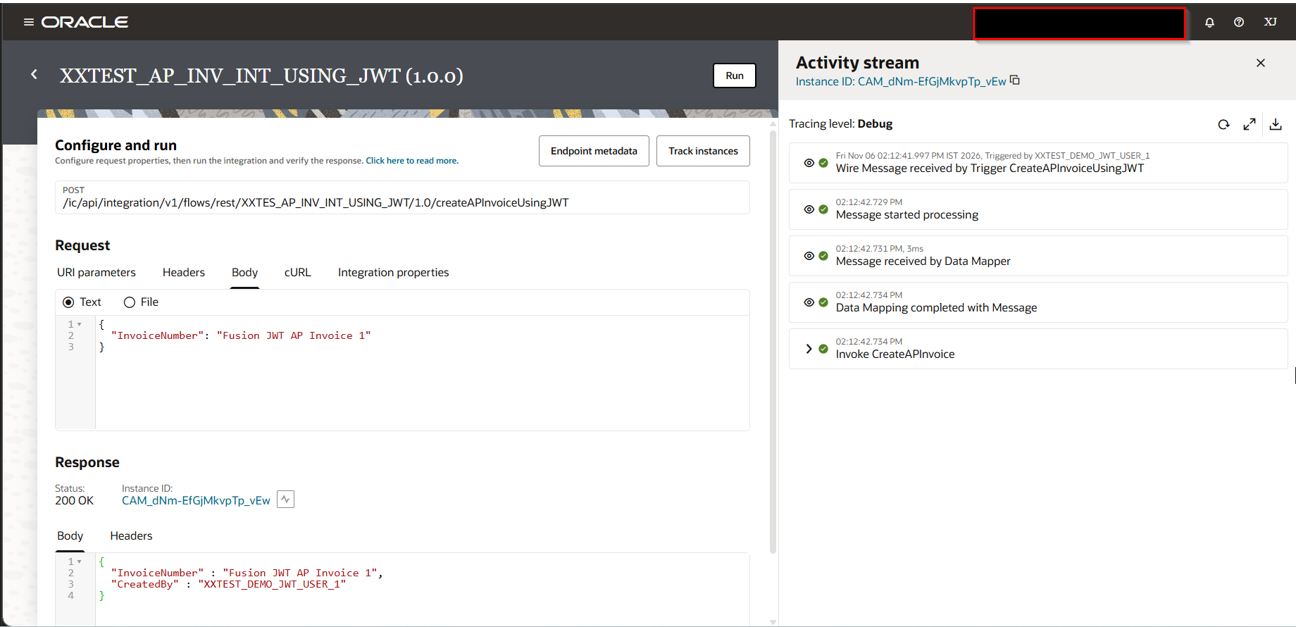
Integration is successfully completed and Invoice is created with Created by as “XXTEST_DEMO_JWT_USER_1”.
Login to OIC with XXTEST_DEMO_JWT_USER_2 and run the integration.
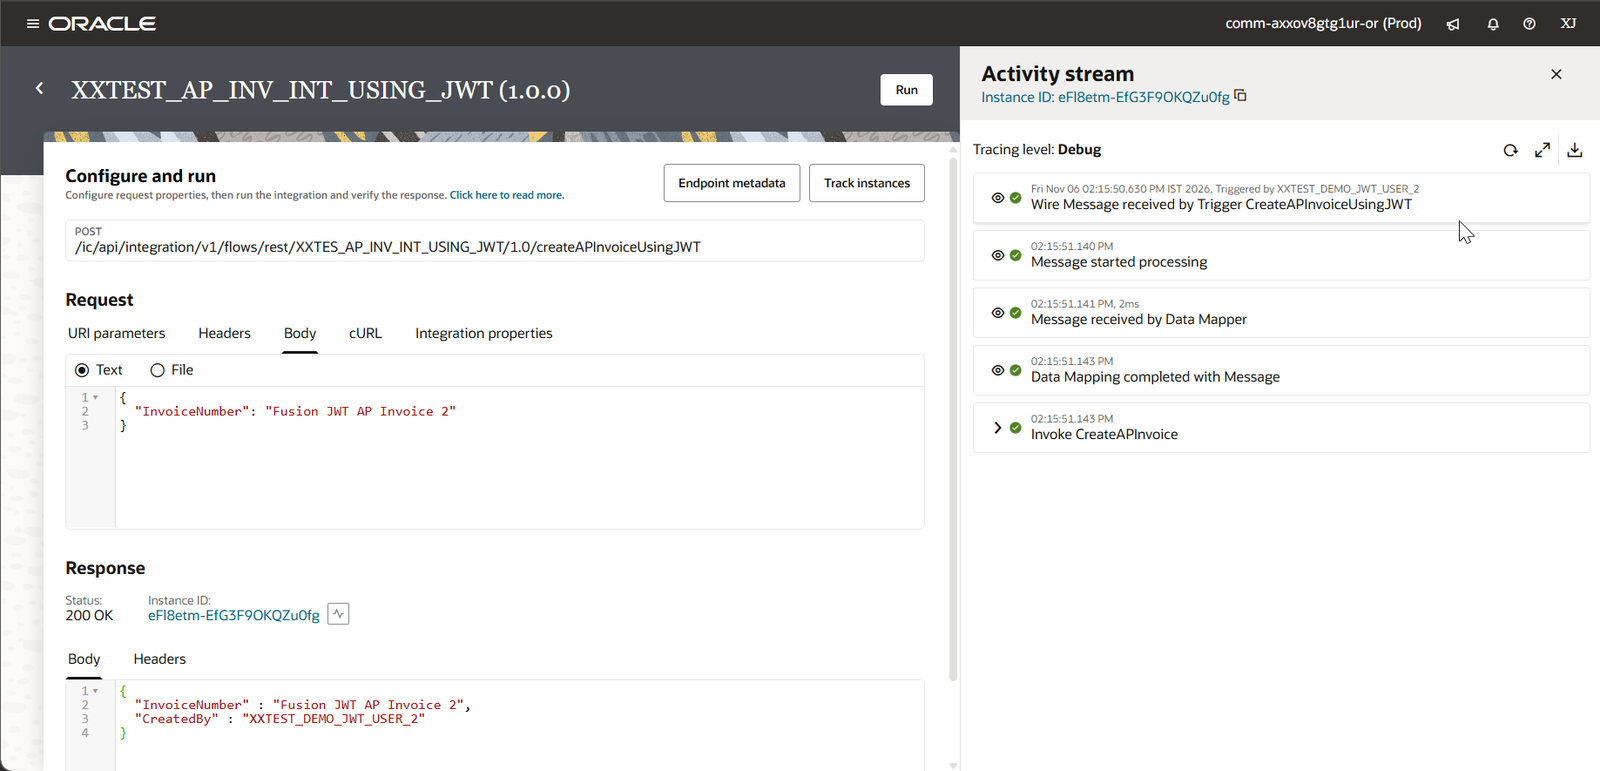
Integration is successfully completed and Invoice is created with Created by as “XXTEST_DEMO_JWT_USER_2”.
Both Invoices are created in fusion on behalf of OIC login user.
Note: To work JWT assertion in OIC, OIC users with which we are calling REST API must be available in Oracle fusion.
Step7: OAUTH Client Credentials using JWT Client Assertion.
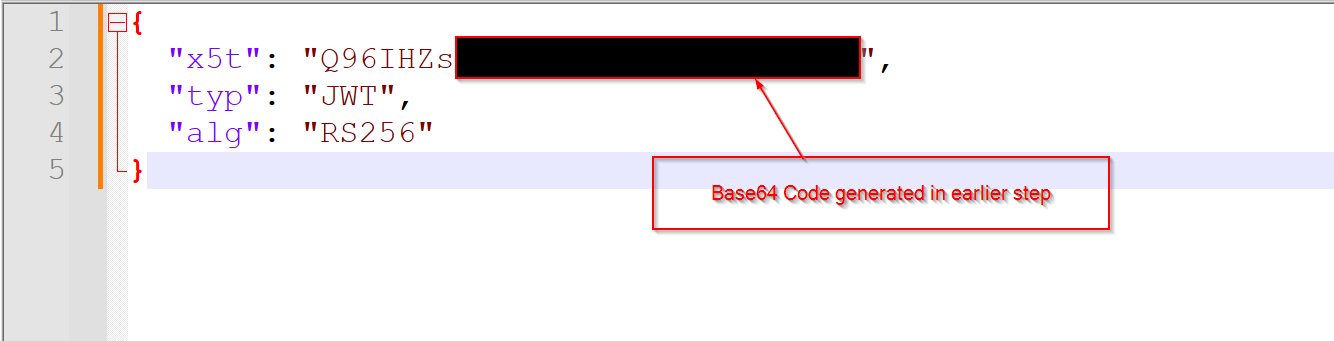
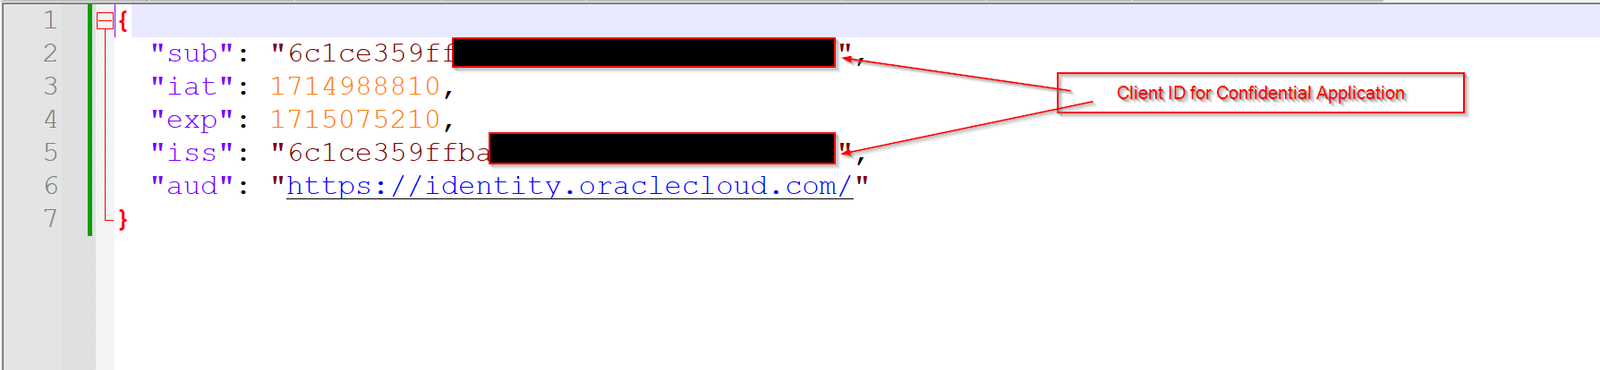
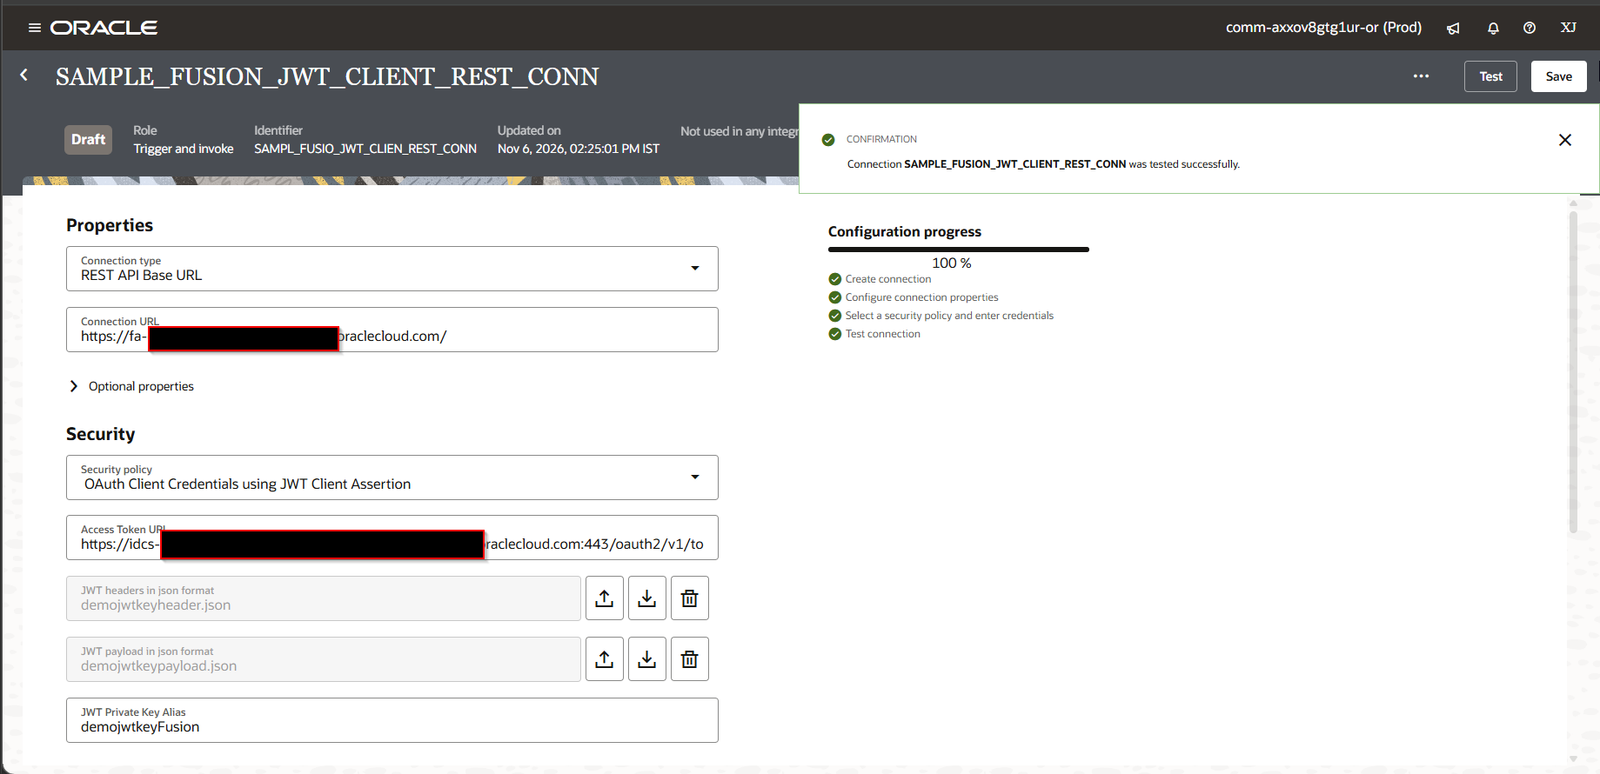
If we want to use “OAuth Client Credentials using JWT Client Assertion” as security Policy, we need to change header and payload JSON file.
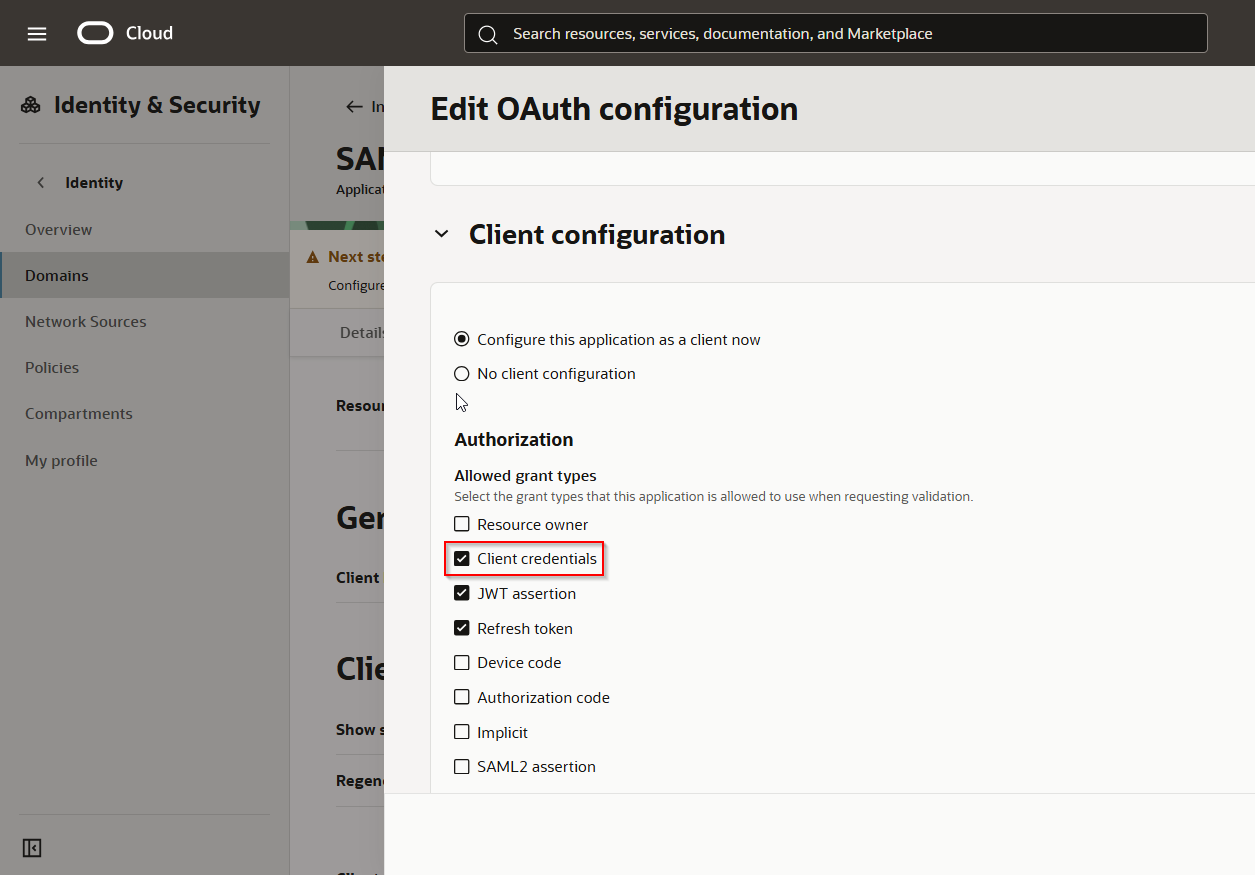
Make sure client credentials checkbox is enabled at Confidential application.
Generate x5t from security certificate (cer file):
Run the following OpenSSL command
openssl sha1 -binary demojwtkey.cer | openssl base64
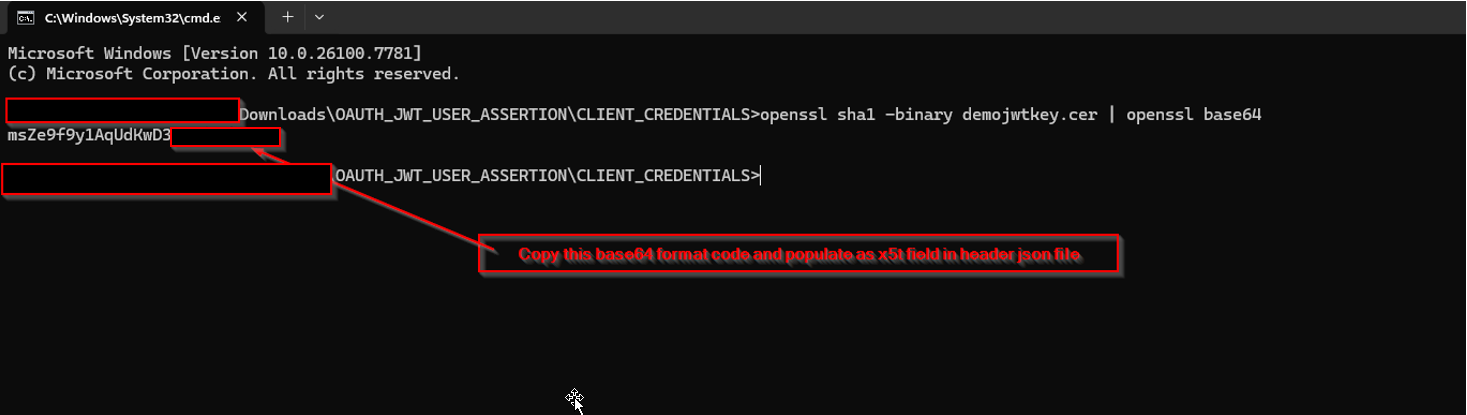
JSON Header File:
JSON Payload File:
Create new REST Connection as shown below:
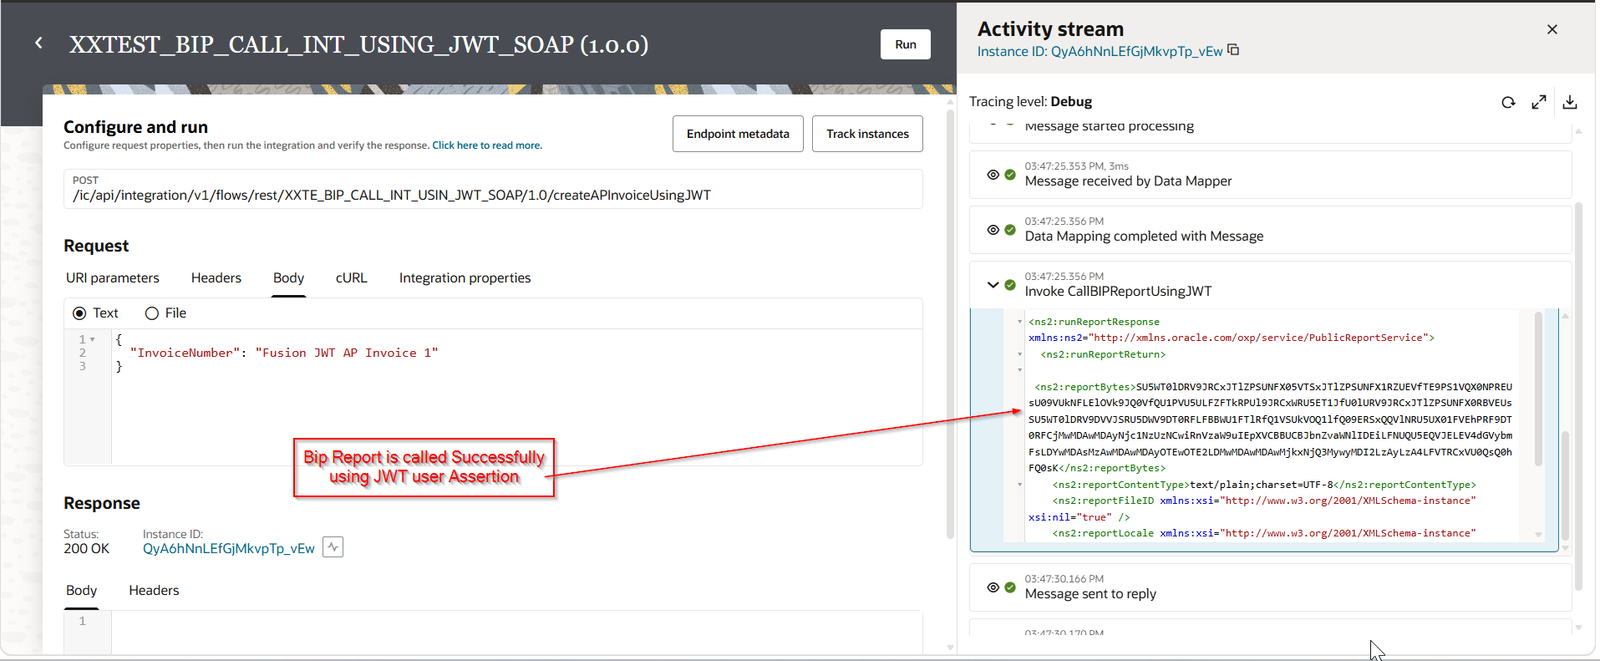
Step7: Create SOAP Connection with JWT user Assertion to Call Fusion BIP Report.
Let us call below BIP Report using SOAP connection with JWT user Assertion.

BIP Report Details:
Report Absolute Path | “/Custom/APEX/AP_DETAILS_REPORT.xdo” |
Parameter | P_INVOICE_NUMBER |
WSDL | /xmlpserver/services/ExternalReportWSSService?WSDL |
Create new SOAP connection in OIC:
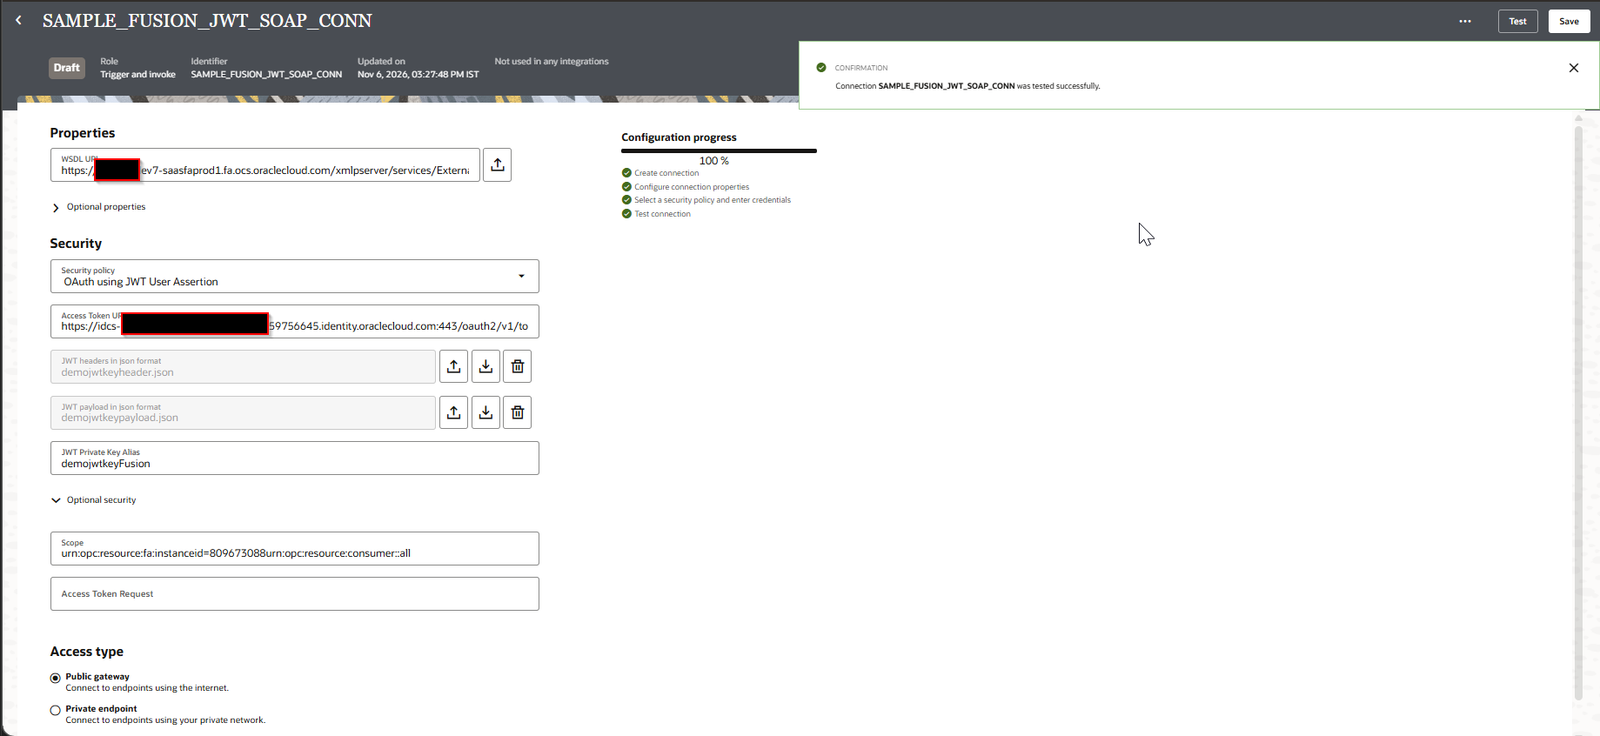
Provide WSDL for calling BIP report and other details same as provided earlier.
Save the Connection.
Create new Integration with this SOAP connection to call BIP report.
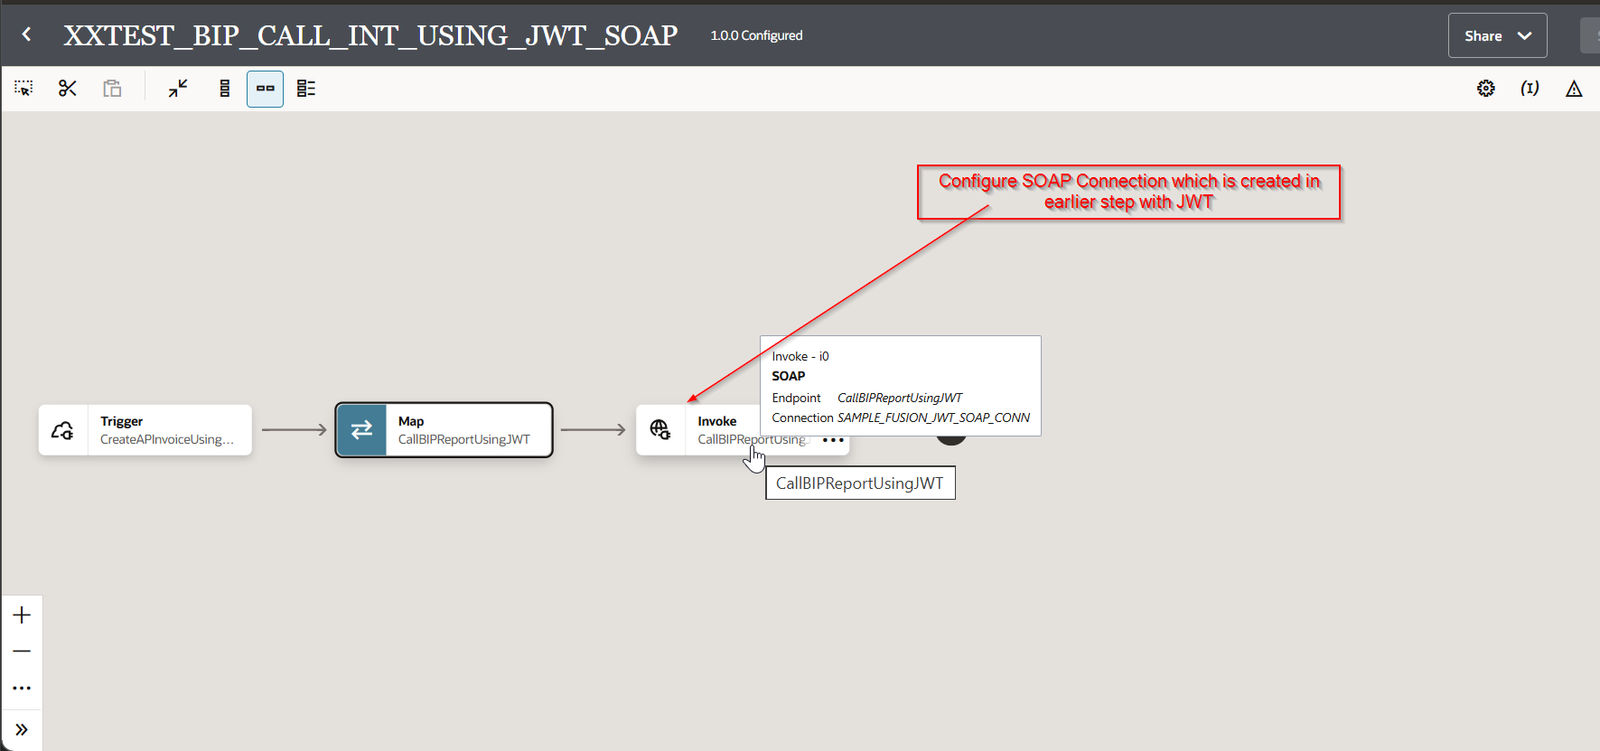
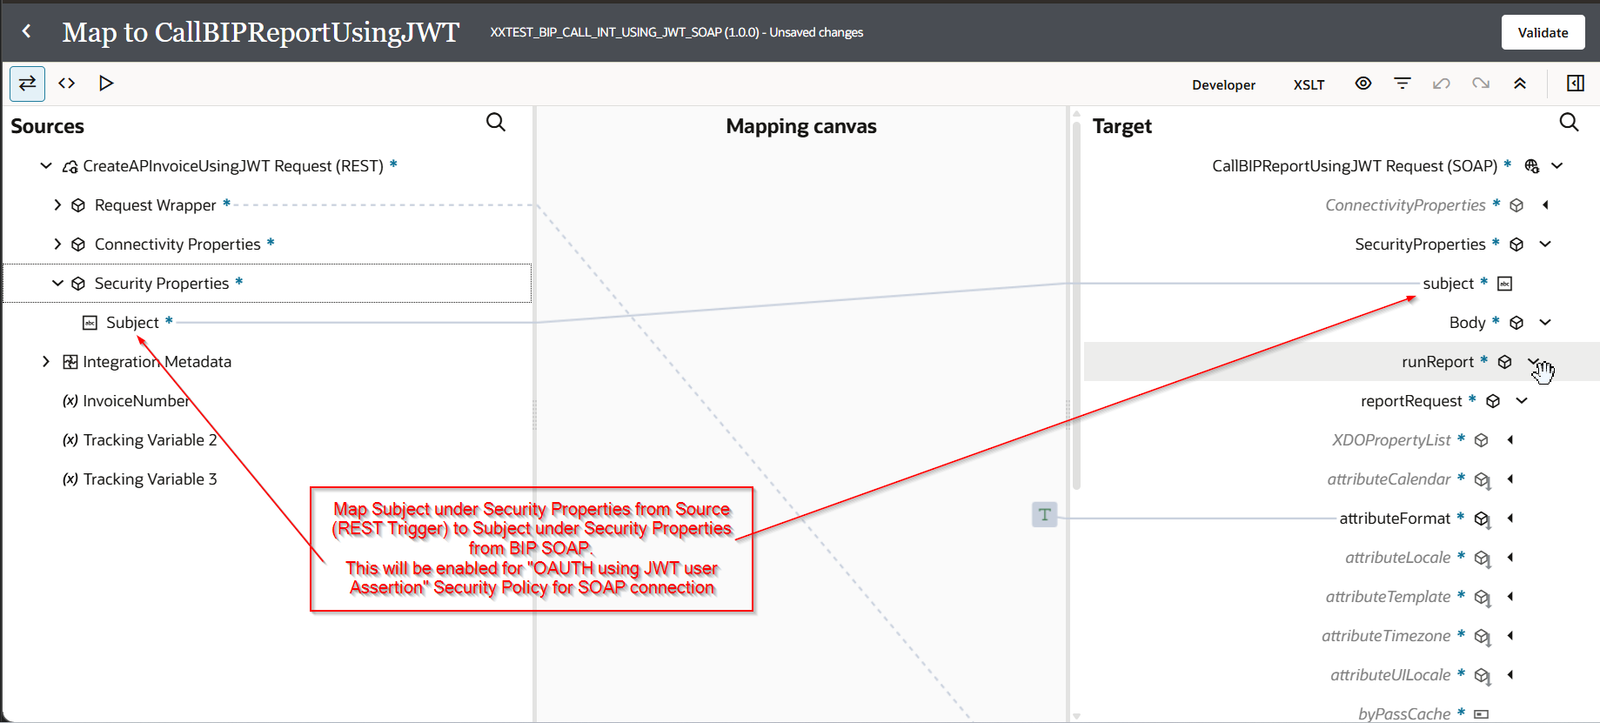
Now run the Integration.