
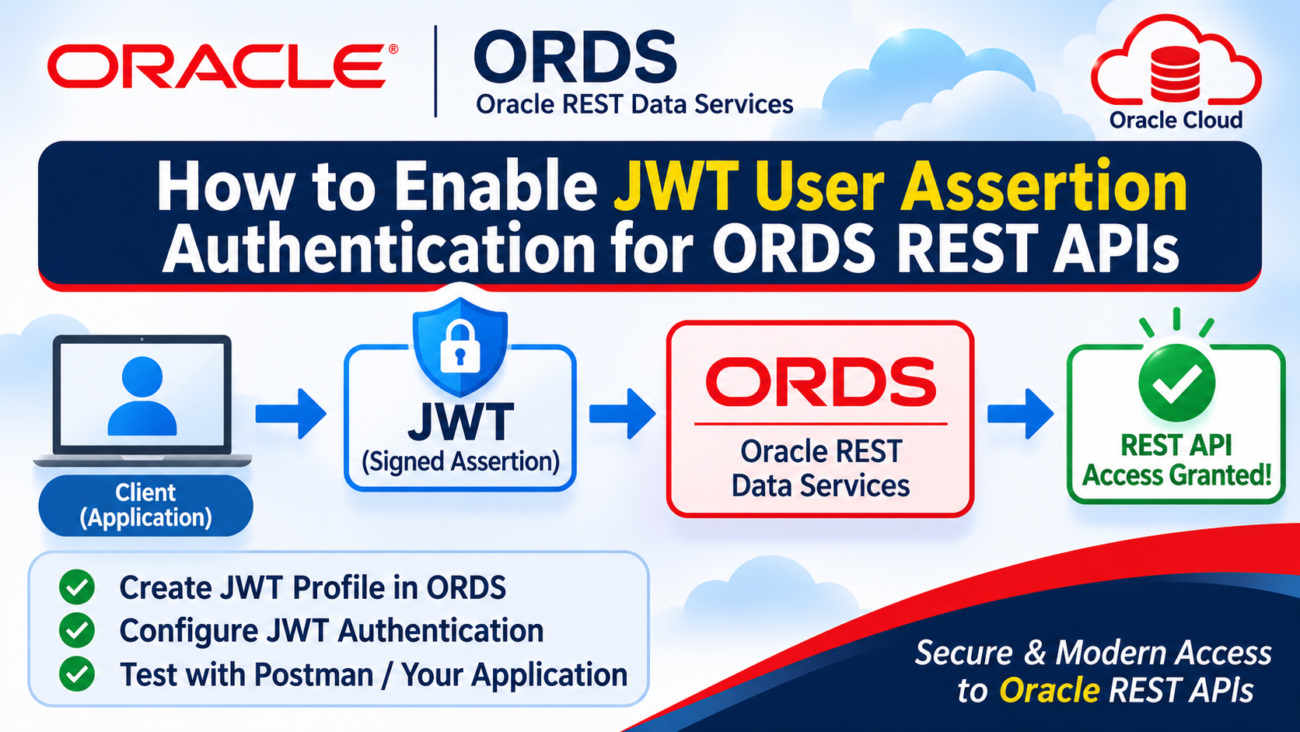
Oracle REST Data Services (ORDS) supports Oauth2.0 authentication using JWT User Assertion grant type. This allows an external application, such as Oracle APEX, OIC, Postman or a java application to authenticate with ORDS and invoke secured REST APIs without passing the database username and password in every API request.
In this guide, we will configure JWT User Assertion authentication from scratch and test it using POST REST API call.
Pre-Requisite:
We need following before we start configuration:
Component | Example |
Oracle Database | 19c/21C/23ai/26ai |
ORDS | 23.3 or above |
JWT Signing algorithm | RS256 |
JWT private key | Client-side private key |
JWT public key | Registered with ORDS |
Follow below steps to enable JWT user assetion for ORDS REST API:
Step1: Generate the RSA public/private key pair
a. Generate the self-Signed key pair:
Open command prompt and run below command to generate self-signed key pair
Command:
keytool -genkey -keyalg RSA -alias demo_ordsjwtkey -keystore sampleKeystore.jks -storepass Oracle@123 -validity 365 -keysize 2048
*** change the password as per your requirement.
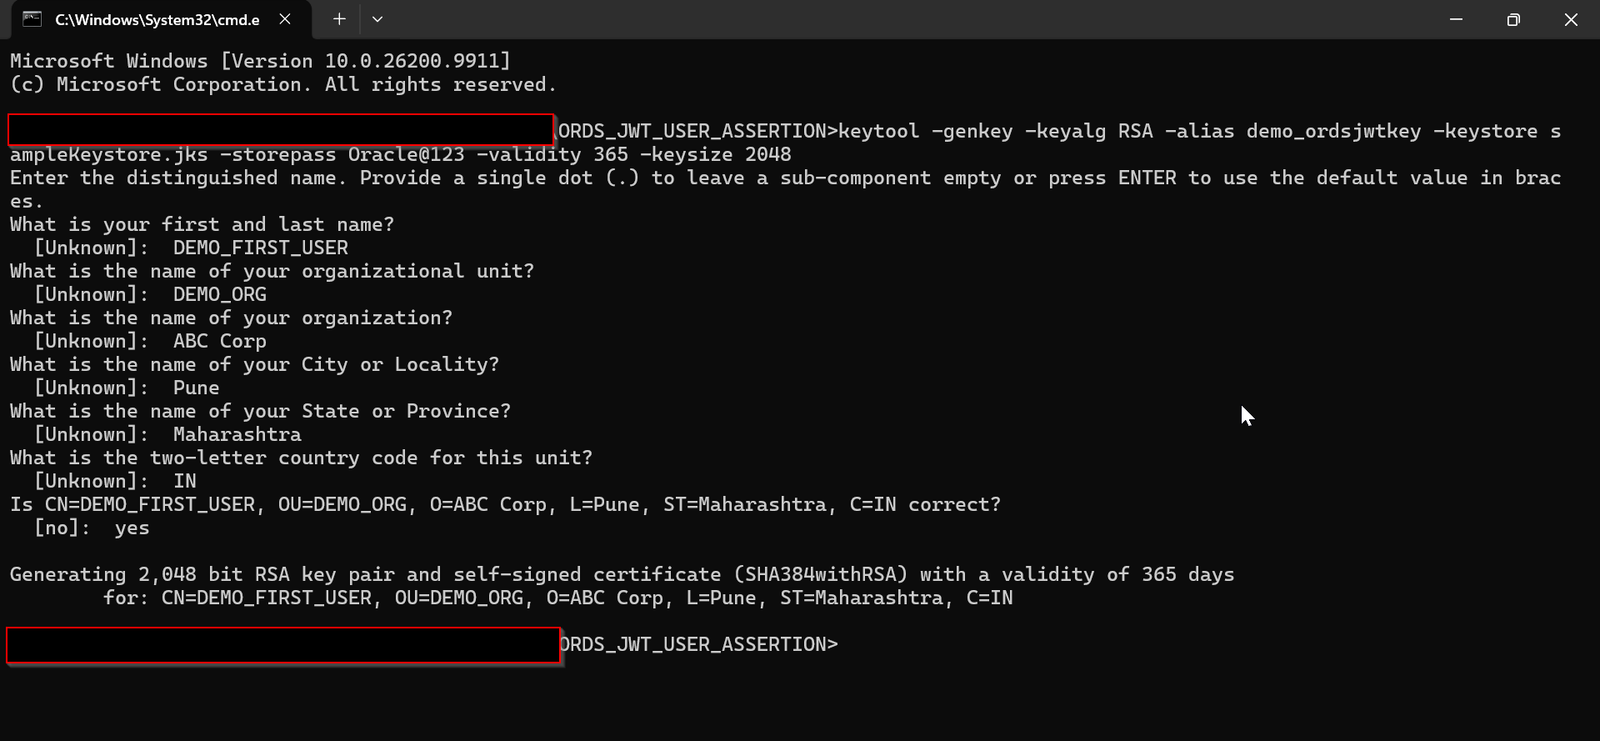
This will generate sampleKeystore.jks file as shown below:

b. Export the public key for signing the JWT assertion
Command:
keytool -exportcert -alias <your_alias> -file <filename> -keystore <keystore_file> -storepass <password>
##example
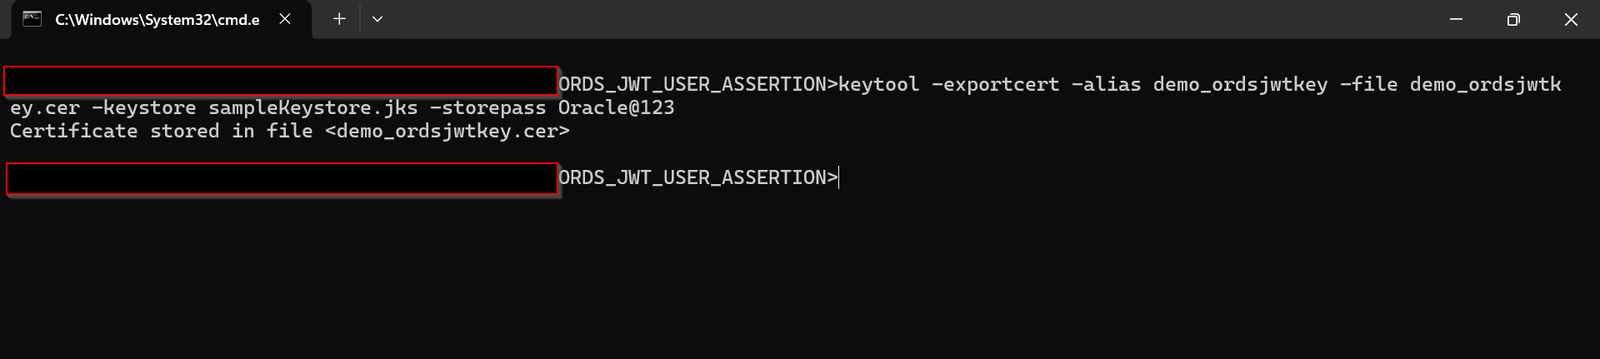
keytool -exportcert -alias demo_ordsjwtkey -file demo_ordsjwtkey.cer -keystore sampleKeystore.jks -storepass Oracle@123

  ## This should show a success message e.g. Certificate stored in file <assert.cer>

c. Convert the keystore to P12 format:
Command:
keytool -importkeystore -srckeystore <filename> -srcstorepass <password> -srckeypass <password> -srcalias <your_alias> -destalias <your_alias> -destkeystore <destFileName> -deststoretype PKCS12 -deststorepass <password> -destkeypass <password>

  ##example

  keytool -importkeystore -srckeystore sampleKeystore.jks -srcstorepass Oracle@123 -srckeypass Oracle@123 -srcalias demo_ordsjwtkey -destalias demo_ordsjwtkey -destkeystore demo_ordsjwtkey.p12 -deststoretype PKCS12 -deststorepass Oracle@123 -destkeypass Oracle@123

  ## This should show a success message e.g. Importing keystore sampleKeystore.jks to assert.p12...

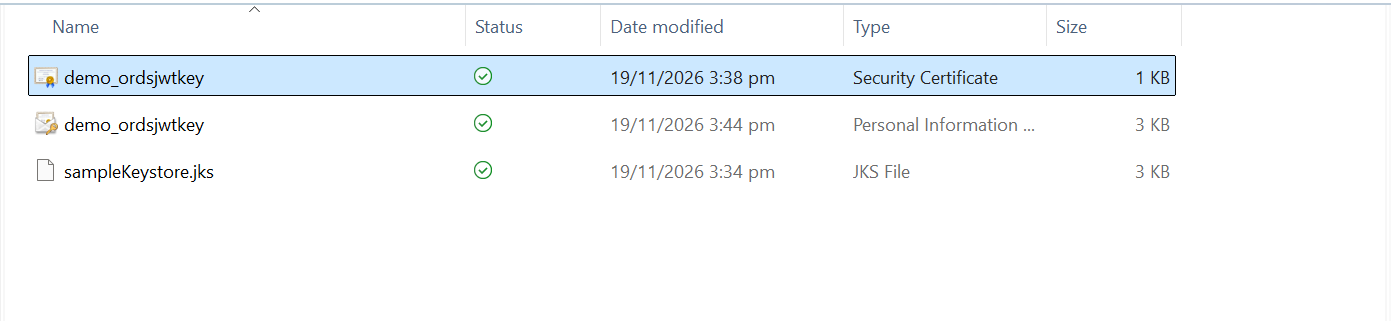
d. Export the private key from the P12 key store:
Command:
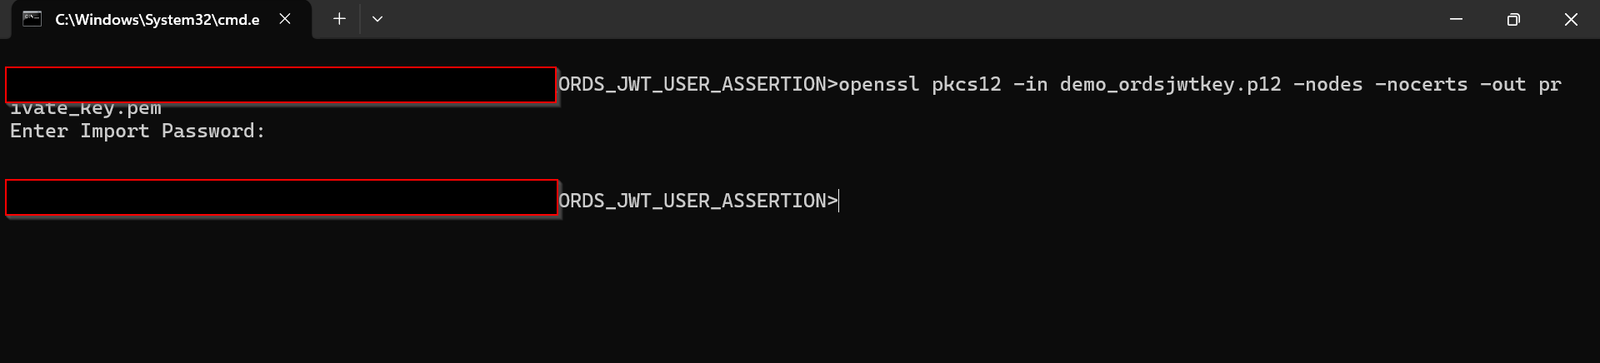
openssl pkcs12 -in <destFileName> -nodes -nocerts -out <pem_file>

  ##example

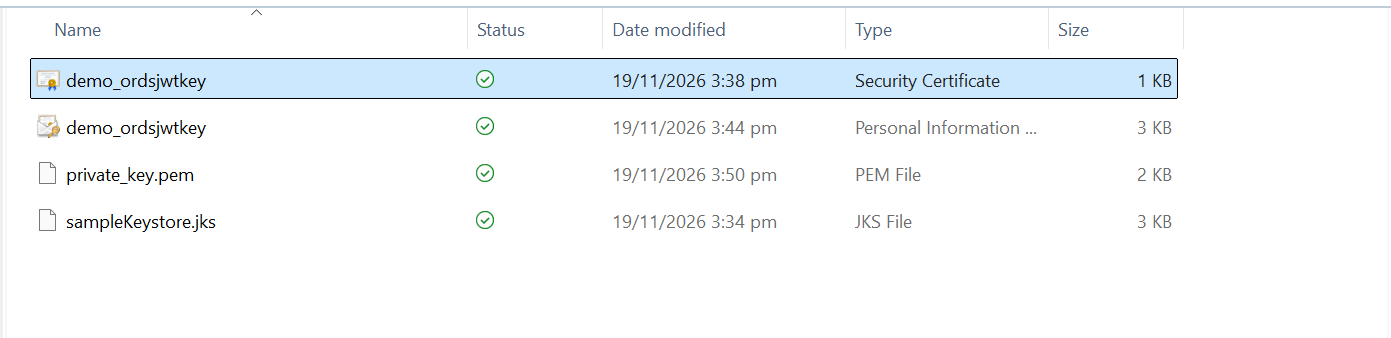
  openssl pkcs12 -in demo_ordsjwtkey.p12 -nodes -nocerts -out private_key.pem

  ## This should show a success message: MAC verified OK
*******Install open ssl before running this command.
Step2: Create and REST-enable your database schema
Connect to your database using an account with the required ORDS administration priviledges.
For this example, we will use APEX_WS_DB with ADMIN user.
a. Create New Database Schema and enable REST:
Login to OCI.
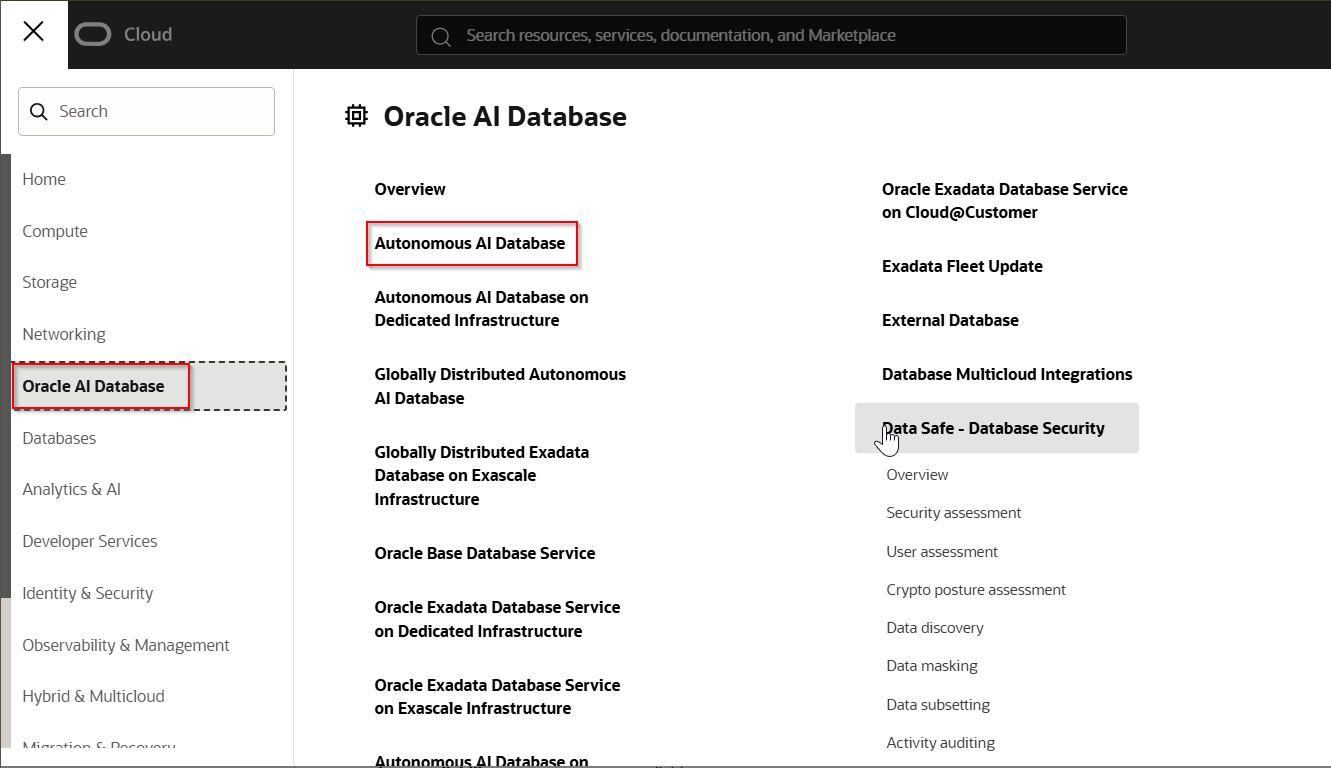
Navigate to Oracle AI Databases —>Autonomous AI Database.
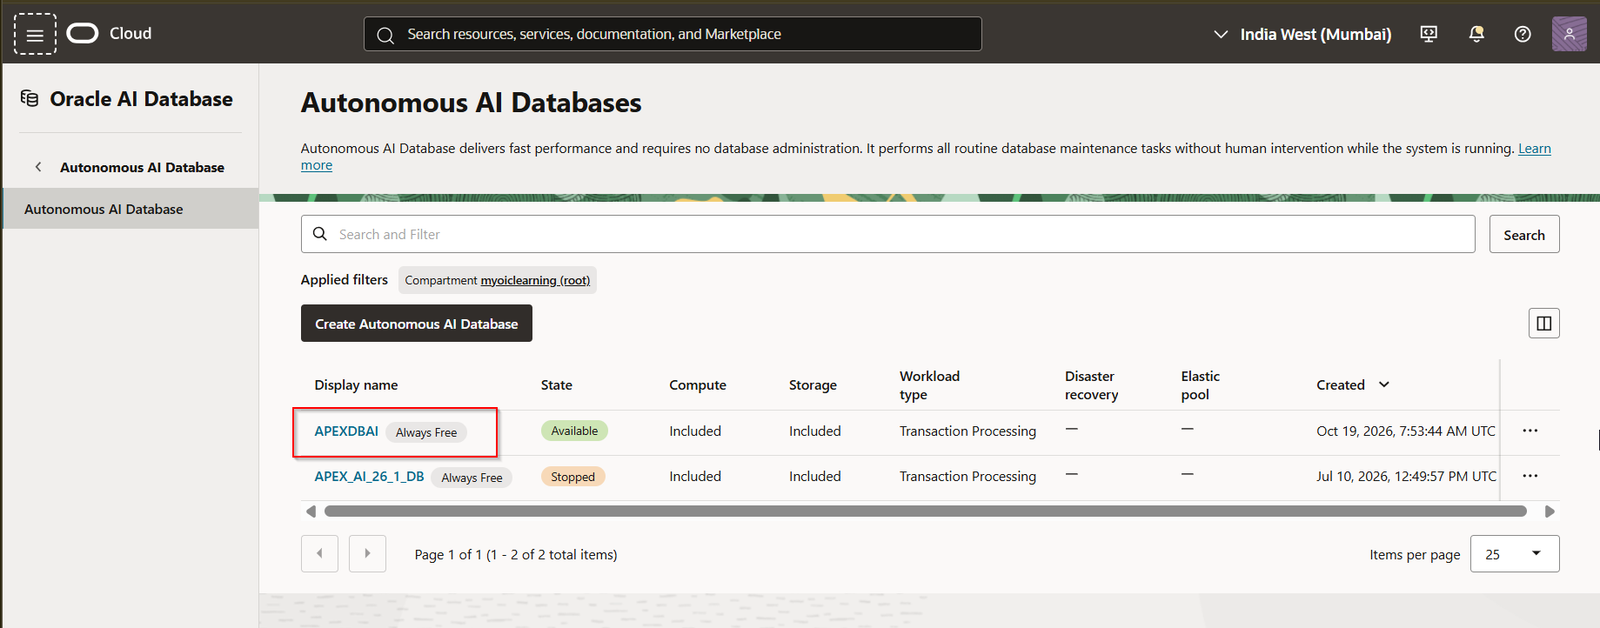
Select the database which is provisioned.
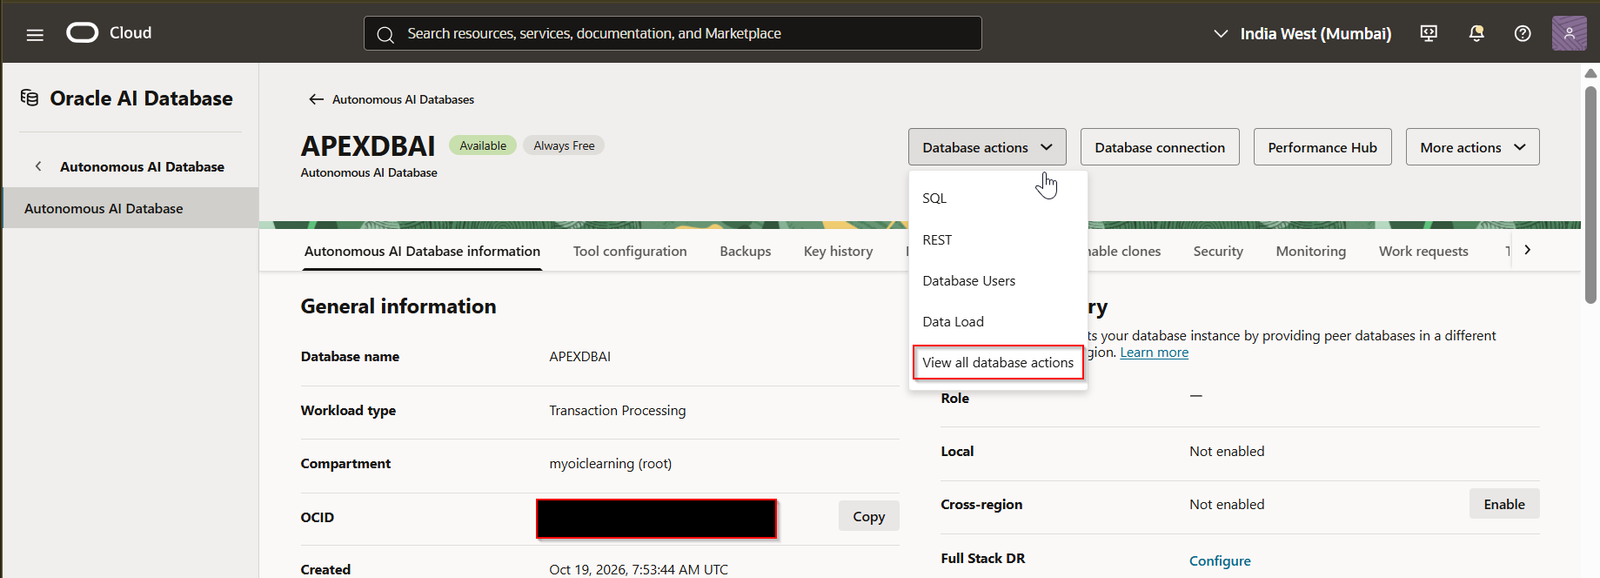
Click on “View all database actions”.
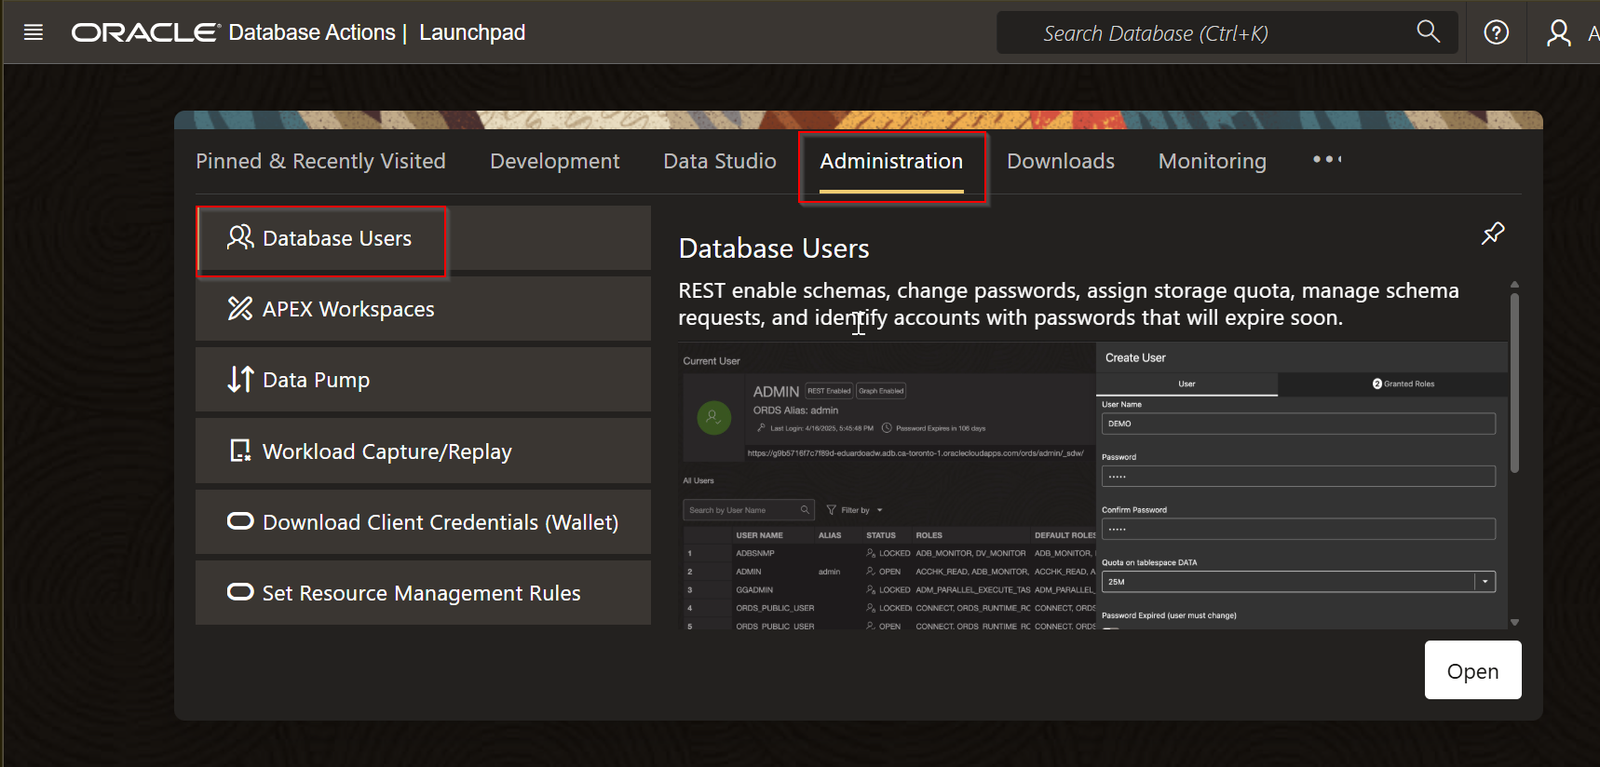
Click on Administration —>Database Users.
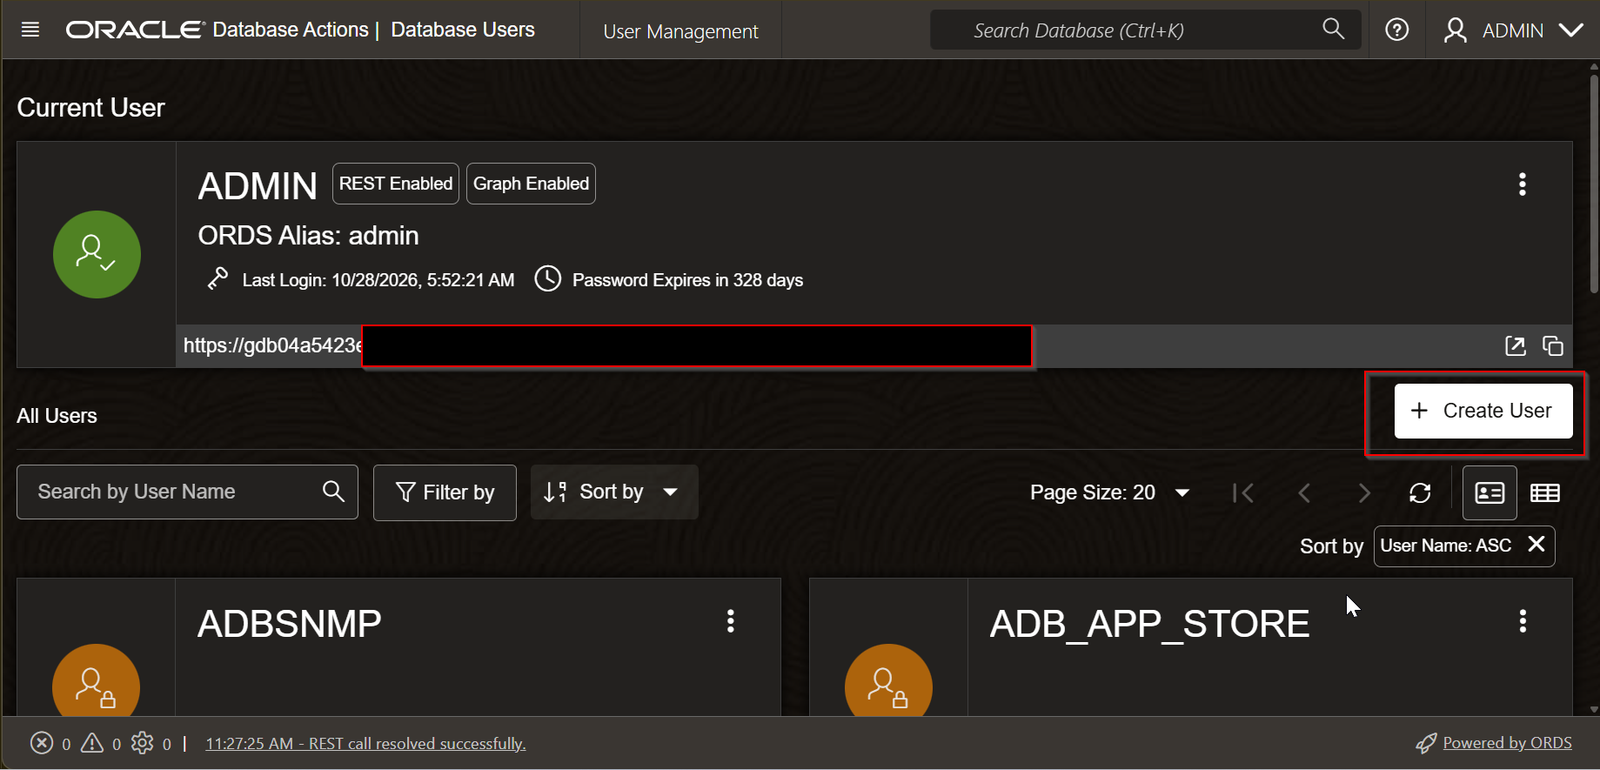
Click on Create User.

We are creating new database schema to test ORDS JWT User Assertion.

Provide DB_DEVELOPER_ROLE to this new schema.
Click on Create User.
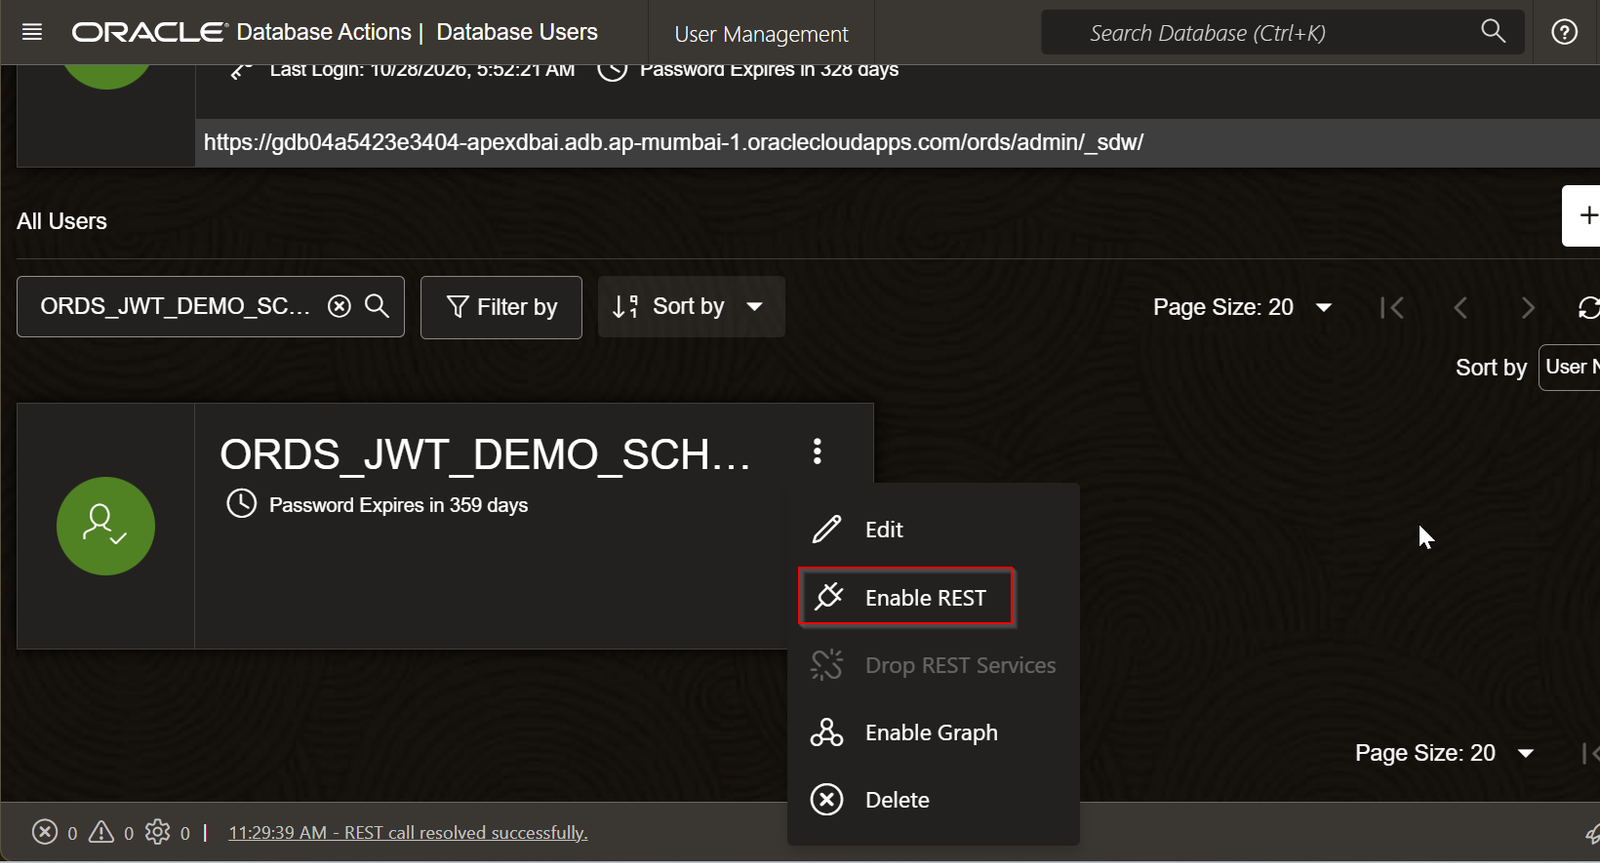
Once User/Schema is created, click on Enable REST to enable ORDS for this schema.
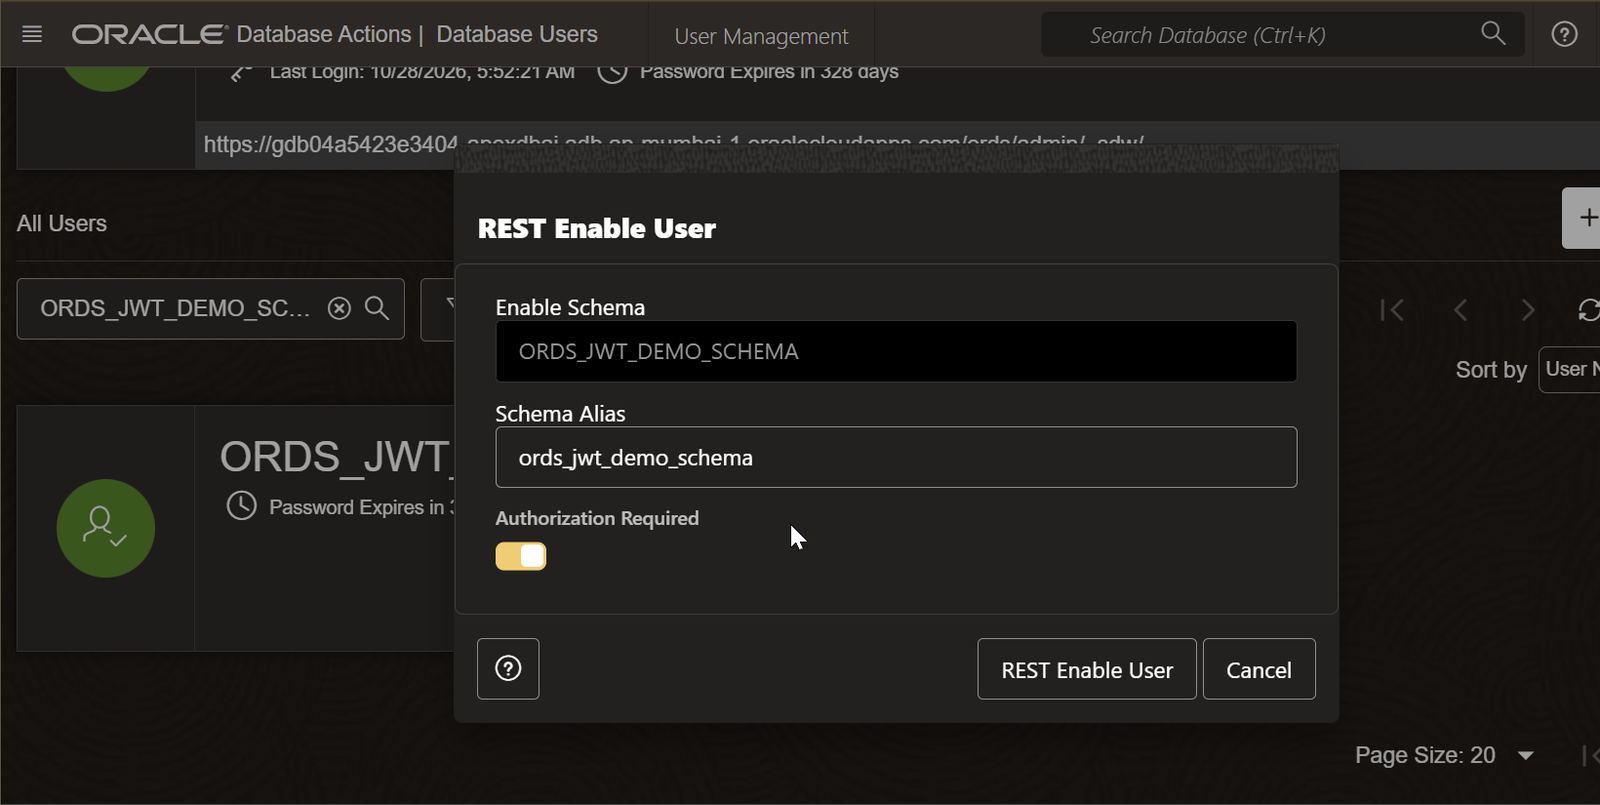
Provide alias name and click on “REST Enable User”.
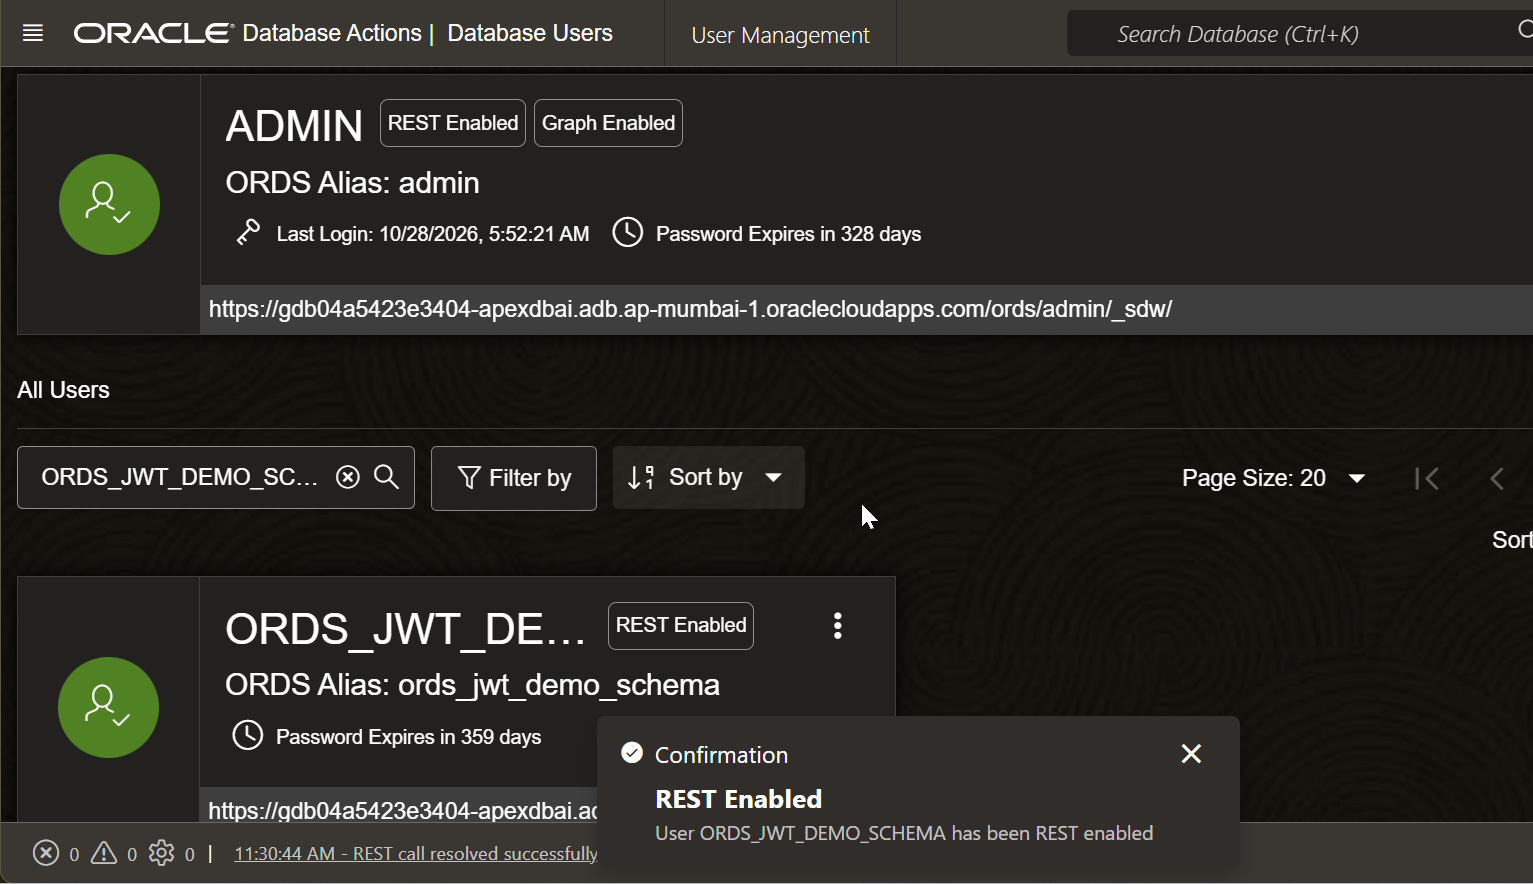
This will enable ORDS for this newly created schema.
Open SQL developer for this user. Click on below highlighted icon.
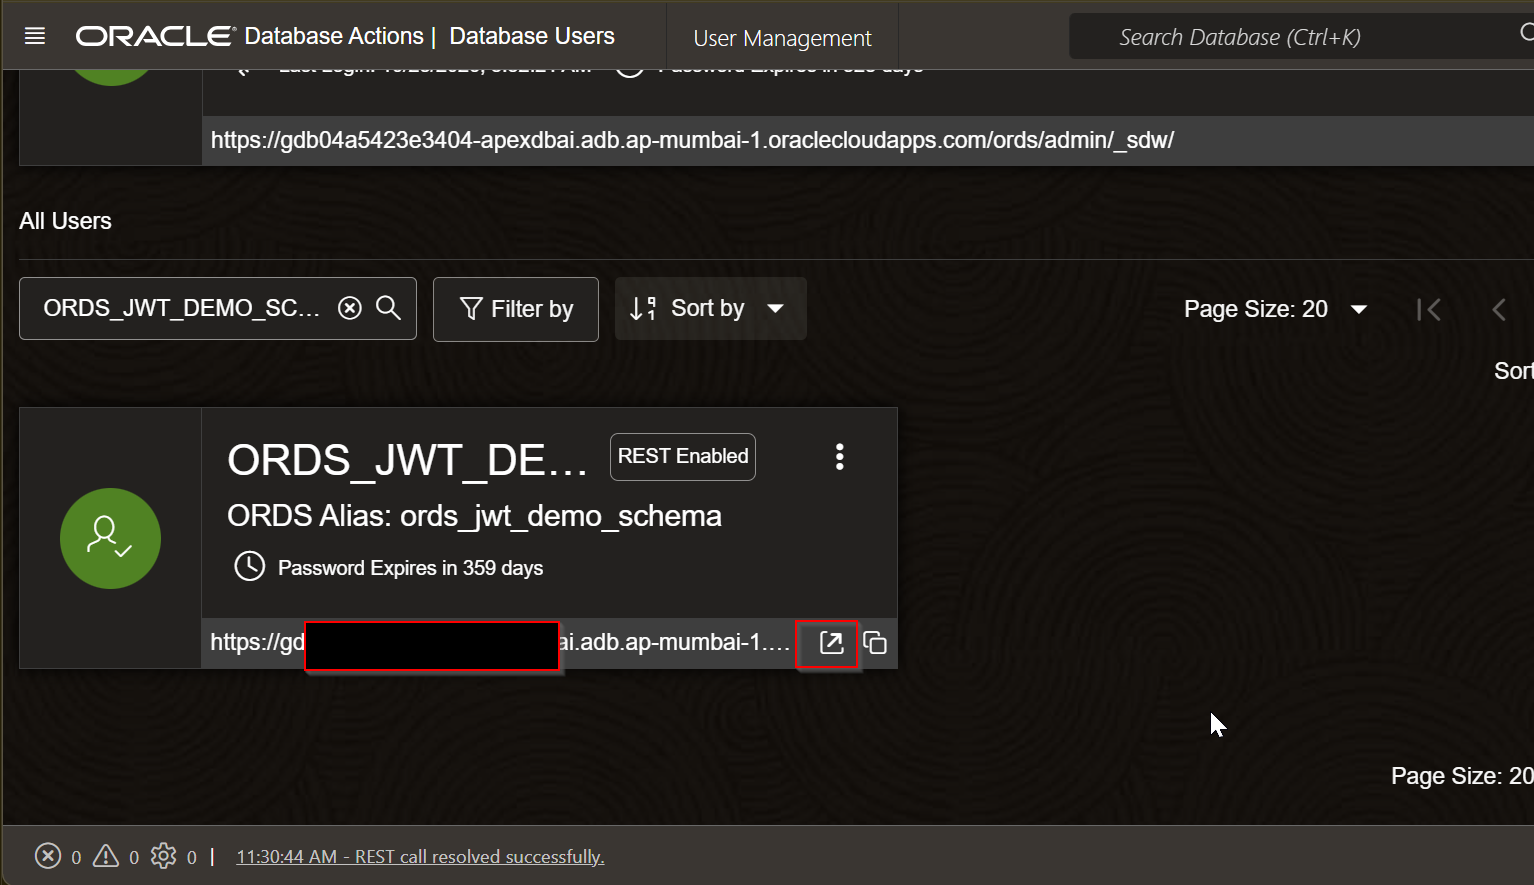
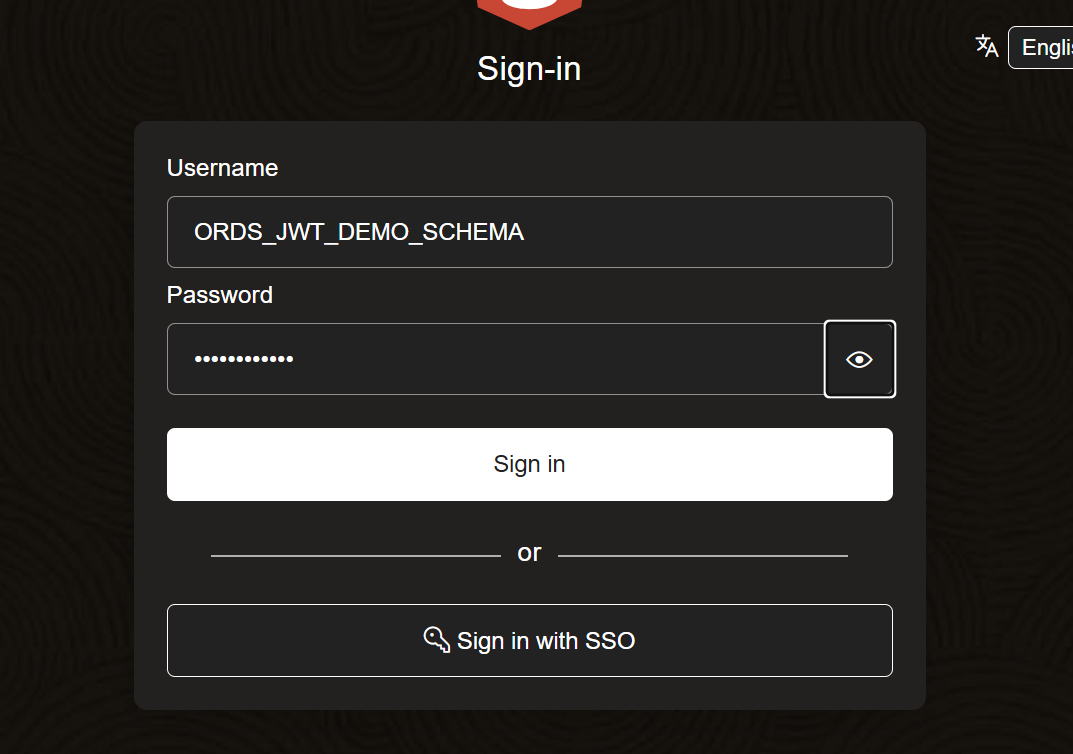
Provide UserName and Password given during user creation.
Click on “Sign in”.

Click on SQL.
b. Create Role and Privilege:
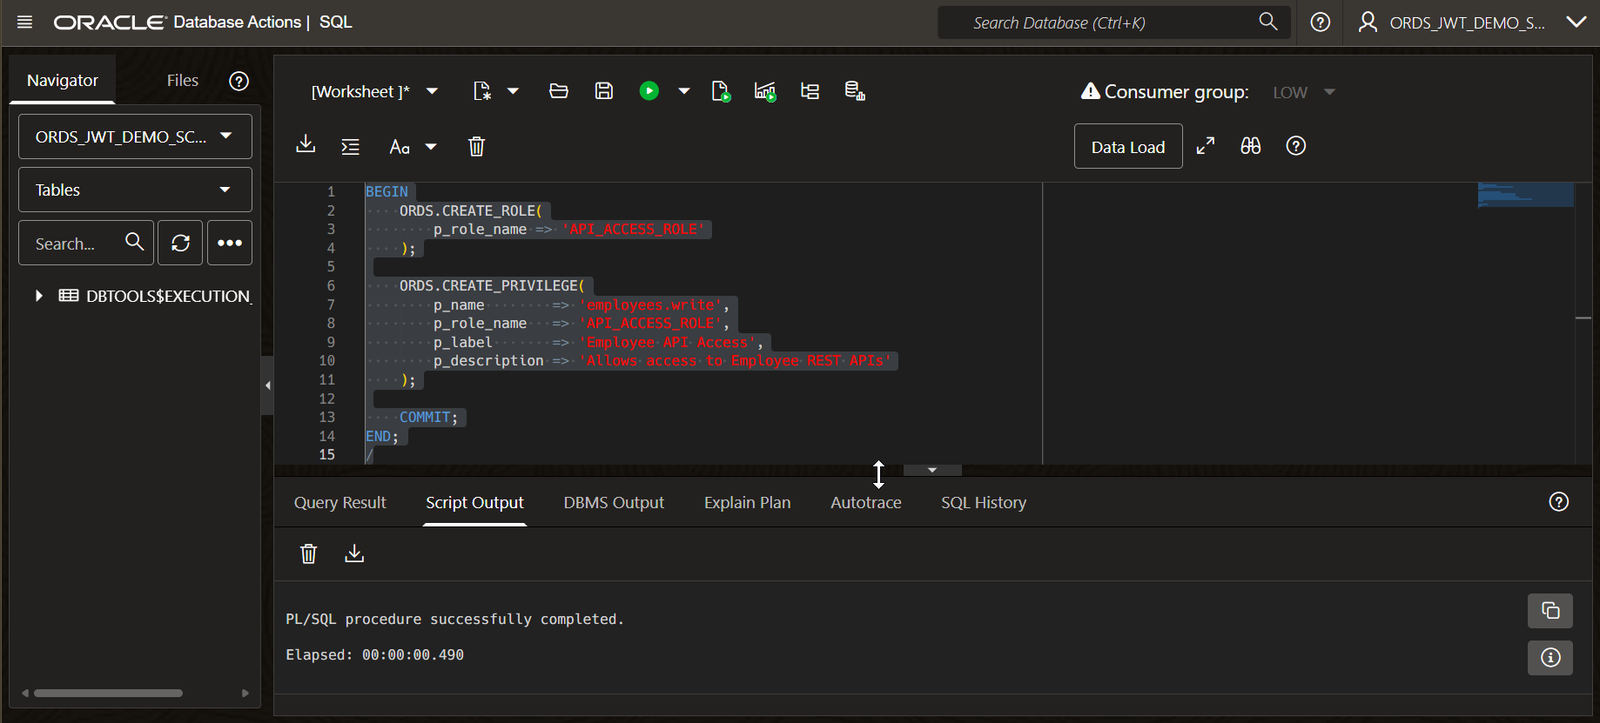
Use below PLSQL code to create role and privilege:
BEGIN
    ORDS.CREATE_ROLE(
        p_role_name => 'API_ACCESS_ROLE'
    );
    ORDS.CREATE_PRIVILEGE(
        p_name        => 'employees.write',
        p_role_name   => 'API_ACCESS_ROLE',
        p_label       => 'Employee API Access',
        p_description => 'Allows access to Employee REST APIs'
    );
    COMMIT;
END;
/
c. Map the privilege to REST API URL
Run below PLSQL code to map privilege to REST API URL
BEGIN
    ORDS.CREATE_PRIVILEGE_MAPPING(
        p_privilege_name => 'employees.write',
        p_pattern        => '/demo/employees/*'
    );
    COMMIT;
END;
/
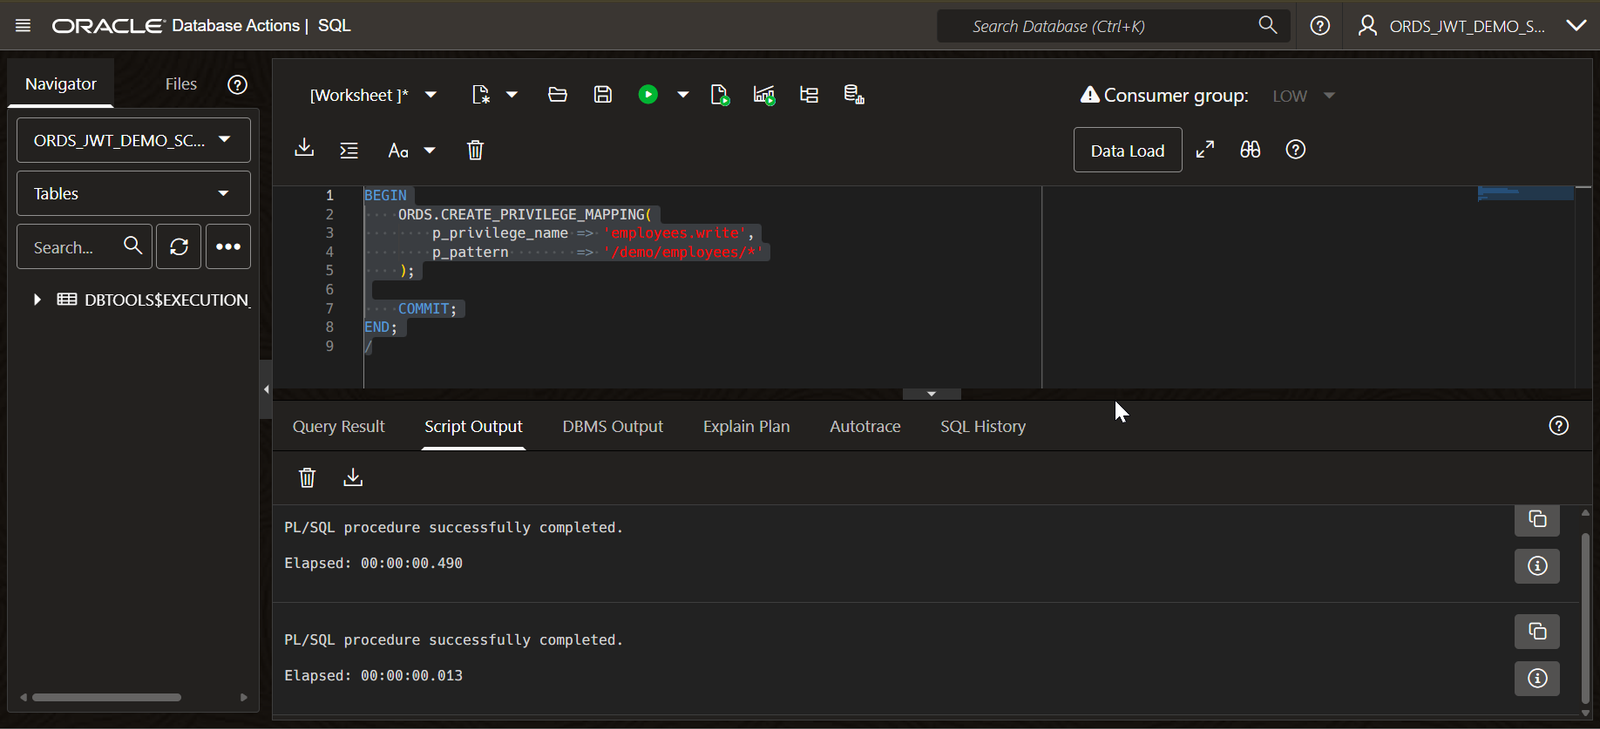
Make note of ’employees.write’ as this will be needed while creating confidential application in next steps.
d. Create a sample database table in schema:
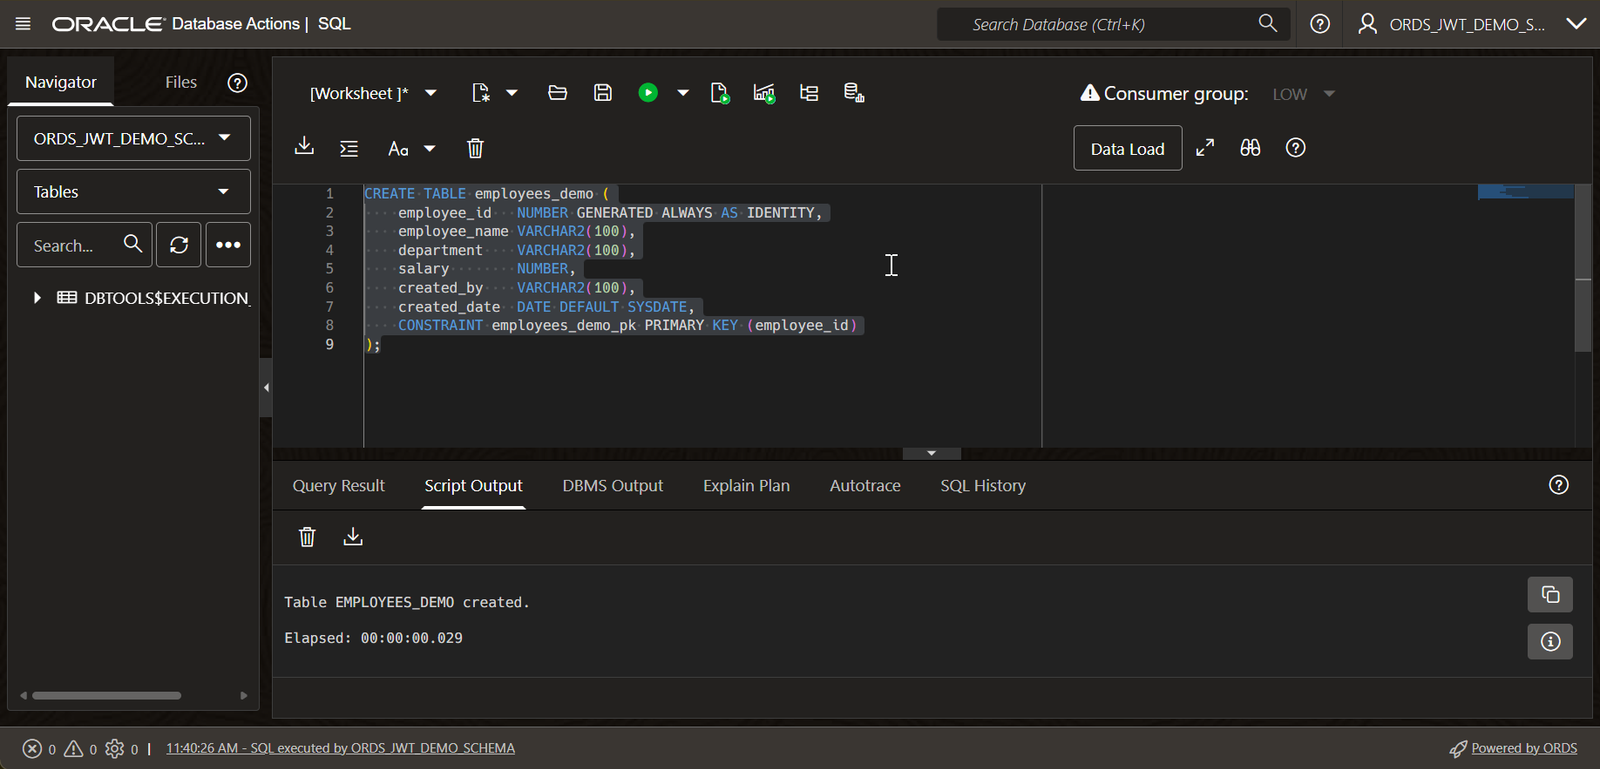
Run below SQL statement to create ewn database schema:
CREATE TABLE employees_demo (
    employee_id   NUMBER GENERATED ALWAYS AS IDENTITY,
    employee_name VARCHAR2(100),
    department    VARCHAR2(100),
    salary        NUMBER,
    created_by    VARCHAR2(100),
    created_date  DATE DEFAULT SYSDATE,
    CONSTRAINT employees_demo_pk PRIMARY KEY (employee_id)
);
e. Create a POST REST API in ORDS
Run below PLSQL code to define the REST module and endpoint:
BEGIN
    ORDS.DEFINE_MODULE(
        p_module_name    => 'demo',
        p_base_path      => '/demo/',
        p_items_per_page => 25,
        p_status         => 'PUBLISHED'
    );
    ORDS.DEFINE_TEMPLATE(
        p_module_name => 'demo',
        p_pattern     => 'employees/'
    );
    ORDS.DEFINE_HANDLER(
        p_module_name => 'demo',
        p_pattern     => 'employees/',
        p_method      => 'POST',
        p_source_type => ORDS.SOURCE_TYPE_PLSQL,
        p_source      => q'~
DECLARE
    l_json          JSON_OBJECT_T;
    l_employee_name VARCHAR2(100);
    l_department    VARCHAR2(100);
    l_salary        NUMBER;
    l_employee_id   NUMBER;
    l_created_by    VARCHAR2(255);
BEGIN
    l_json := JSON_OBJECT_T.PARSE(:body_text);
    l_employee_name := l_json.get_string('employee_name');
    l_department    := l_json.get_string('department');
    l_salary        := l_json.get_number('salary');
    -- Capture authenticated user from JWT
    l_created_by := :current_user;
    INSERT INTO employees_demo (
        employee_name,
        department,
        salary,
        created_by
    )
    VALUES (
        l_employee_name,
        l_department,
        l_salary,
        l_created_by
    )
    RETURNING employee_id INTO l_employee_id;
    COMMIT;
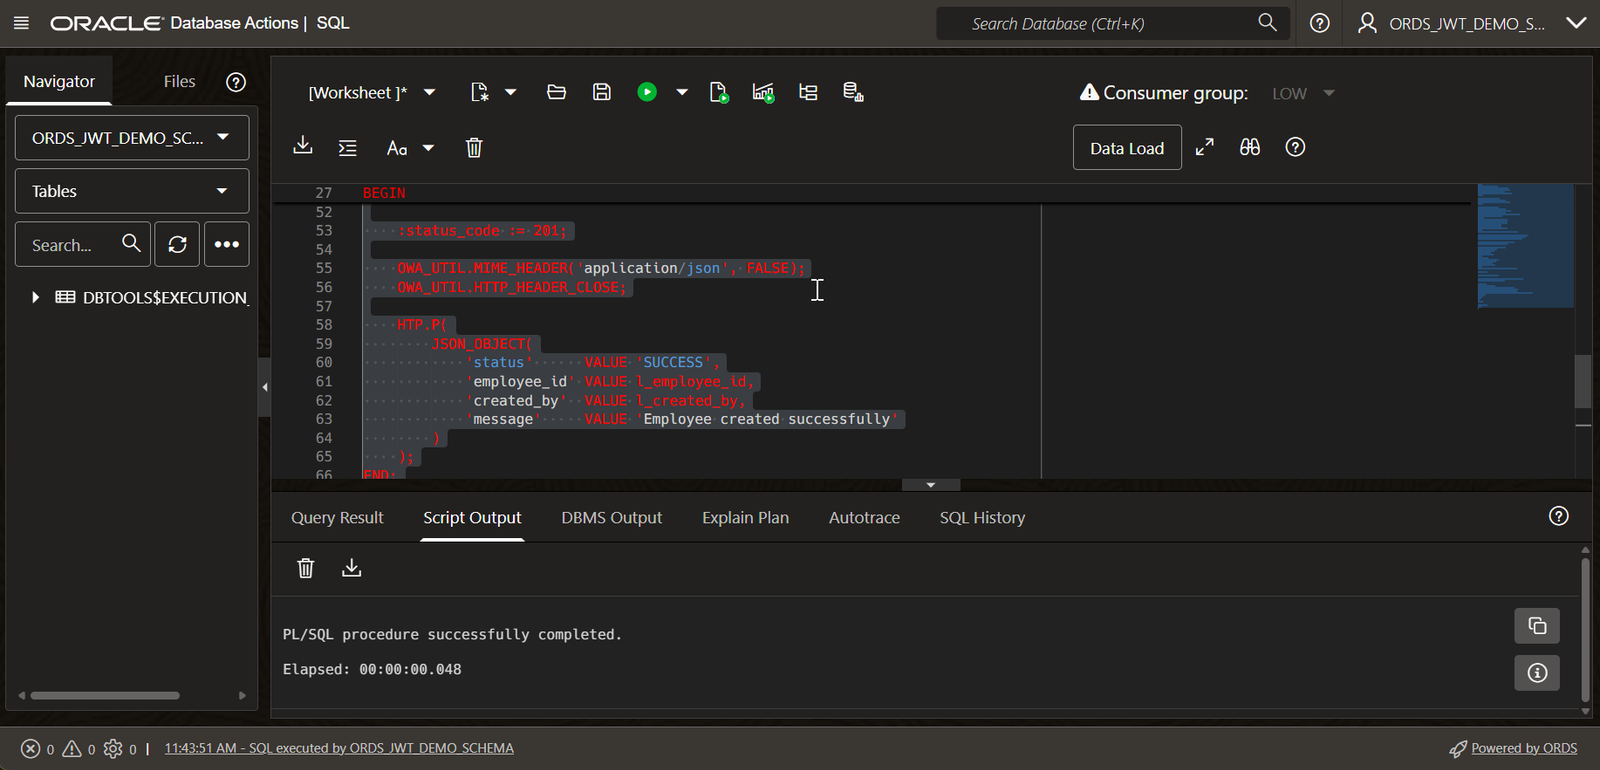
    :status_code := 201;
    OWA_UTIL.MIME_HEADER('application/json', FALSE);
    OWA_UTIL.HTTP_HEADER_CLOSE;
    HTP.P(
        JSON_OBJECT(
            'status'      VALUE 'SUCCESS',
            'employee_id' VALUE l_employee_id,
            'created_by'  VALUE l_created_by,
            'message'     VALUE 'Employee created successfully'
        )
    );
END;
~'
    );
    COMMIT;
END;
/
Step3: Crate Resource Confidential Application in IDCS
Confidential application needs to create in OCI domain.
Login to OCI console.
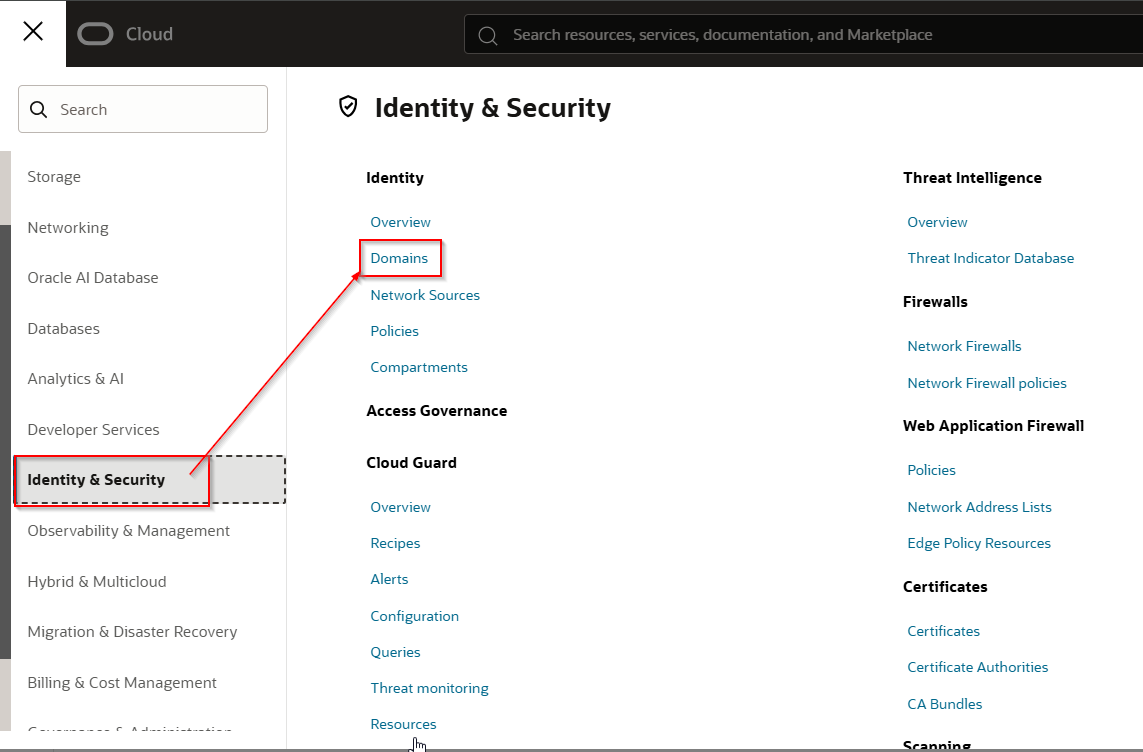
Navigate to Identity & Security —>Domains
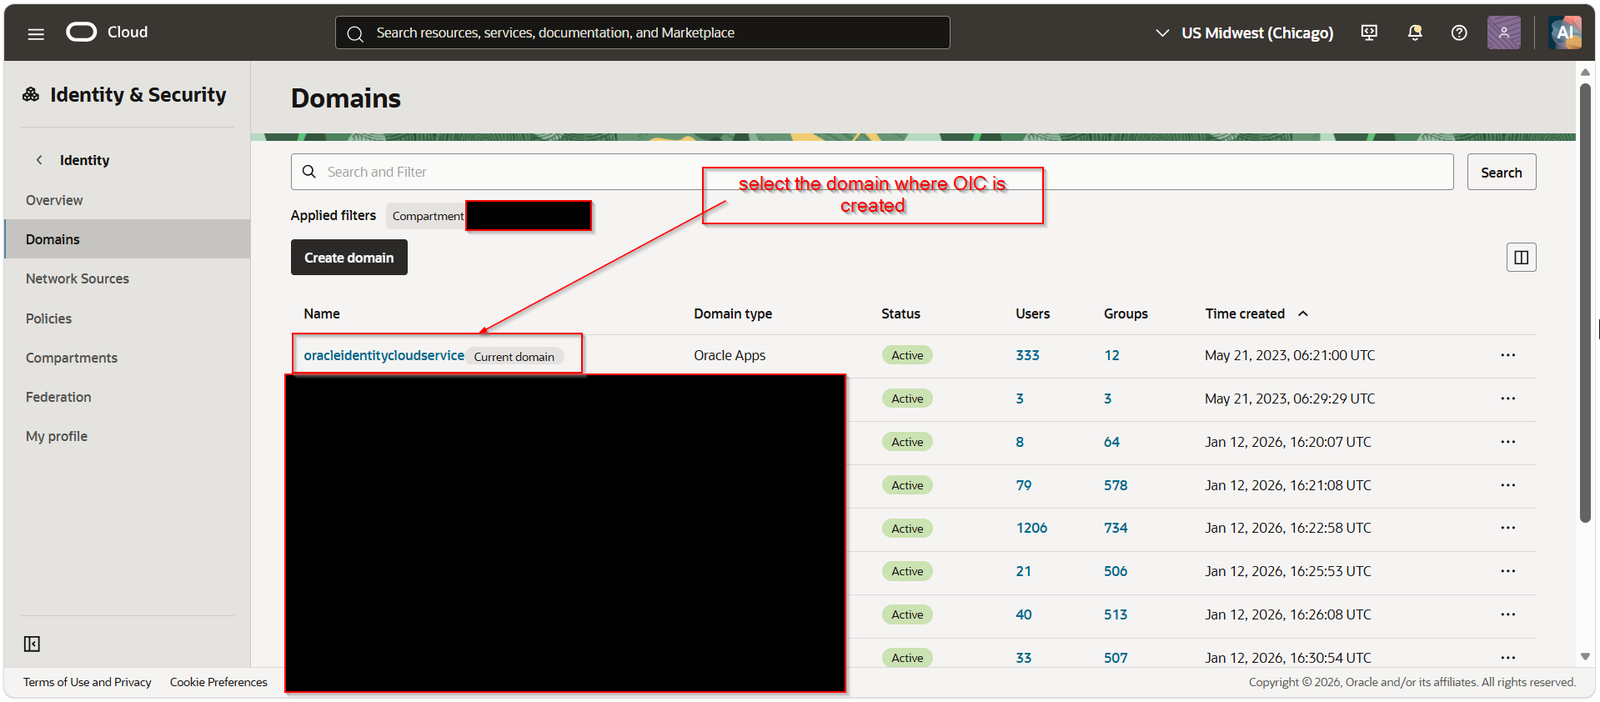
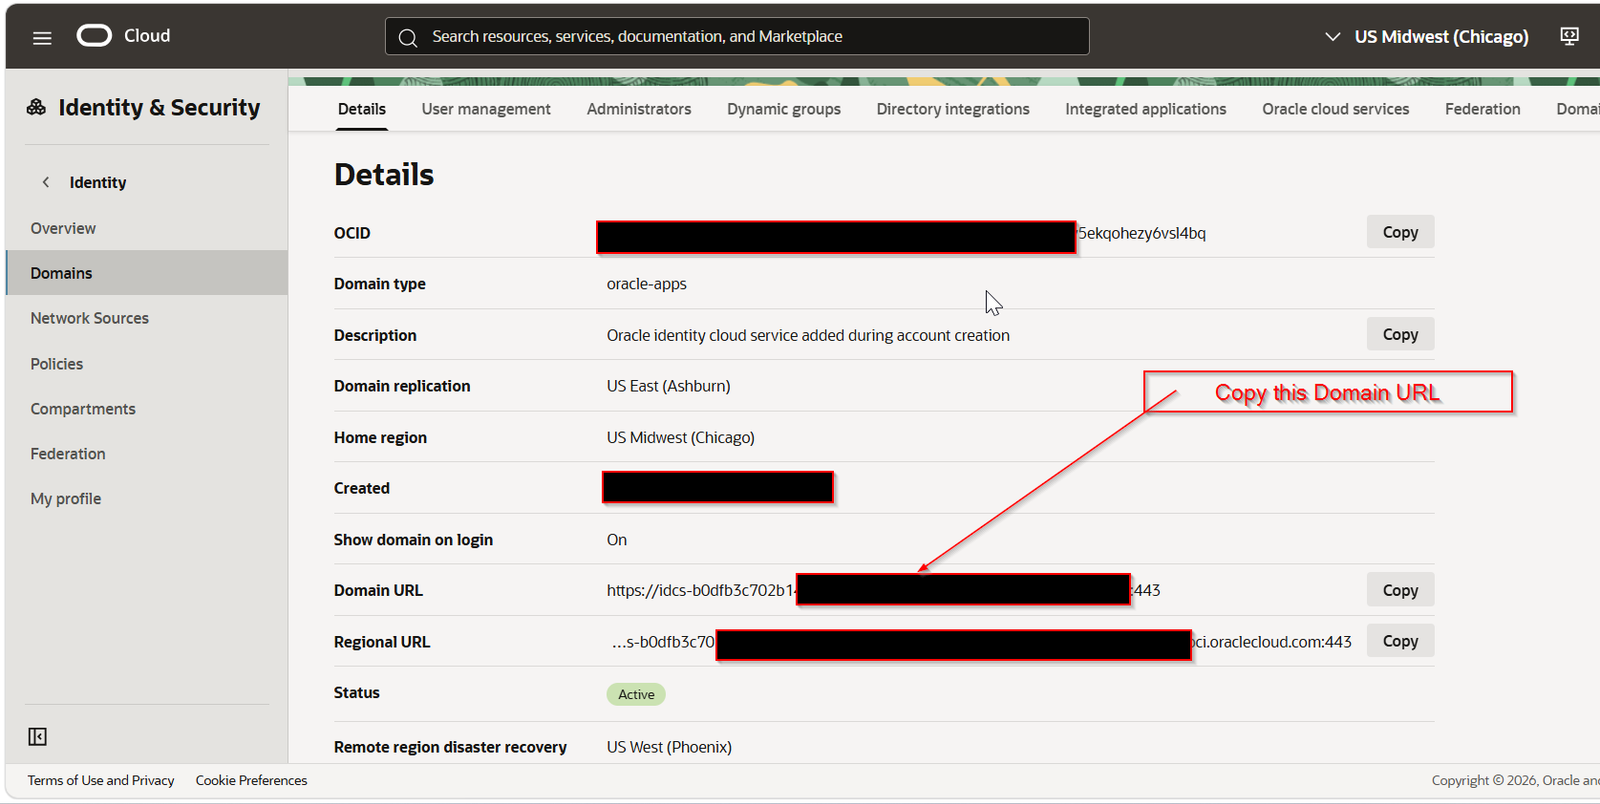
Copy domain URL which we need in further steps.
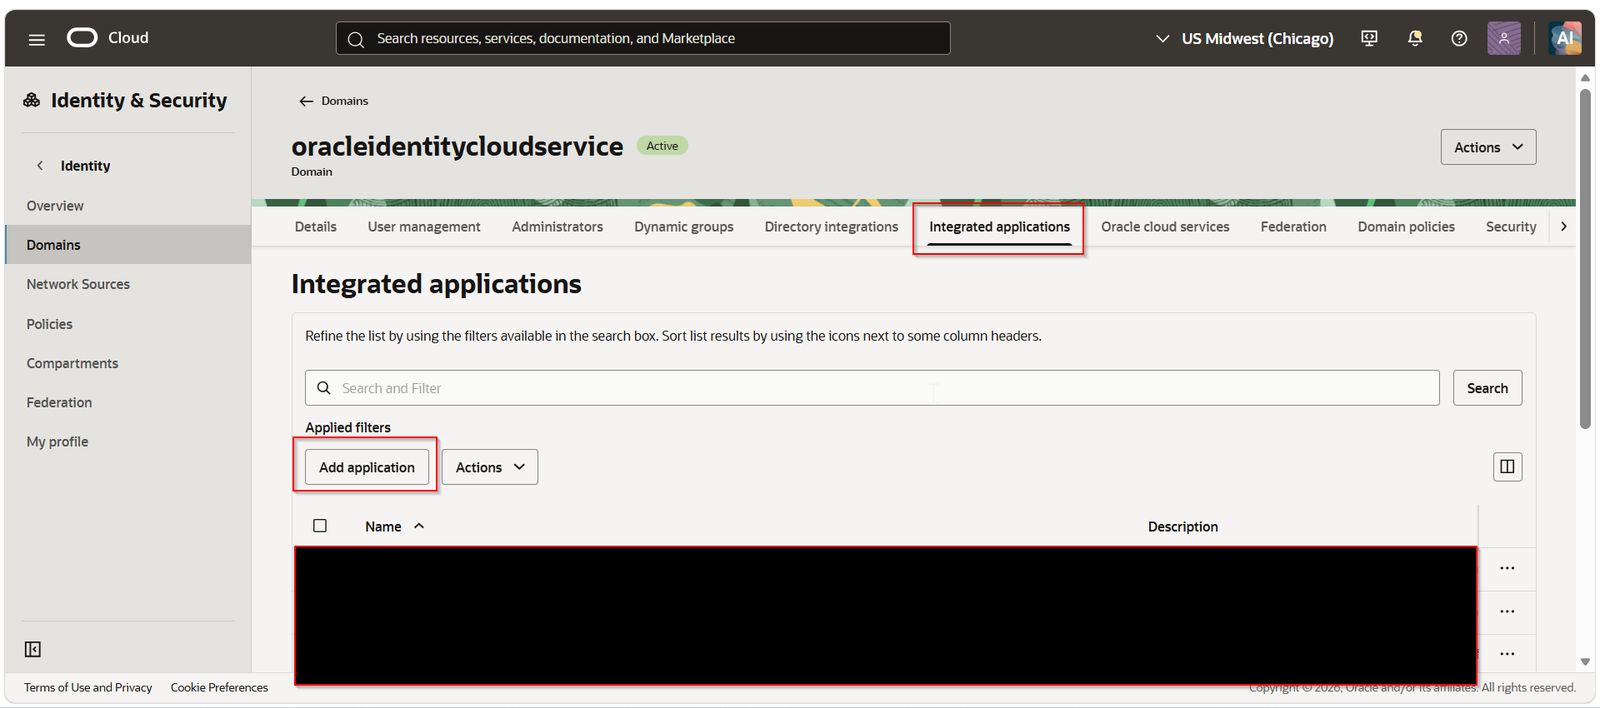
Navigate to Integrated applications —> Add application
Select Confidential Application
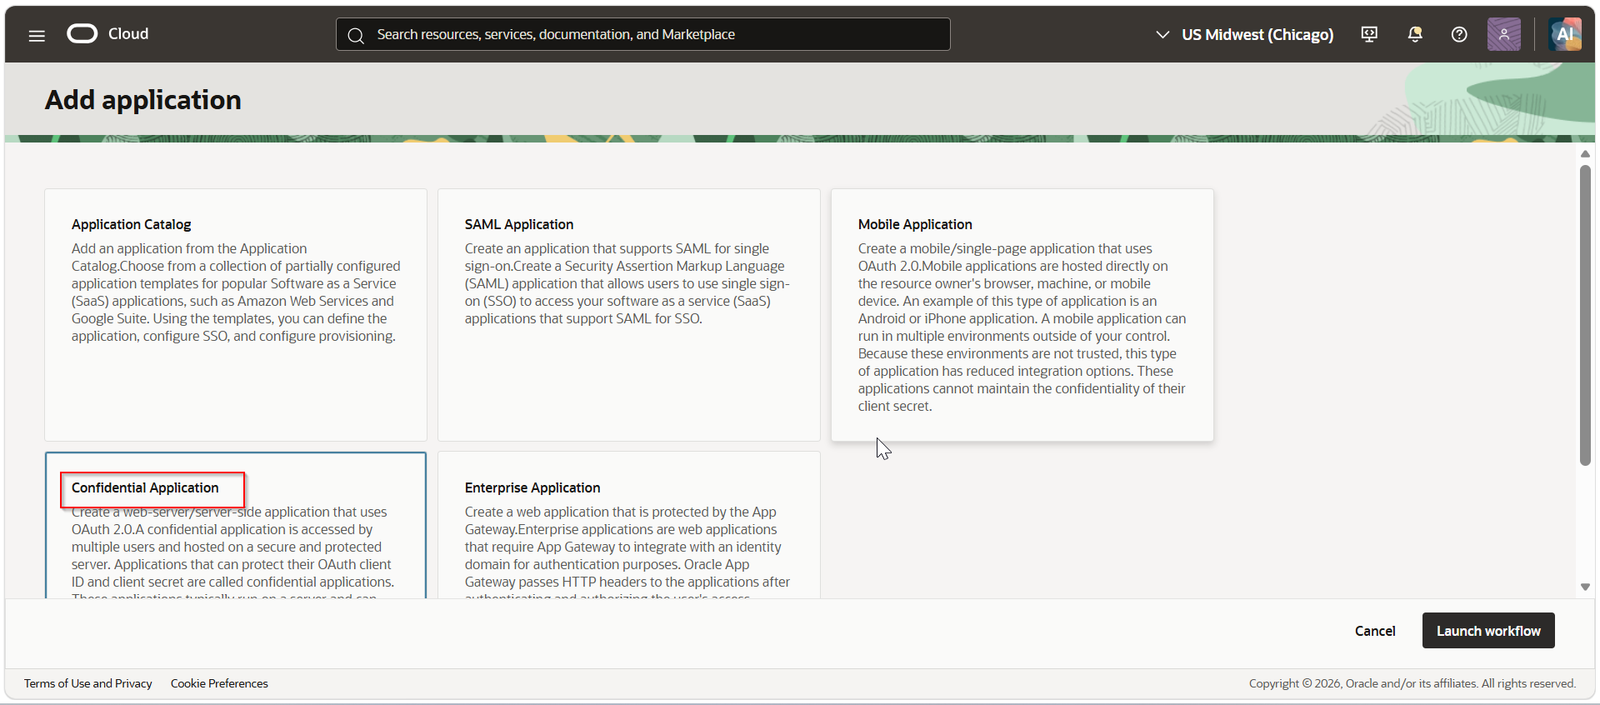
Click on Launch Workflow.
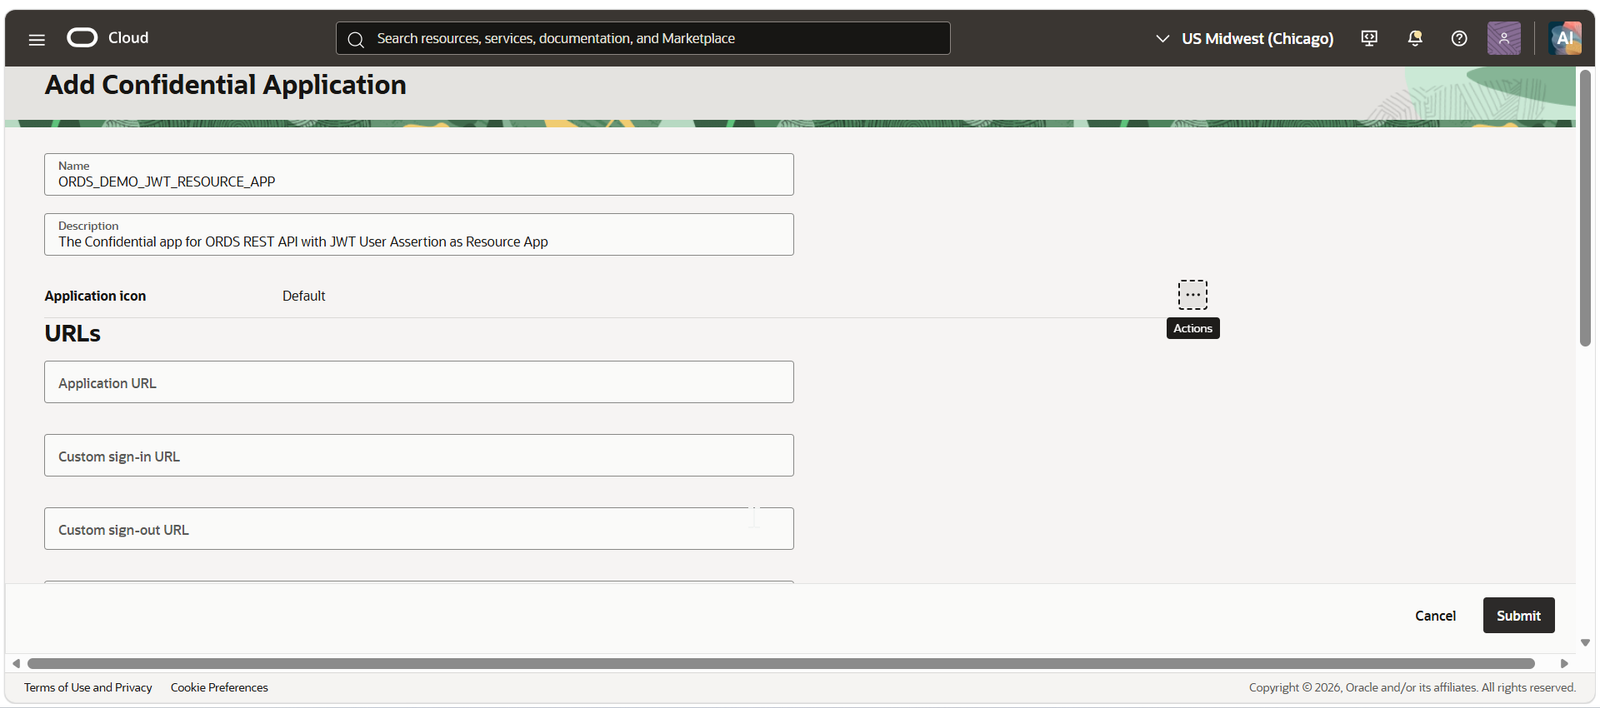
Provide any valid Name and description and Click on Submit.
This will create new confidential application. Now we need to edit this application.
Navigate to Oauth configuration —>Edit Oauth configuration.
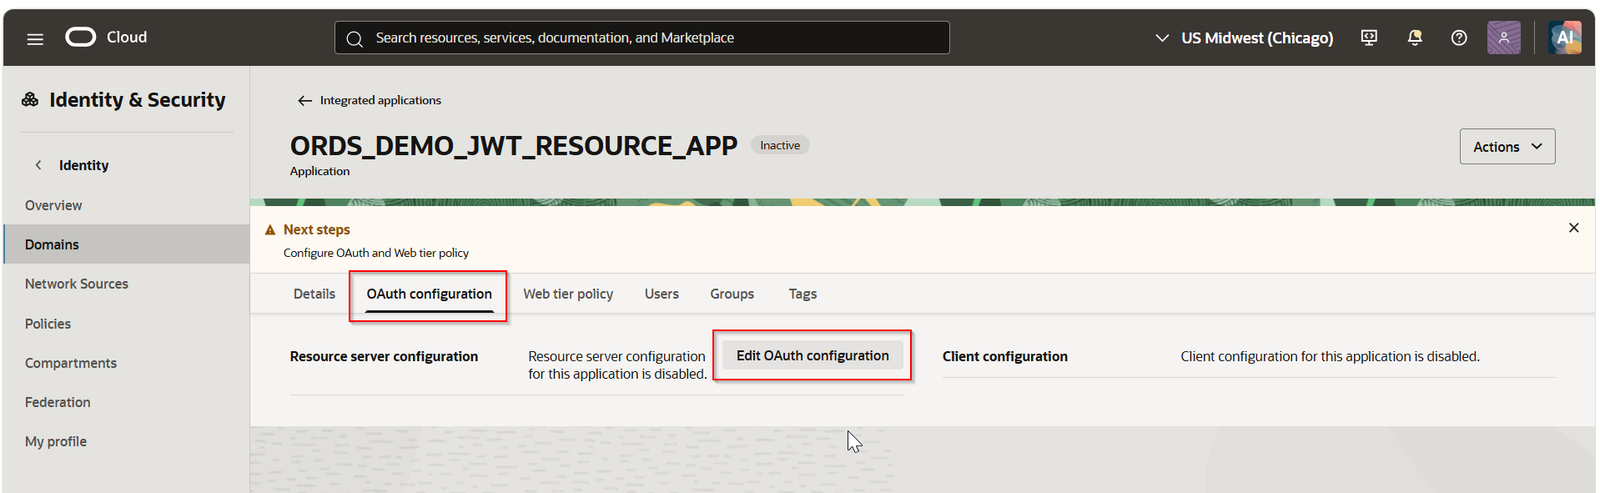
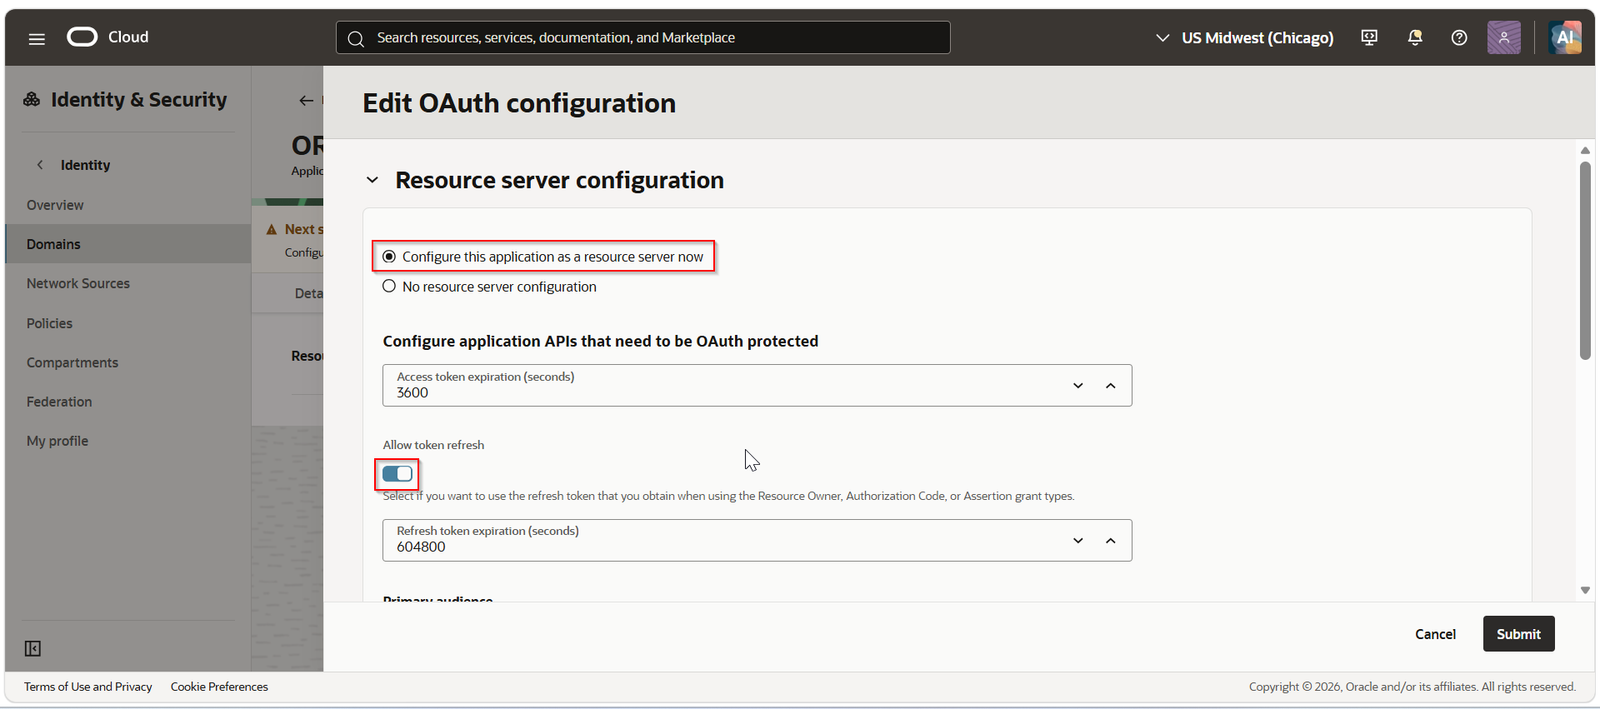
Select “Configure this application as a resource server now”.
Enable “Allow token refresh”.
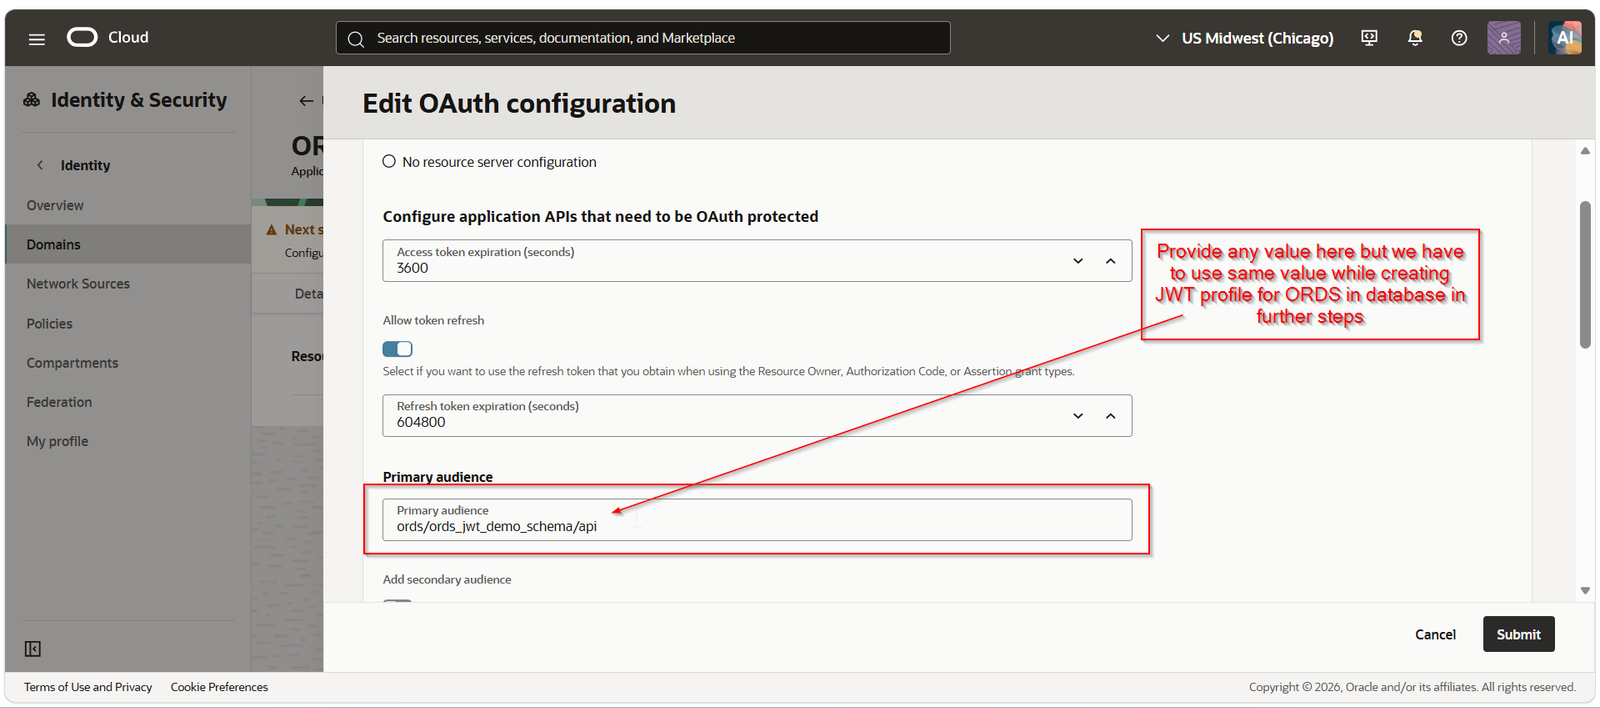
*For Primary Audience, provide any value but we have to use same value while creating JWT profile for ORDS in database in further steps.
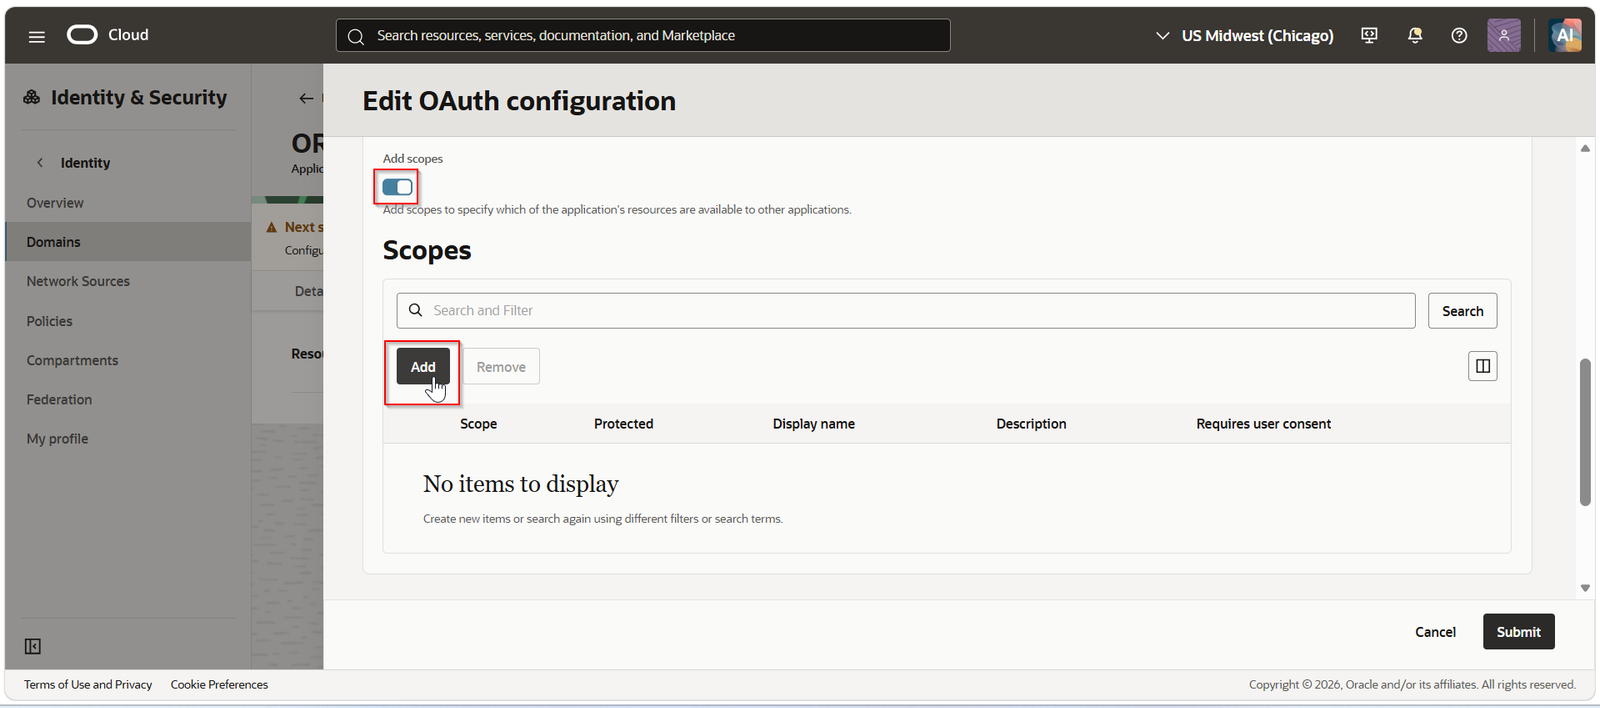
Enable “Add Scope” and Click on Add.
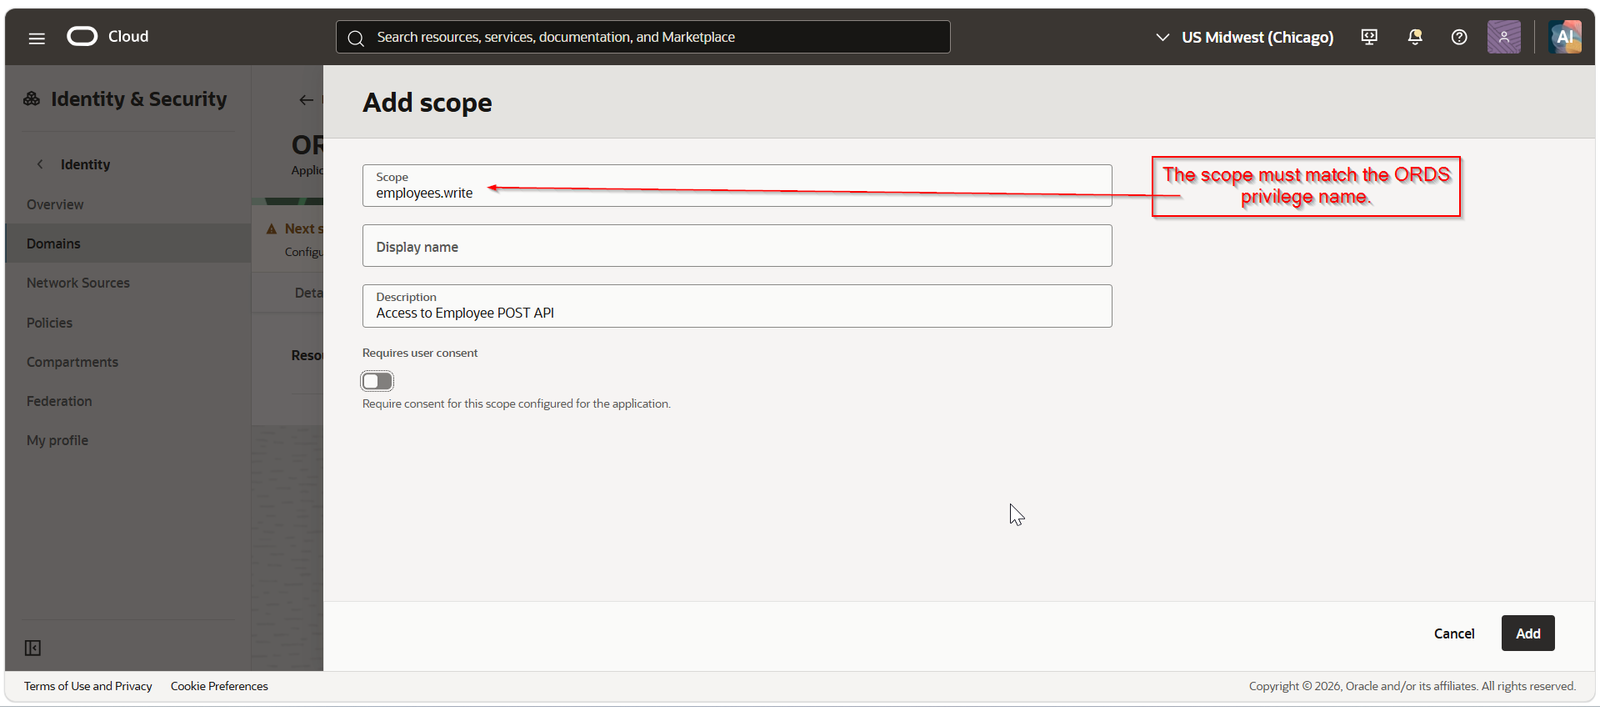
*Provide value of scope exactly matching with privilege name given in earlier step.
Click on Add.
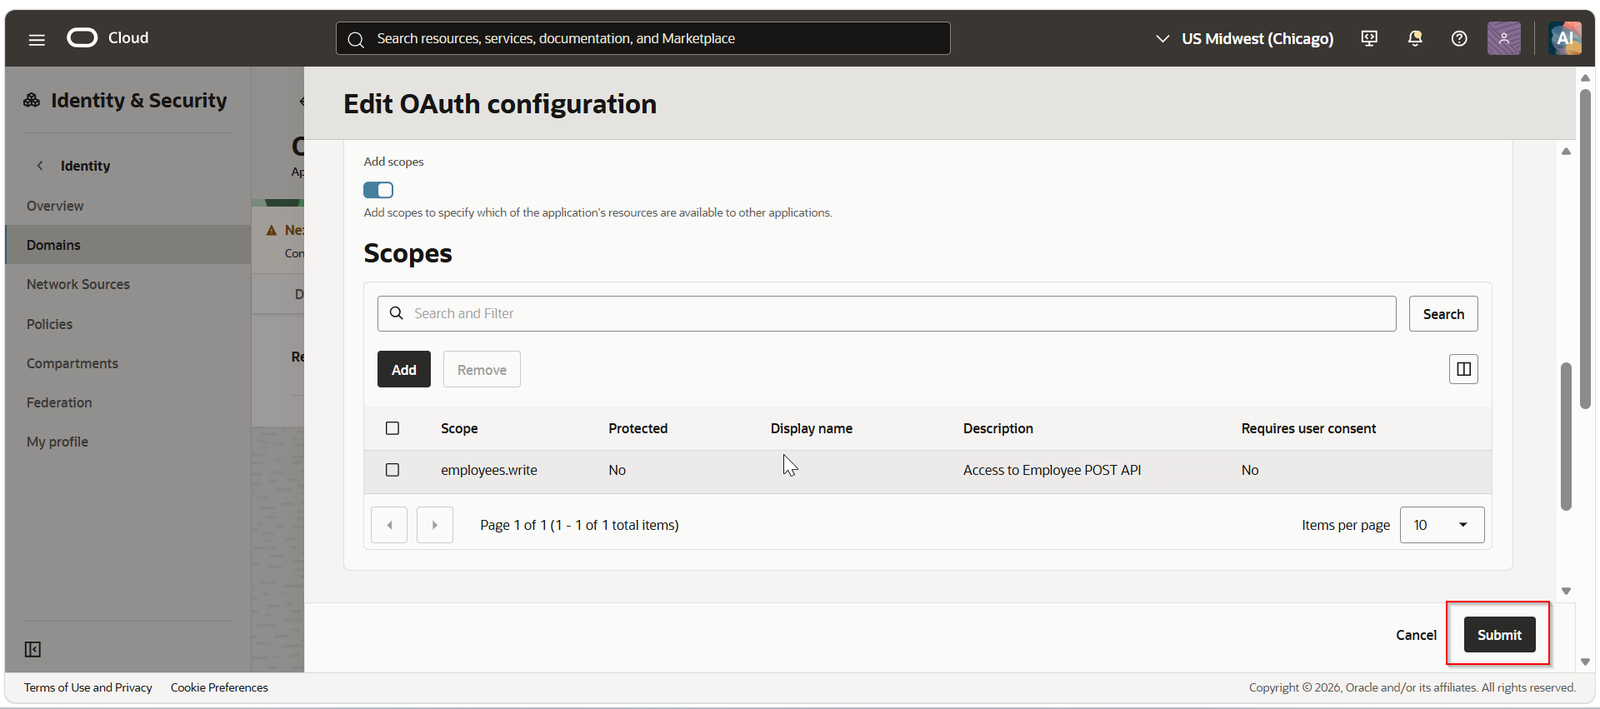
Click on Submit.

This will create new resource confidential application.
Click on Activate.

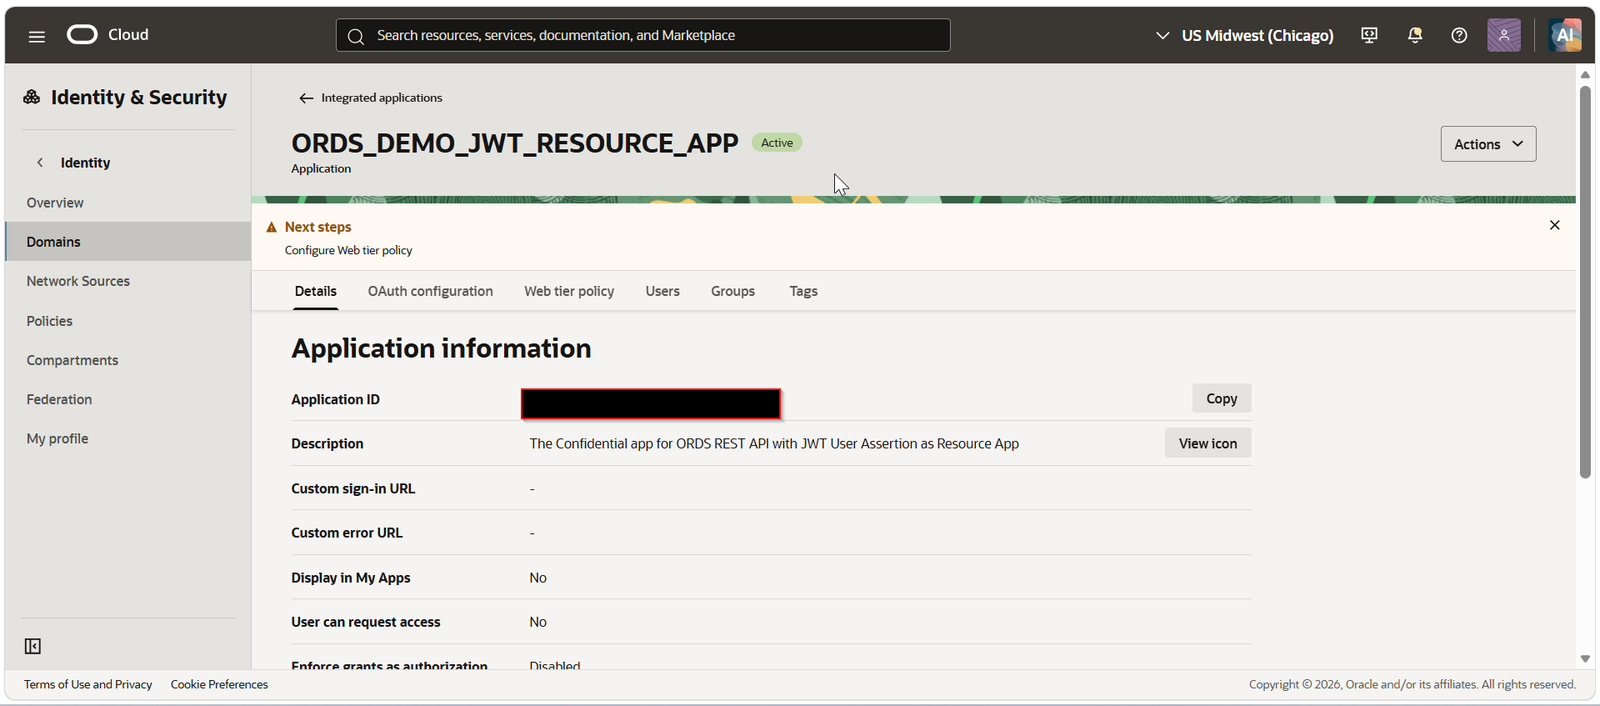
Step4: Crate Client Confidential Application in IDCS
We need create another client confidential application with below details:
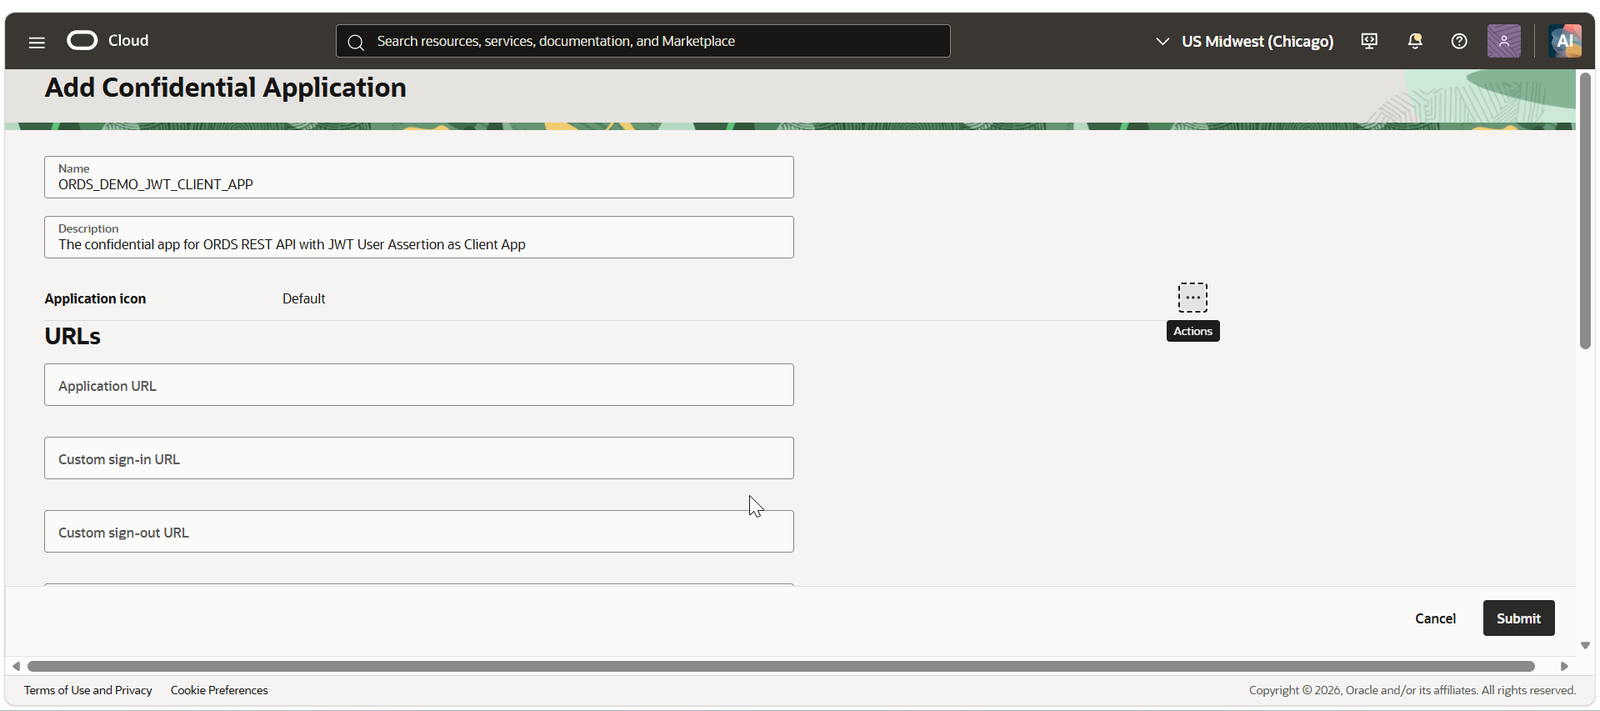
Provide any valid name and description and Click on Submit.
Edit this newly created client confidential application.
Navigate to Oauth configuration —->Edit Oauth configuration.
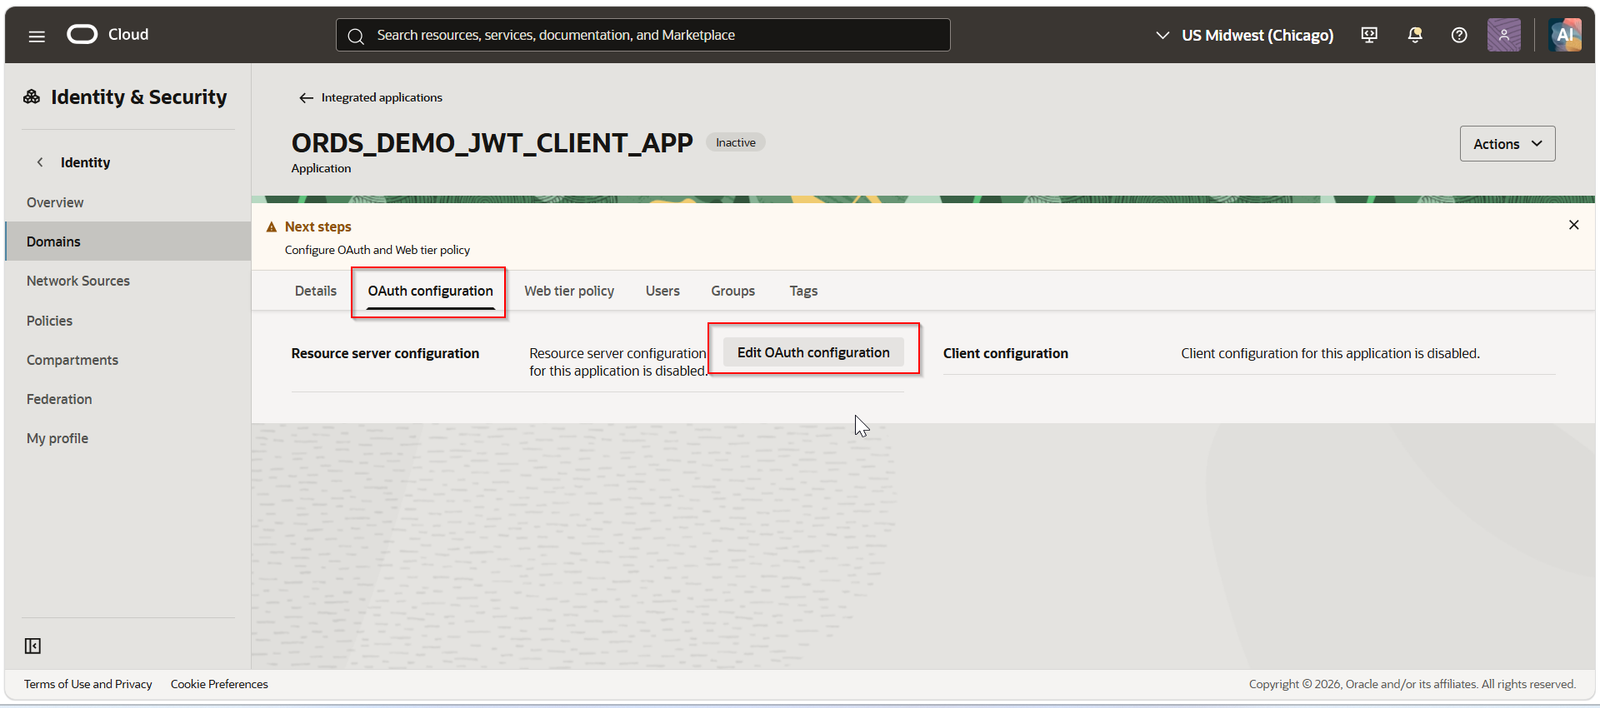
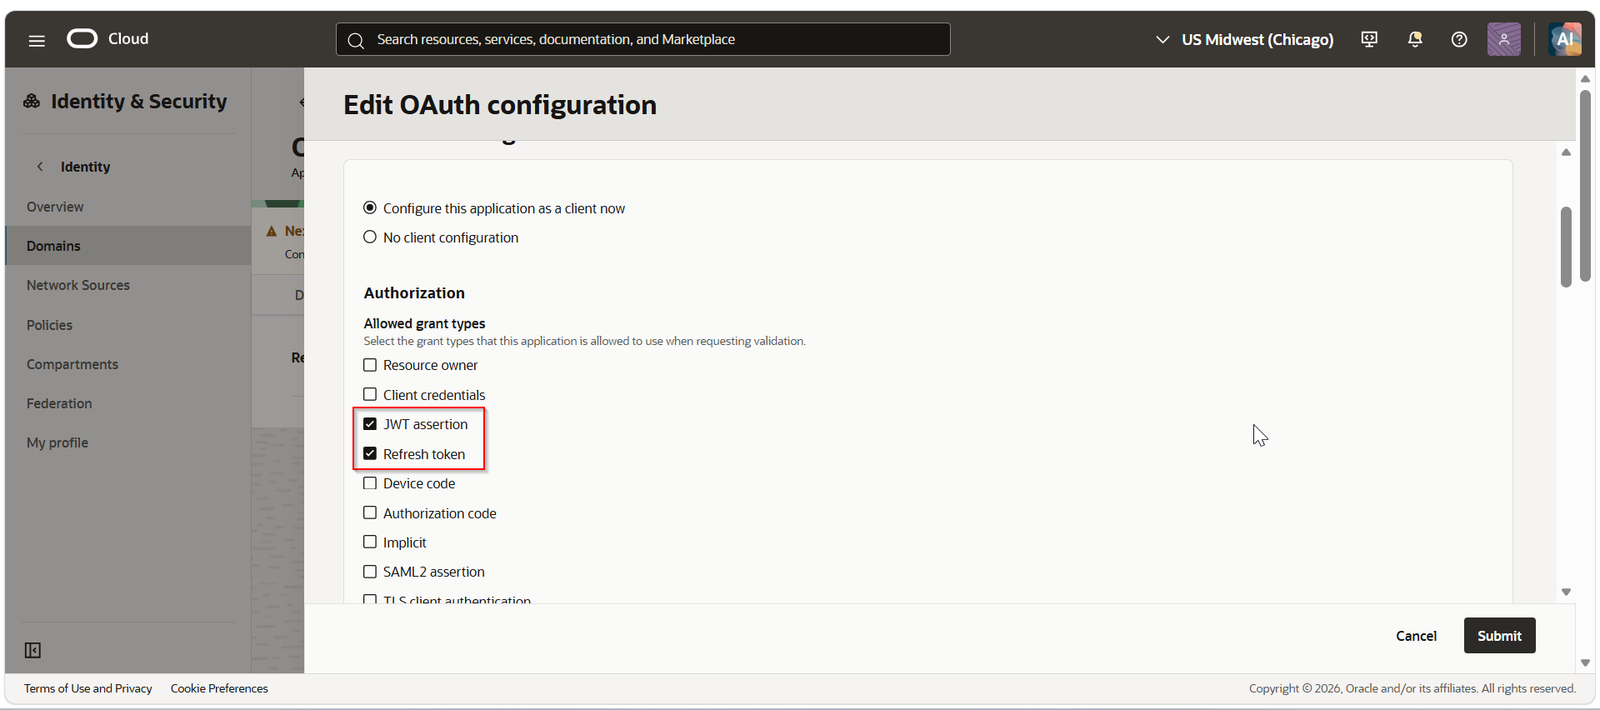
Select Allowed grant types as “JWT assertion” and “Refresh Token”.
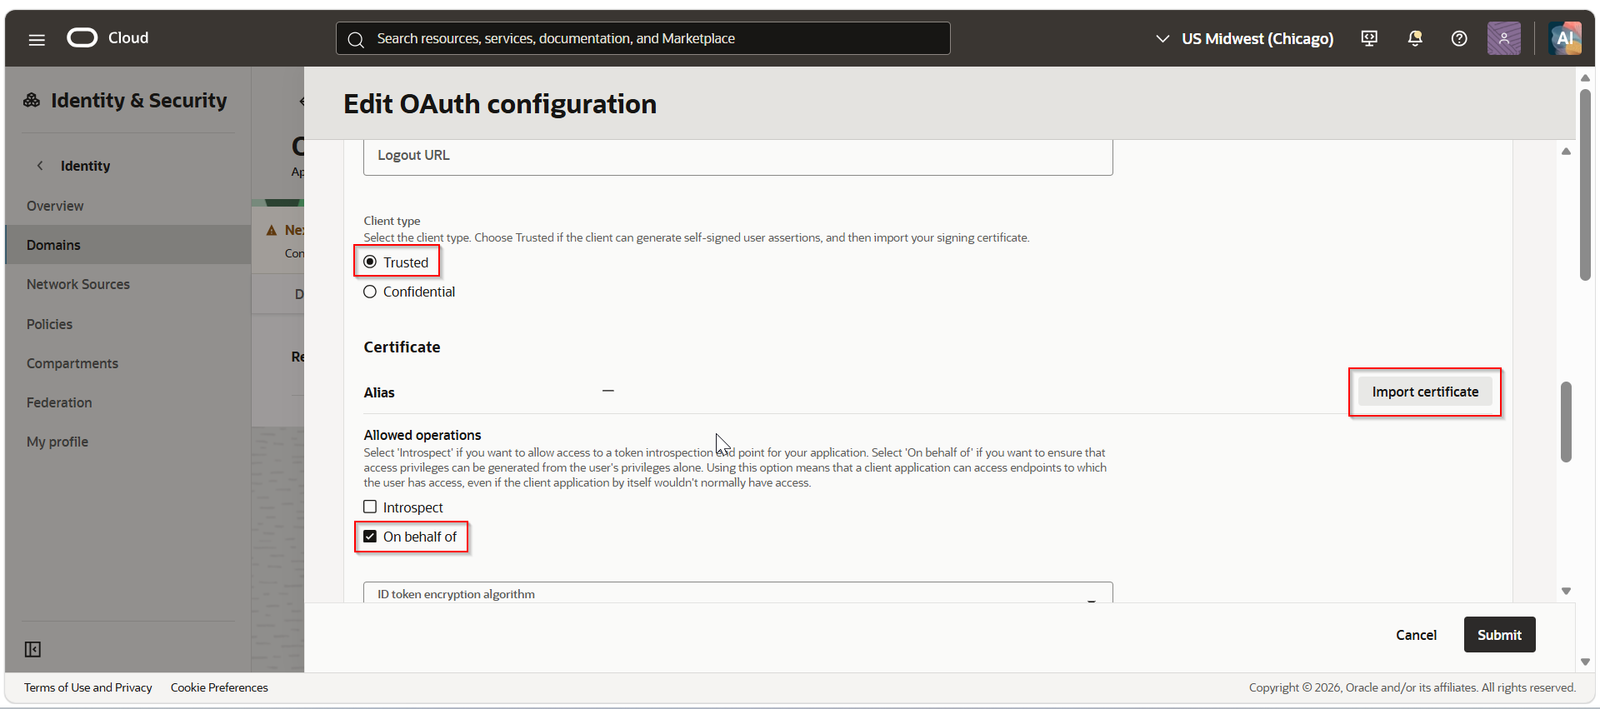
Select client type as “Trusted” and click on Import Certificate.
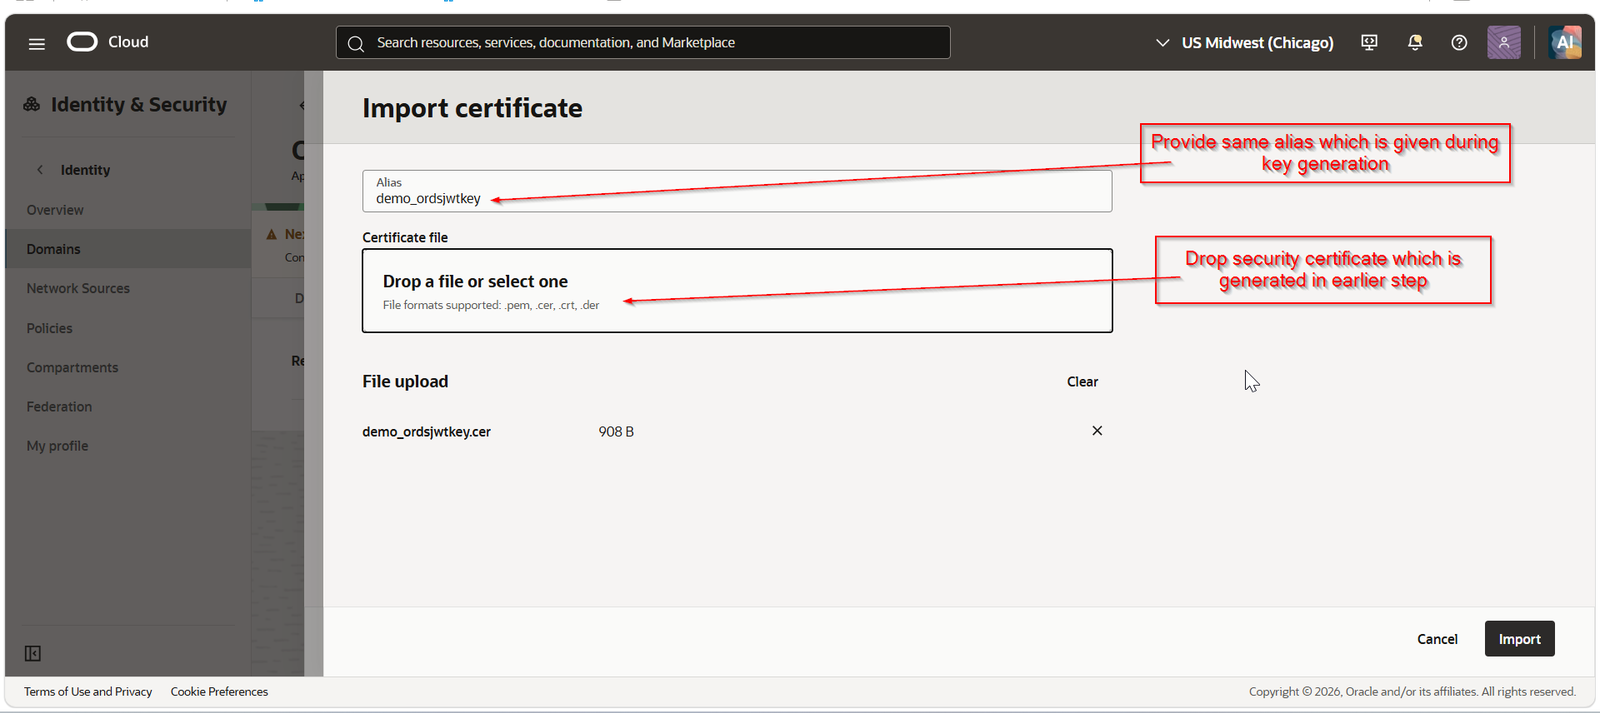
For Alias, provide same alias name which is given during key generation in earlier step.
For Certificate file, drop security certificate file which is generated in earlier step.
Click on Import.
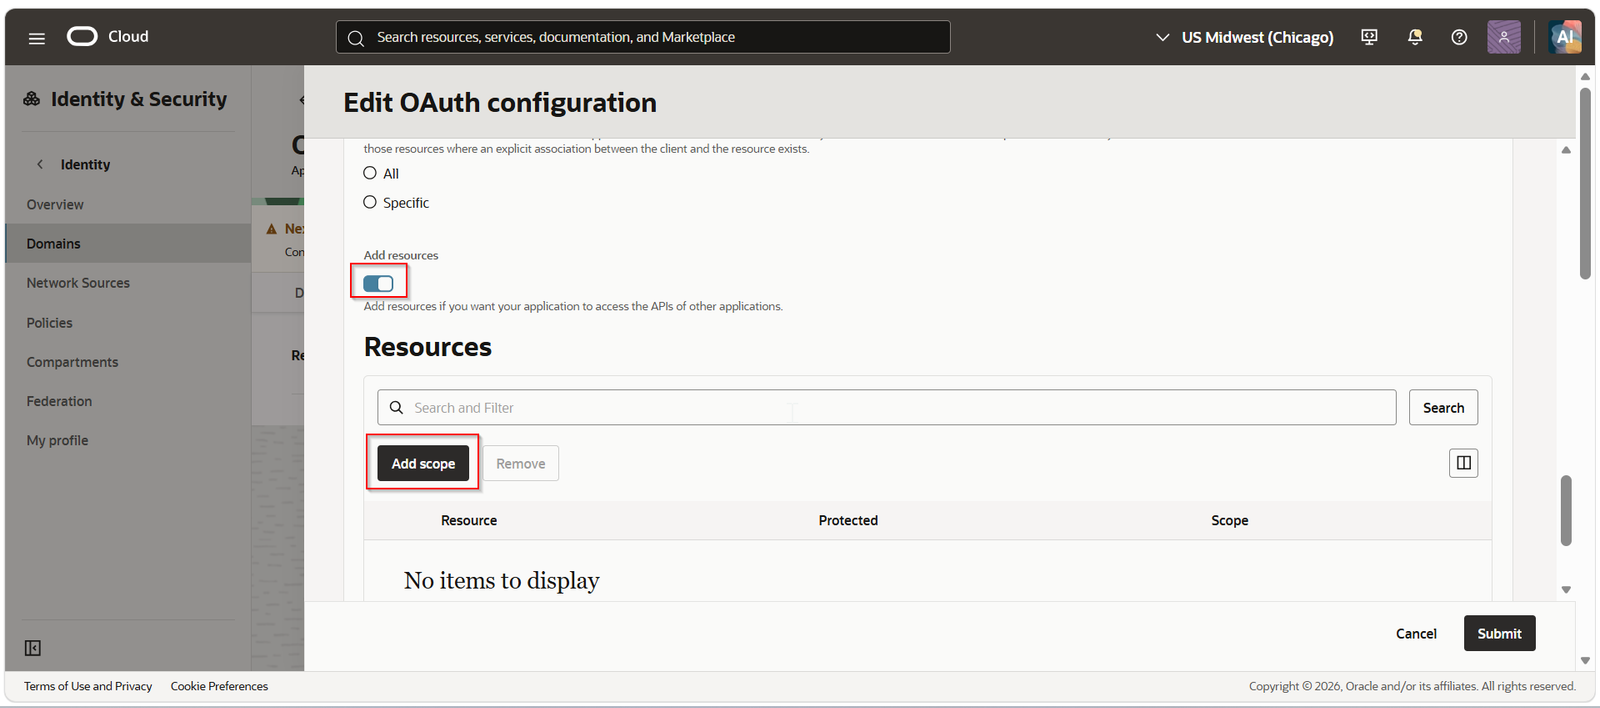
Enable “Add resources” and click on “Add Scope”
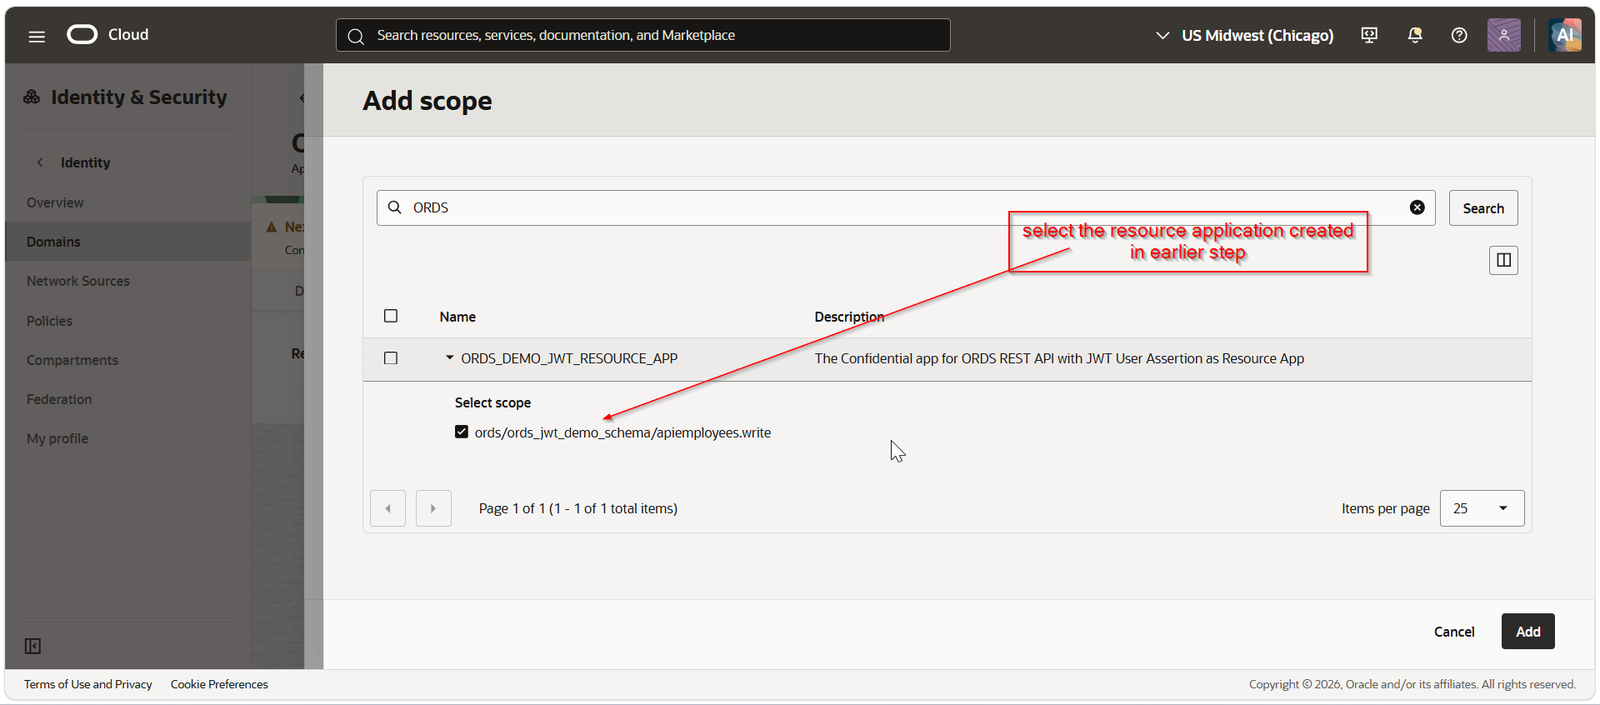
Select resource confidential application which we have created in previous step
Click on Add.
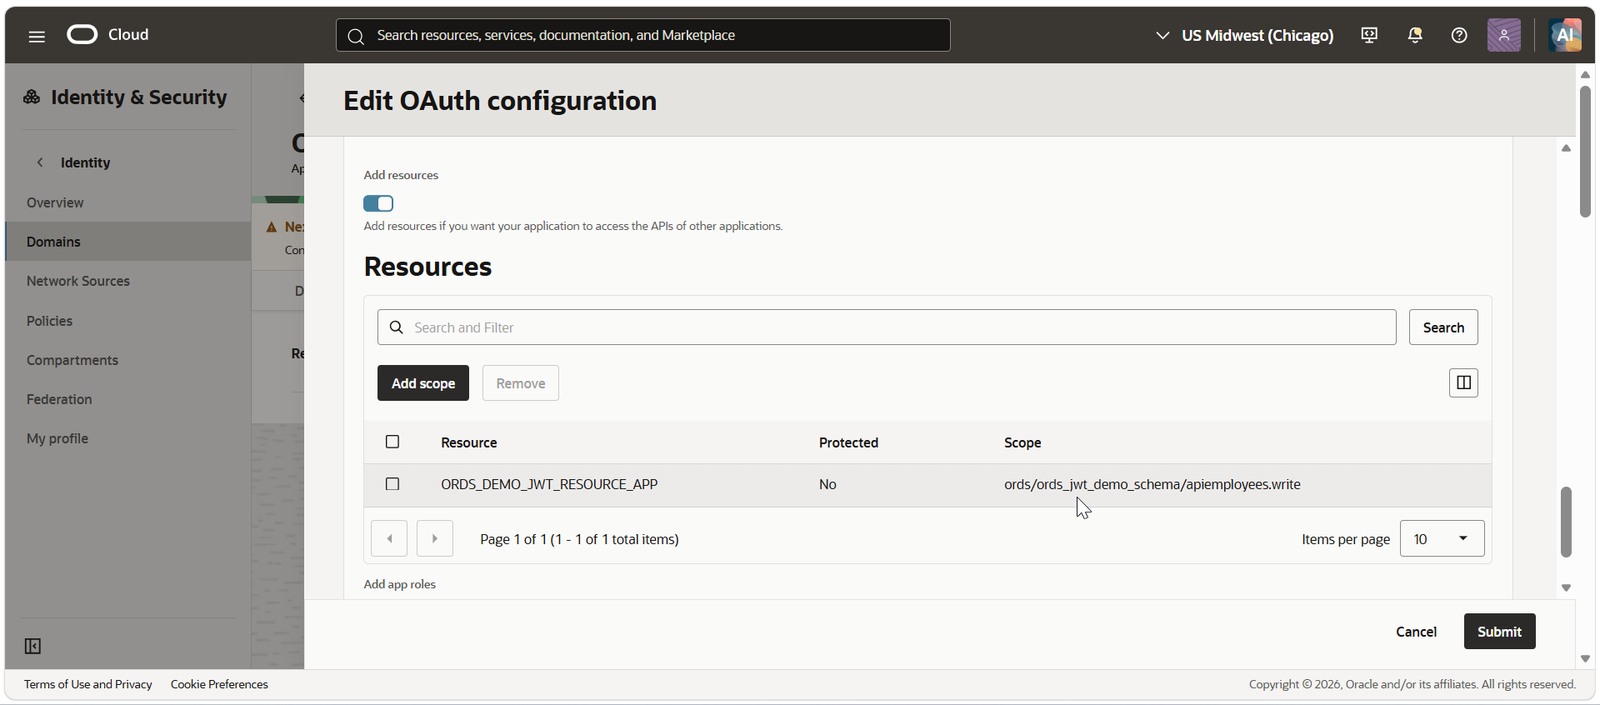
Click on Submit.
This will create new client confidential application.
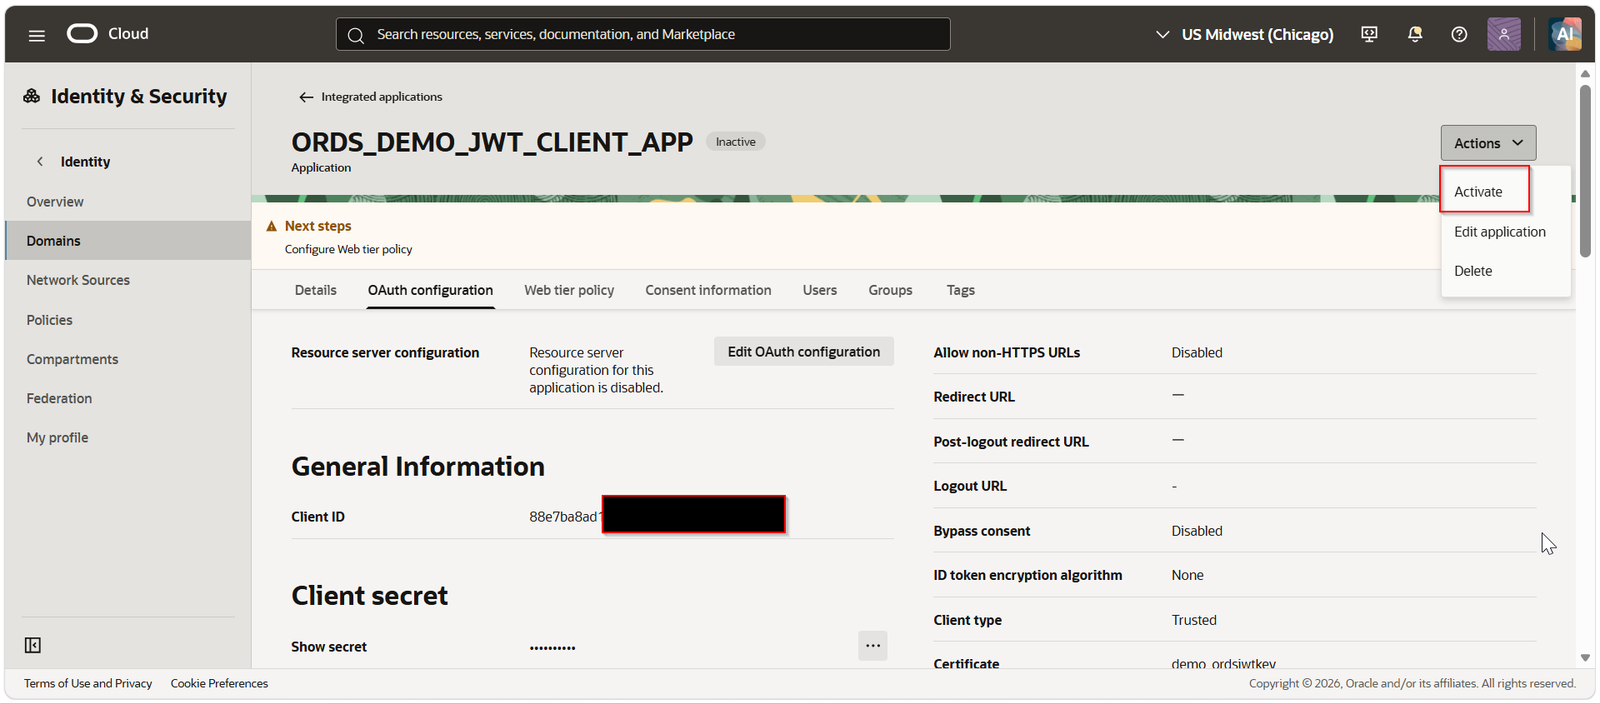
Click on Activate.
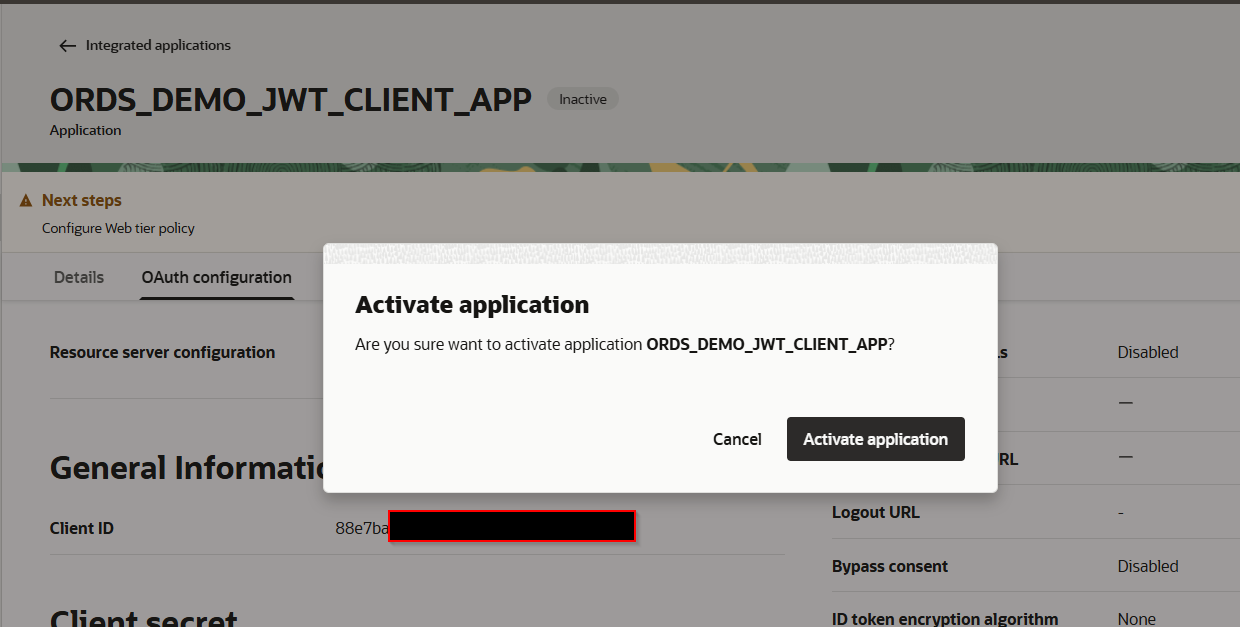
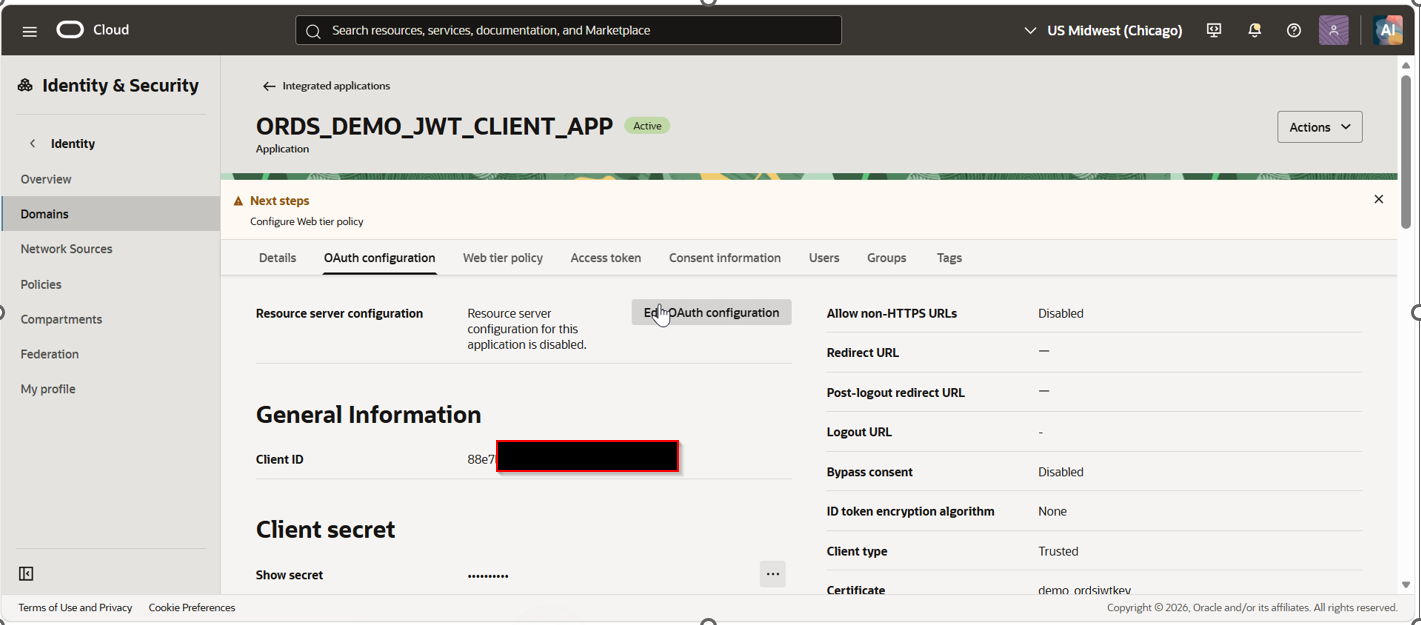
Step5: Upload Certificate as Trusted Partner Certificate.
Navigate to same domain —>Security —>Trusted partner certificates —>Import certificate.
Import same certificate and alias which is uploaded in earlier step.
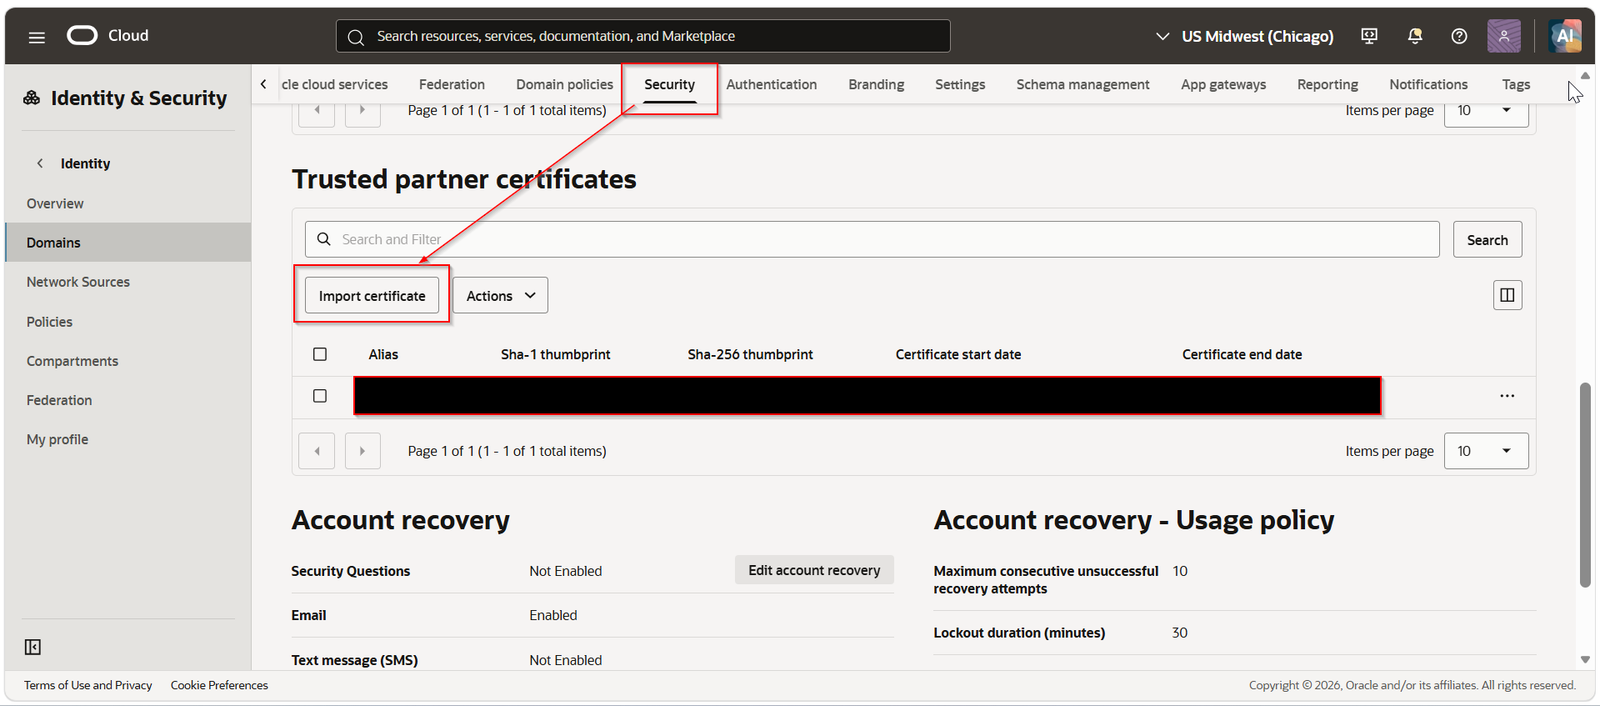
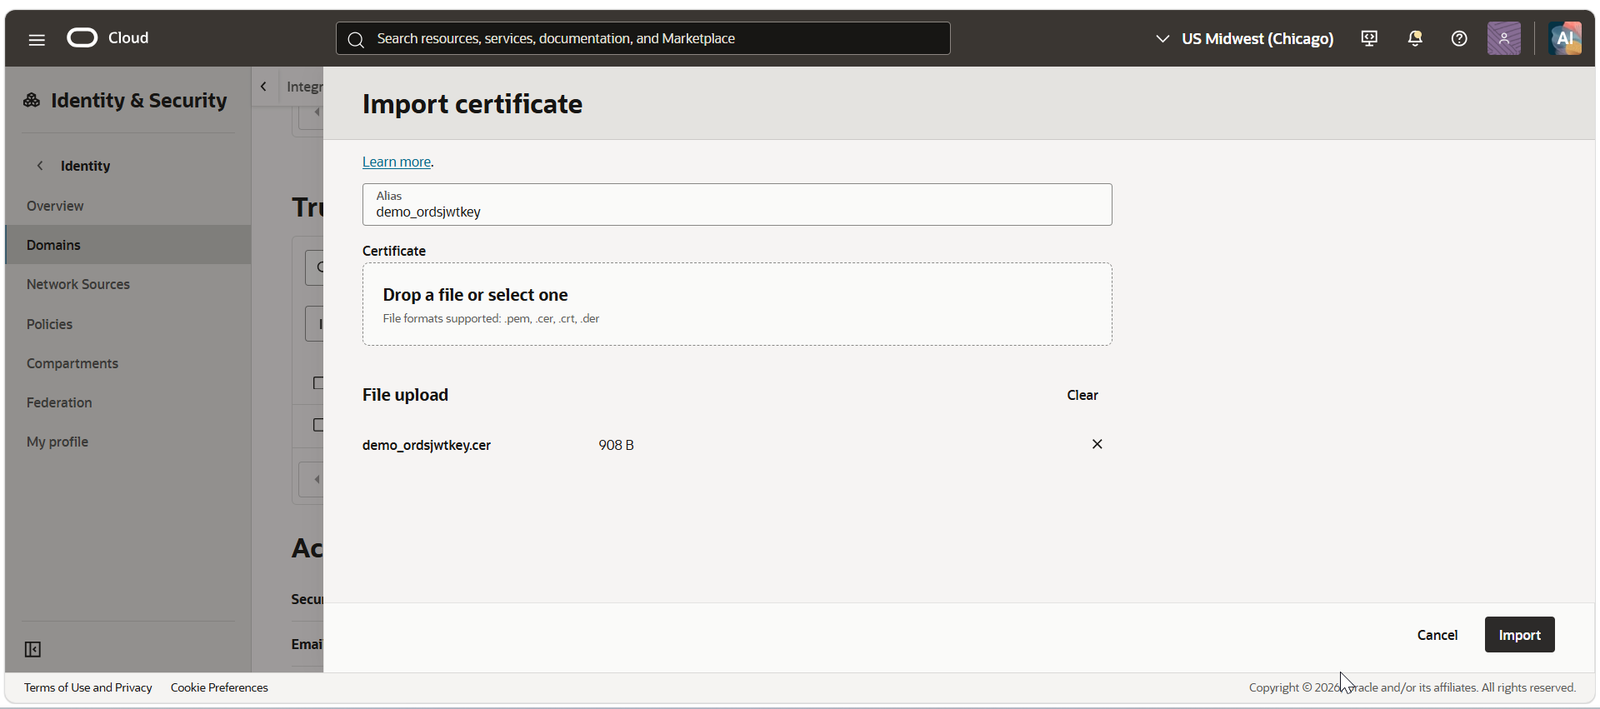
Click on Import.
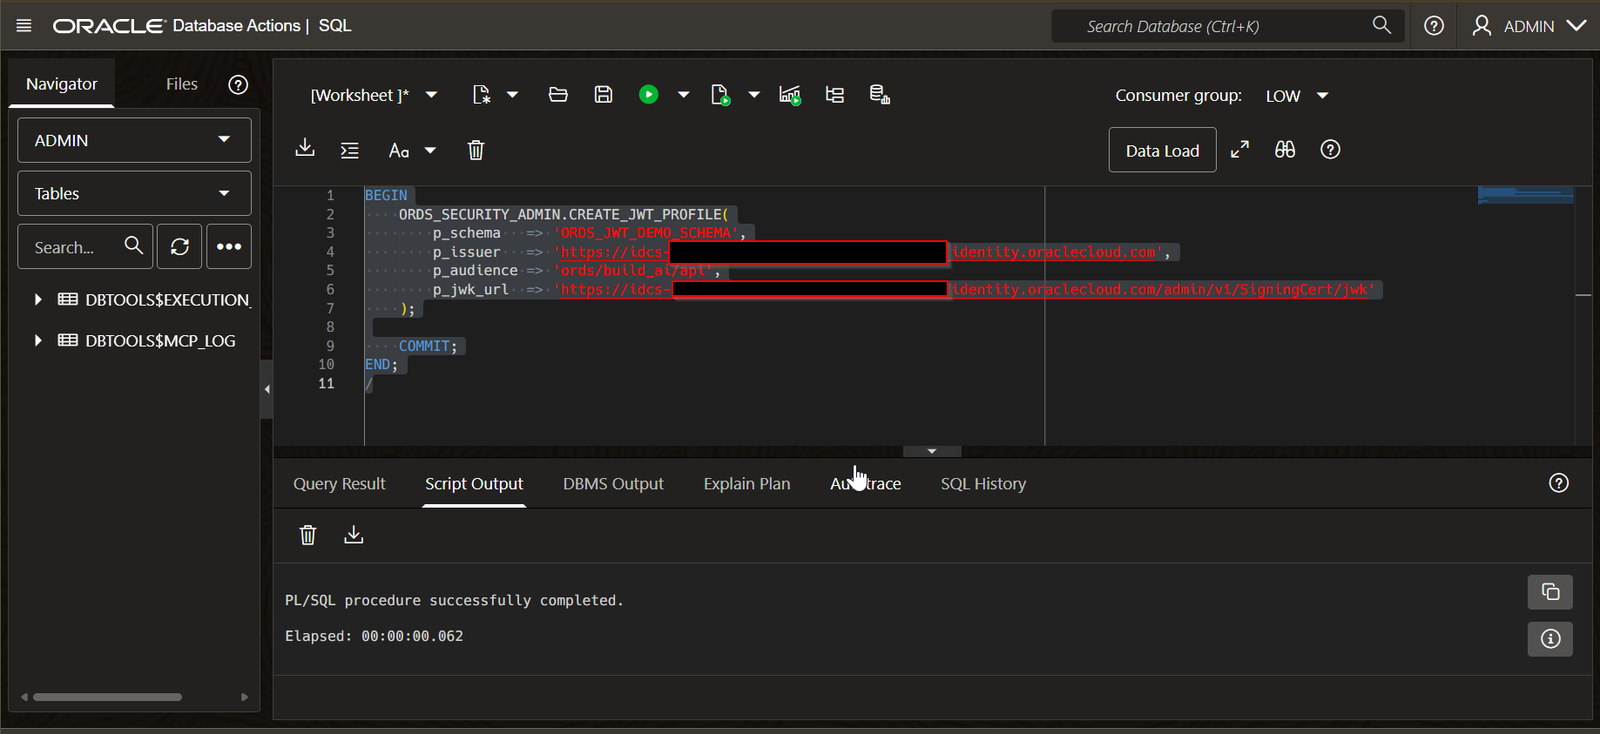
Step6: Create JWT Profile in Oracle Database.
We need to create JWT profile in Oracle database.
Login to database with ADMIN user.
BEGIN
    ORDS_SECURITY_ADMIN.CREATE_JWT_PROFILE(
        p_schema   => 'ORDS_JWT_DEMO_SCHEMA',
        p_issuer   => ' https://identity.oraclecloud.com/' ,
        p_audience => 'ords/ords_jwt_demo_schema/api',
        p_jwk_url  => 'https://idcs-XXXXXXXXXXXXXX/admin/v1/SigningCert/jwk'
    );
    COMMIT;
END;
/
Provide parameter details as shown below:
p_schema | The schema for which we have to enable JWT User assertion |
p_issuer | Provide fixed value as https://identity.oraclecloud.com/ |
p_audience | This value must match with scope provided in resource confidential application. |
p_jwk_url | <domain URL>/ admin/v1/SigningCert/jwk |
Step6: Test ORDS REST API using JWT User Assertion from Postman/Insomnia.
Let us test ORDS REST API from Postman/Insomnia using JWT User assertion.
a. Get ORDS REST API endpoint.
ORDS Rest API is having below format:
https://<host>:<port>/ords/<schema-alias>/<module-base-path>/<template-uri>
Component | Value | Description |
Schema alias | ords_jwt_demo_schema | REST-enabled database schema |
Module | demo | API grouping |
Base Path | demo/ | Module base path |
Template | employees/ | URI pattern |
Handler | POST | HTTP operation |
Sample Payload:
{
    "employee_name": "John Smith",
    "department": "IT",
    "salary": 75000
}
b. Generate Assertion:
Run below python code to generate JWT assertion.
import jwt
import time
import uuid
# Read private key
with open("private_key.pem", "r") as f:
    private_key = f.read()
# Generate current timestamps
now = int(time.time())
# JWT payload
payload = {
    "sub": "XXTEST_DEMO_JWT_USER_1",
    "jti": str(uuid.uuid4()),
    "iat": now,
    "exp": now + 300,
    "iss": "88e7baXXXXXXXXXXXXXXXXXXXXXXXXXX",
    "aud": "https://identity.oraclecloud.com/"
}
# JWT header
headers = {
    "kid": "demo_ordsjwtkey",
    "typ": "JWT"
}
# Generate signed JWT assertion
assertion = jwt.encode(
    payload,
    private_key,
    algorithm="RS256",
    headers=headers
)
# Save assertion
with open("assertionJWT.txt", "w") as f:
    f.write(assertion)
print("JWT Assertion generated successfully!")
print(assertion)
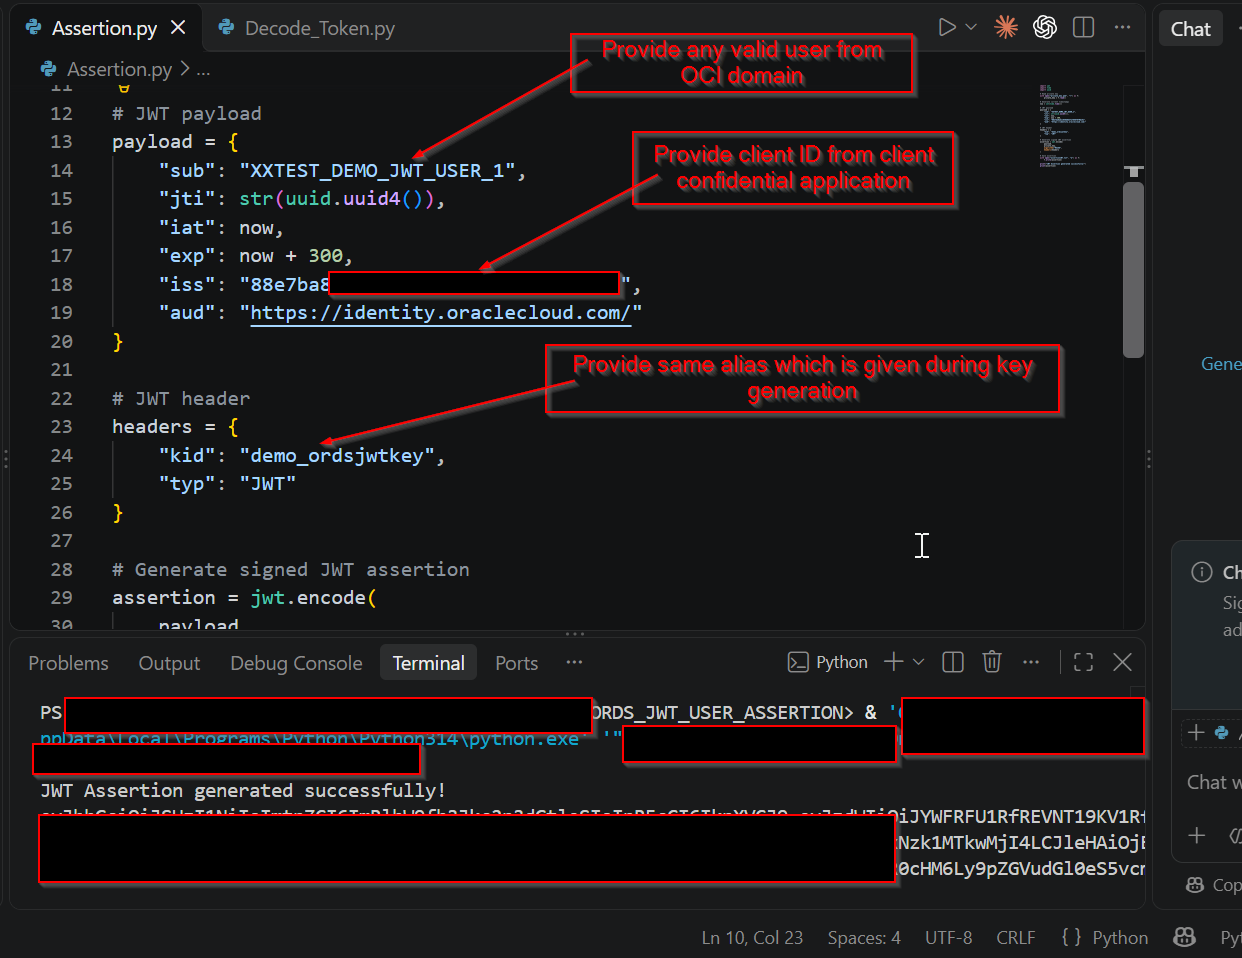
Also provide private_key.pem file to this python script which is generated in step1.
c. Generate Access Token:
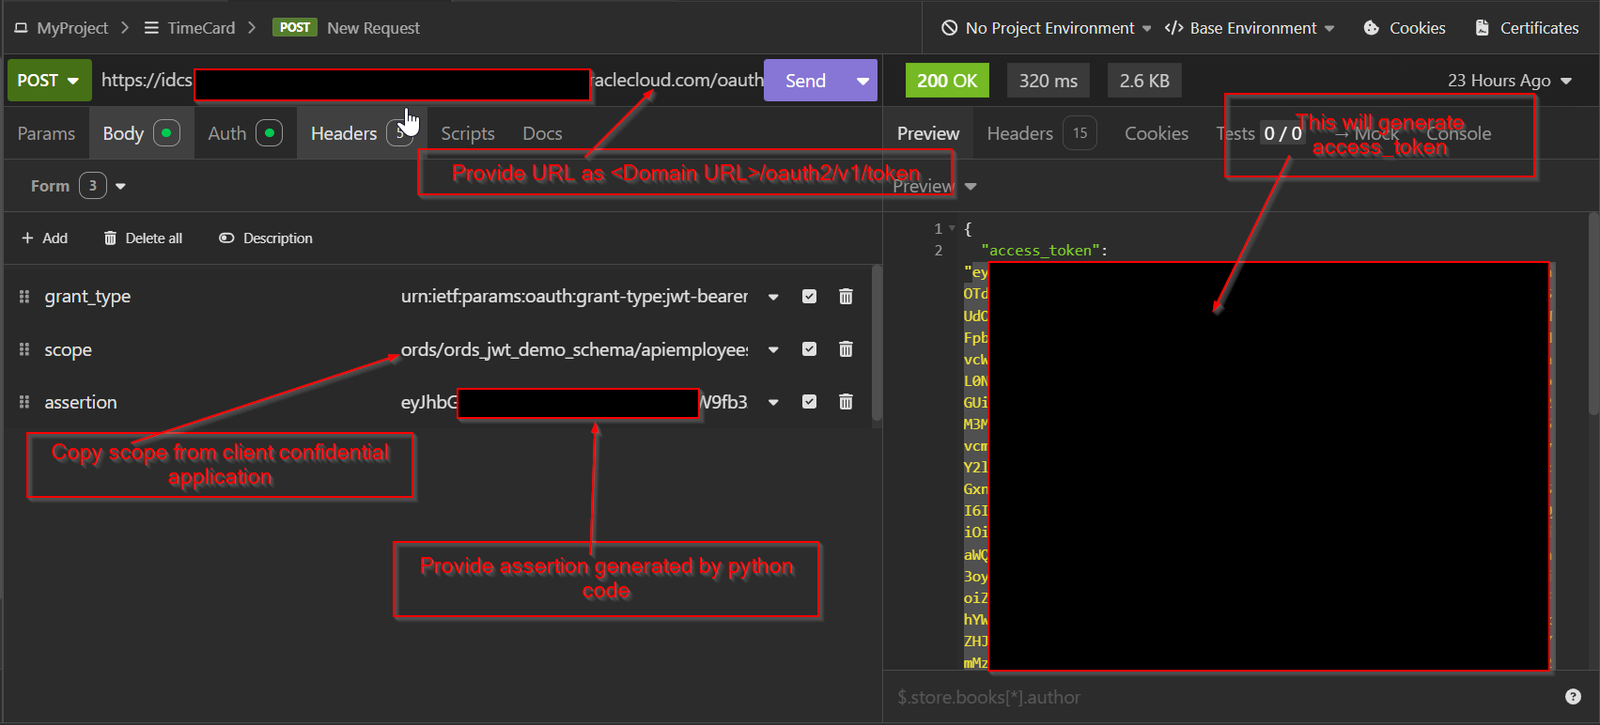
Run below access Token URL:
<Domain URL>/oauth2/v1/token
Under Auth, select authorization type as Basic and provide details as shown below:
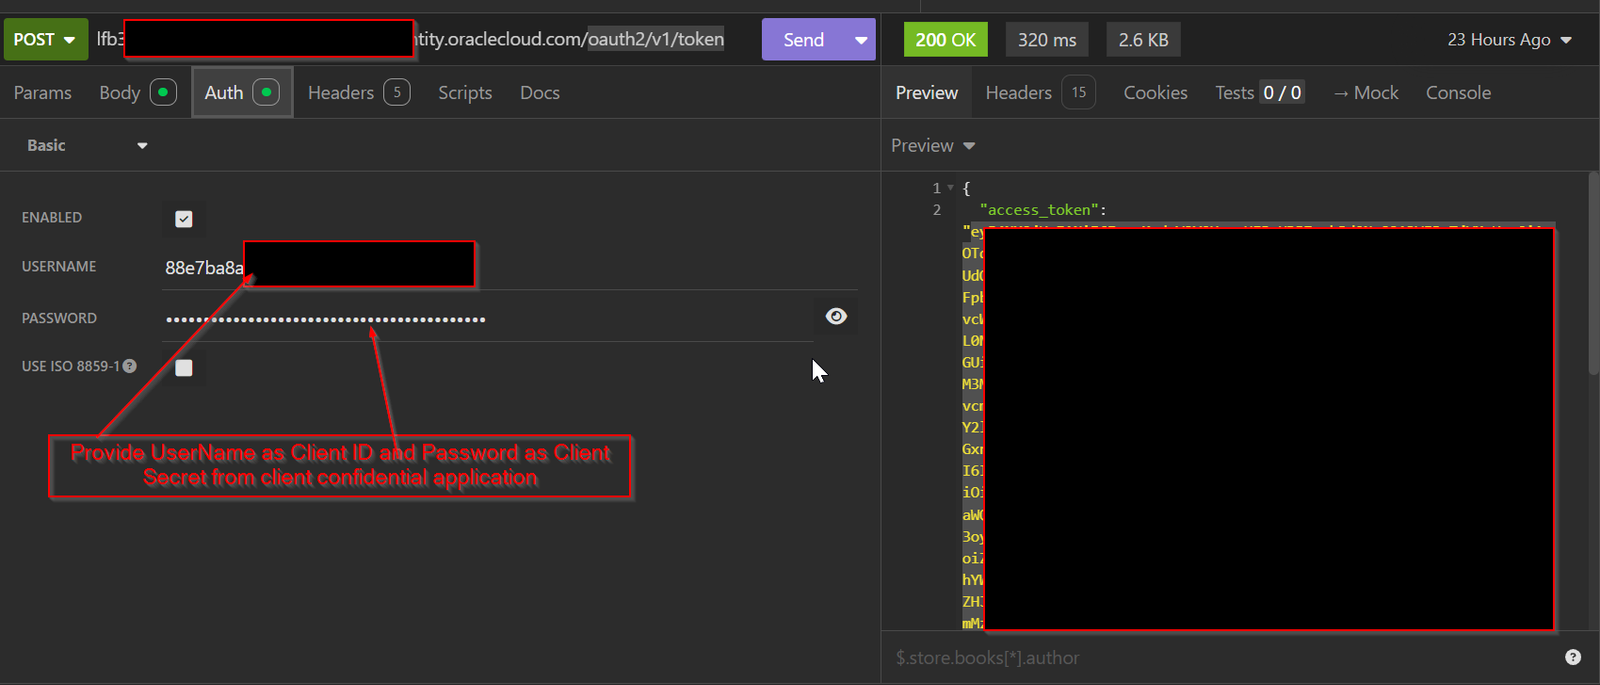
This will generate access token.
d. Call ORDS REST API endpoint with this access token.
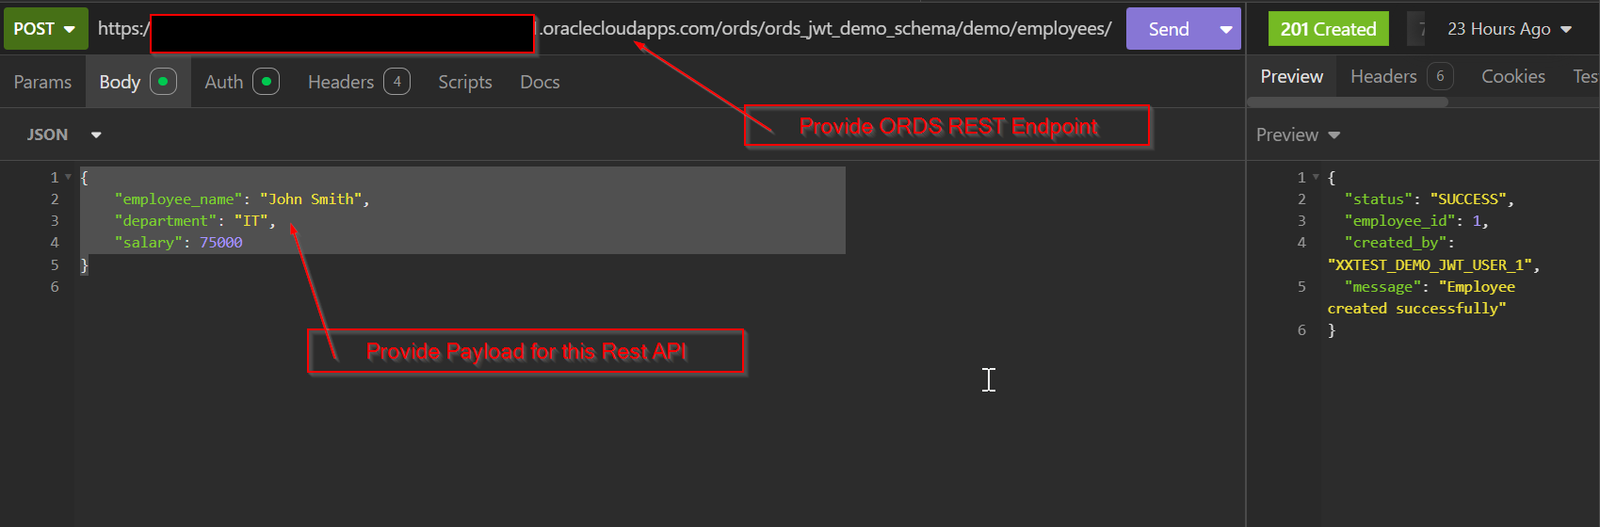
Under Auth, select authorization type as Bearer Token.
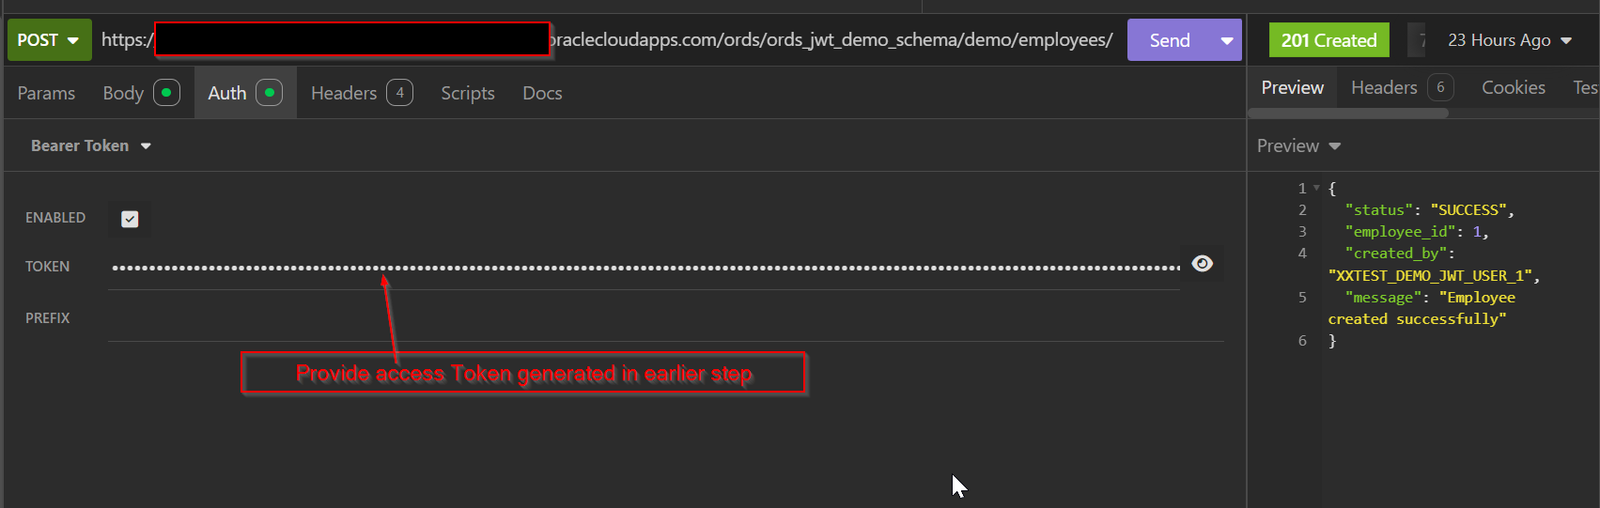
With these details, once we click on send, it will execute REST API call successfully with 201 status.
Step7: Test ORDS REST API using JWT User Assertion from OIC.
Let us test the ORDS REST API with JWT user assertion from OIC, we have to perform below steps:
a. Upload Private key to OIC:
Login to OIC.
Navigate to Settings —>Certificates
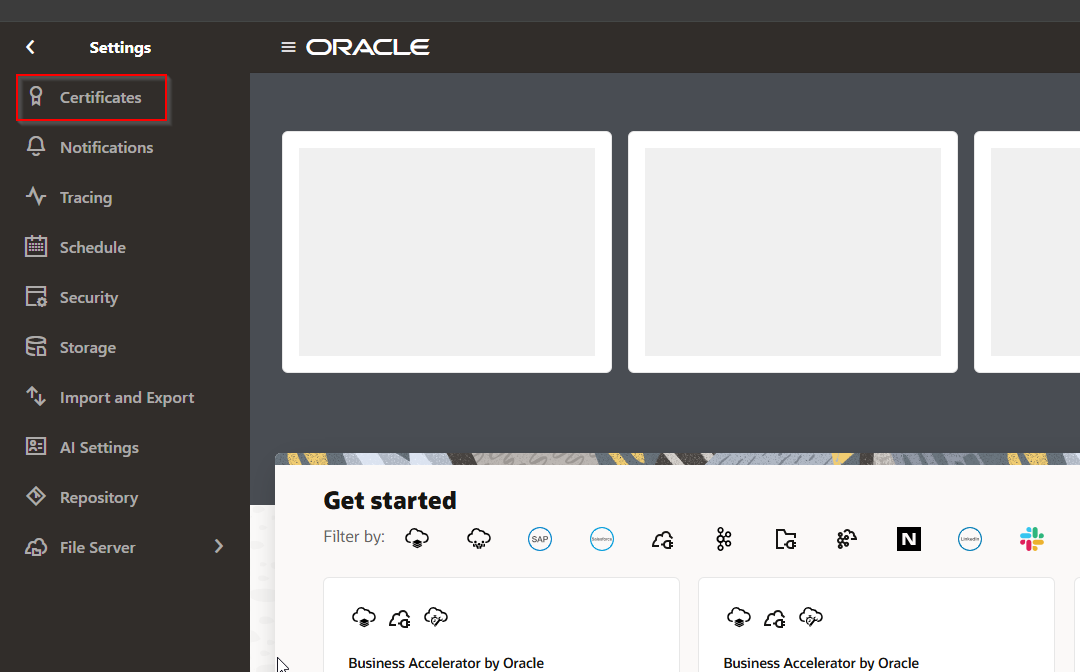
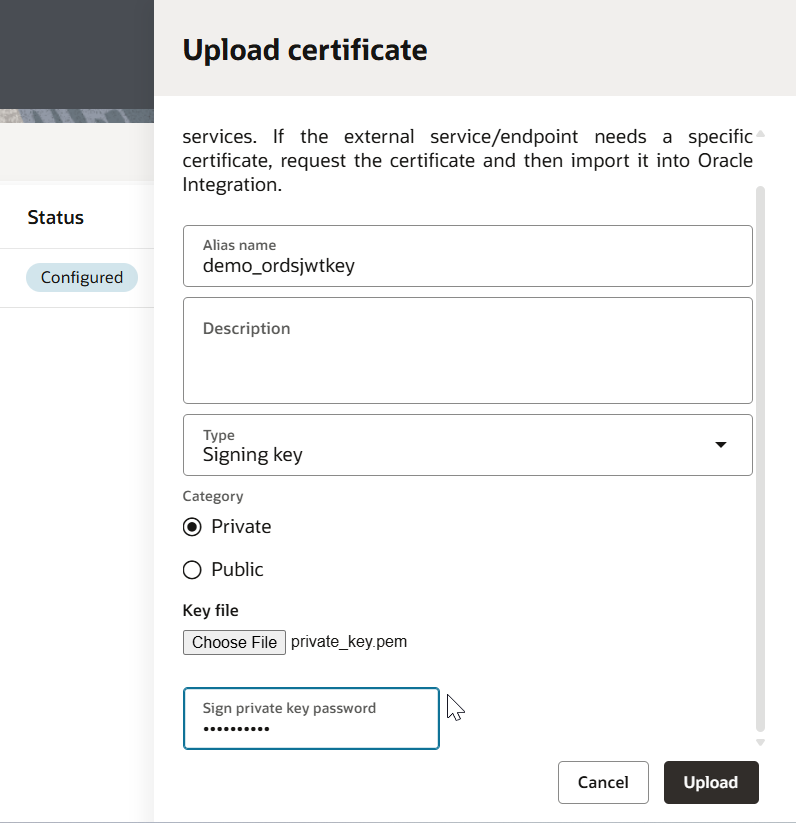
Click on Upload.
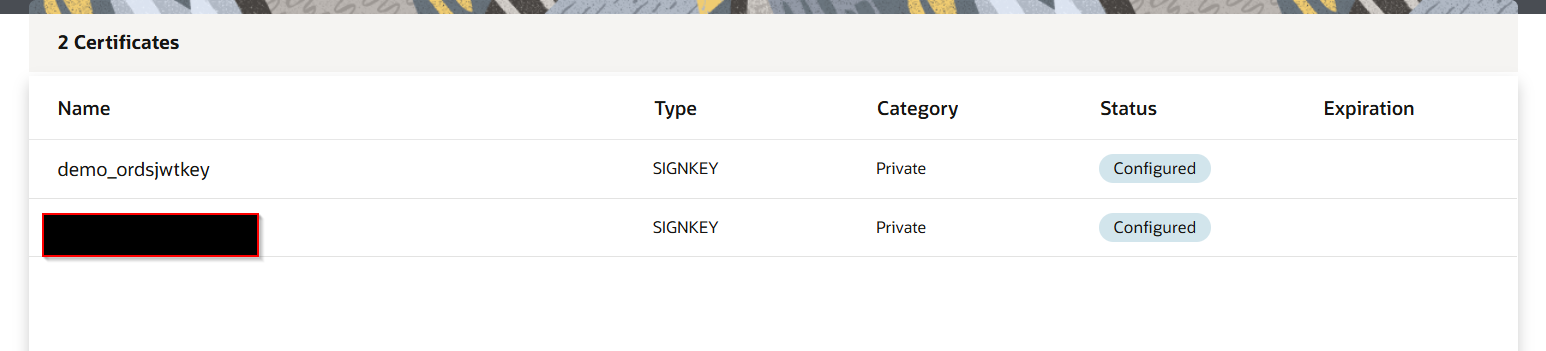
b. Create JWT header and JWT payload:
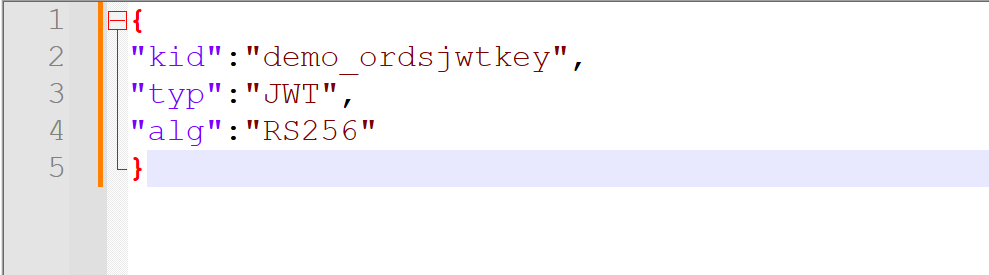
Create new Json file with below content and save this file as demo_ordsjwtkeyheader.json
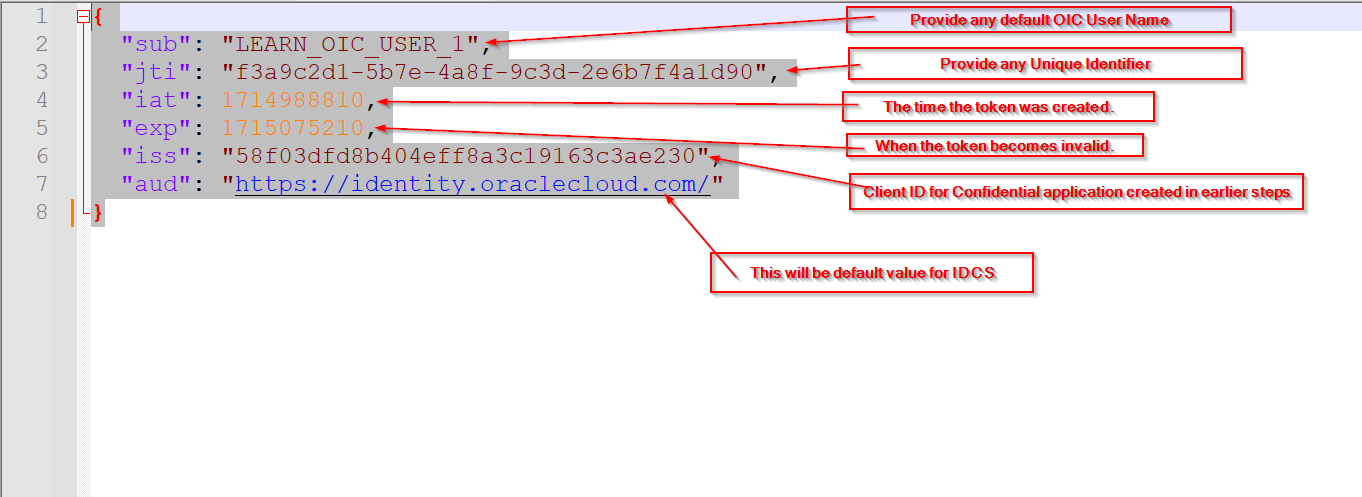
Create another Json file with below content and save this as demo_ordsjwtkeypayload.json
c. Create new REST Connection:
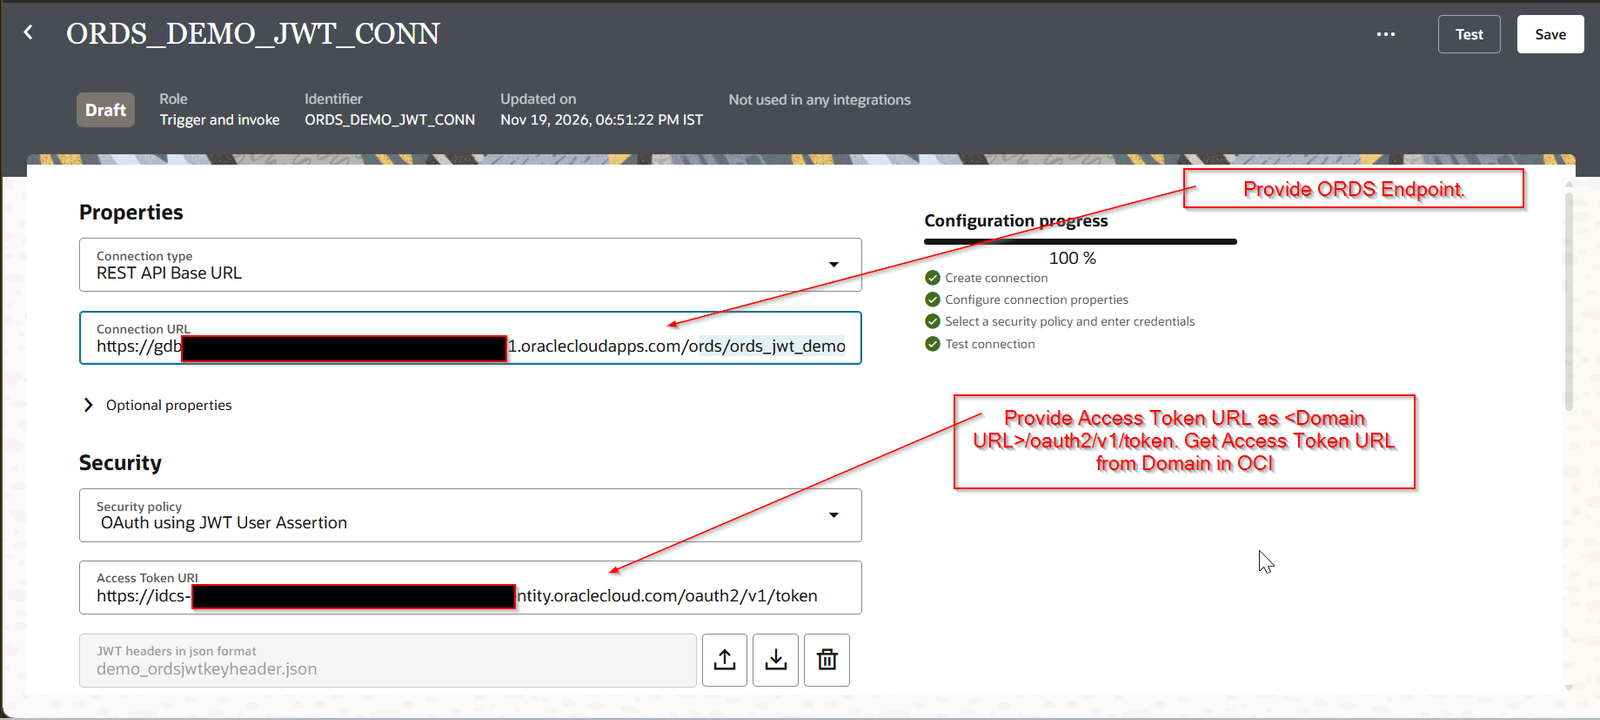
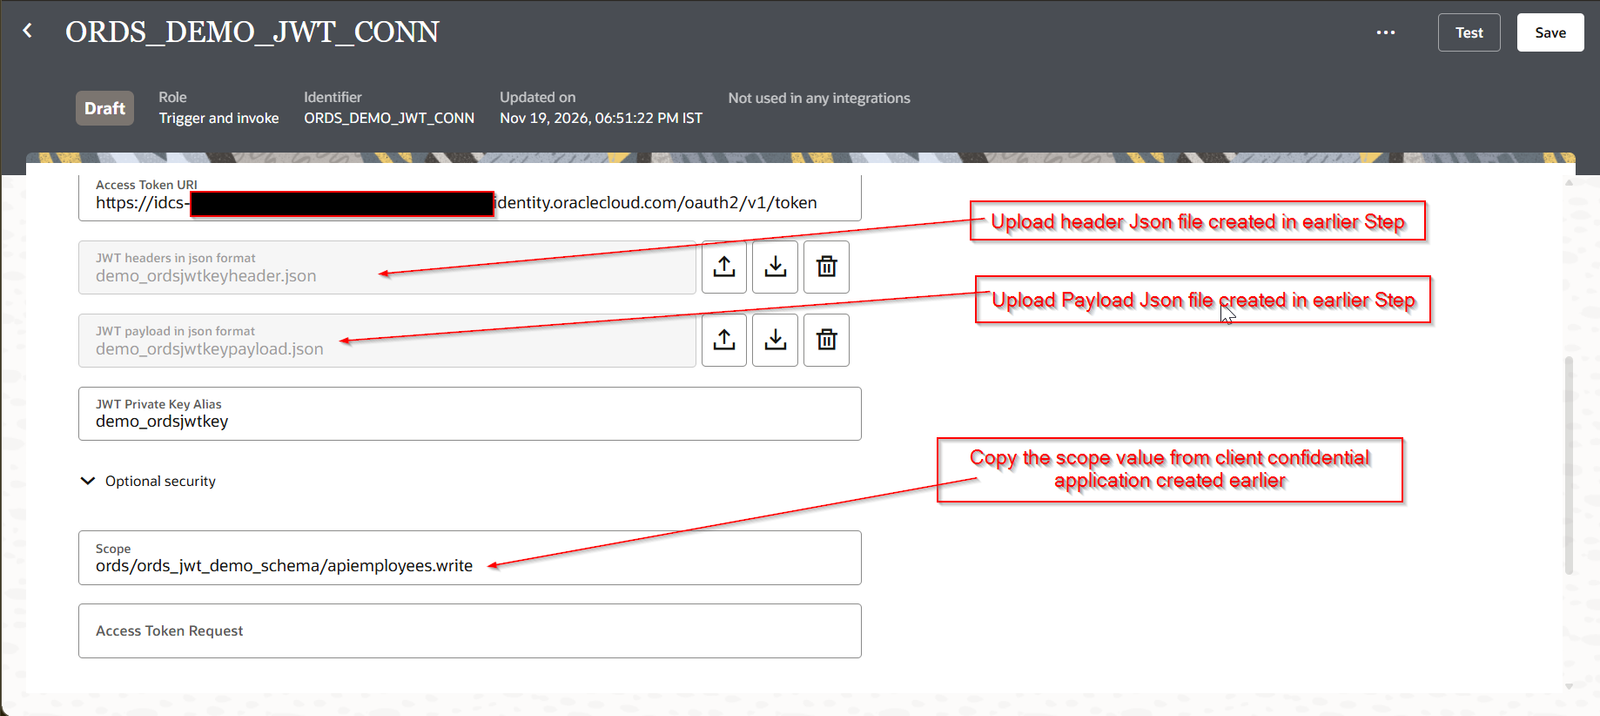
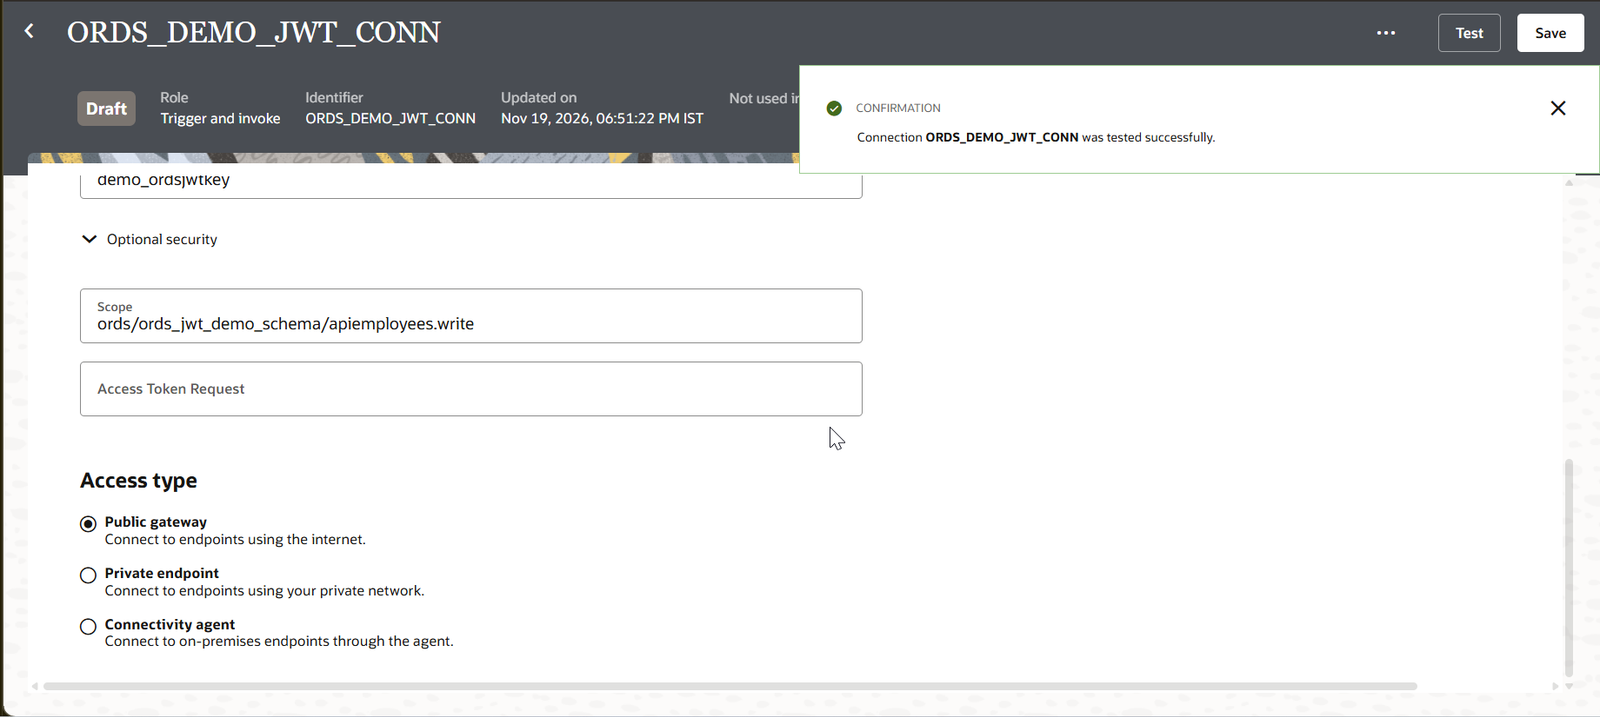
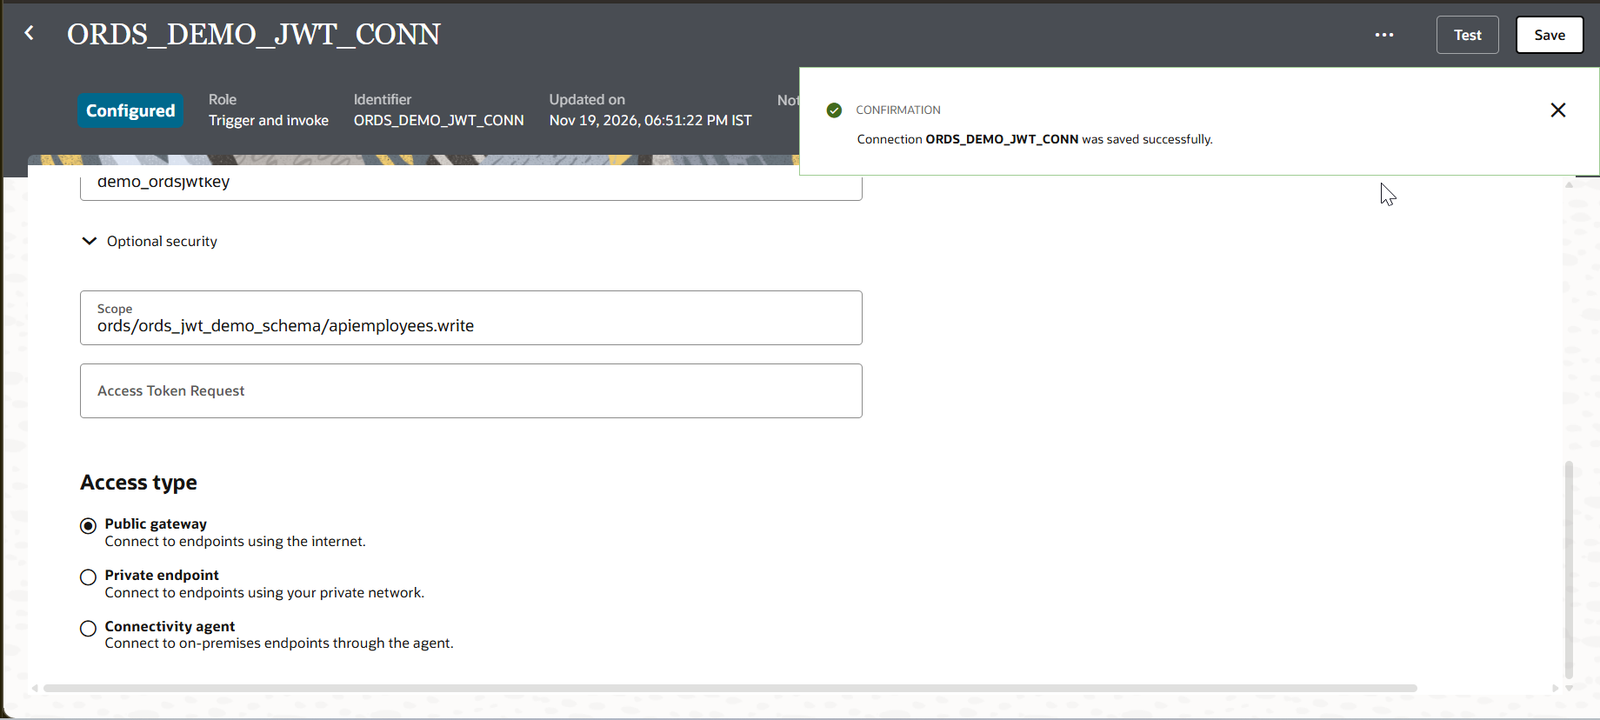
Create new REST Connection for ORDS as shown below:
Click on Test.
Click on Save.
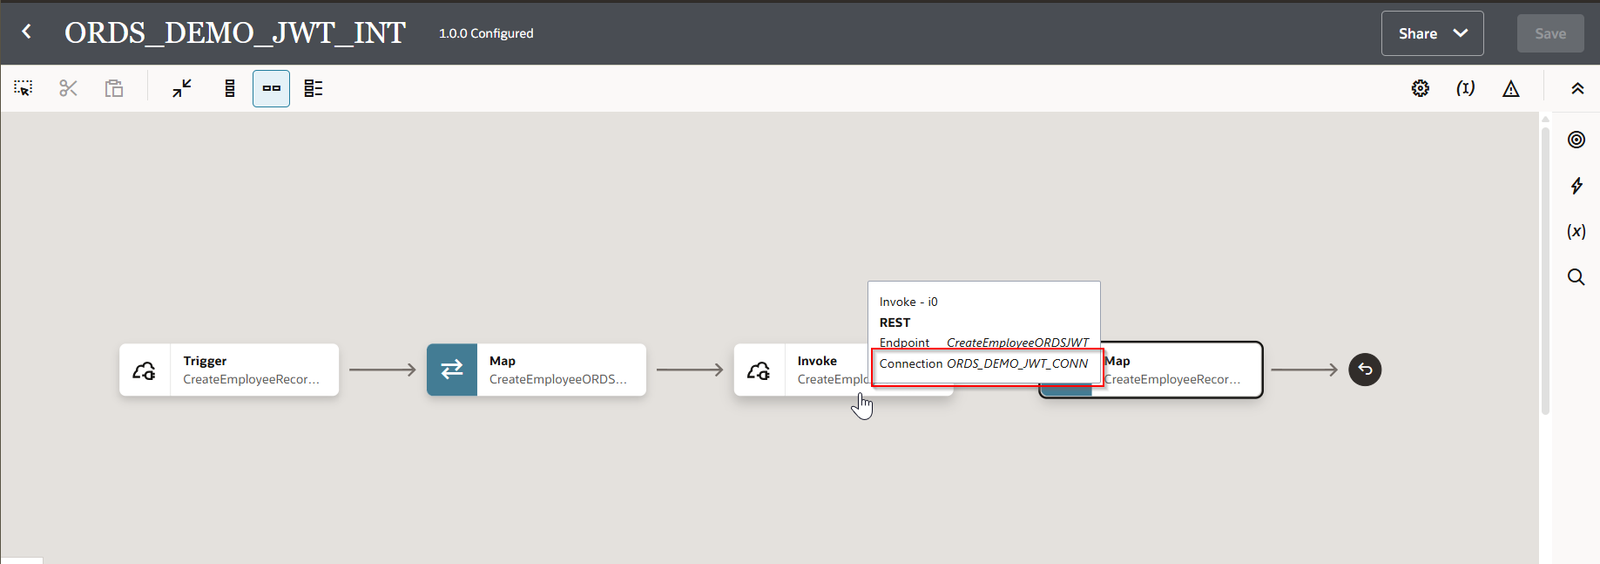
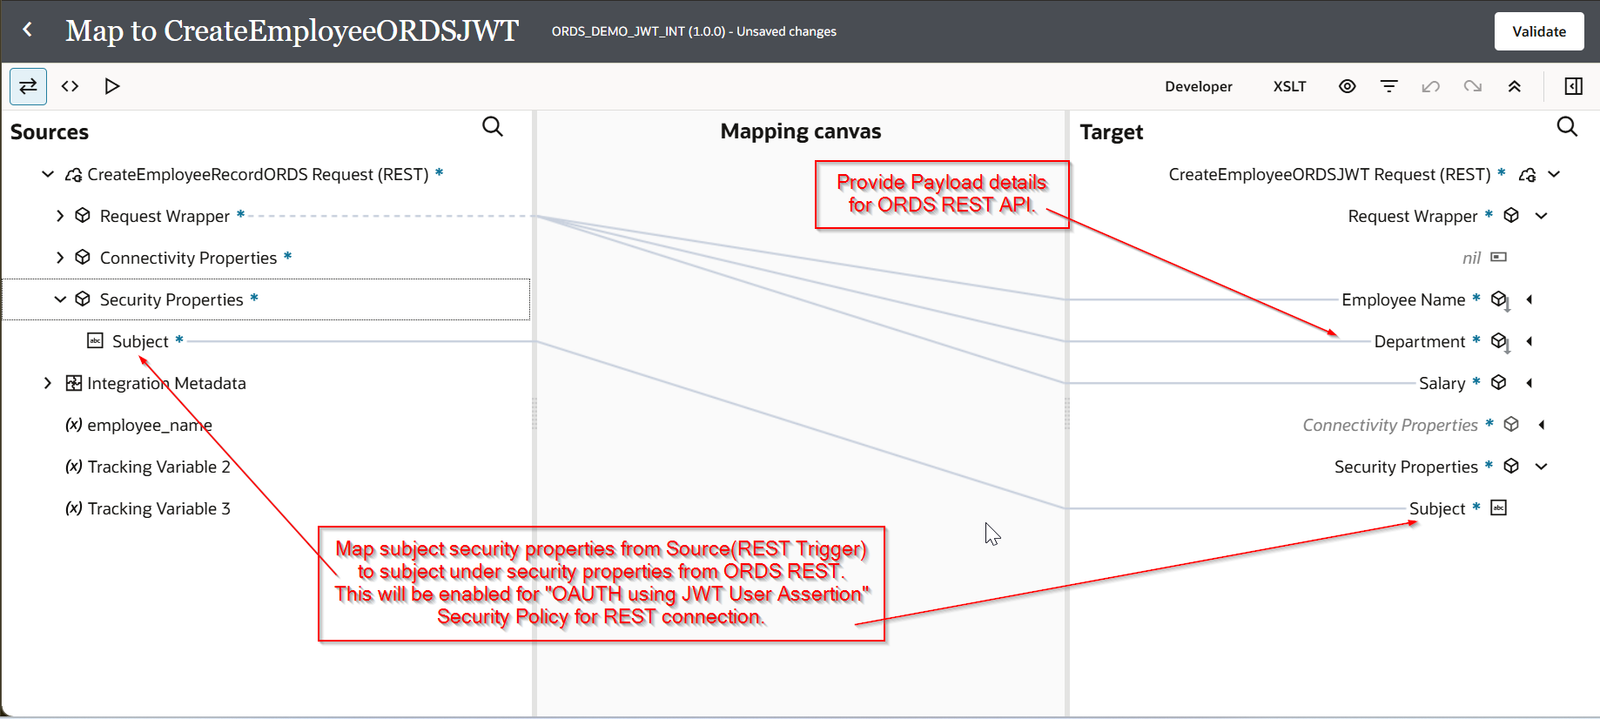
d. Create new simple Integration:
Let us create simple Integration to insert data into table using ORDS connection.
Sample Payload:
{
    "employee_name": "John Smith",
    "department": "IT",
    "salary": 75000
}
Sample Response:
{
    "status": "SUCCESS",
    "employee_id": 1,
    "created_by": "XX_TEST1",
    "message": "Employee created successfully"
}
Save the Integration.
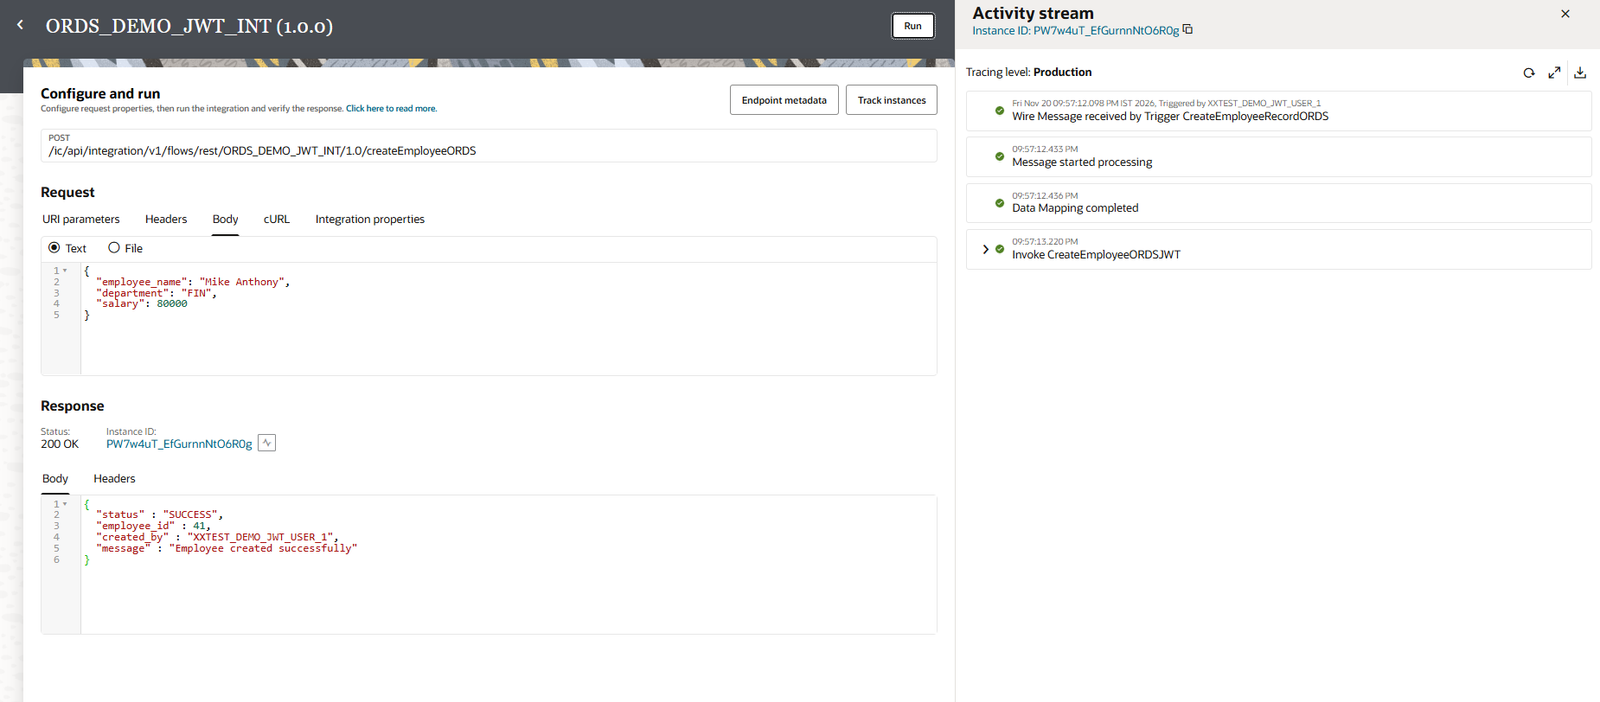
Run the Integration now:
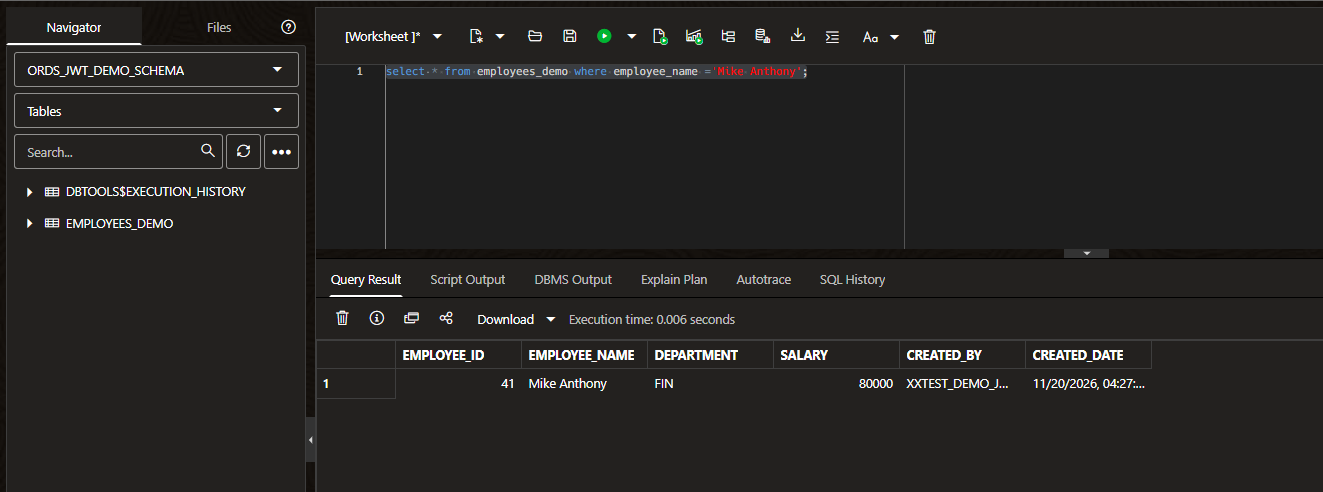
Check result from database: