How to Implement Row Level Edit for Table in using Edit icon and Popup dialog
In this post, we will see how to implement row level edit for table in VBCS using edit icon and popup dialog box.
Let us create new Web application as shown below:
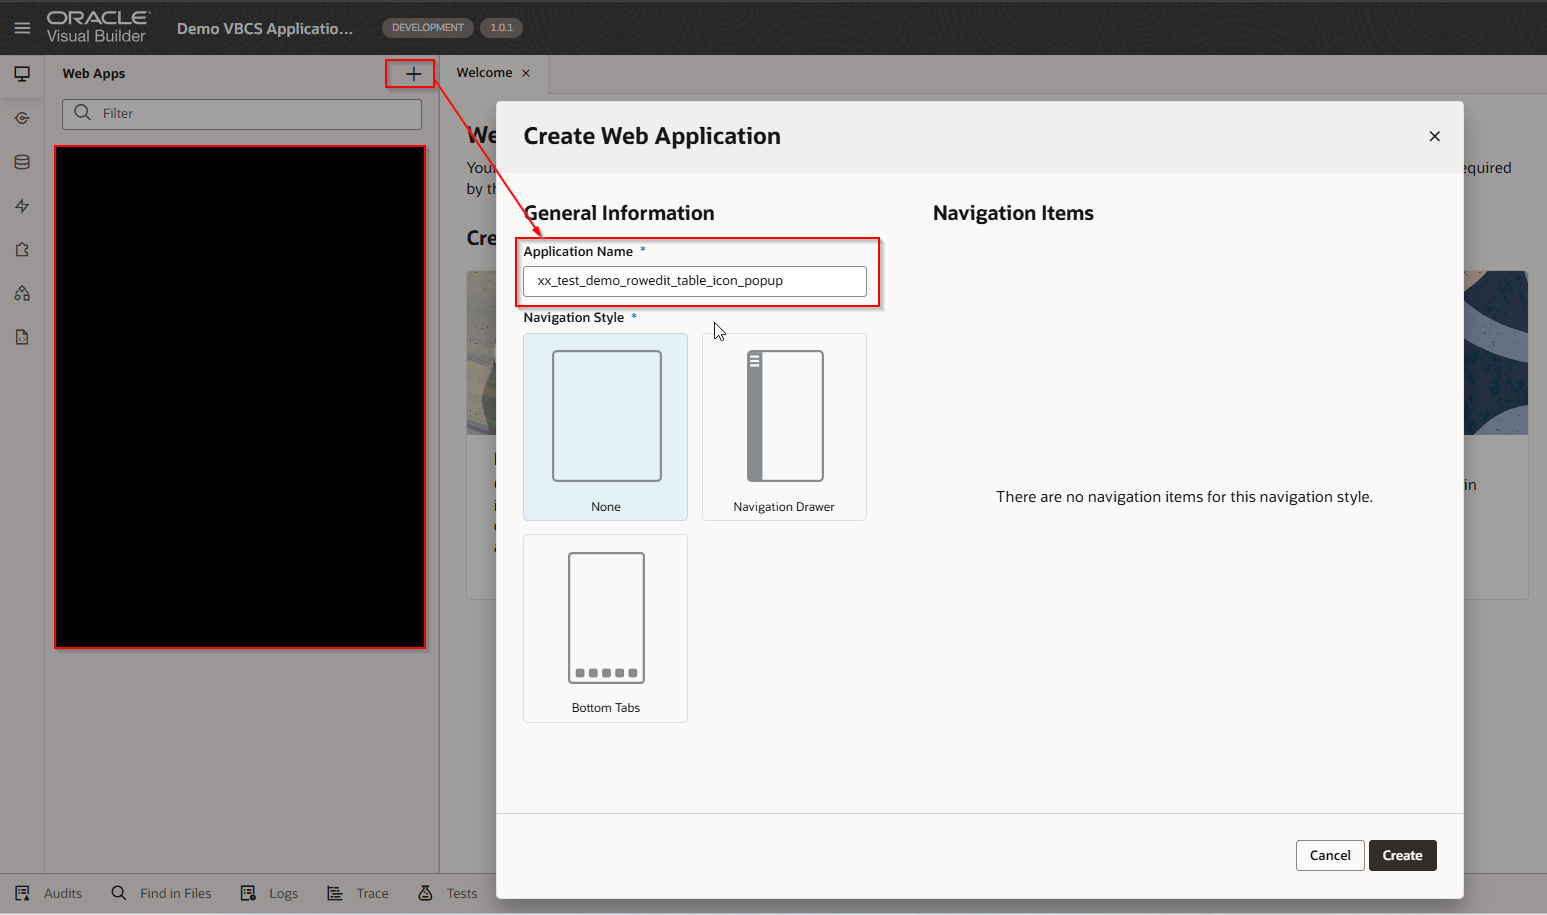
Click on Create.
This will create new web application.
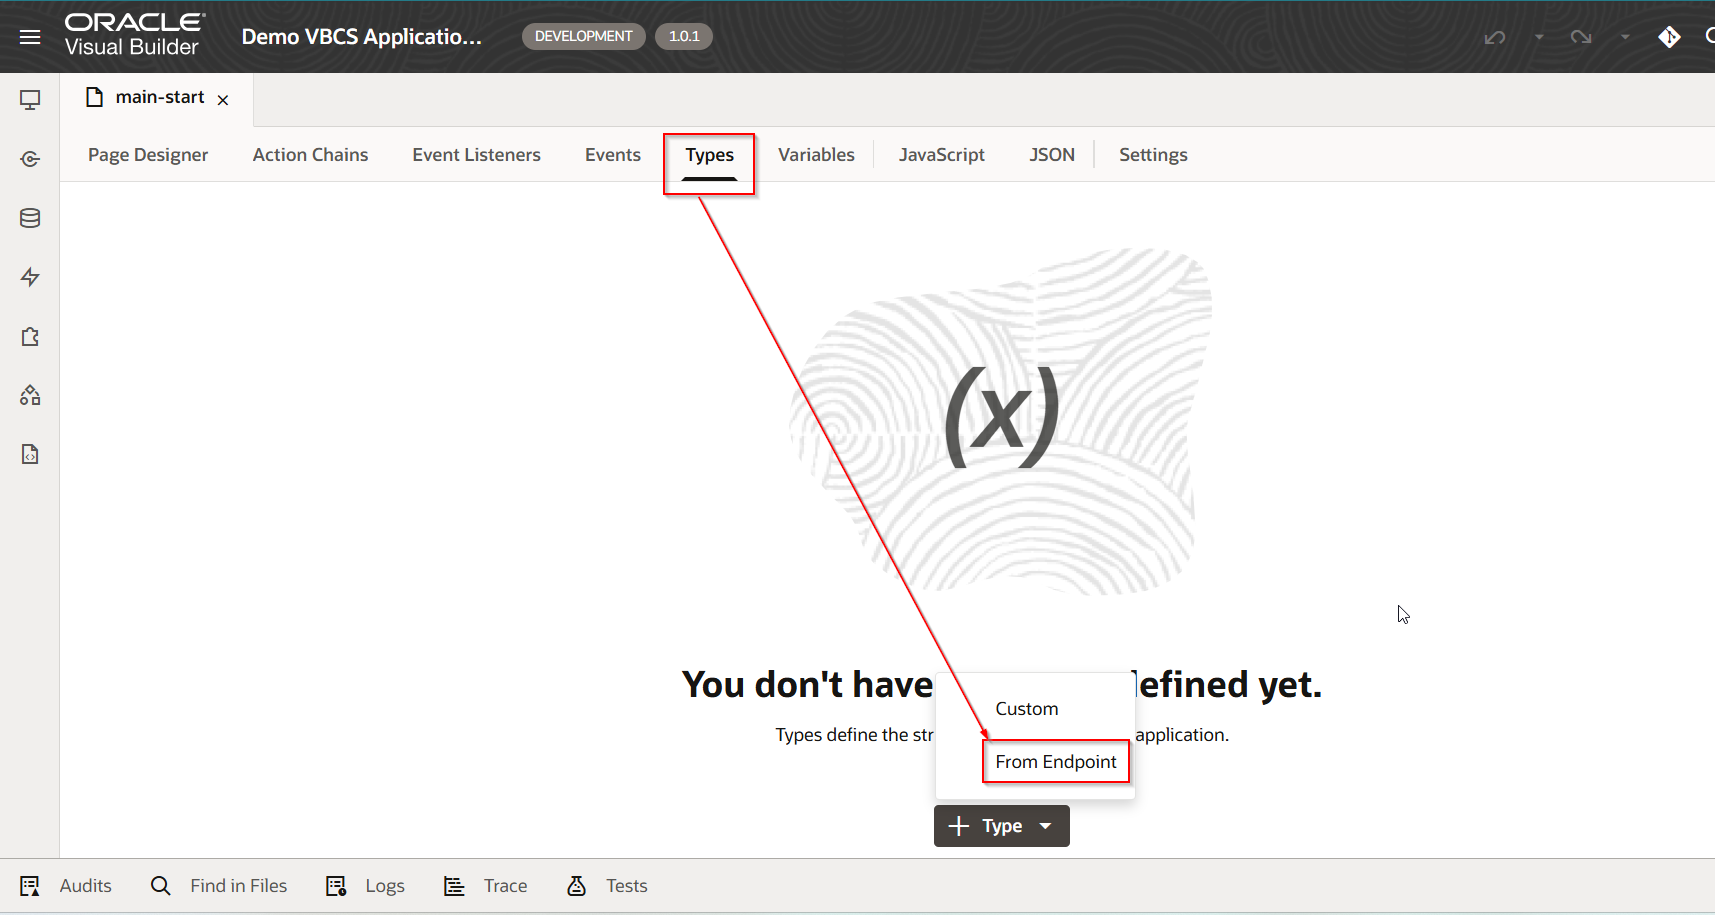
Create new Type.
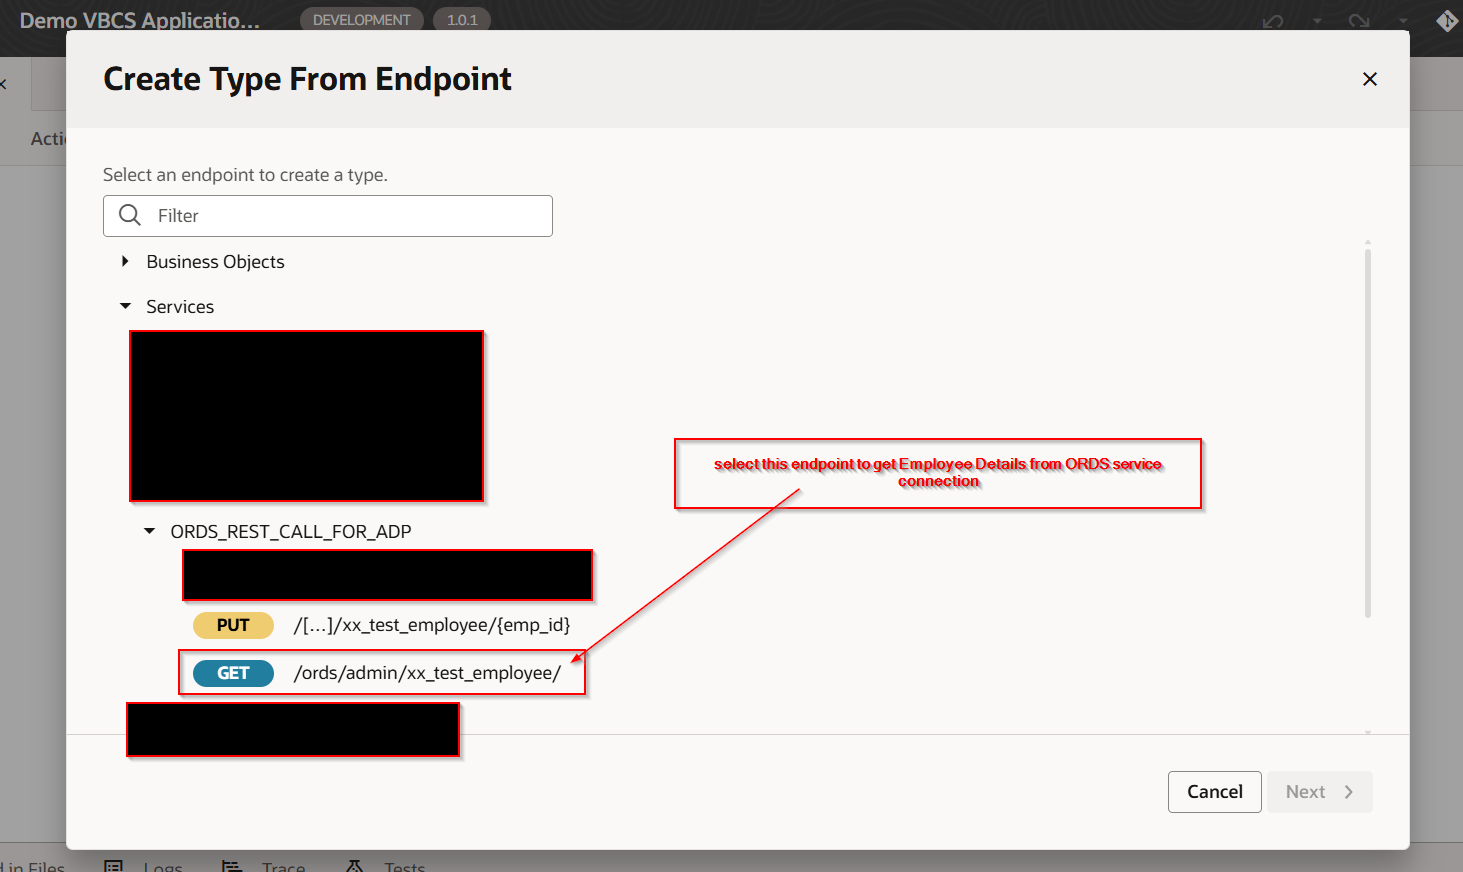
Navigate to Types—>Type —>From Endpoint
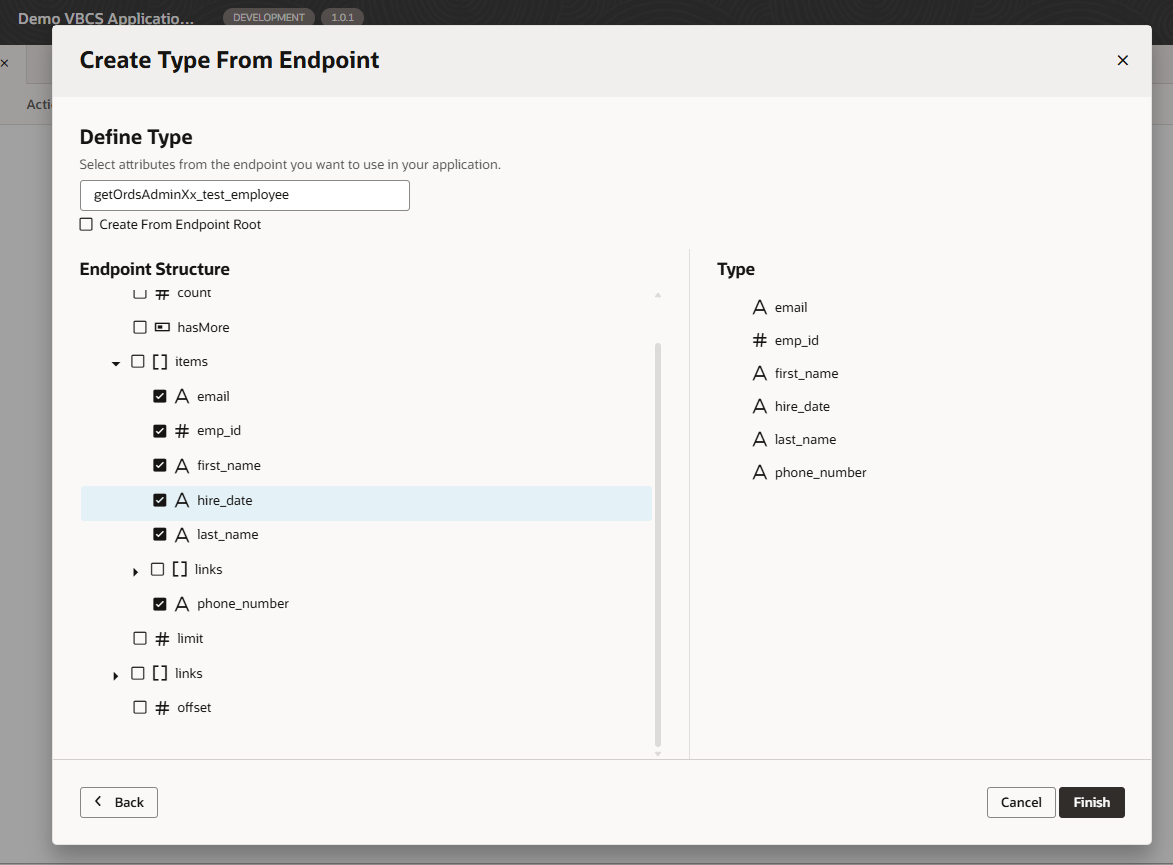
Click on Finish.
Create new ADP variable based on above type.
Navigate to Variables —>Variable
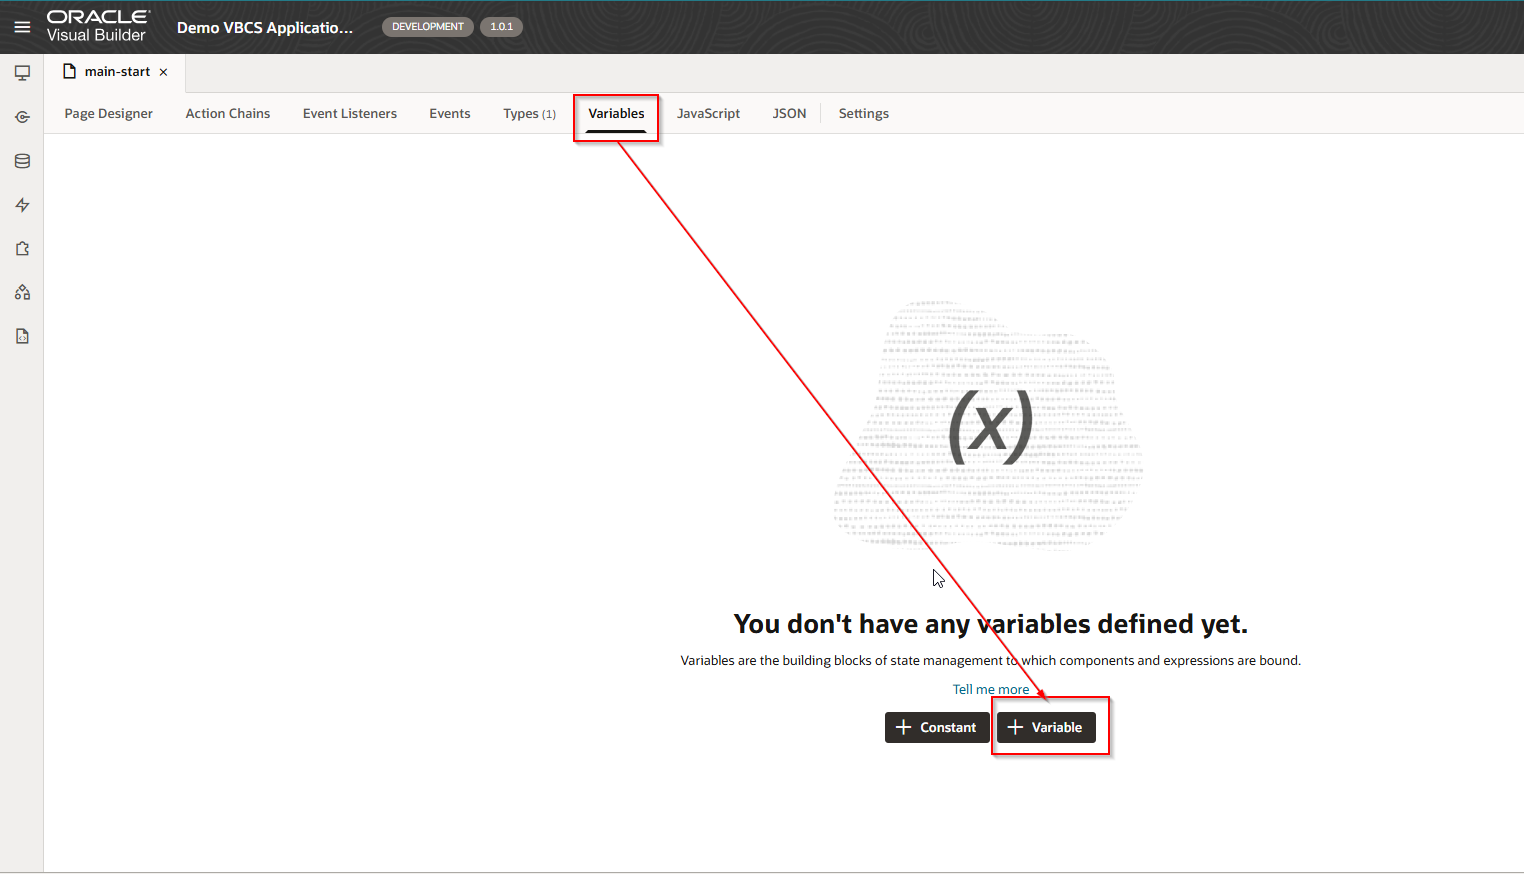
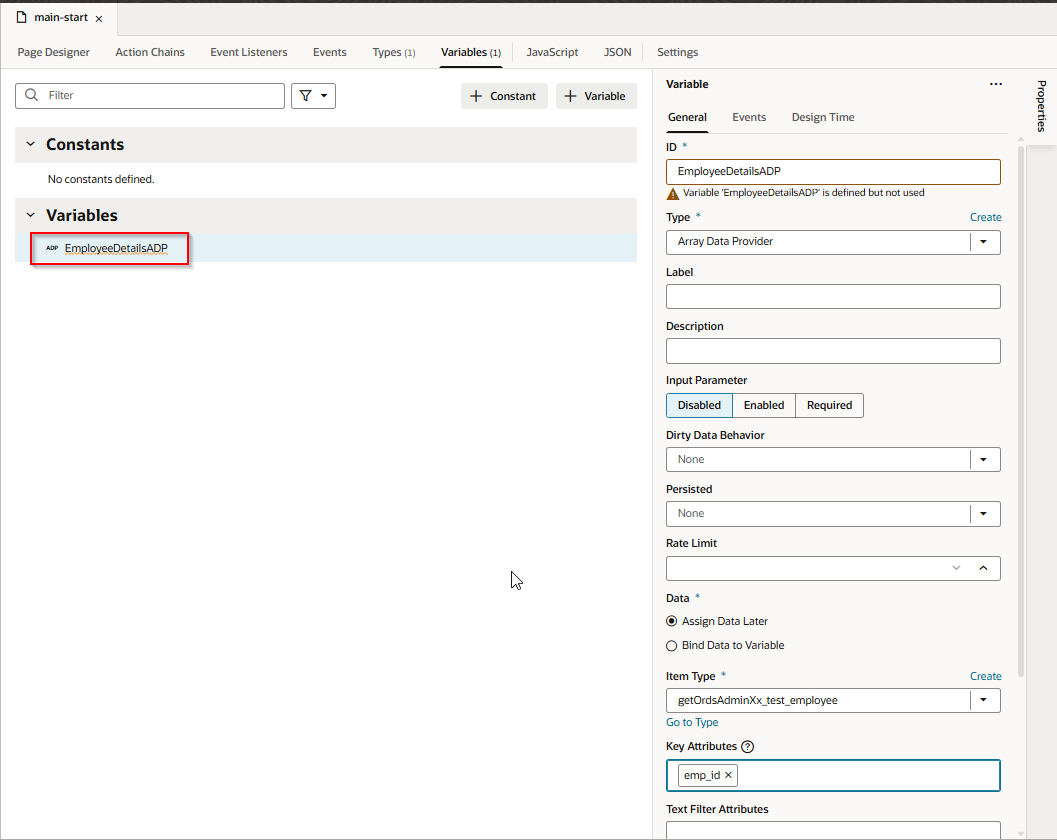
Provide Name to variable. Select Type as Array Data Provider and Item Type as type created in earlier step and provide key Attributes as emp_id.
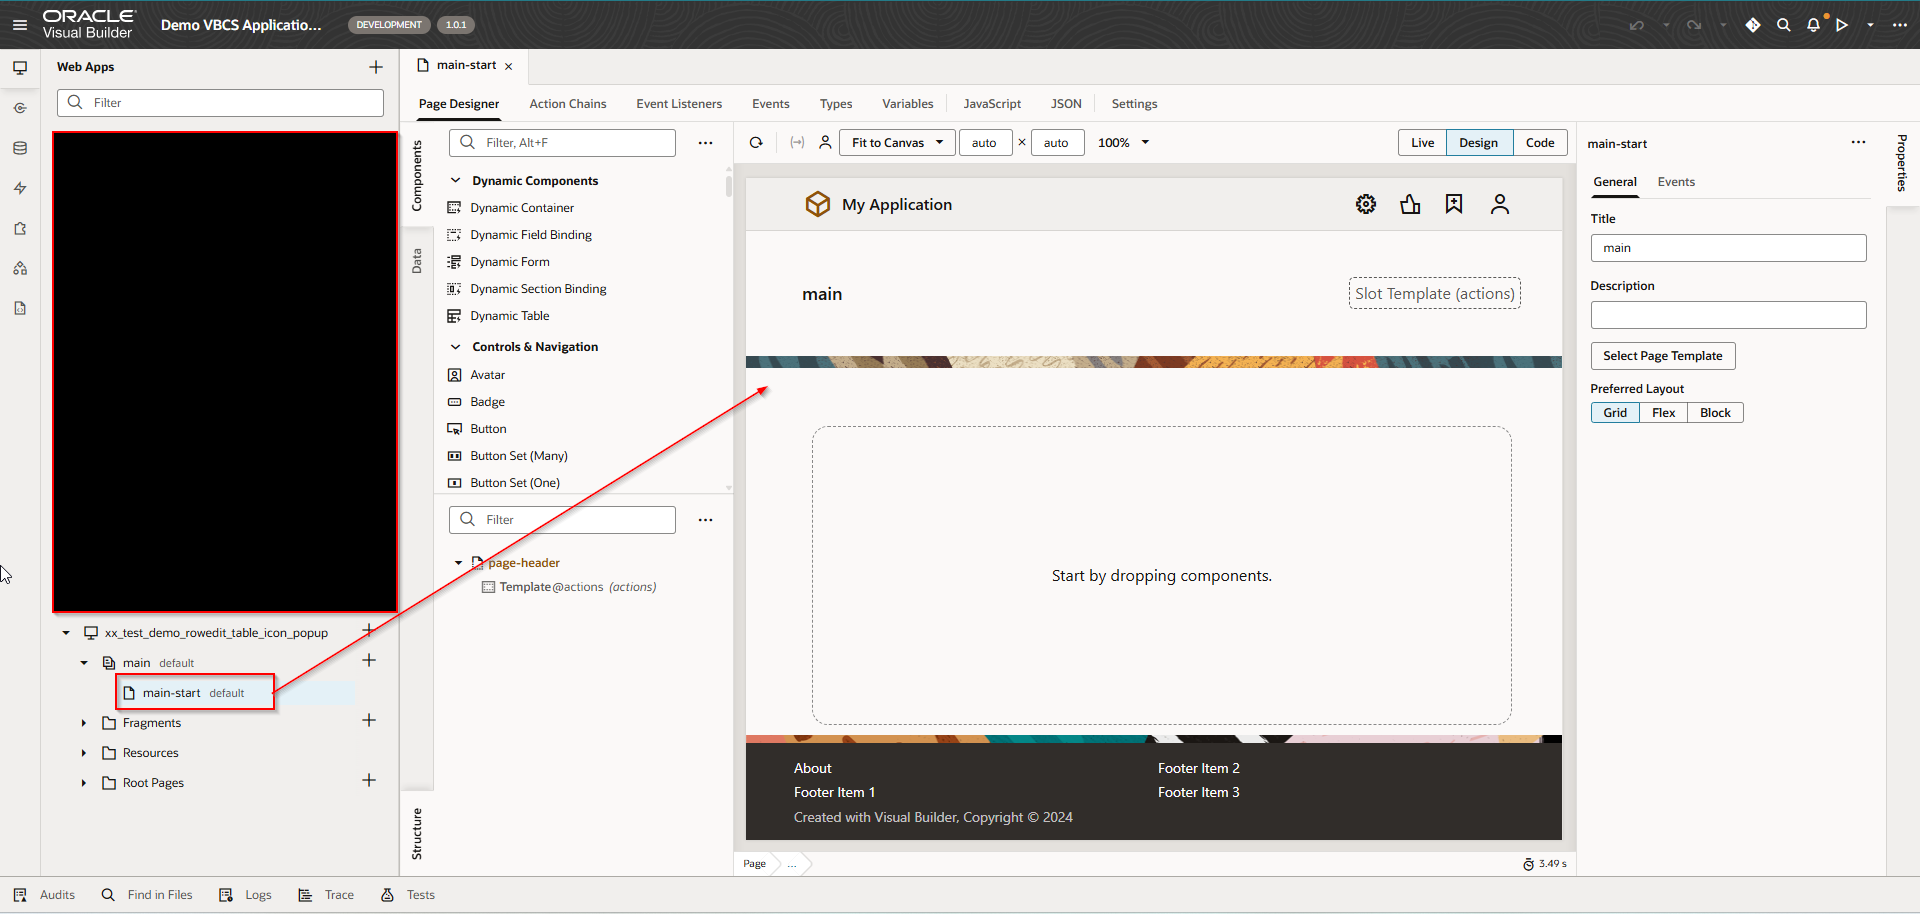
Create Table on VBCS page and assign ADP variable as data source to table.
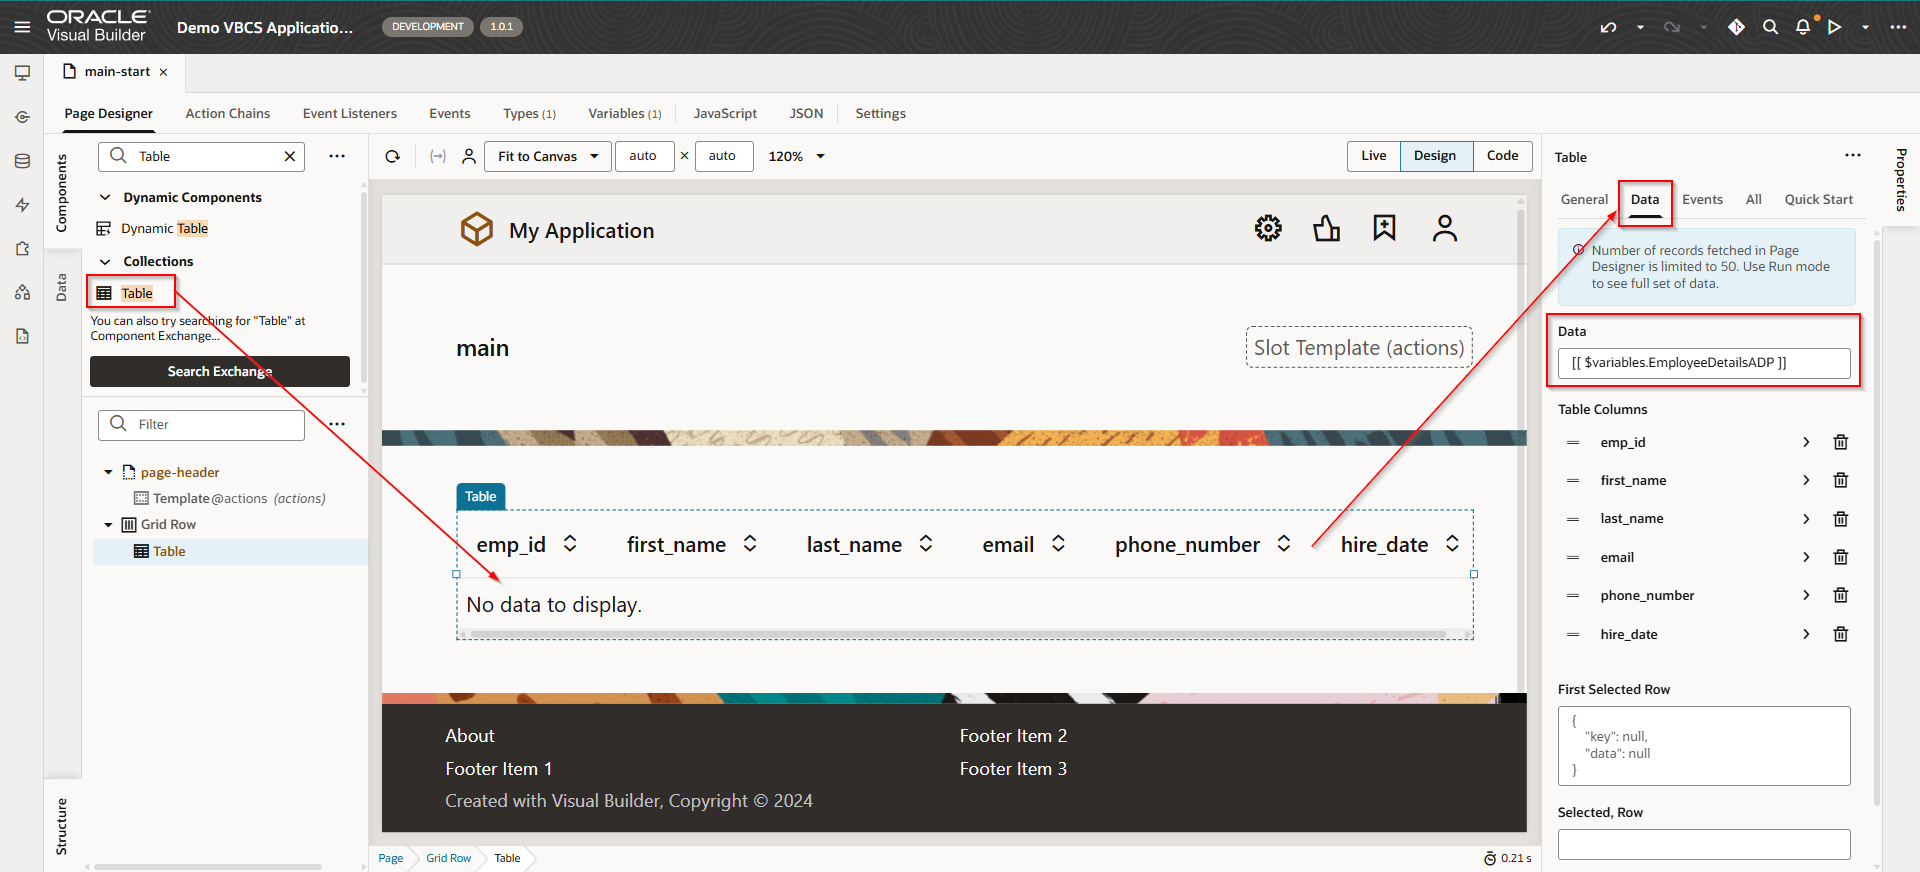
Add columns for table as shown above.
To populate data into ADP variable when page loads,
create VB Enter event to populate ADP variable when page loads
Navigate to Event Listeners —->Event Listener.

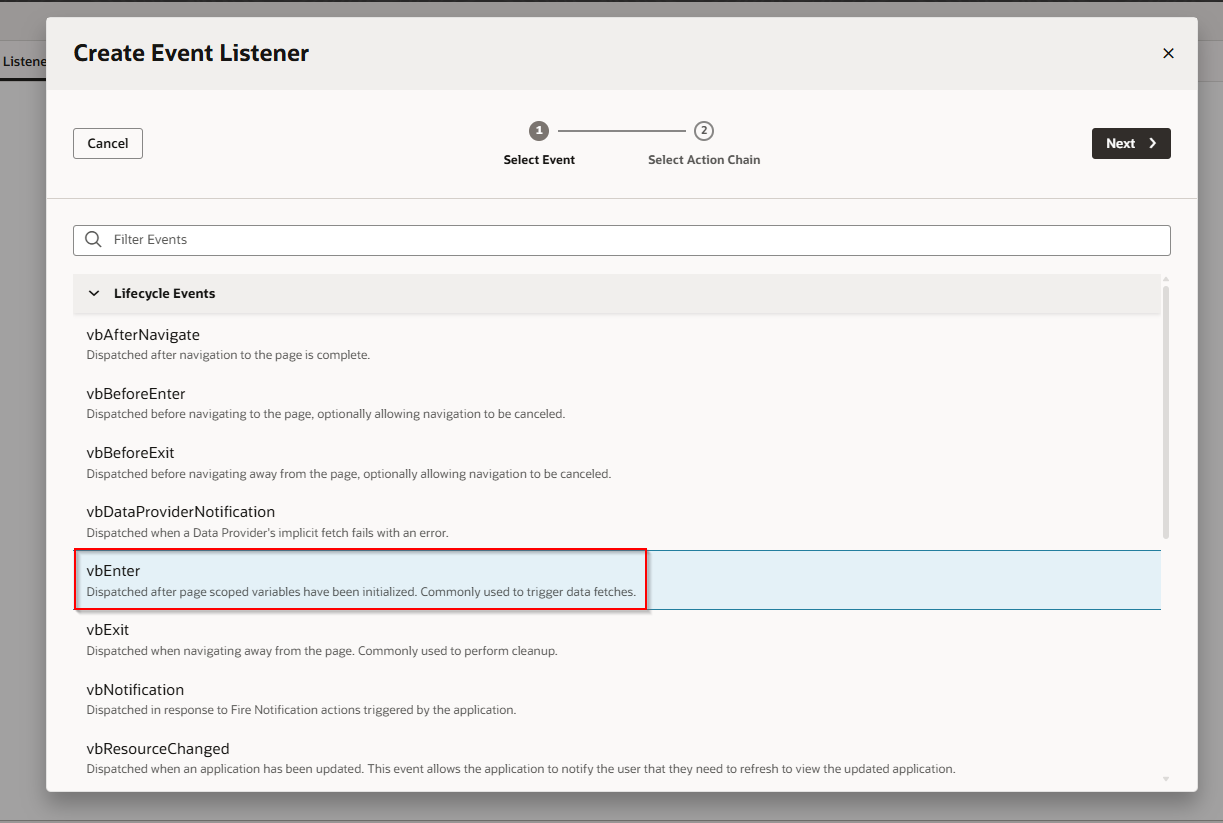
Select “vbEnter” under Lifecycle events and click Next.
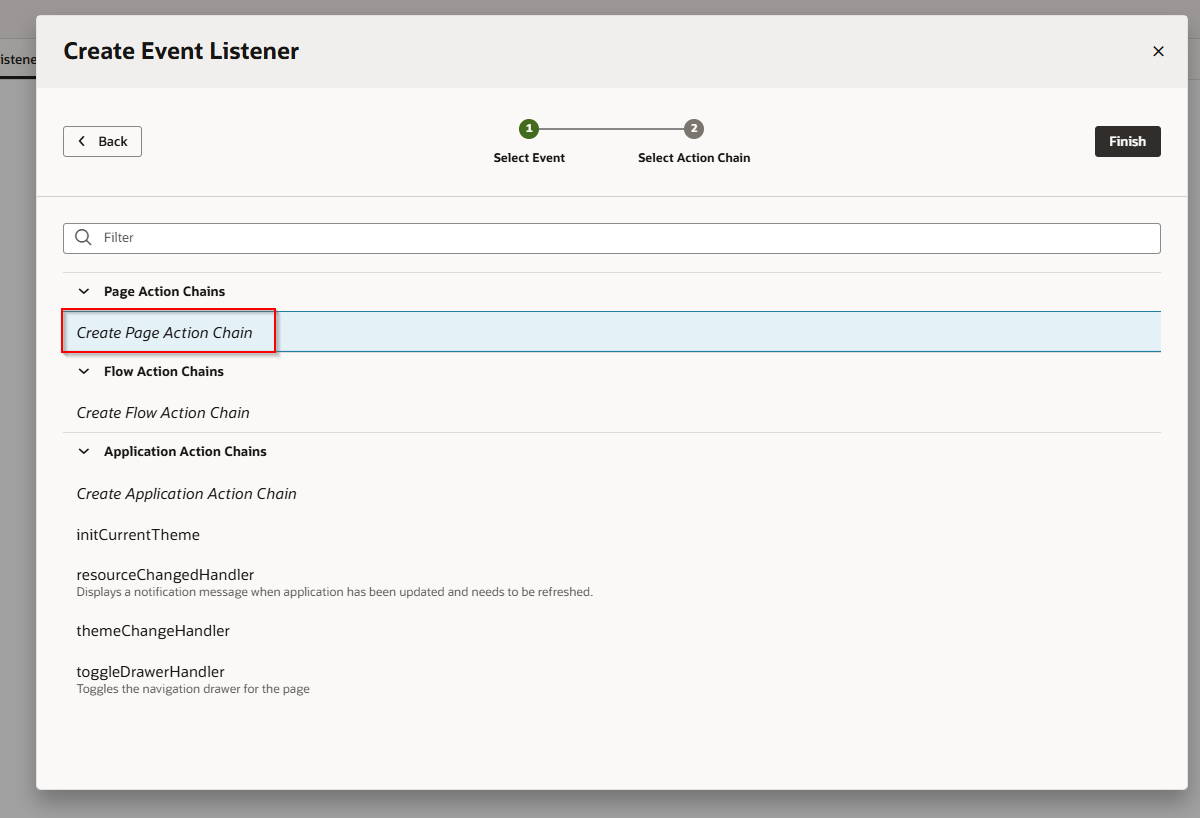
Select “Create Page Action Chain” and click on Finish.
This will create new action chain.
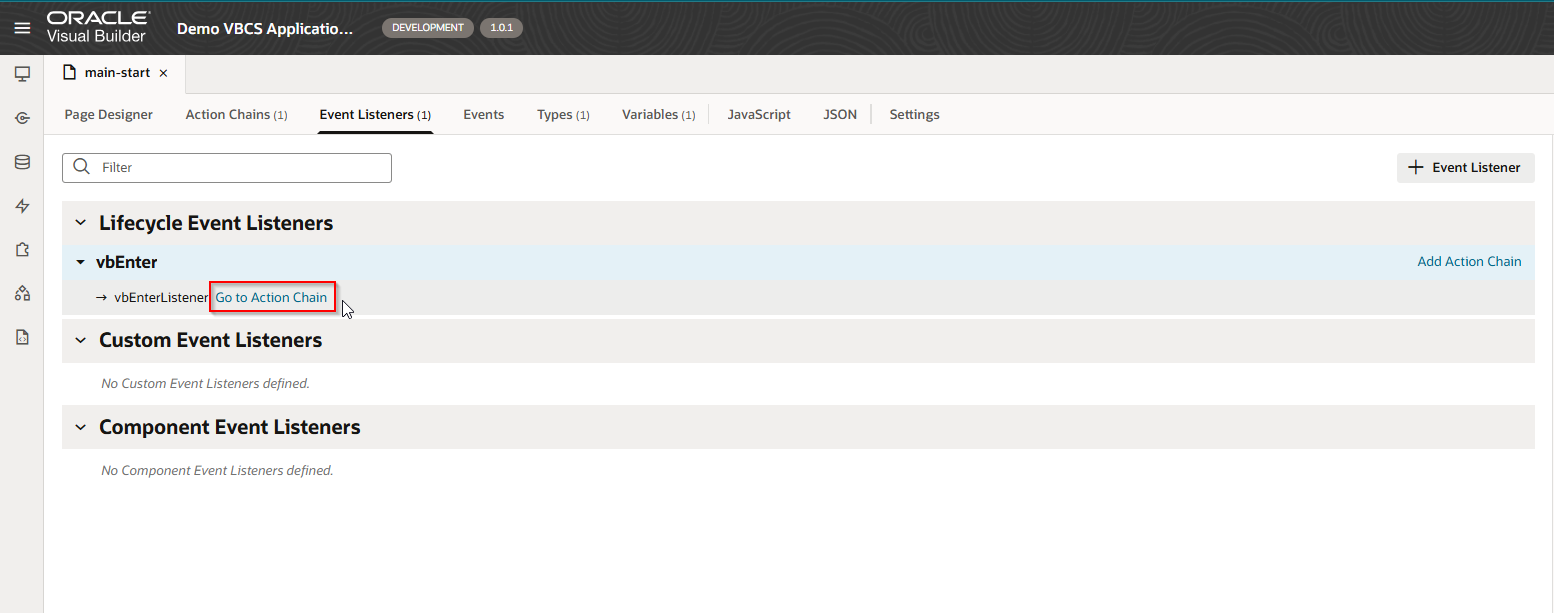
Click on “Go to Action Chain”.
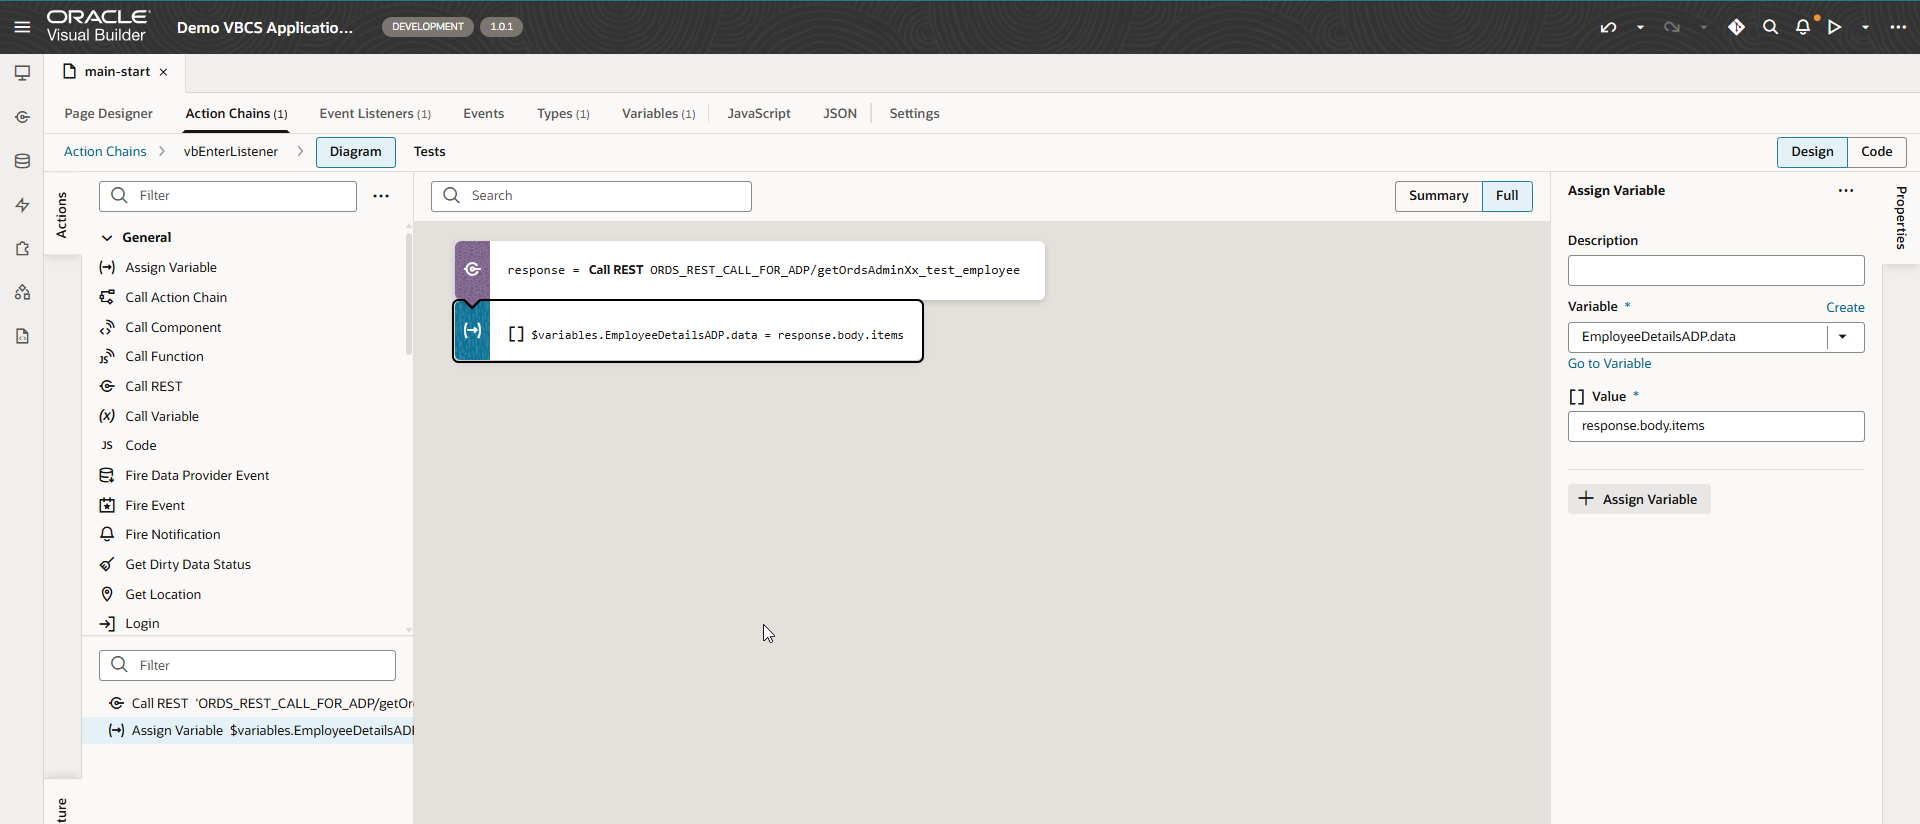
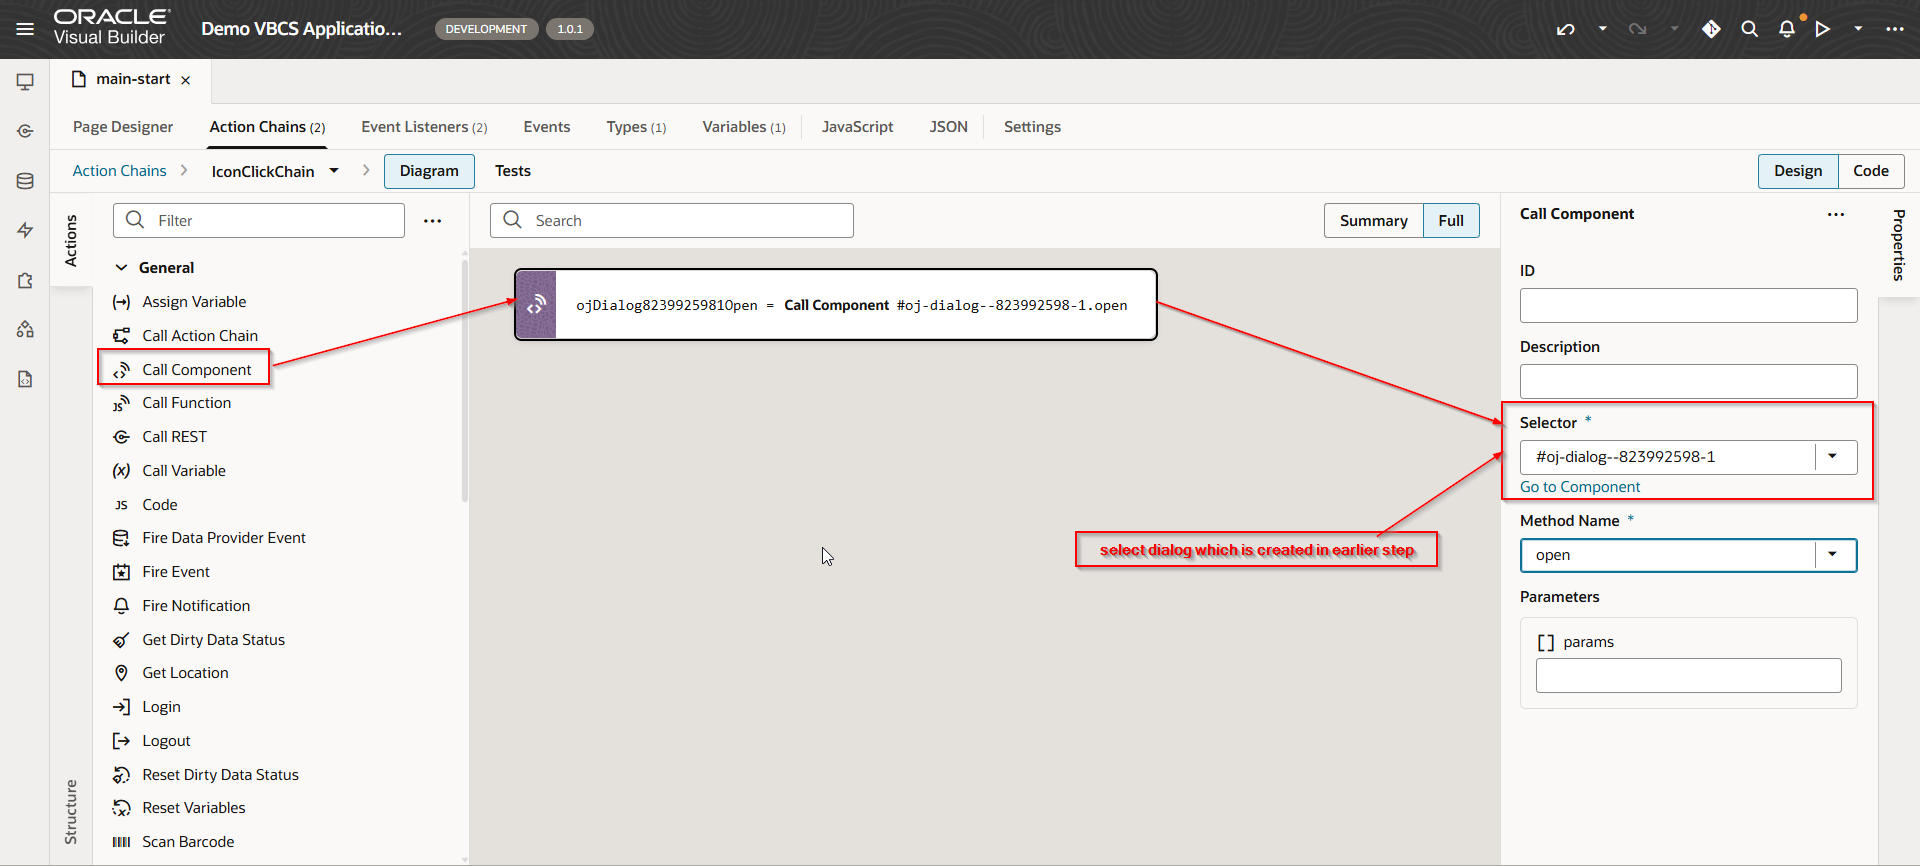
Add the logic below in action chain.
-
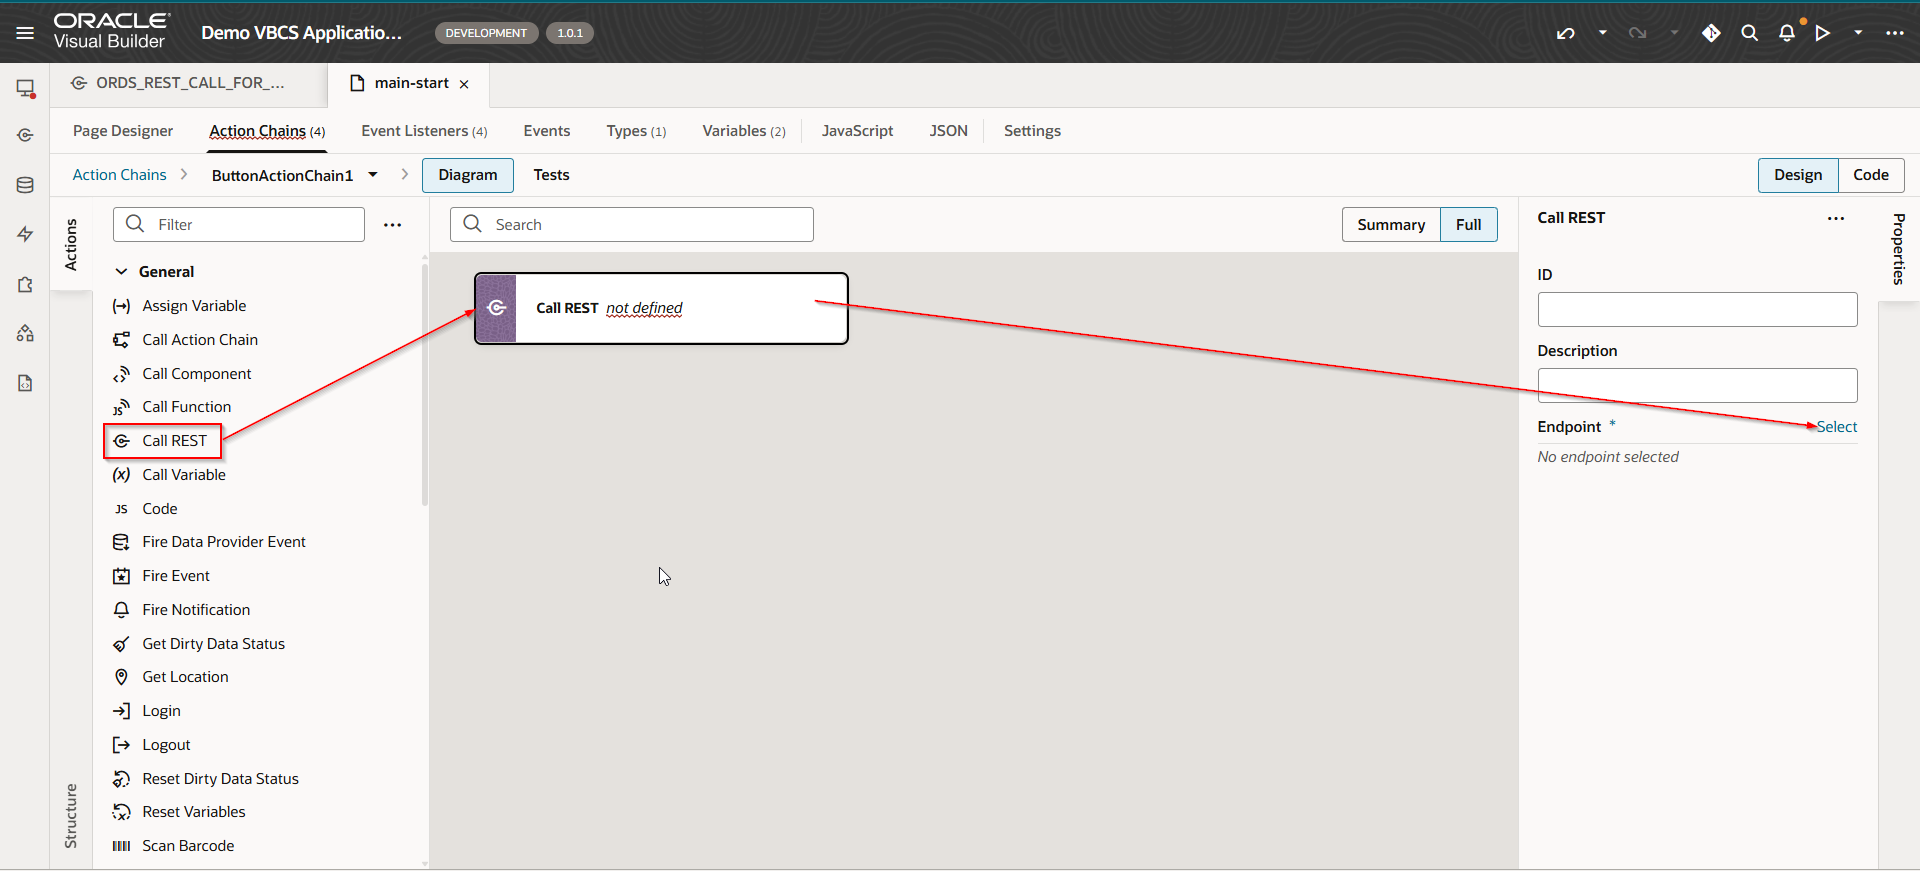
Add REST API call to get data using ORDS service connection.
-
Assign response to ADP variable.
Run the application.
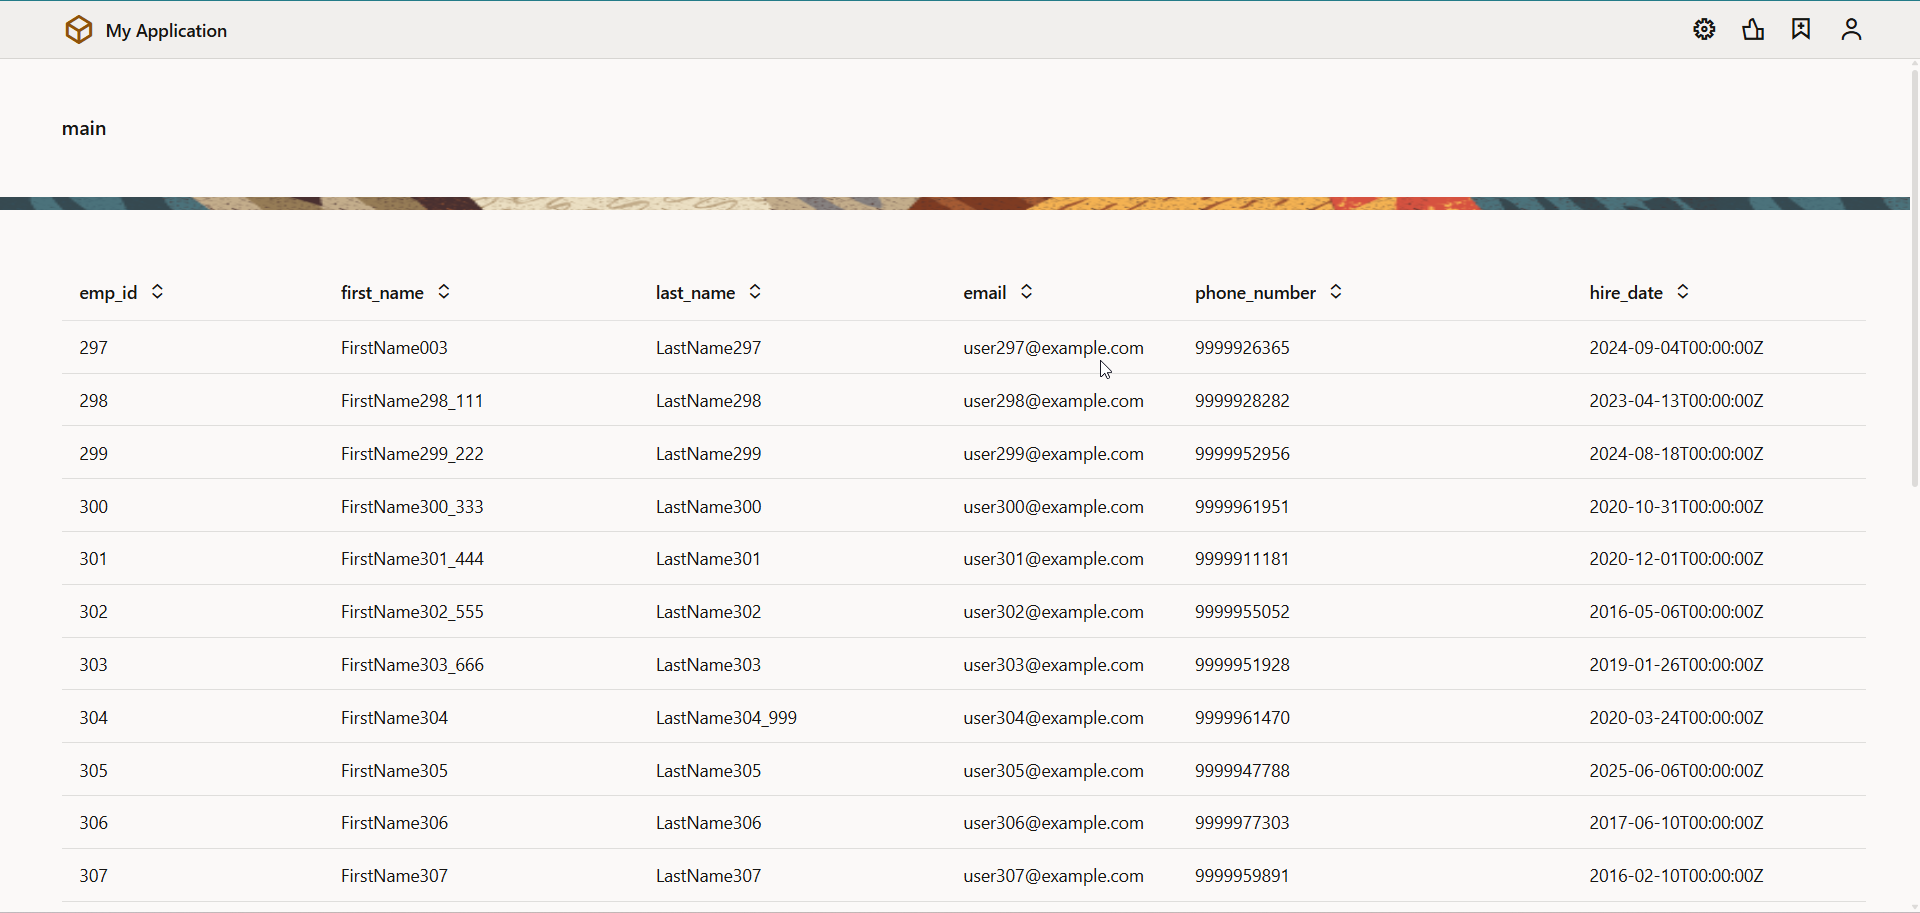
ADP variable is populated with REST API response and displayed in table.
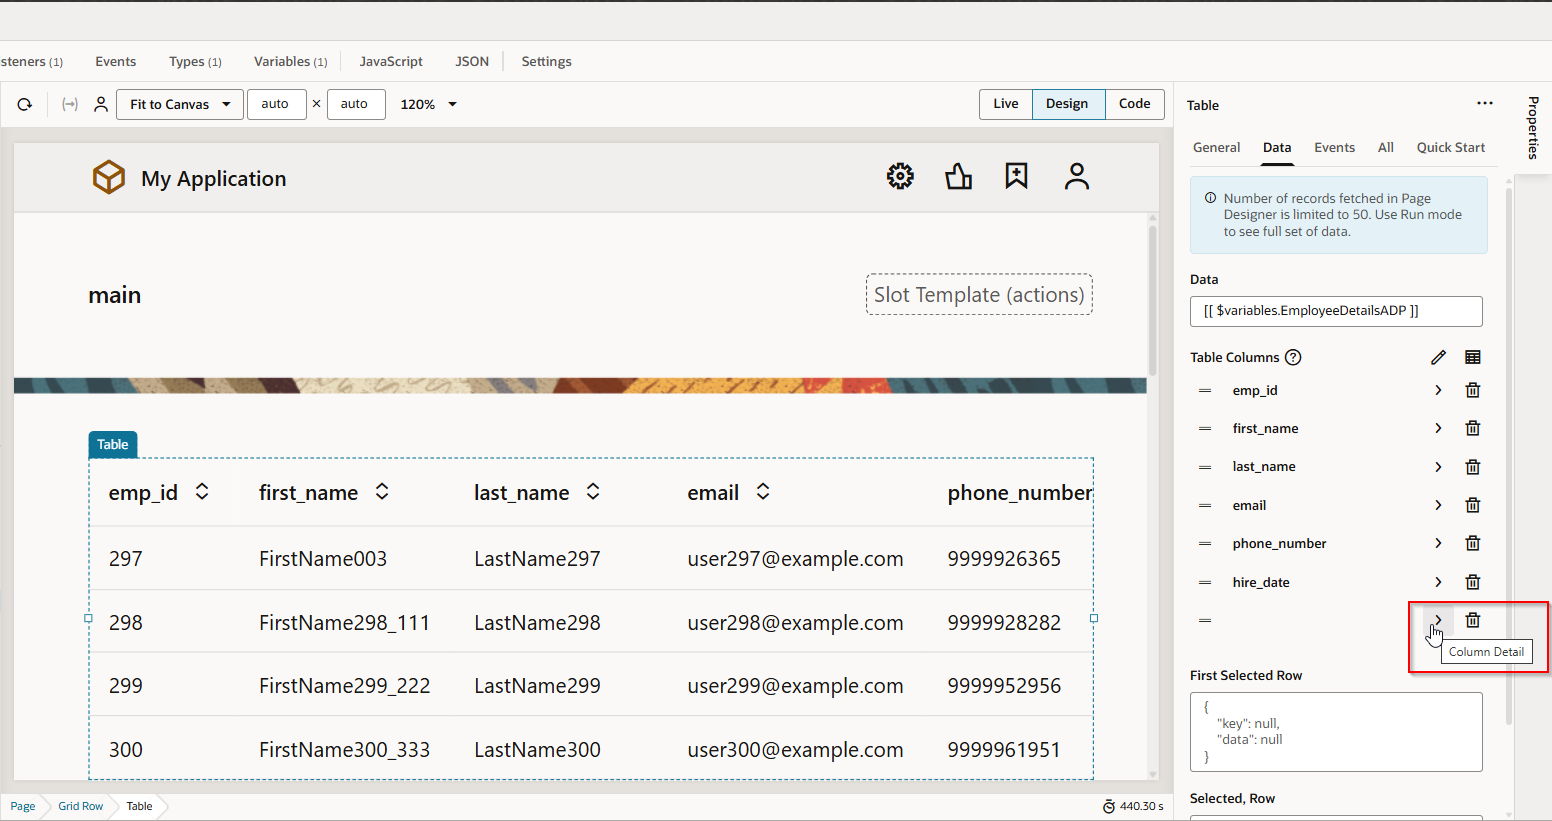
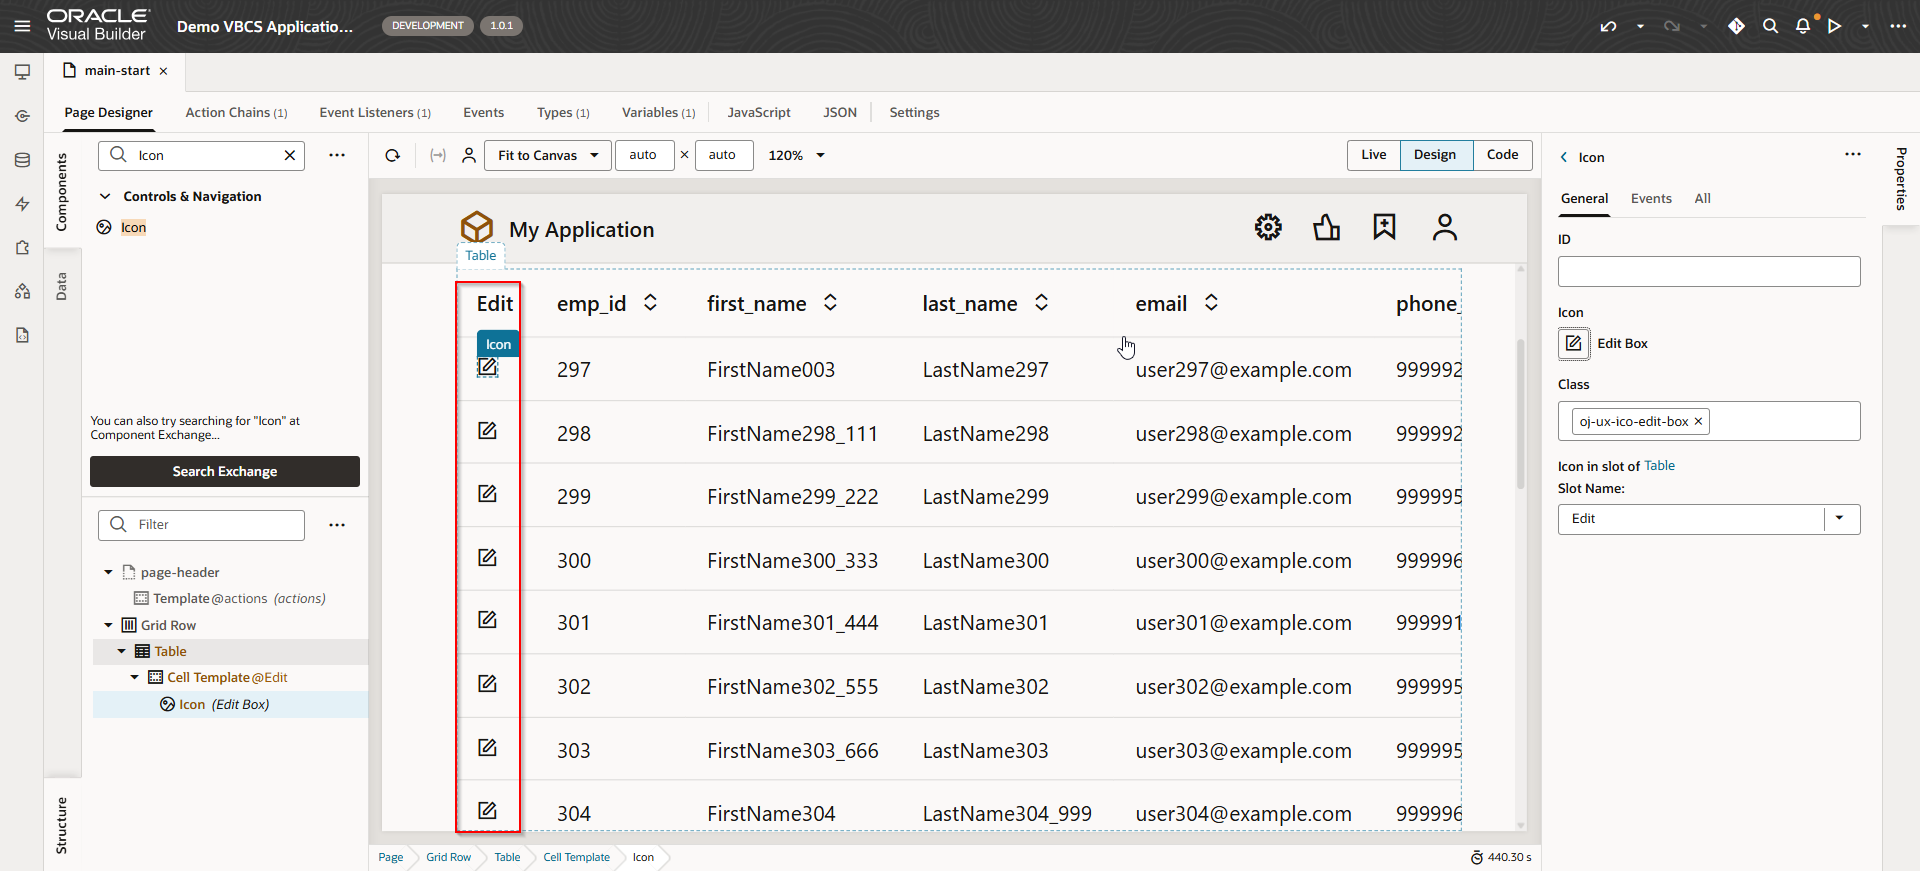
Create one more column to this table for Edit.
Navigate to table —>Table Columns —>New Empty Column.
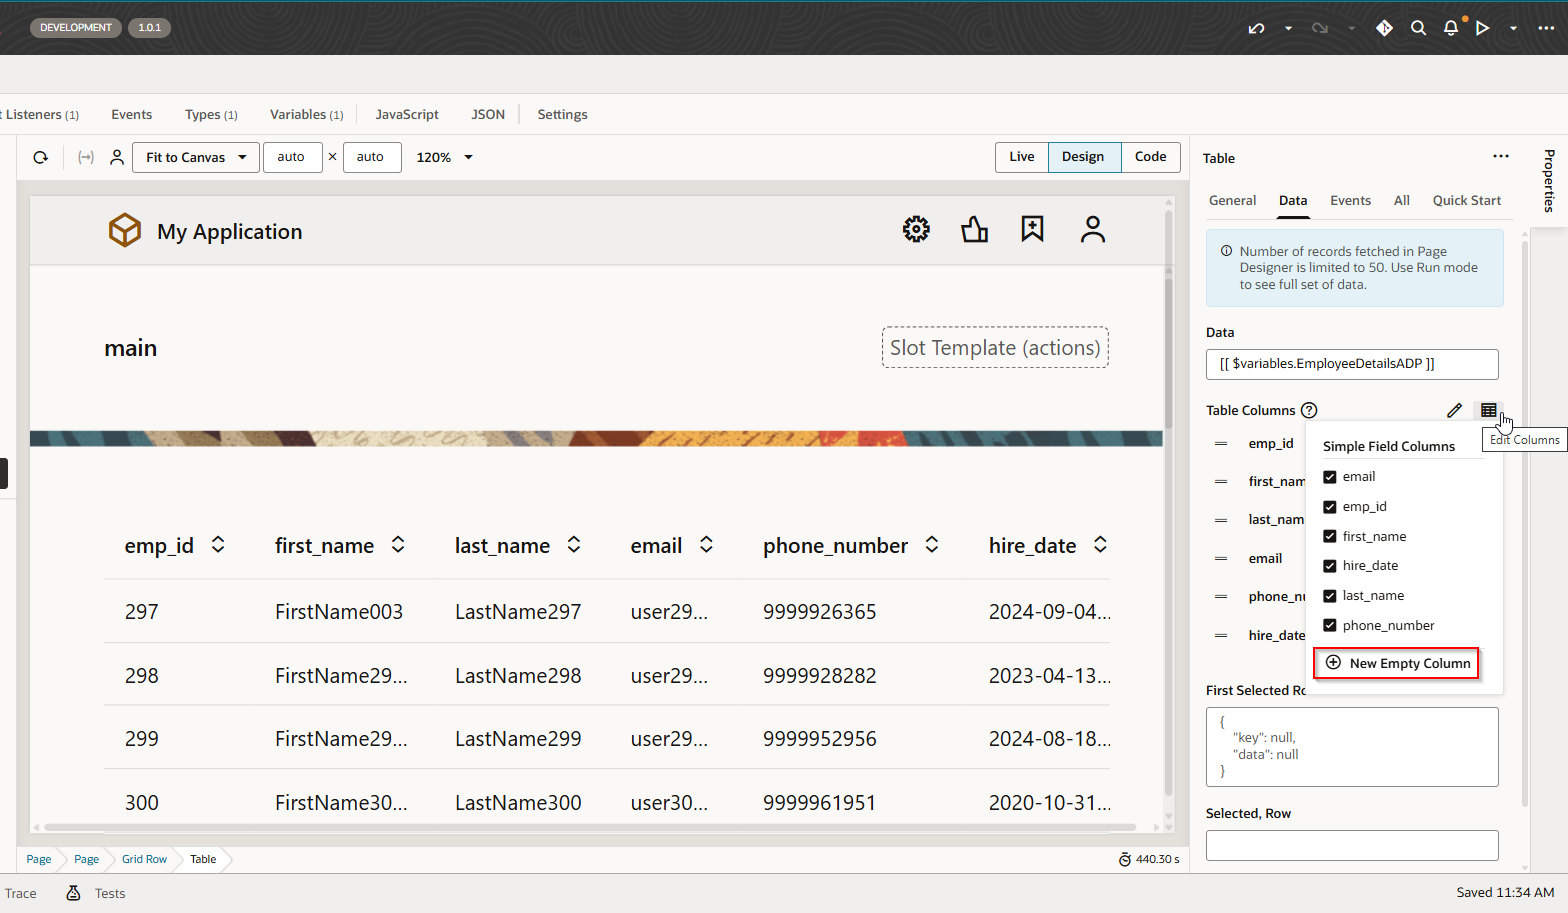
This will create new column.
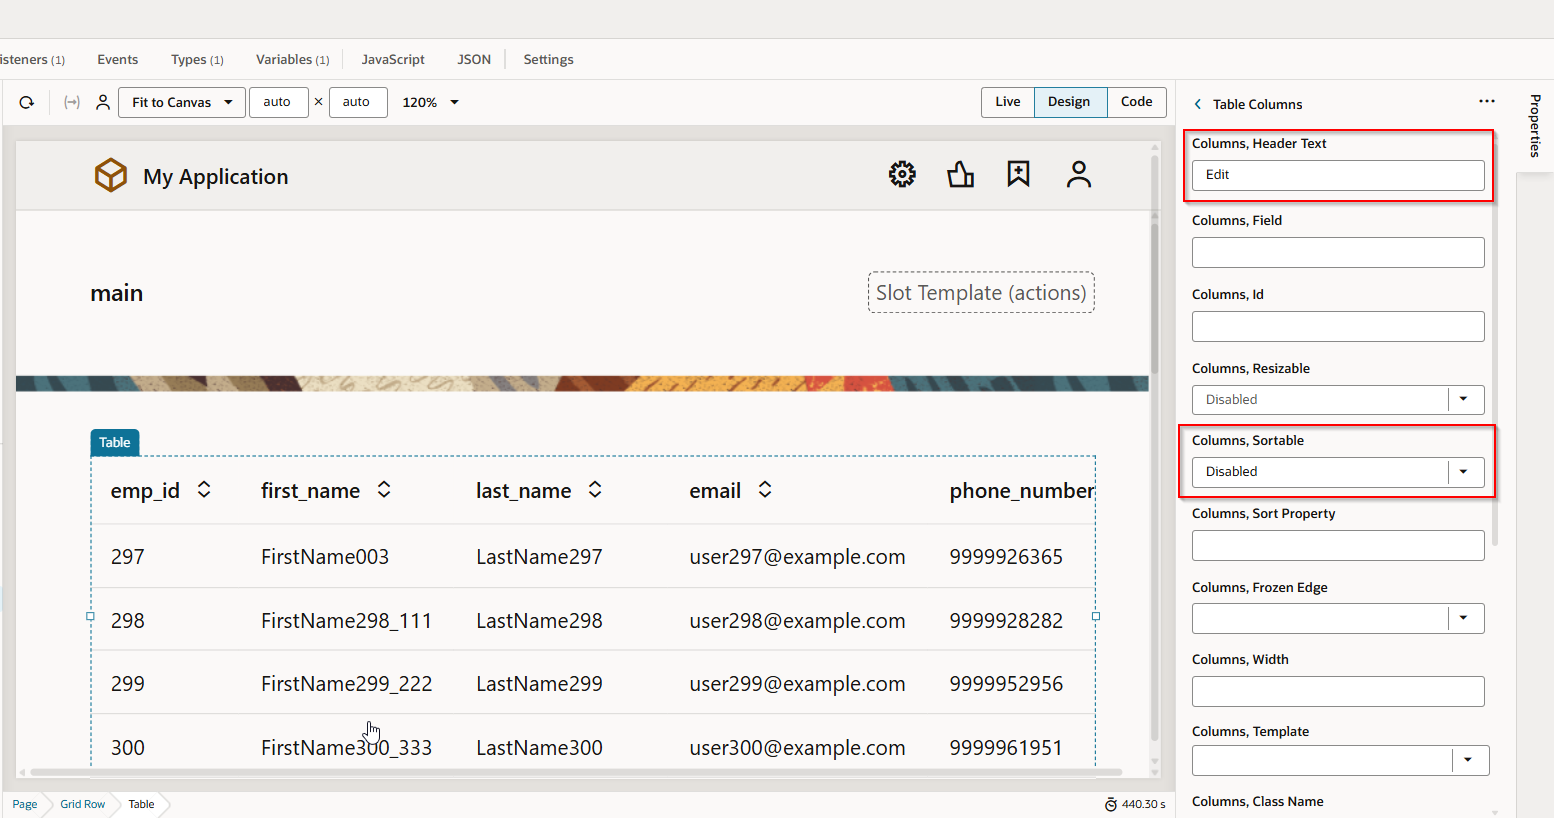
Click on Column Detail.
Set properties as below:
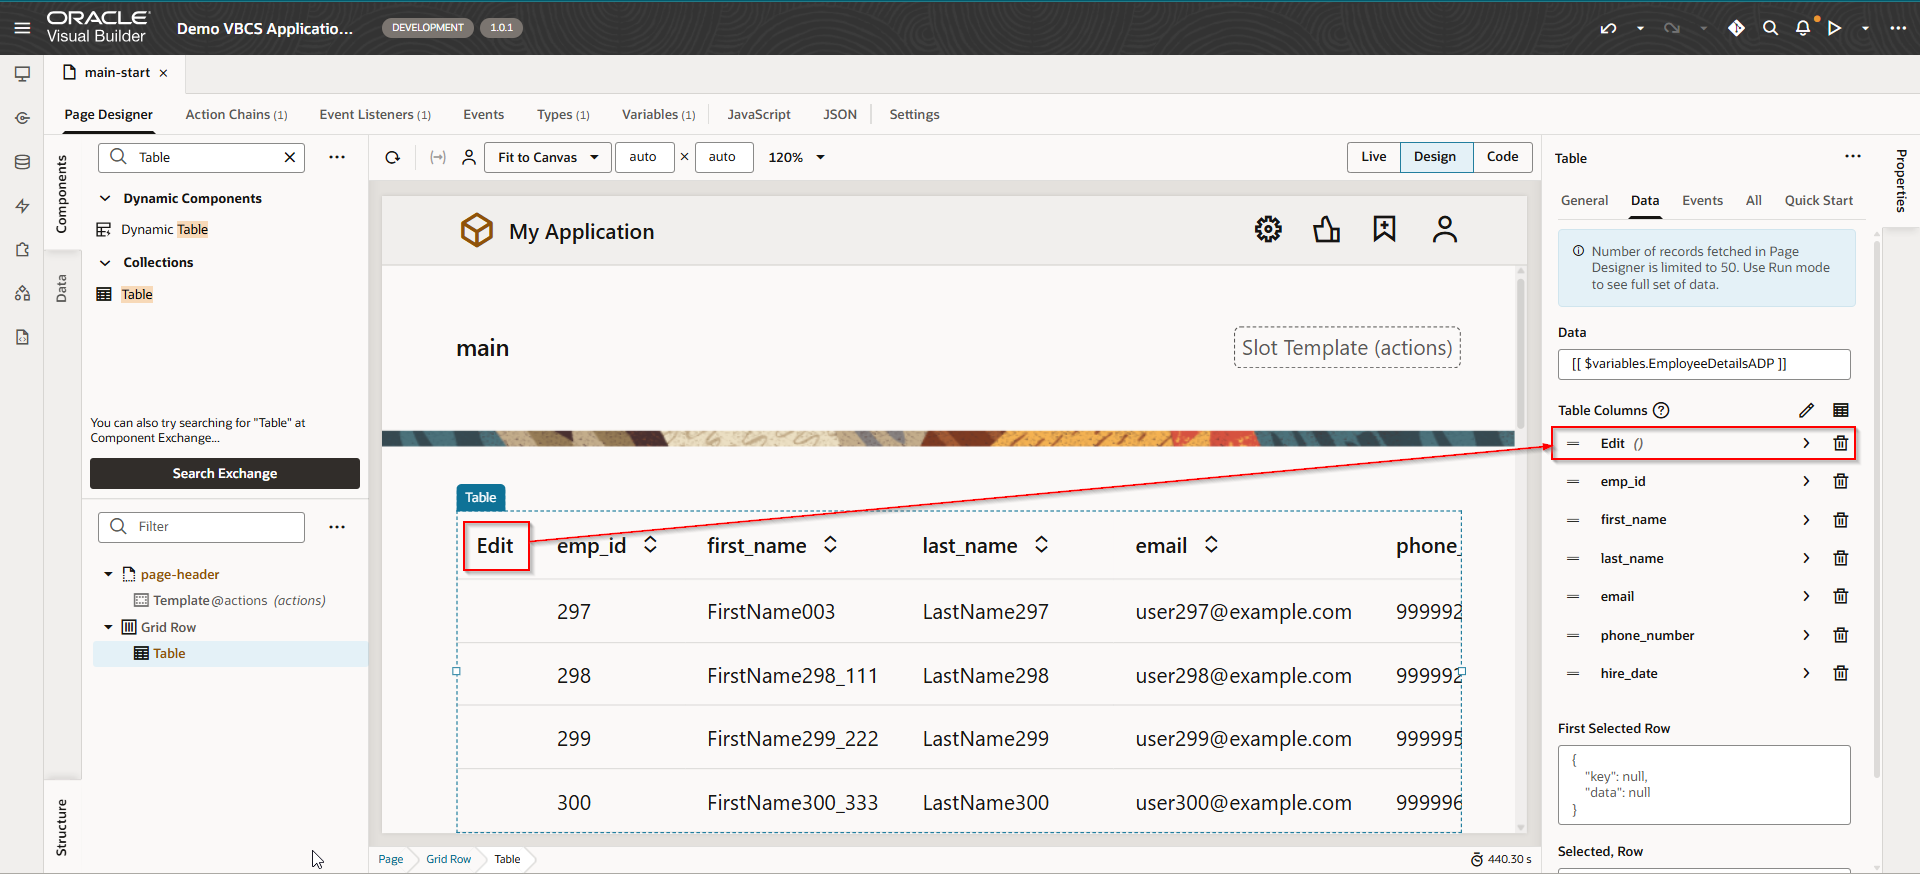
Move this edit column at top of all columns:
Add Icon to Edit column.
Drag and drop Icon component on Edit column.
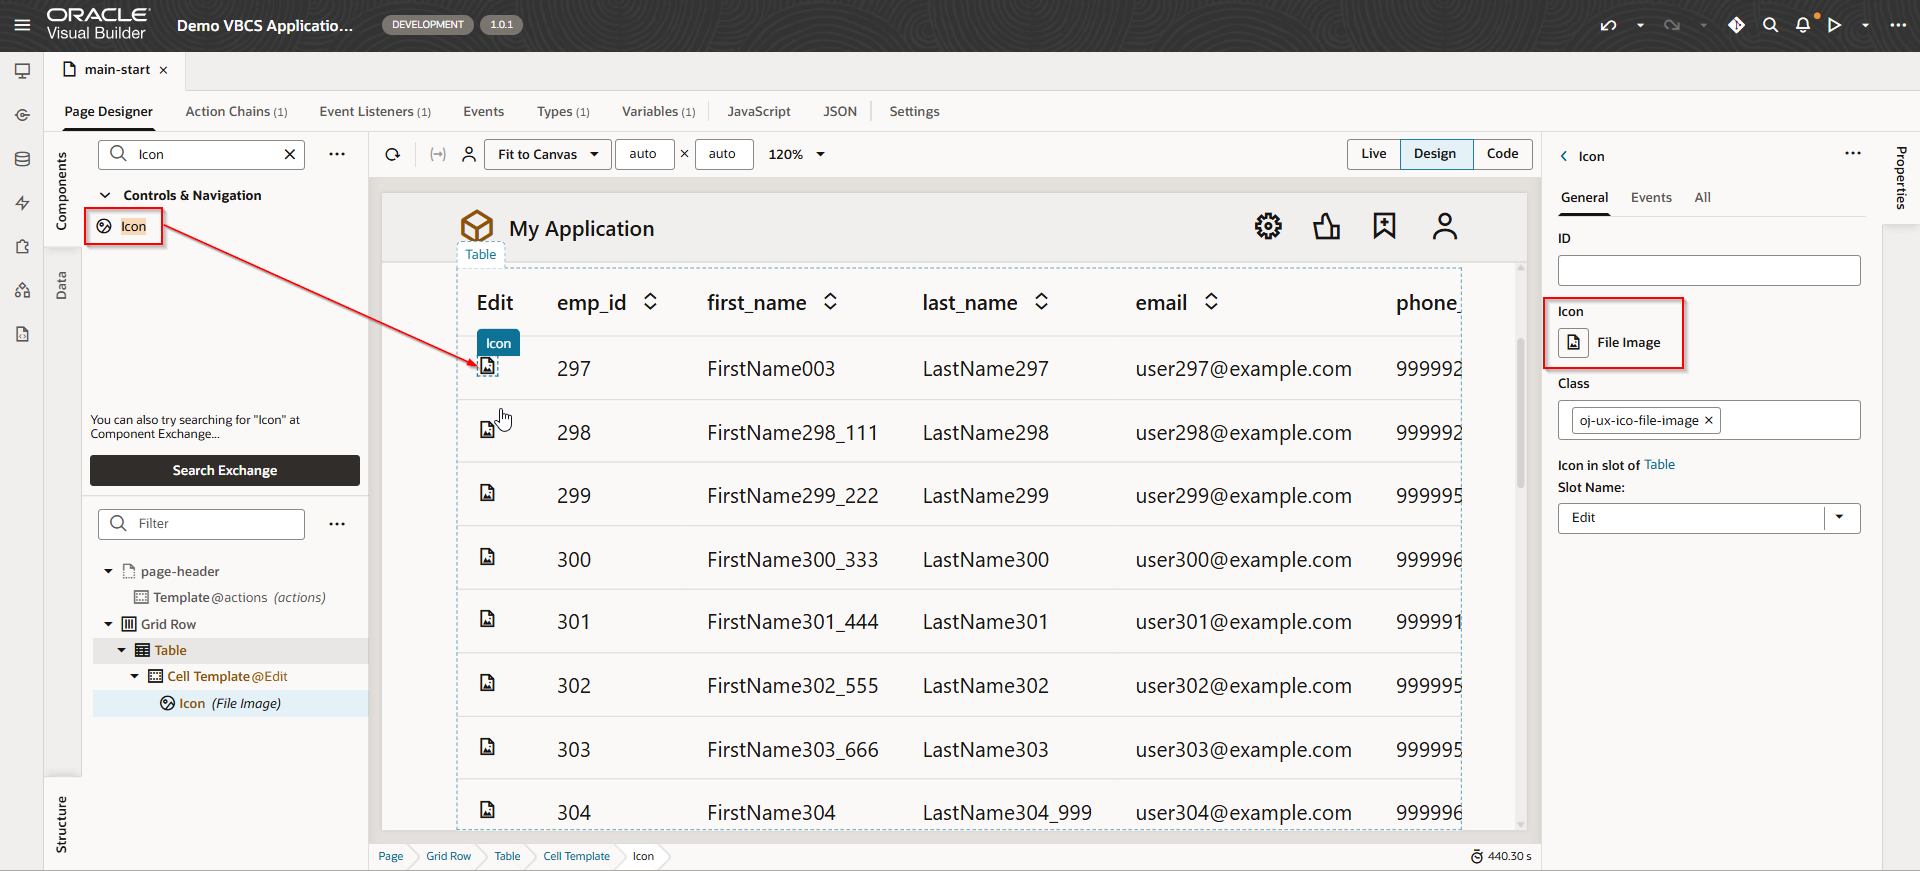
Click on File Image to add image to icon.
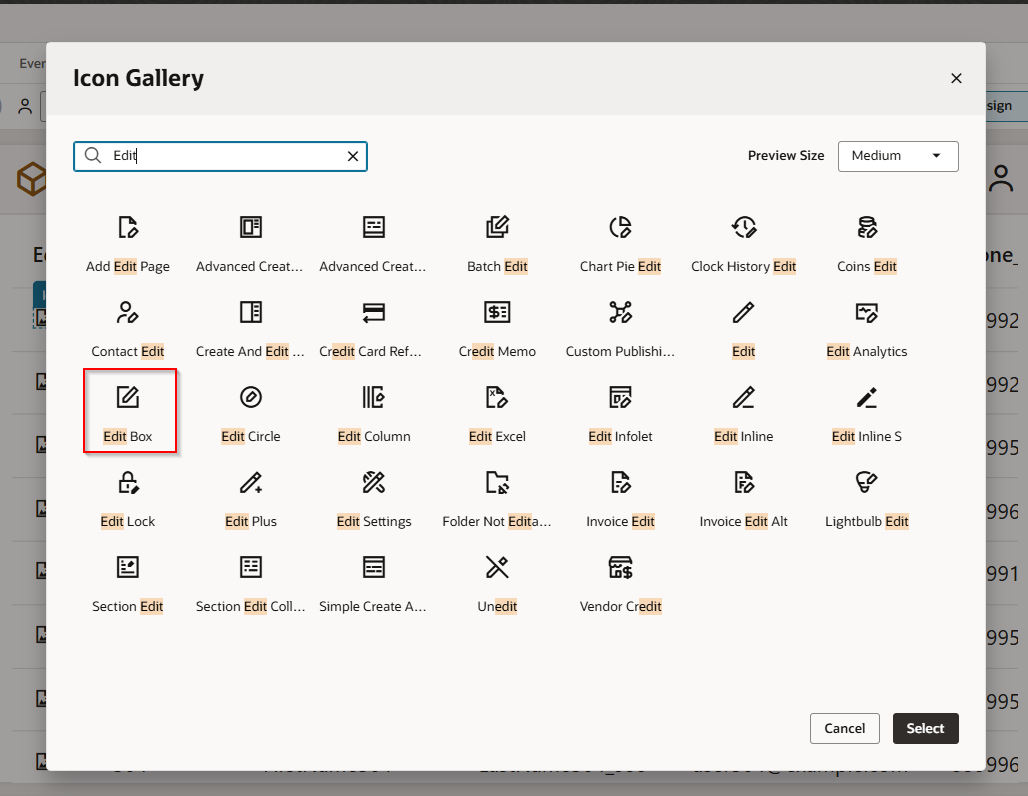
Click on Select.
Add dialog box to edit the selected row for table.
Navigate to Components —>Dialog
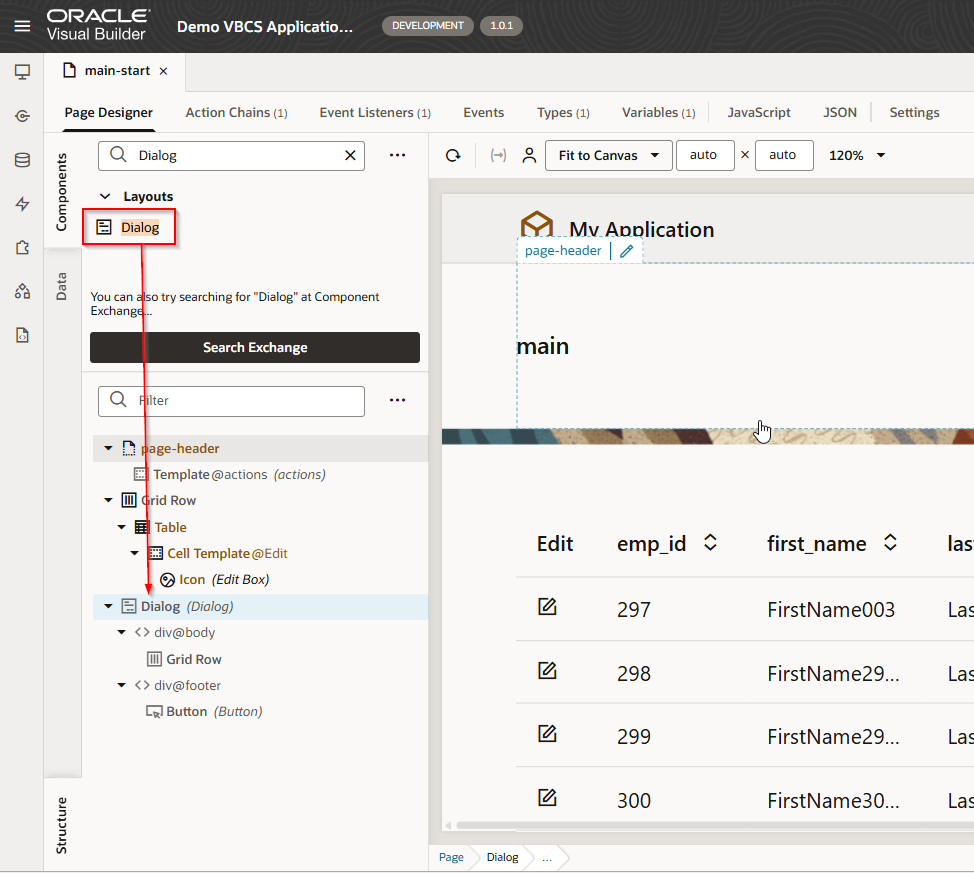
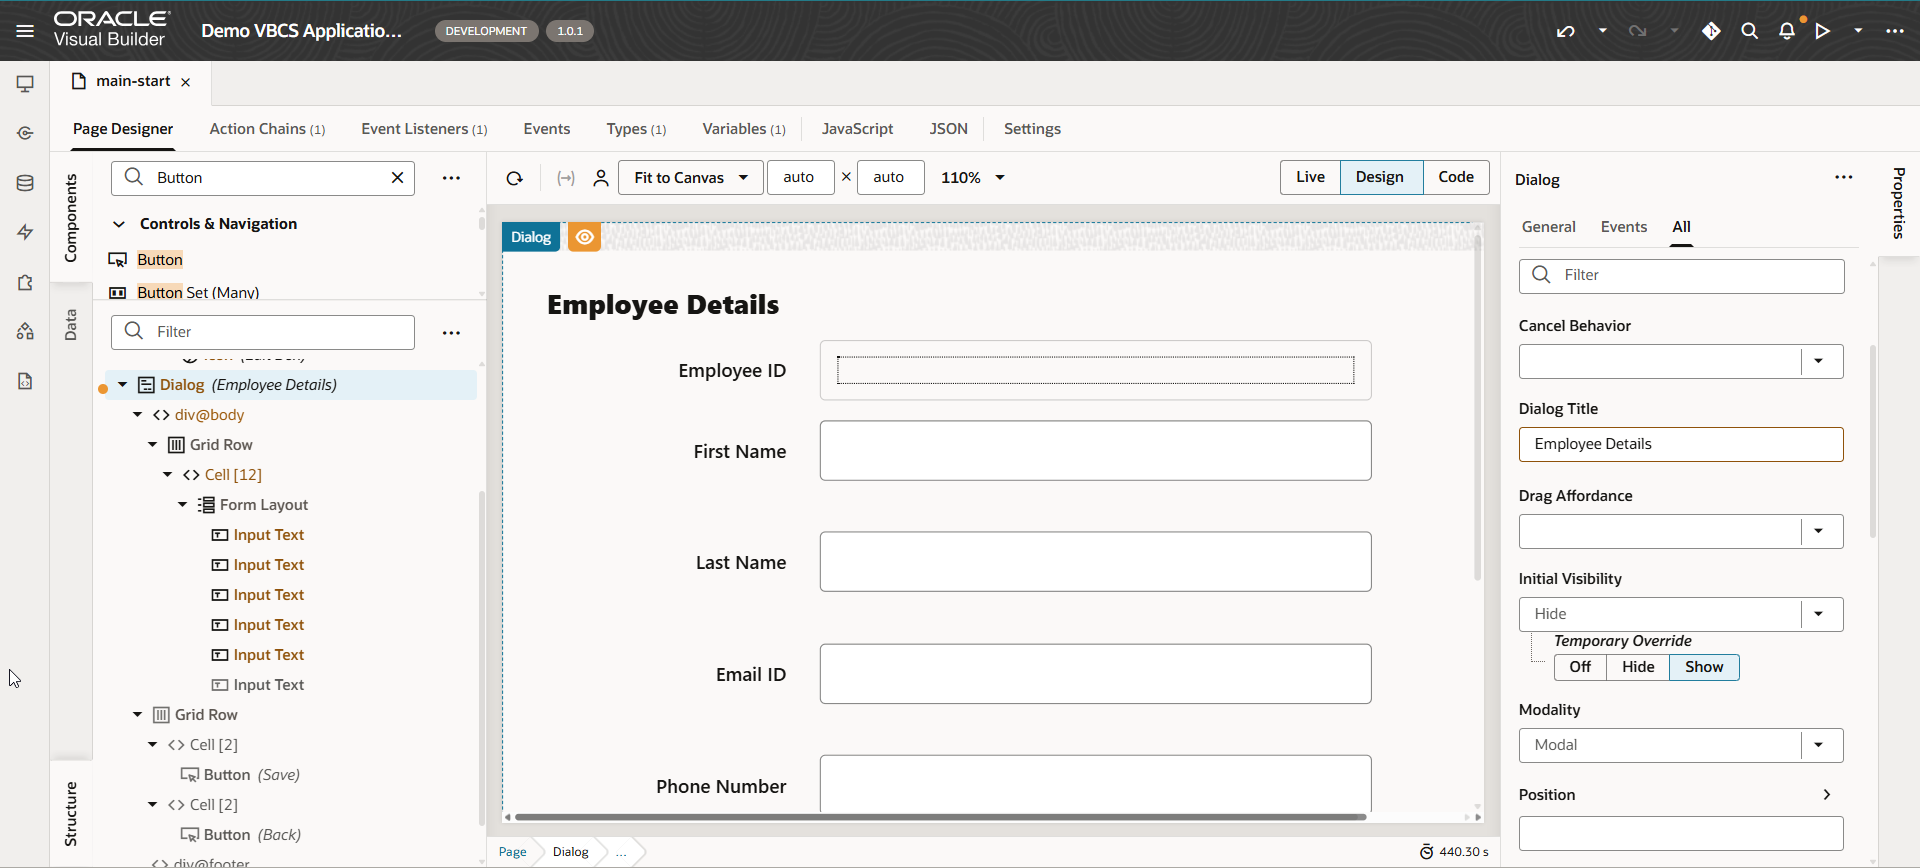
Set properties for dialog as:
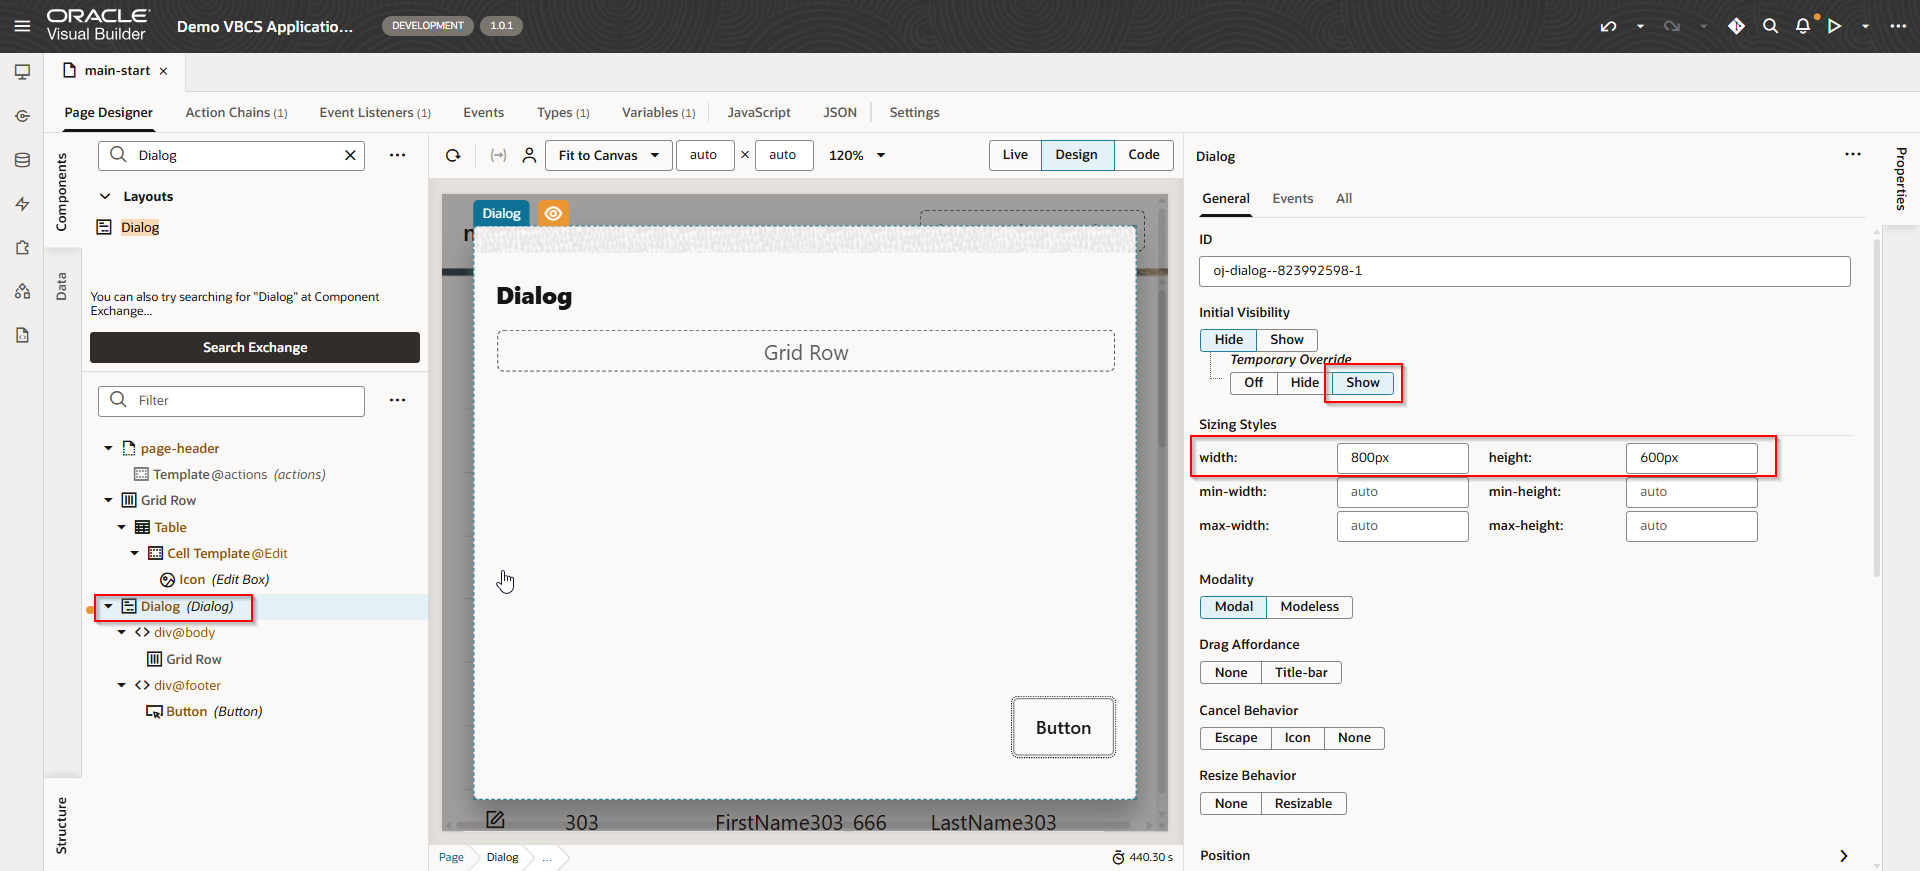
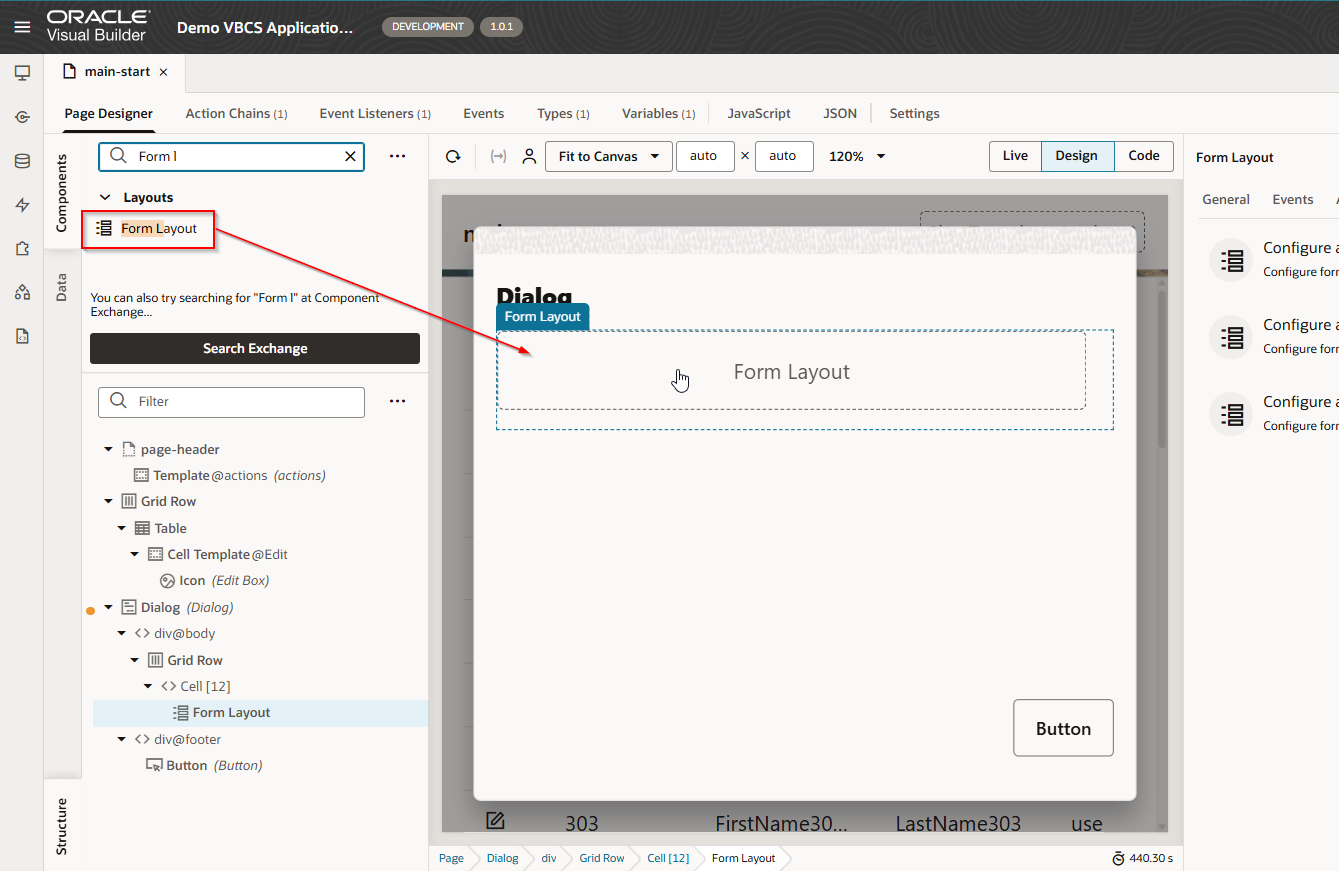
Drag and drop form Layout to dialog:
Add Input text for fields and two buttons as shown below.
Let us call this dialog box on edit icon click.
Create event on Icon.
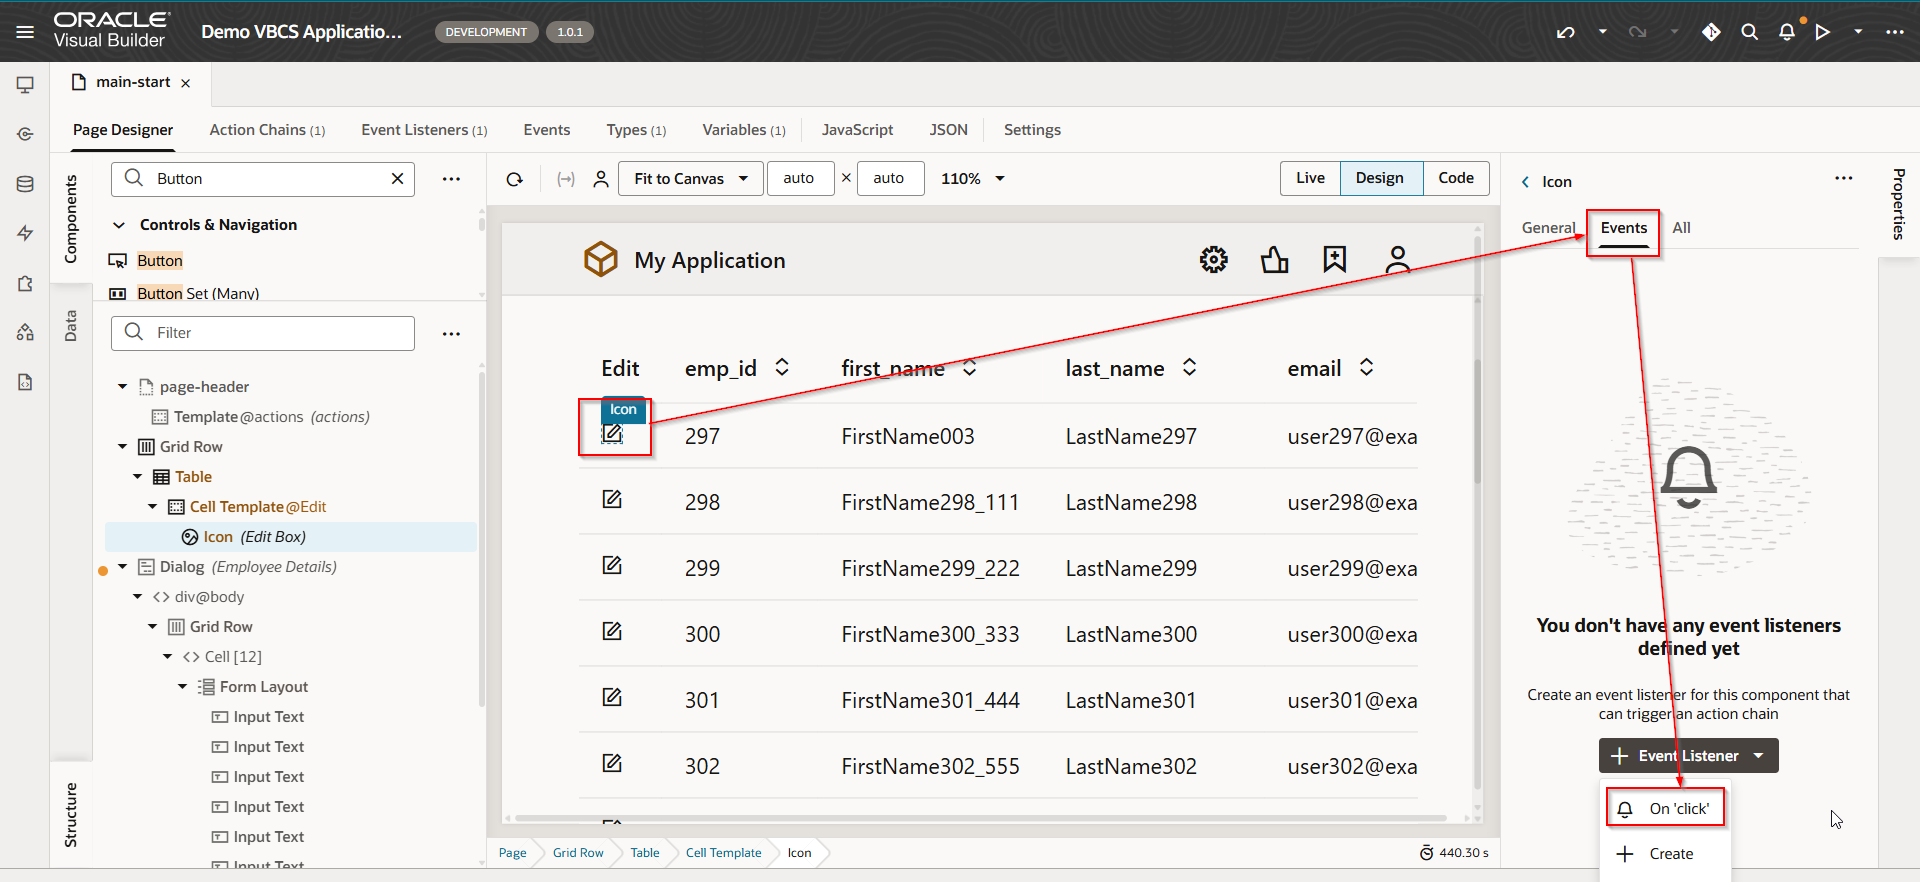
This will create new action chain.
Run the application.

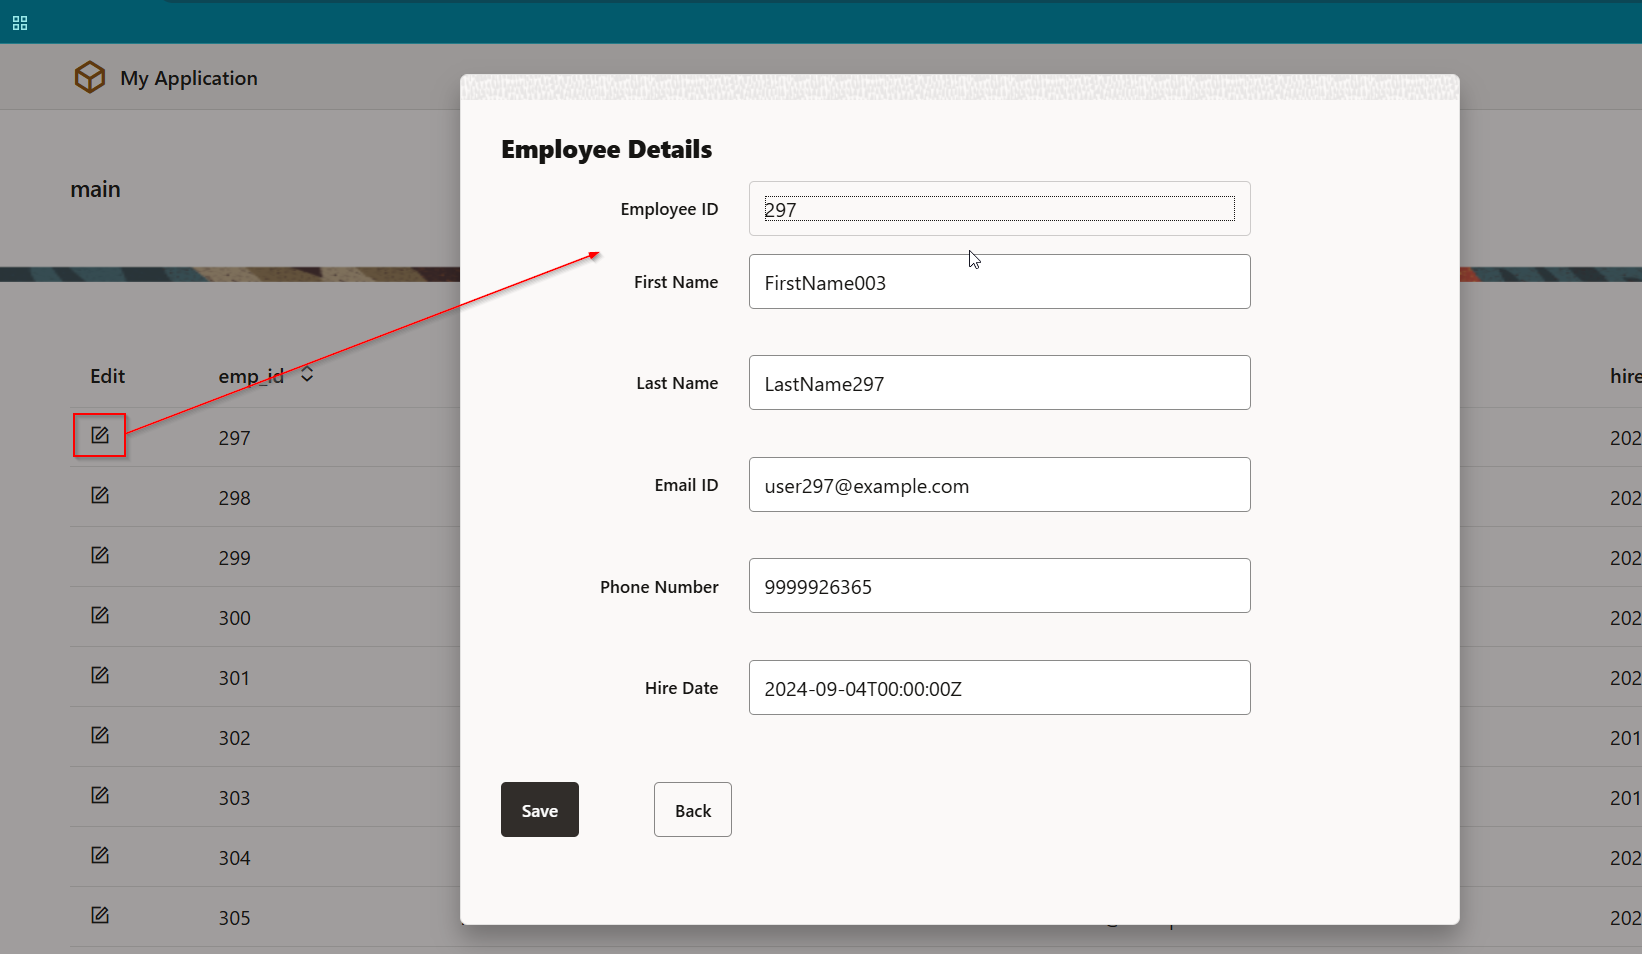
To populate data in dialog for selected record,
Create new Variable as shown below:
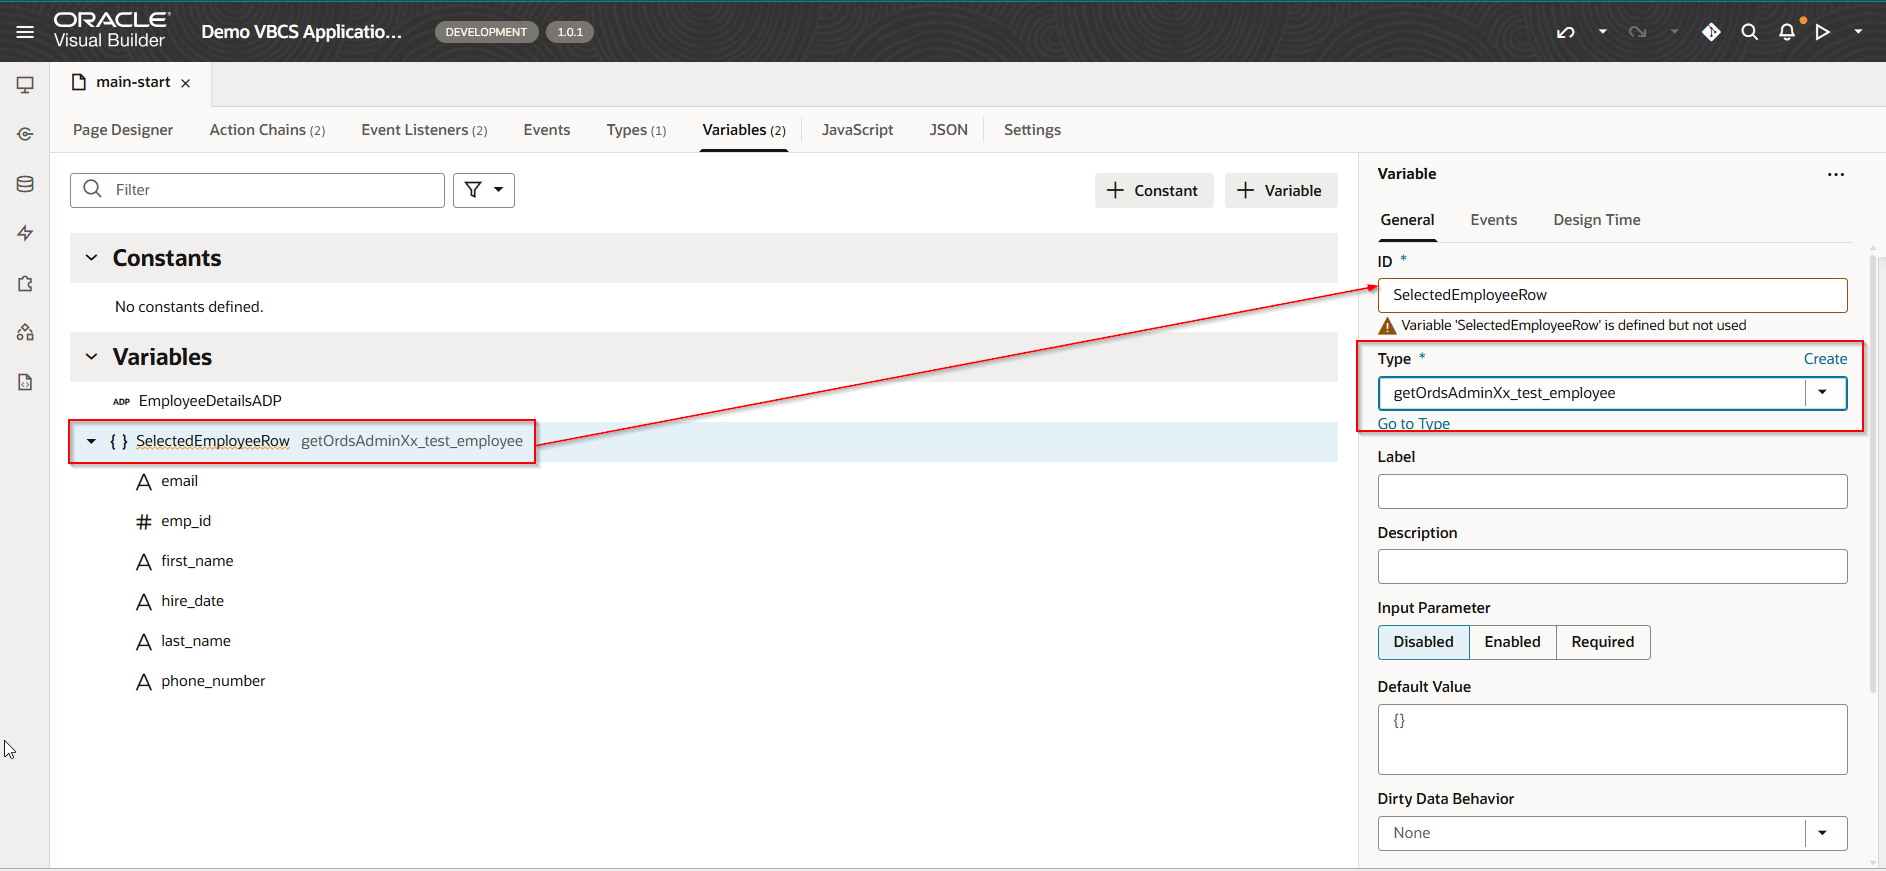
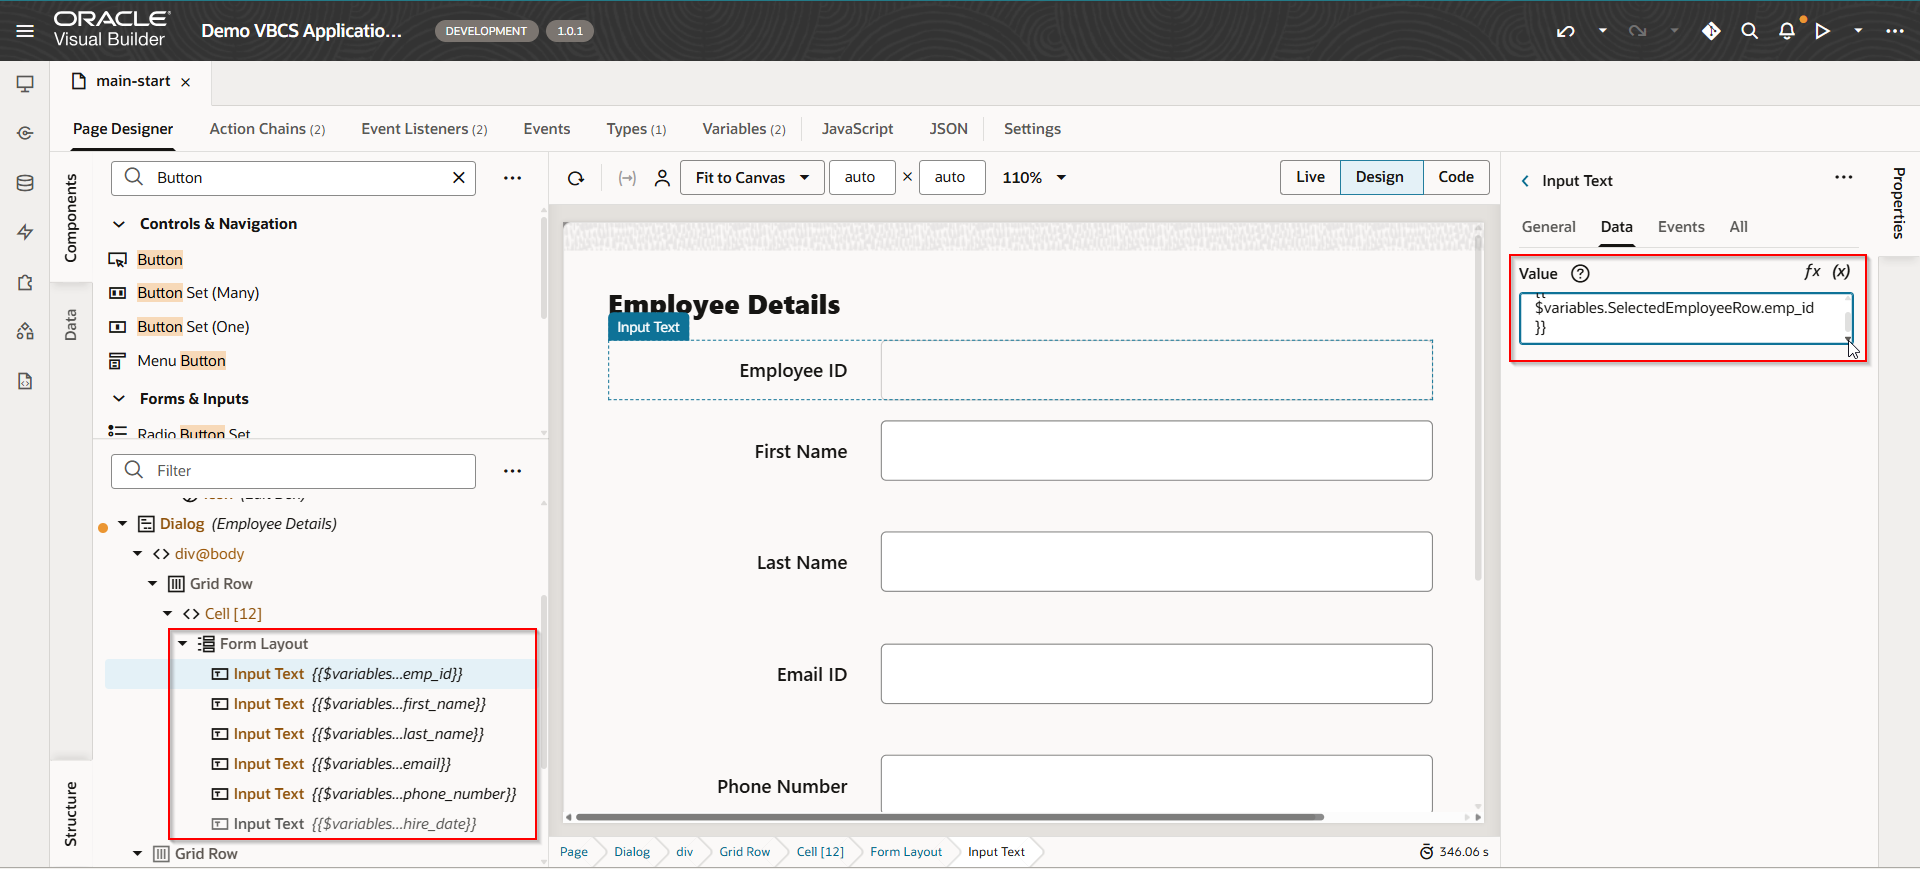
Navigate to dialog box and assign this variable to Fields on dialog.
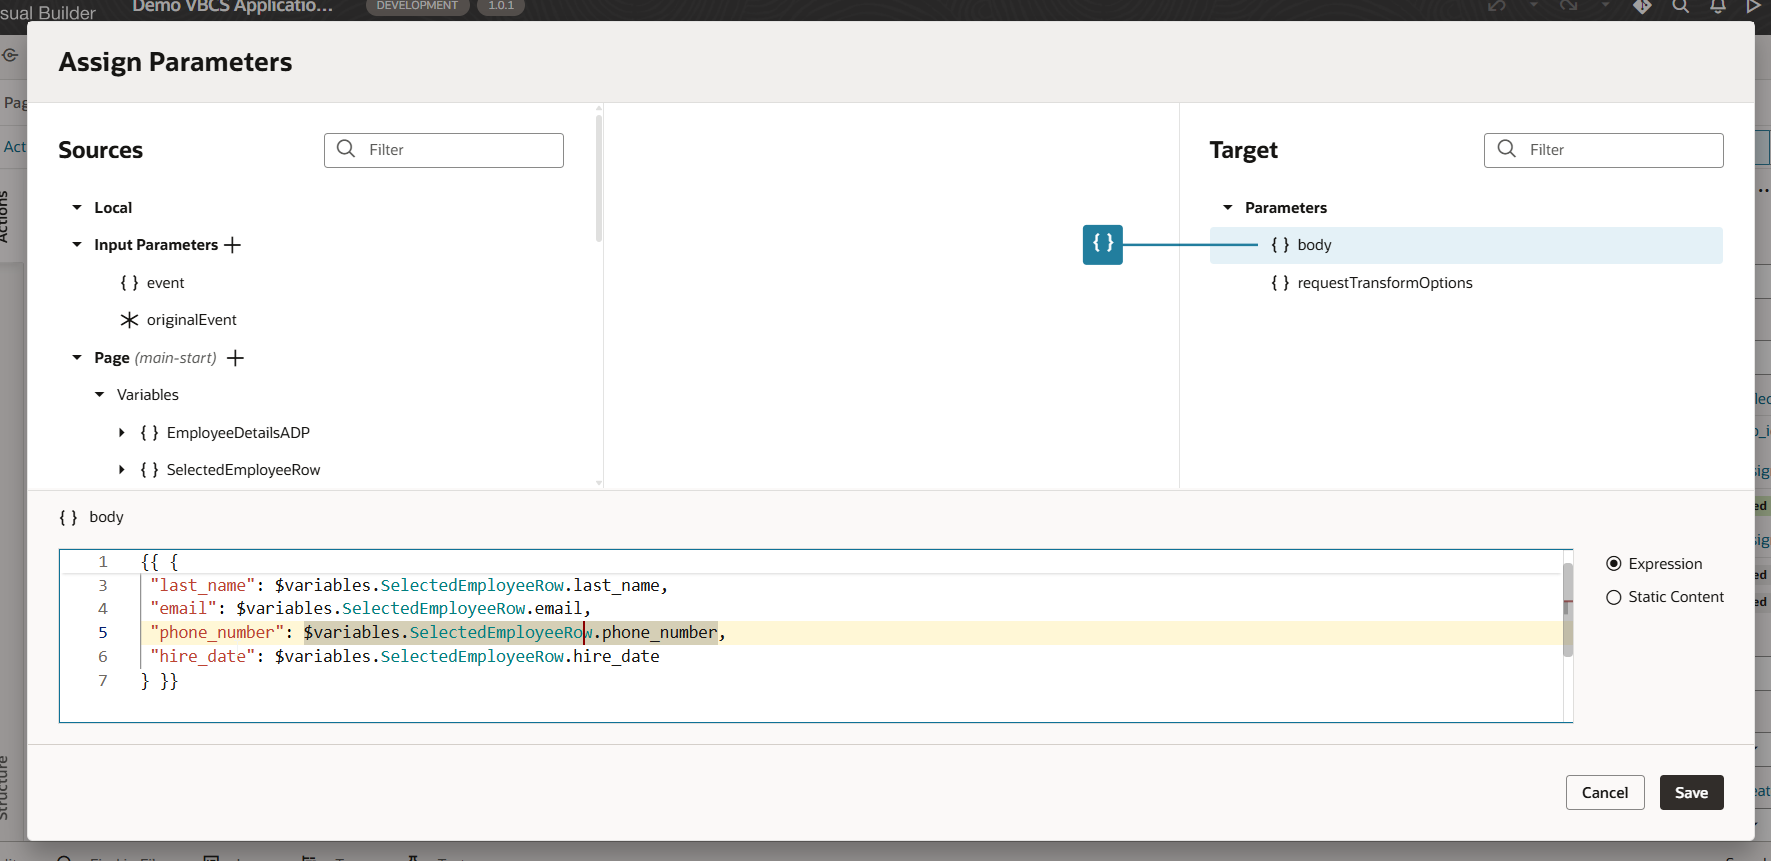
Navigate to dialog and assign data for each field as below shown:
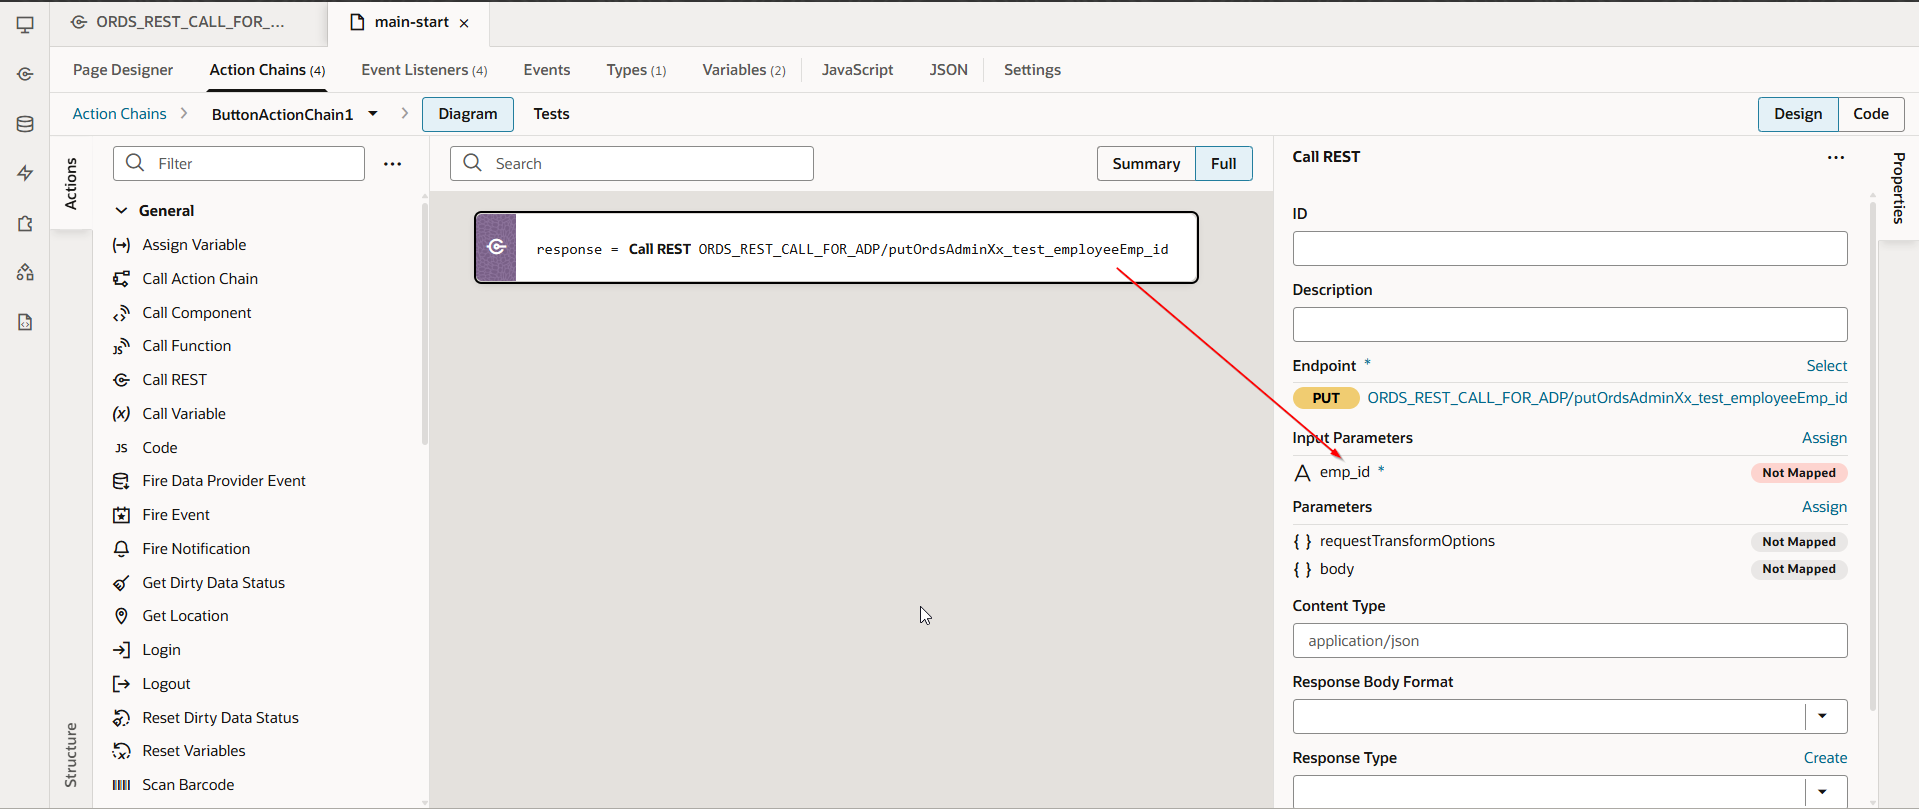
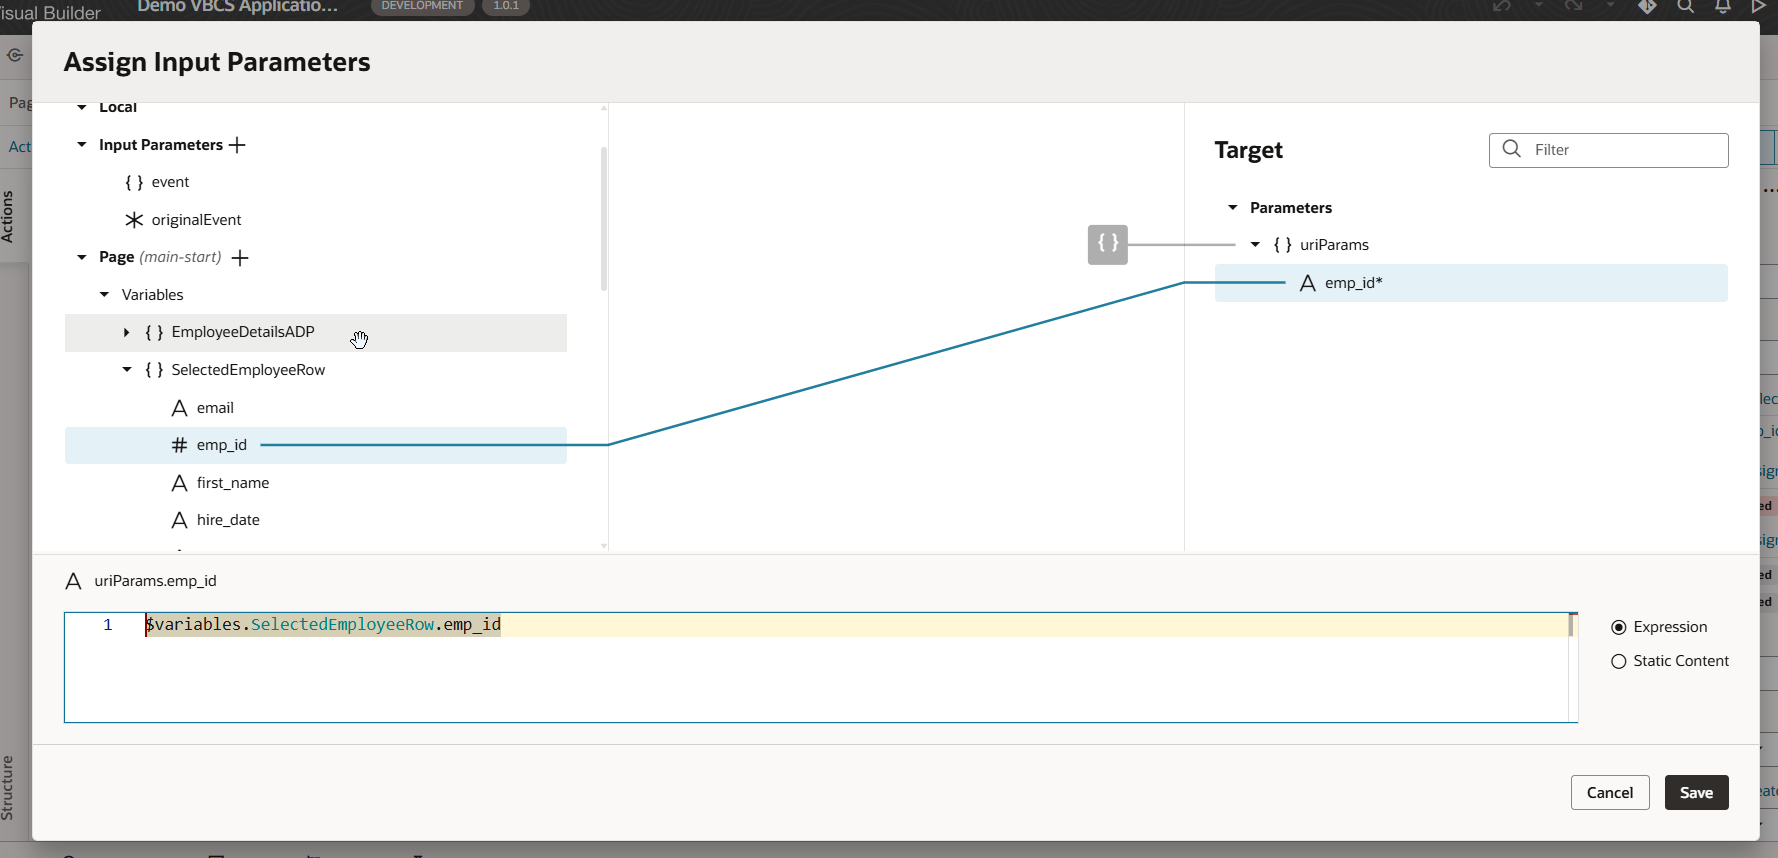
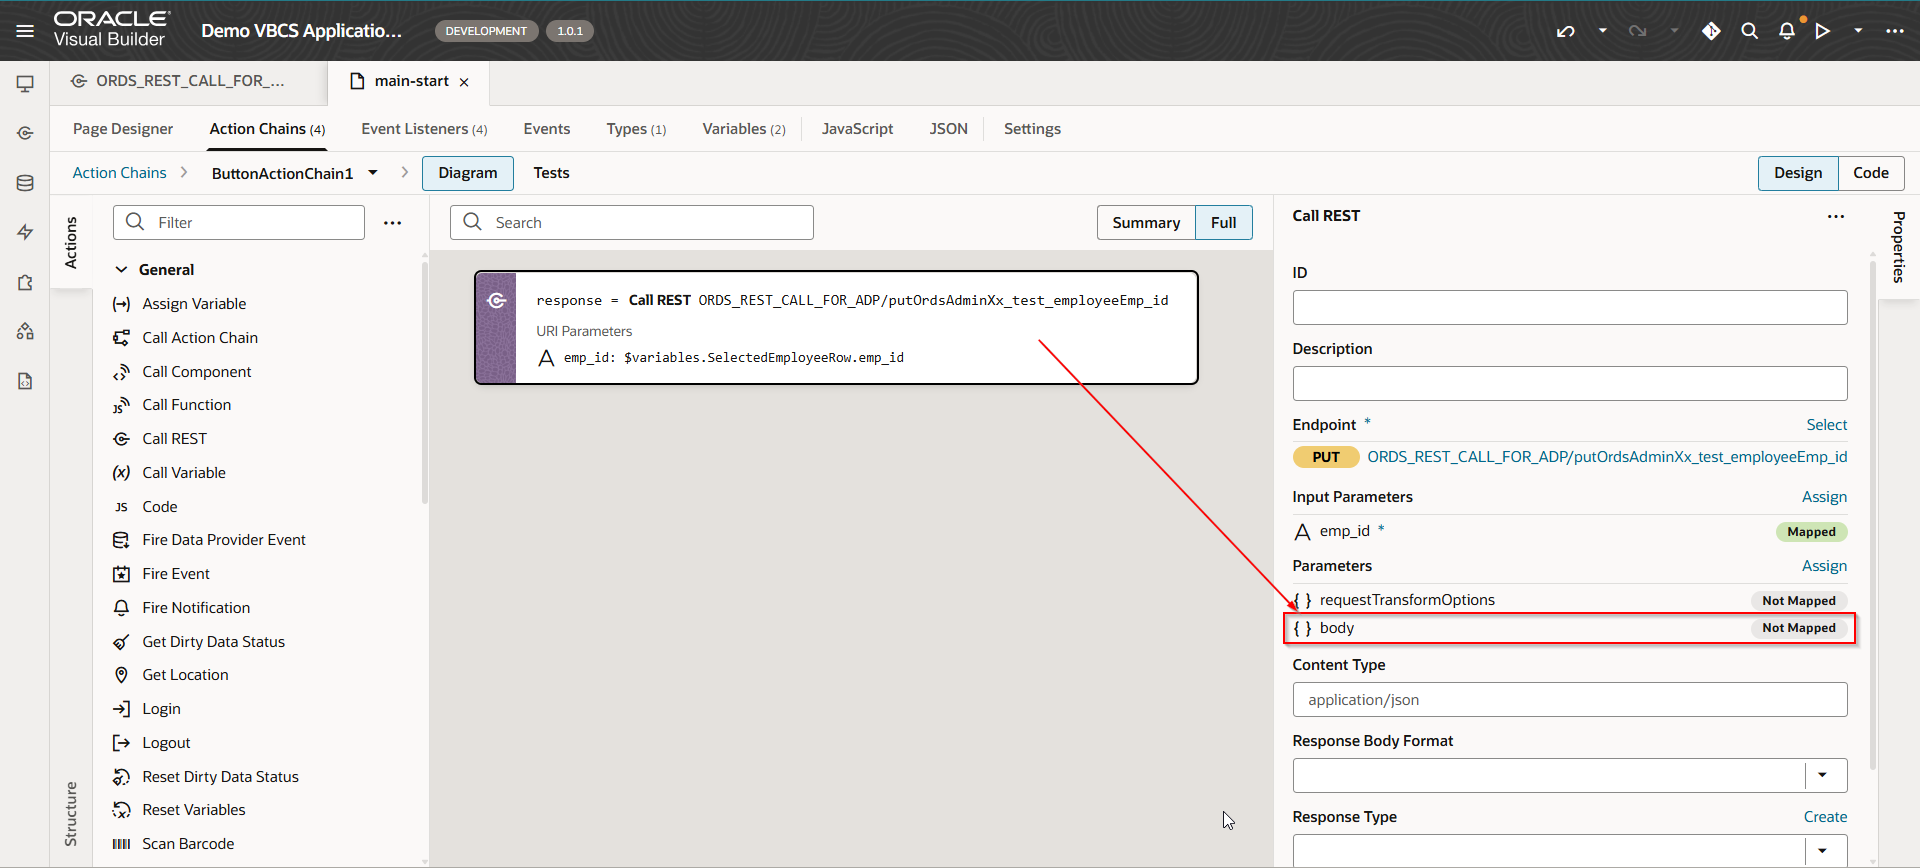
To populate SelectedEmployeeRow variable, add new endpoint for service connection as shown below with emp_id as path parameter:

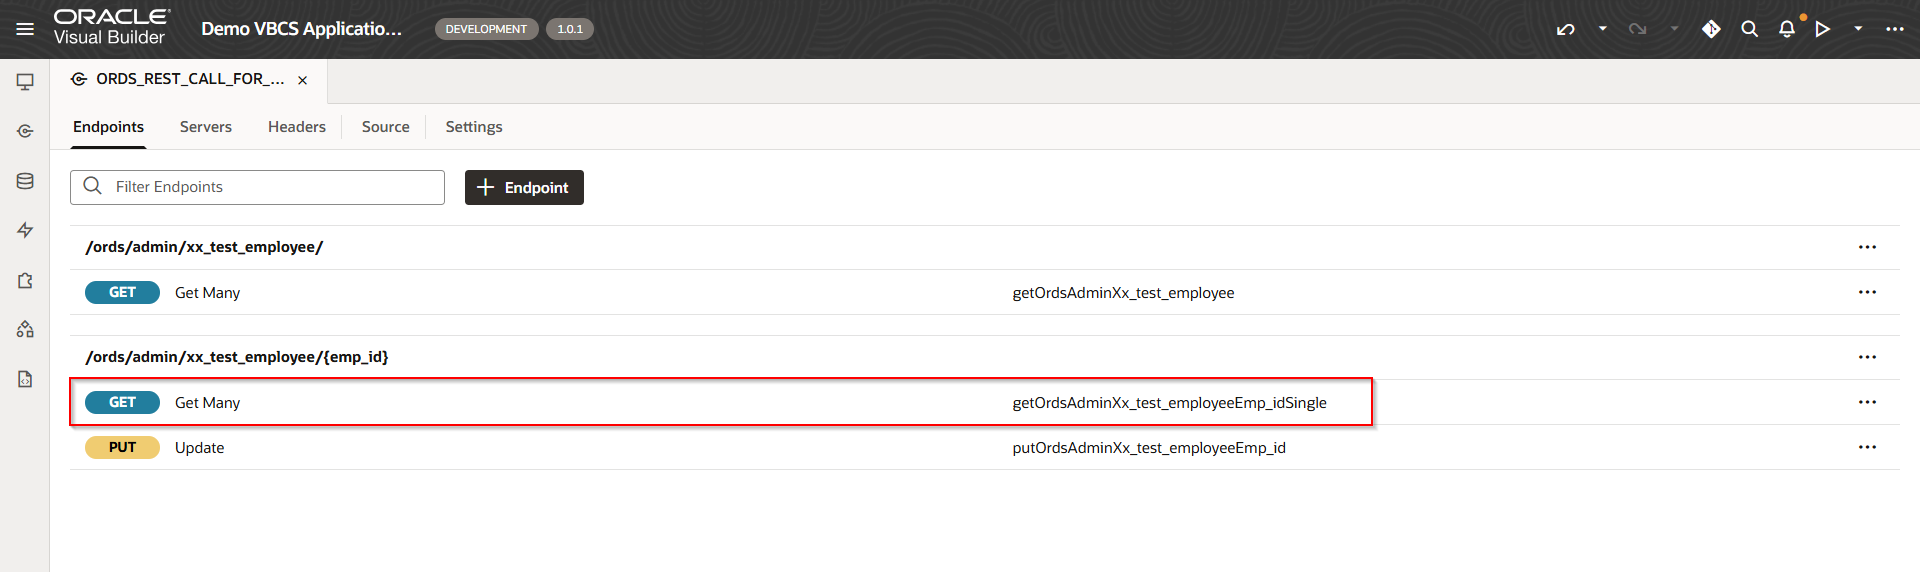
Call this endpoint when we click on Edit icon and pass Key (Emp_id) as path parameter and populate SelectedEmployeeRow with response.
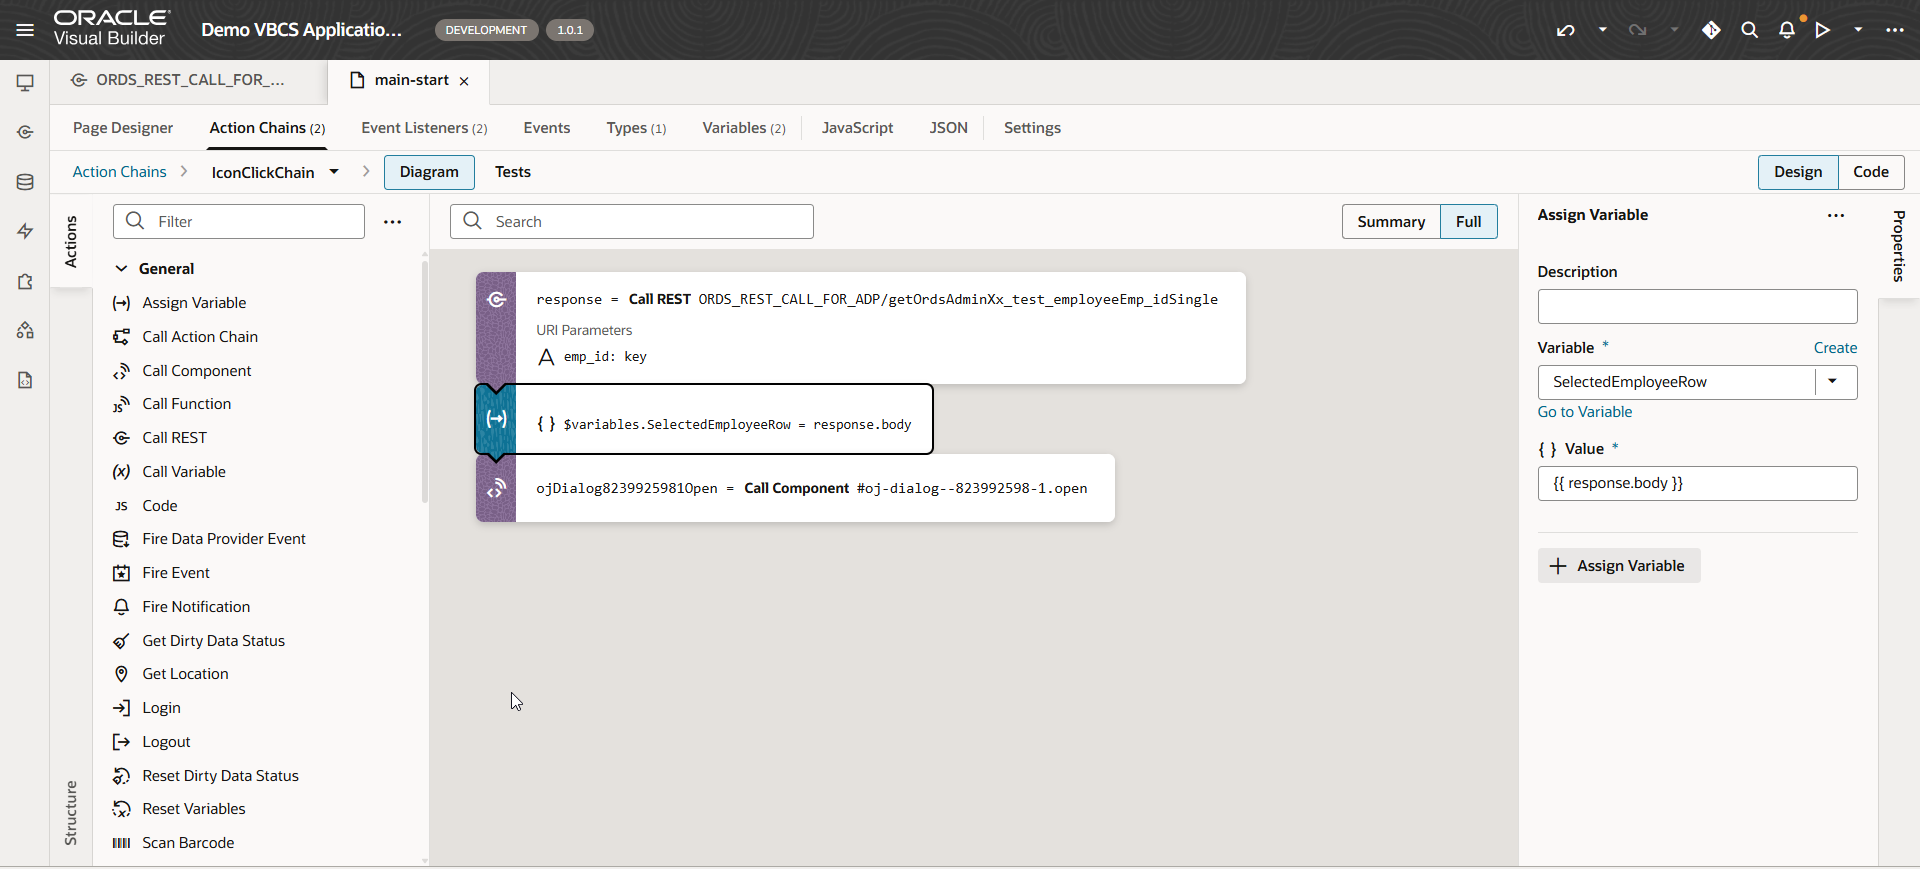
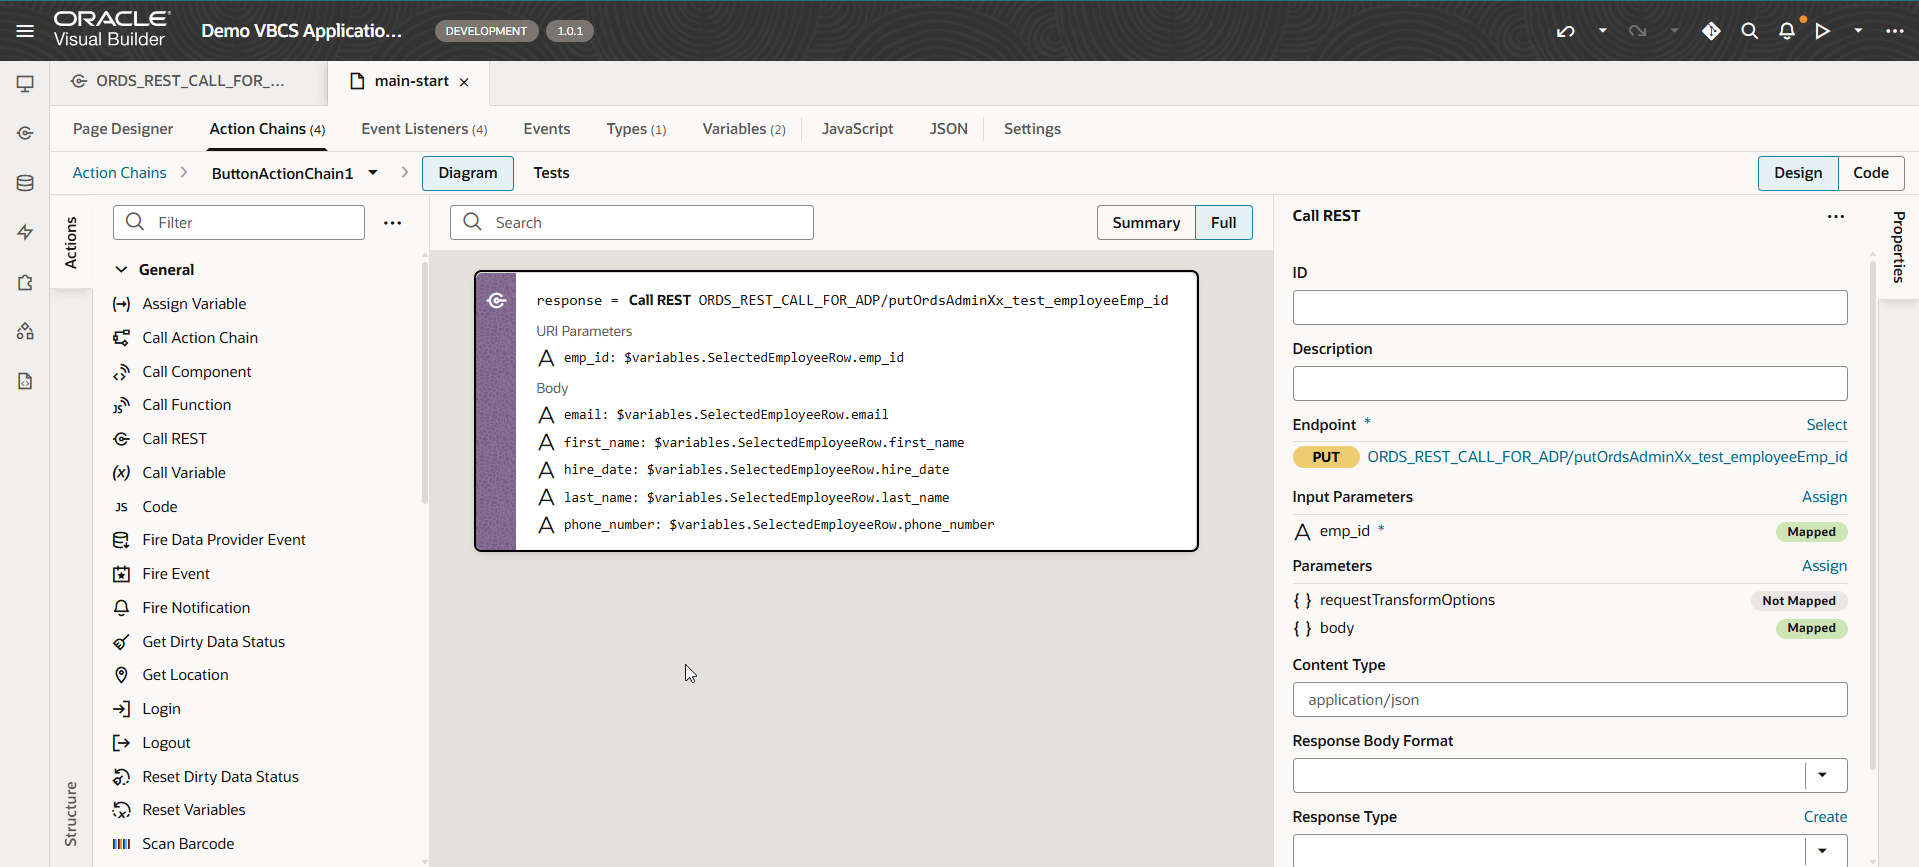
Navigate to action chain for Icon.
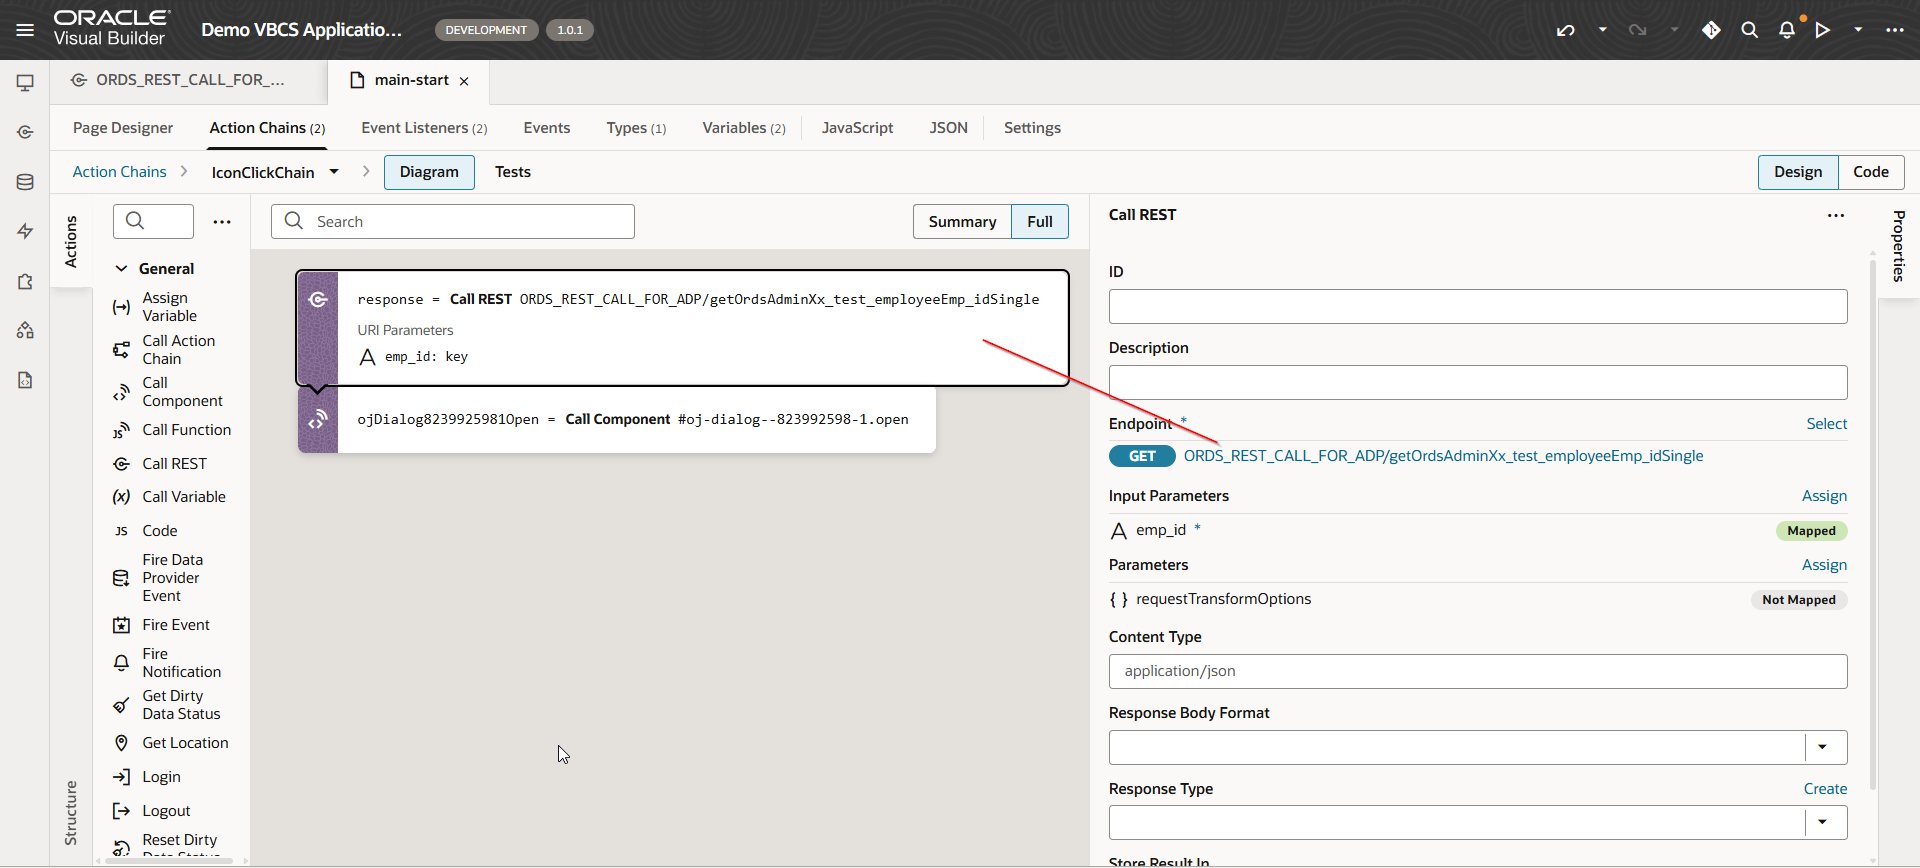
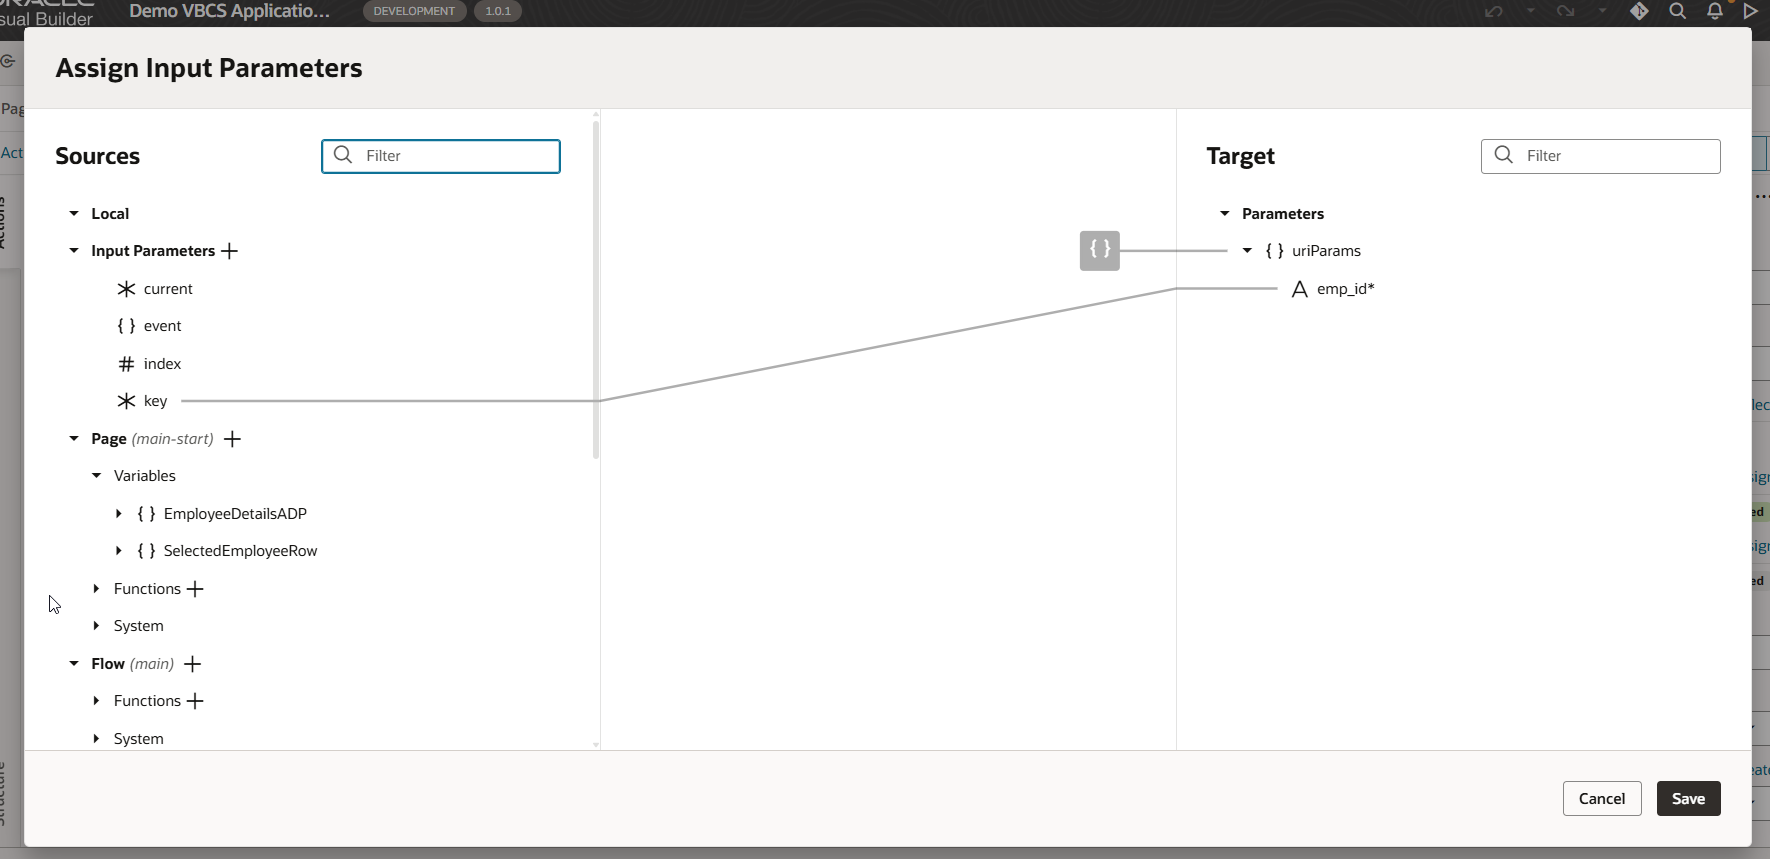
Assign response to variable- SelectedEmployeeRow.
Run the application
Add functionality to Back Button:
Navigate to Back Button —>Events —>Event Listener —> On ‘ojAction’
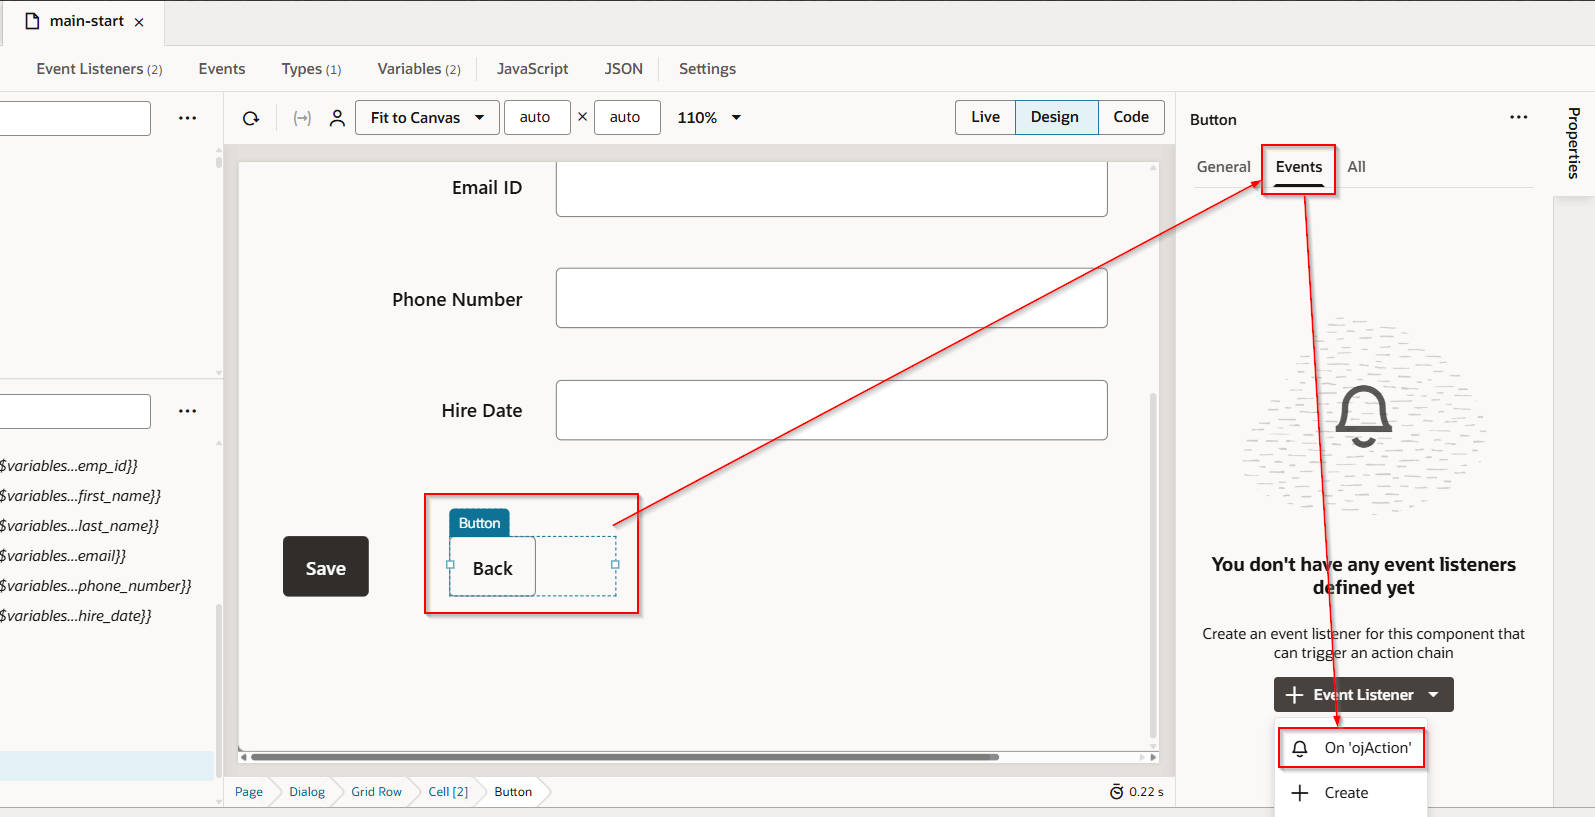
This will create new action chain.
Add functionality to Save Button:

This will create action chain.

Click on Select.
Click Save.
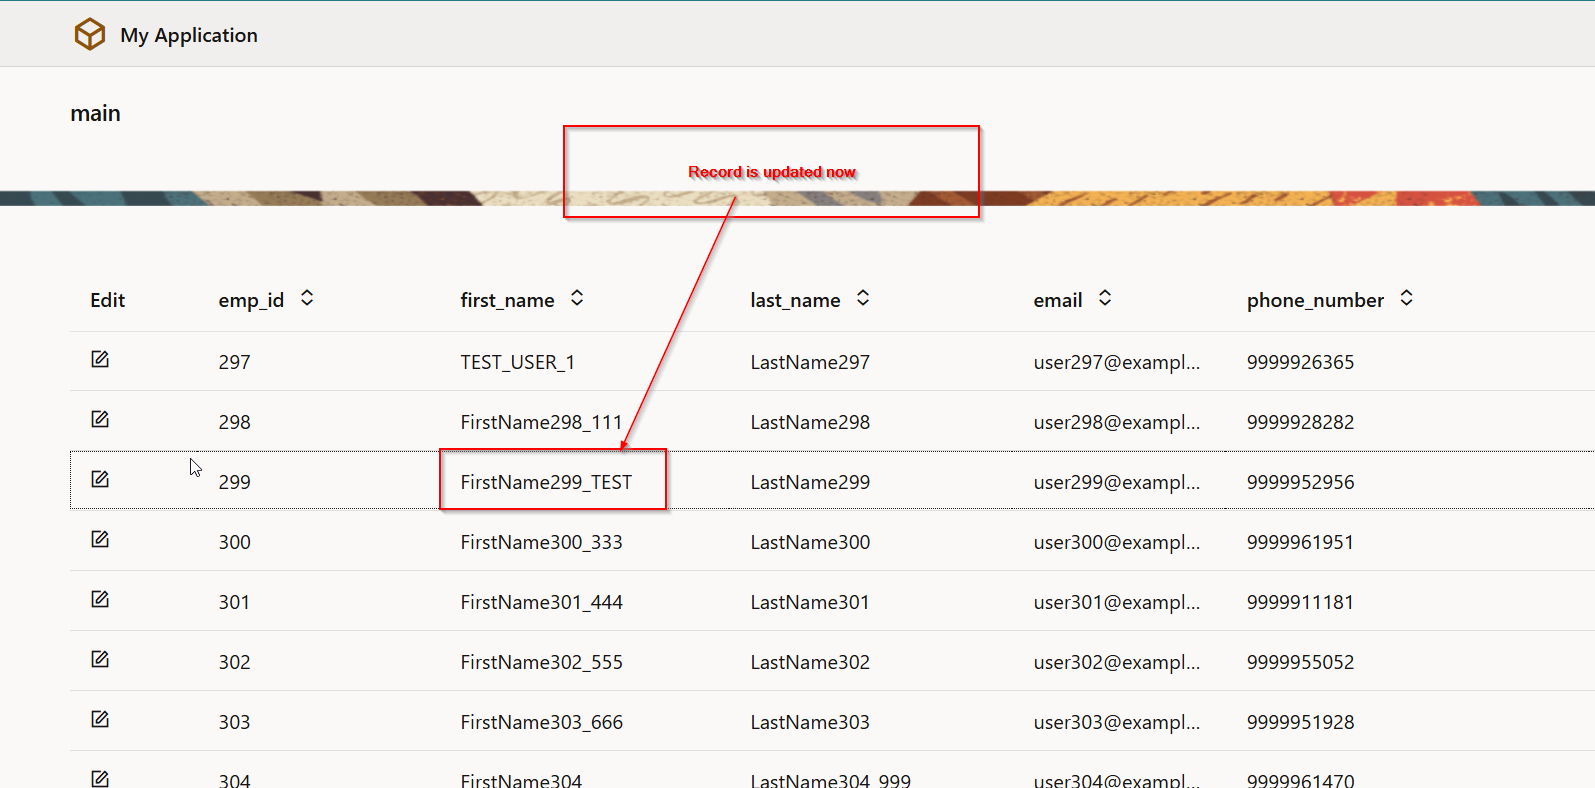
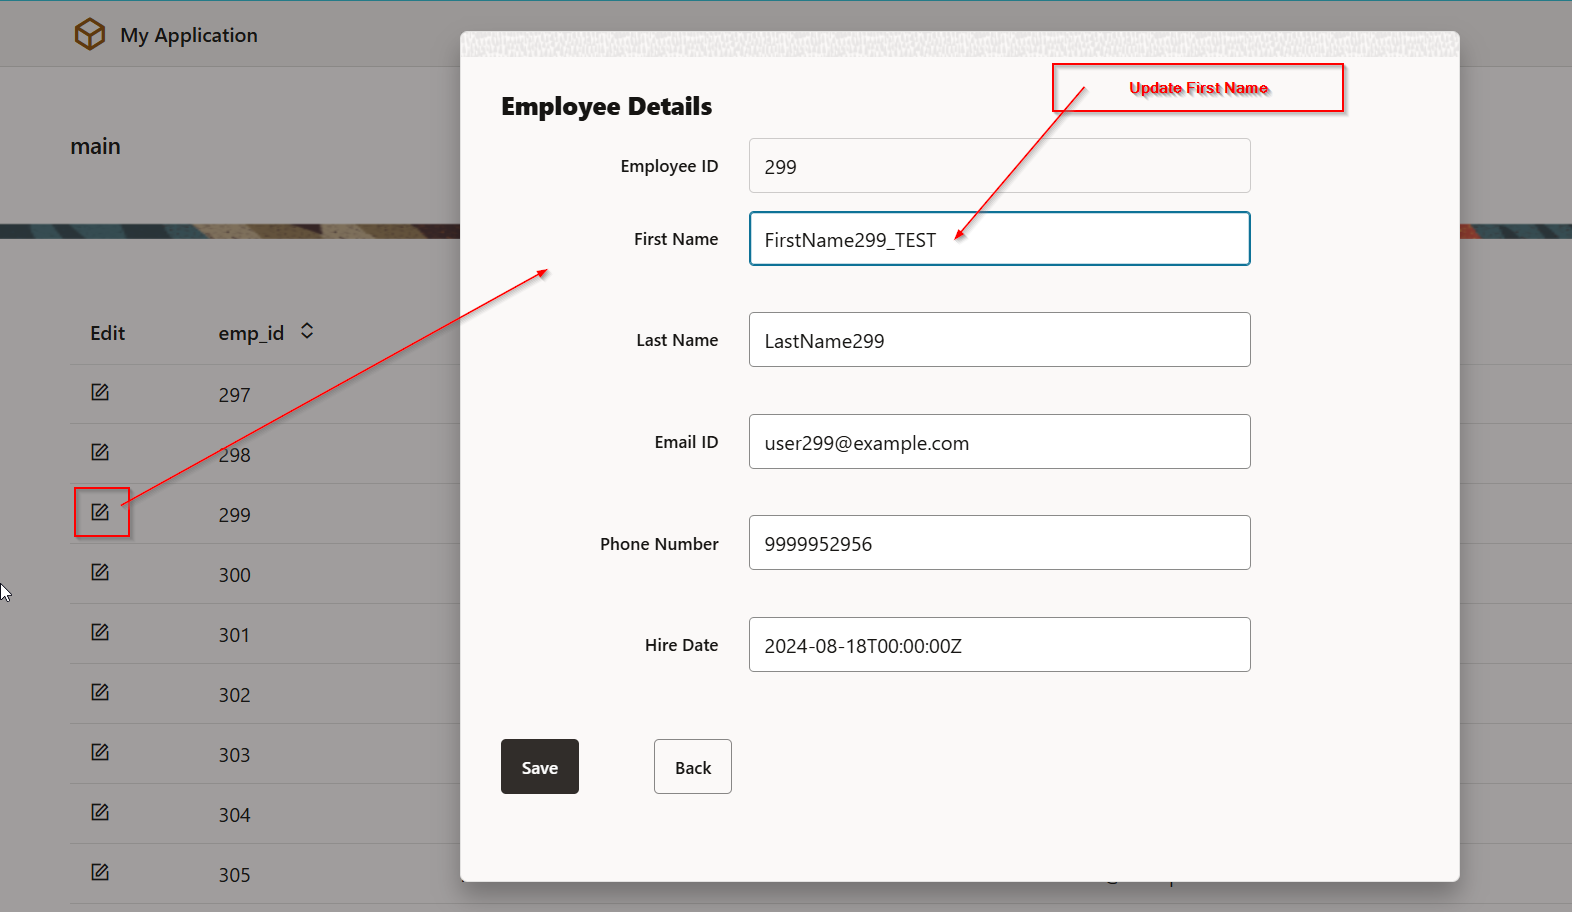
Run the application.
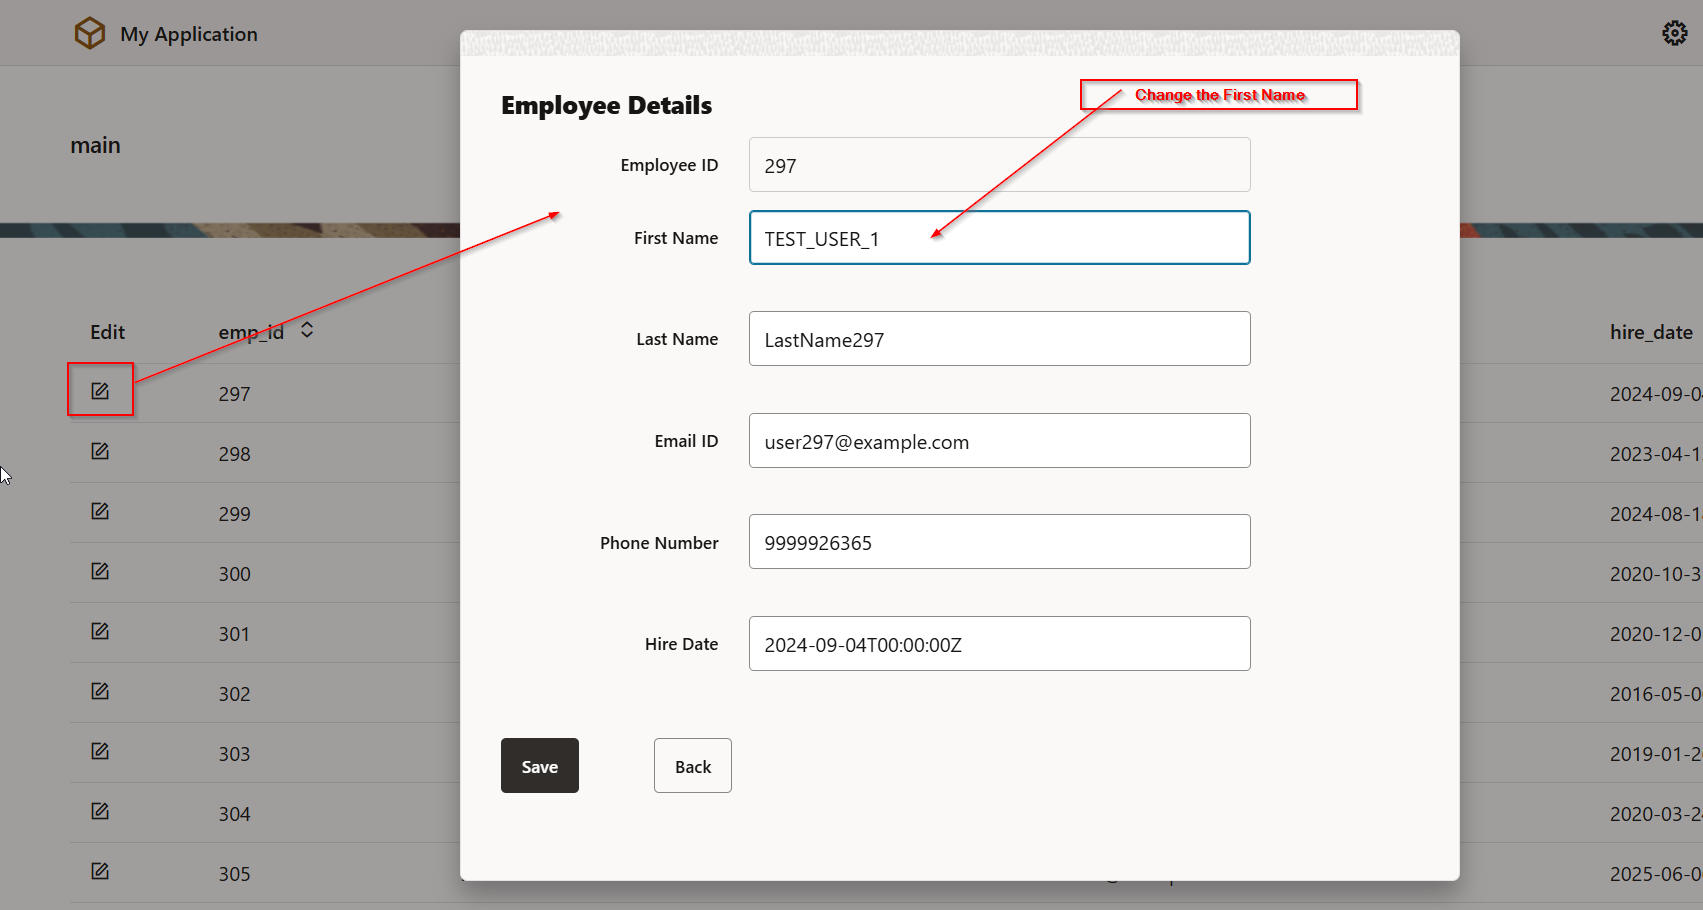
Click on Save.
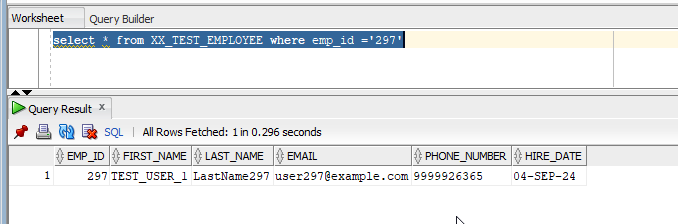
Records are updated successfully.
Now Click on Back Button.
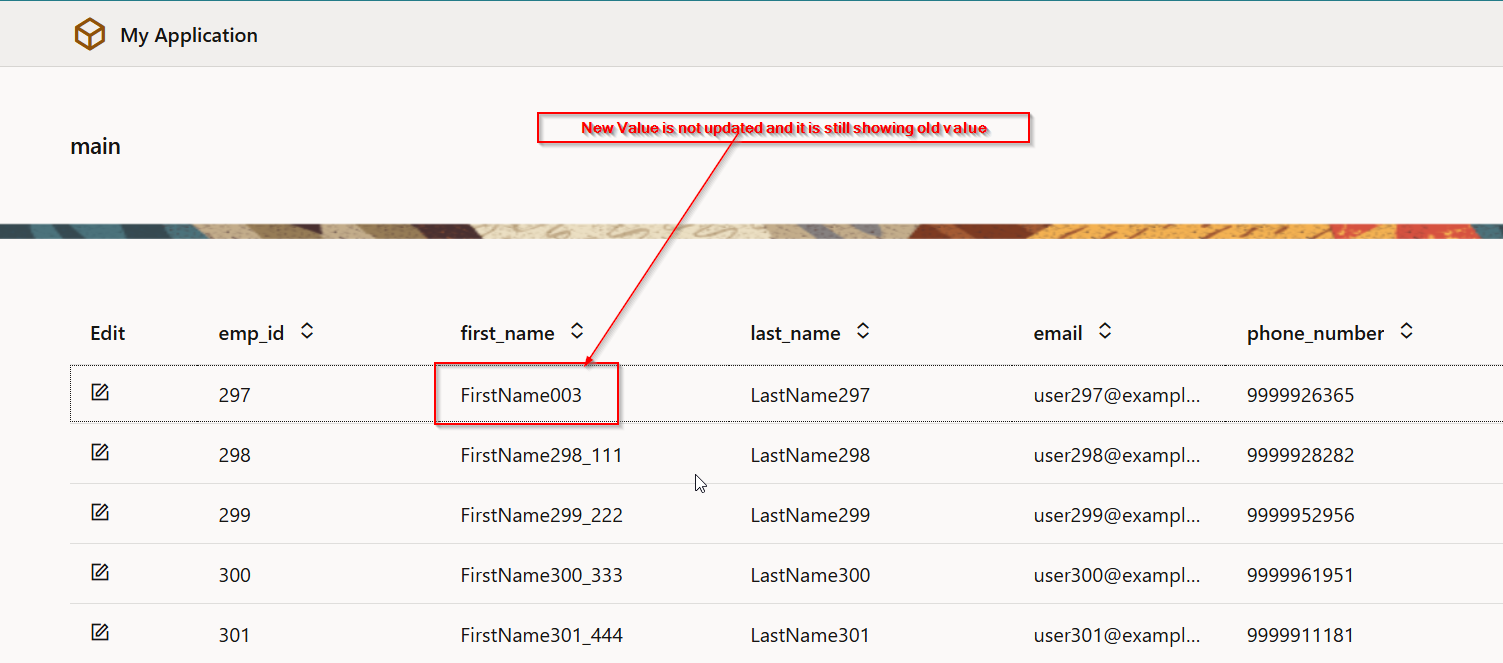
When we click on save button, below functionality should be implemented:
- It will update record in database table via ORDS REST service connection.
- Dialog box will be closed, and ADP variable (EmployeeDetailsADP) should be refreshed, and it should show updated records.
To implement this, let us create new Custom event at page level.
Navigate to Events —>Custom Event.

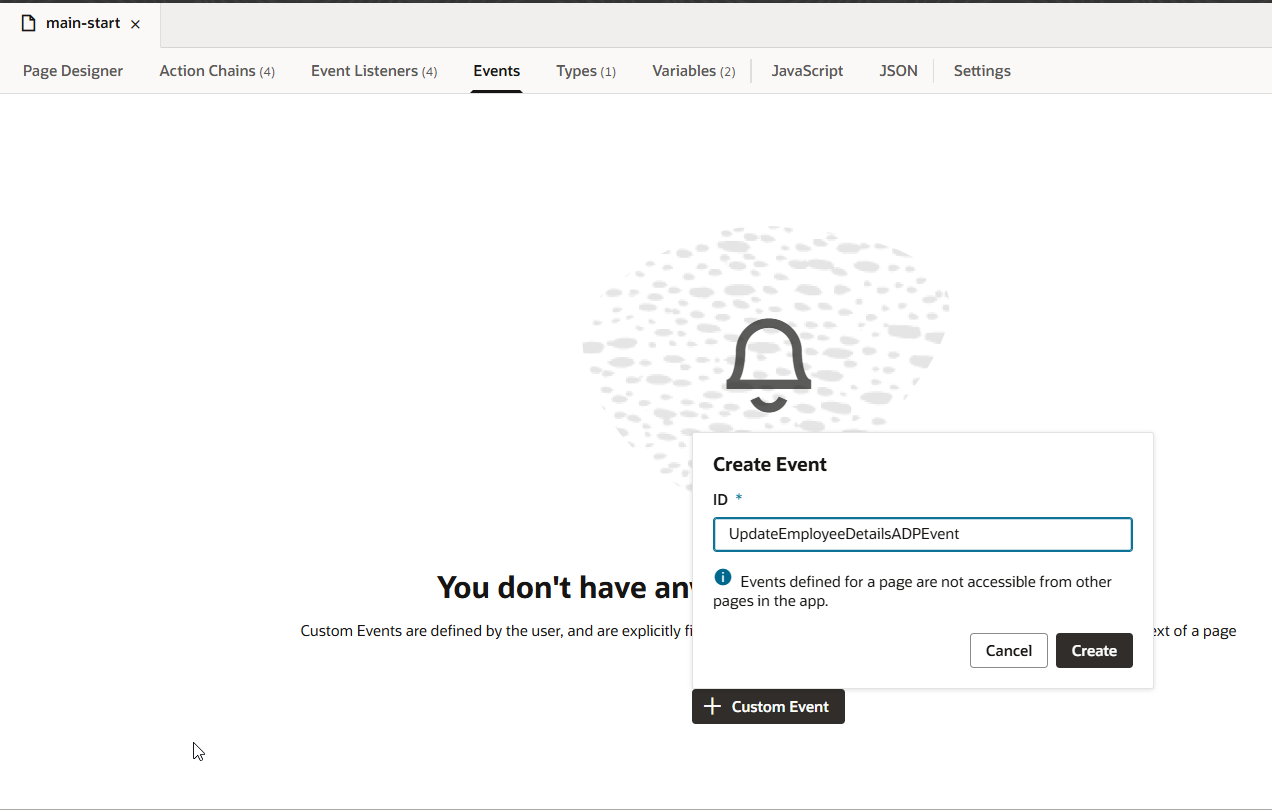
Click on Create.
Navigate to Event Listeners —>Event Listener
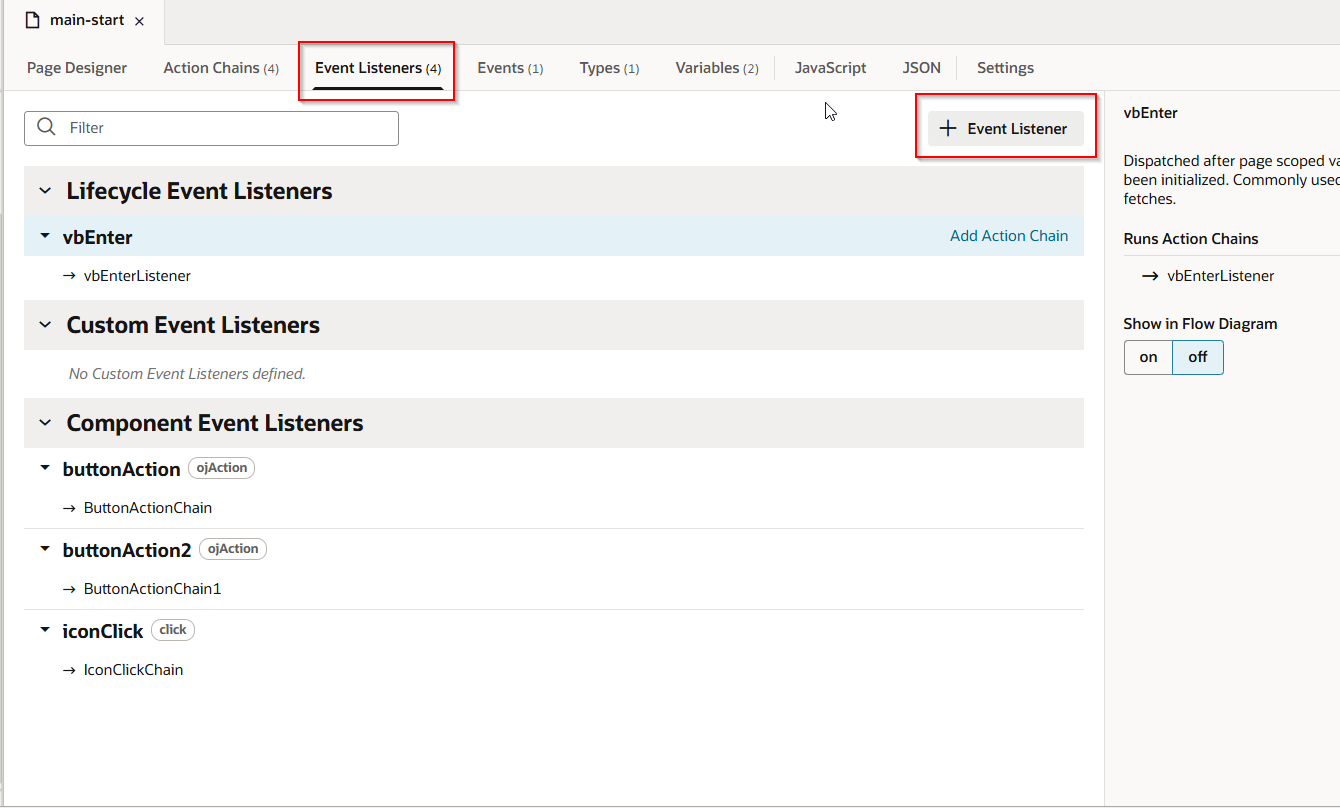
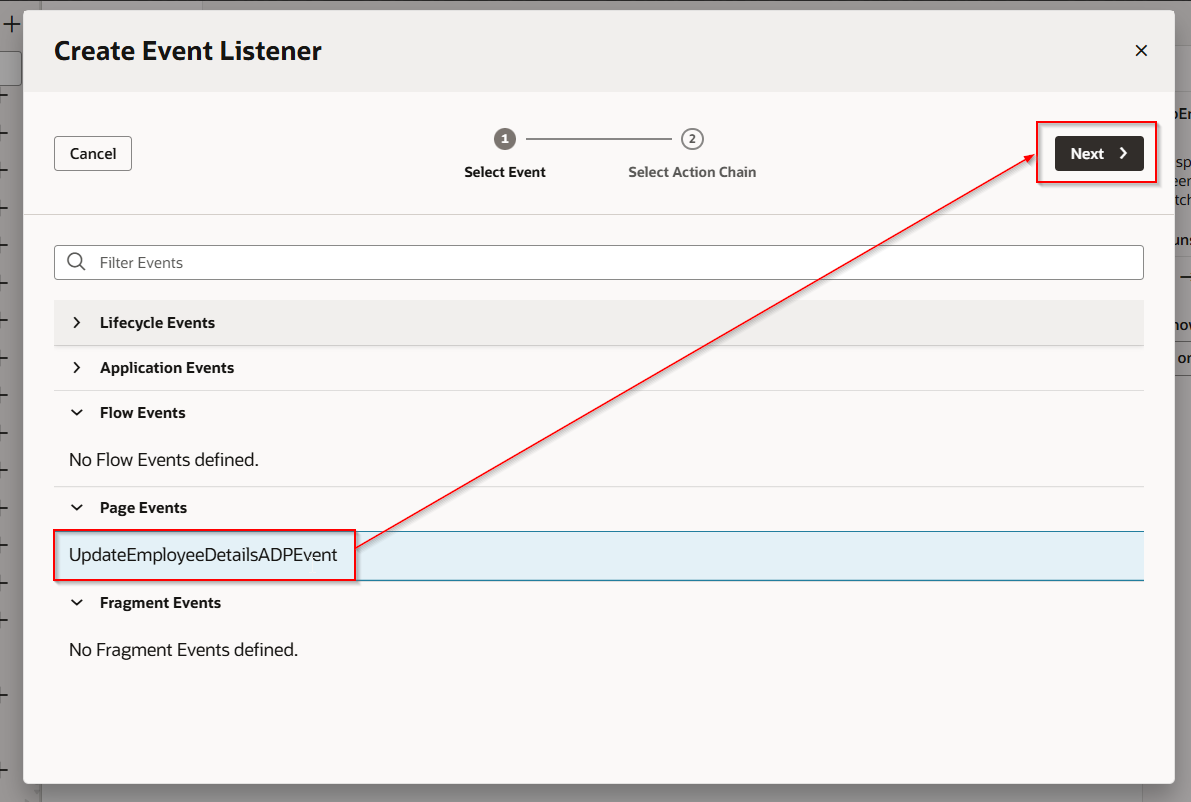
Select event which is created in earlier step and click Next.
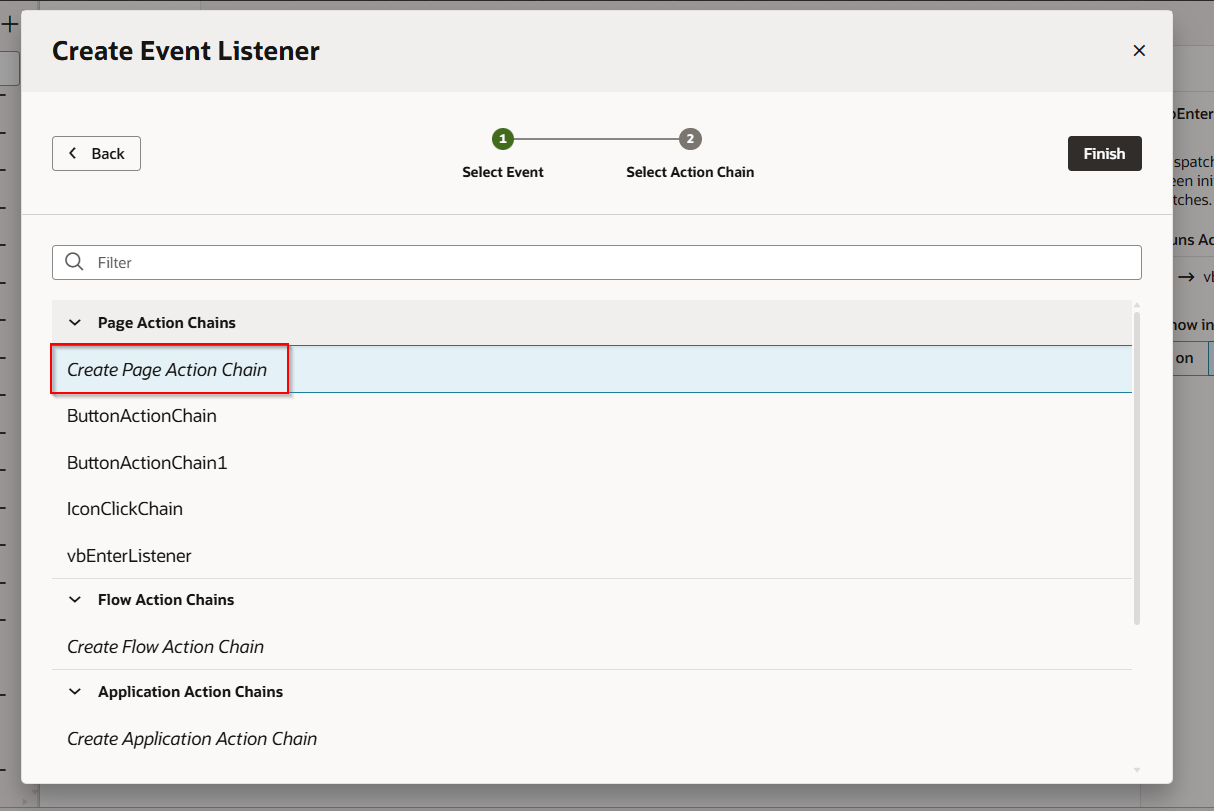
Select “Create Page Action Chain” and click Finish.
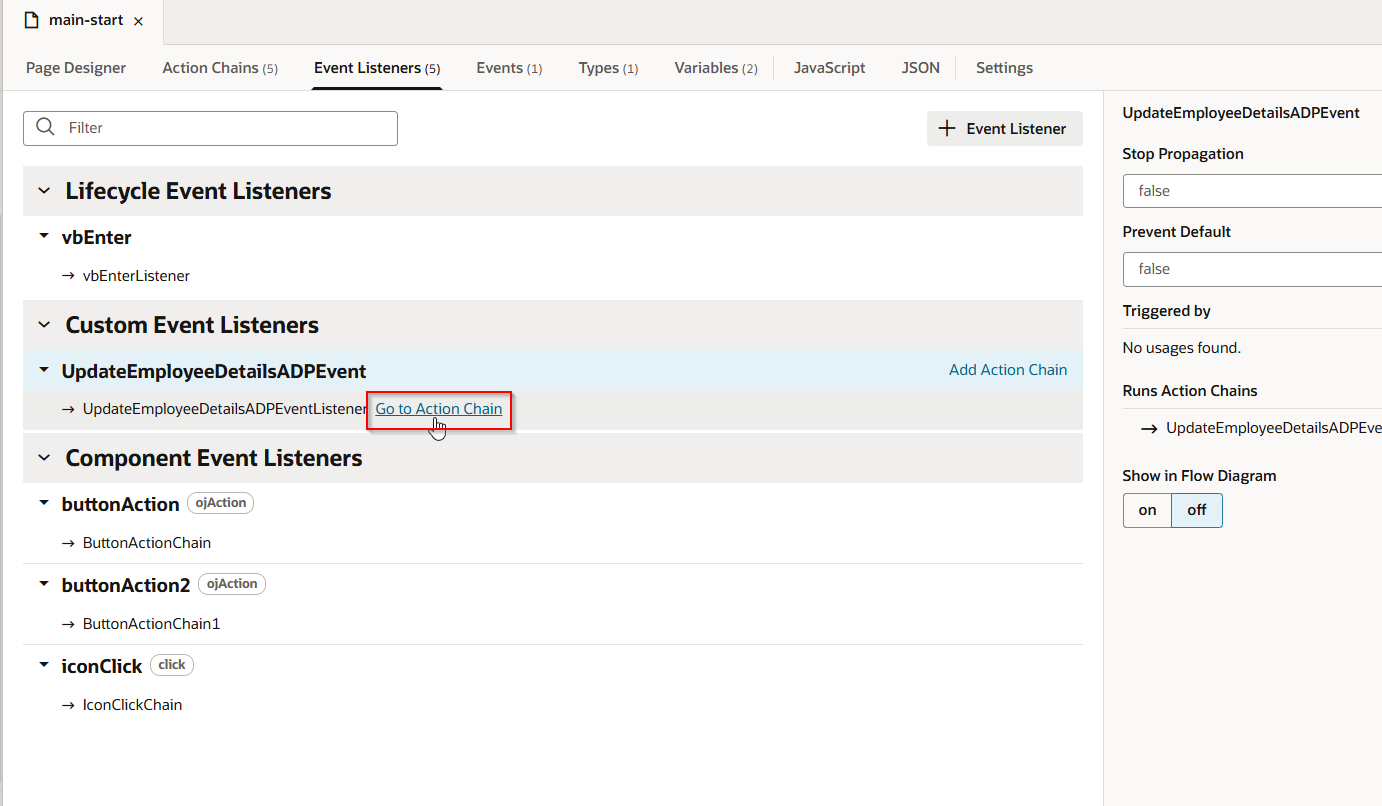
This will create new action chain.
Click on “Go to Action Chain”.
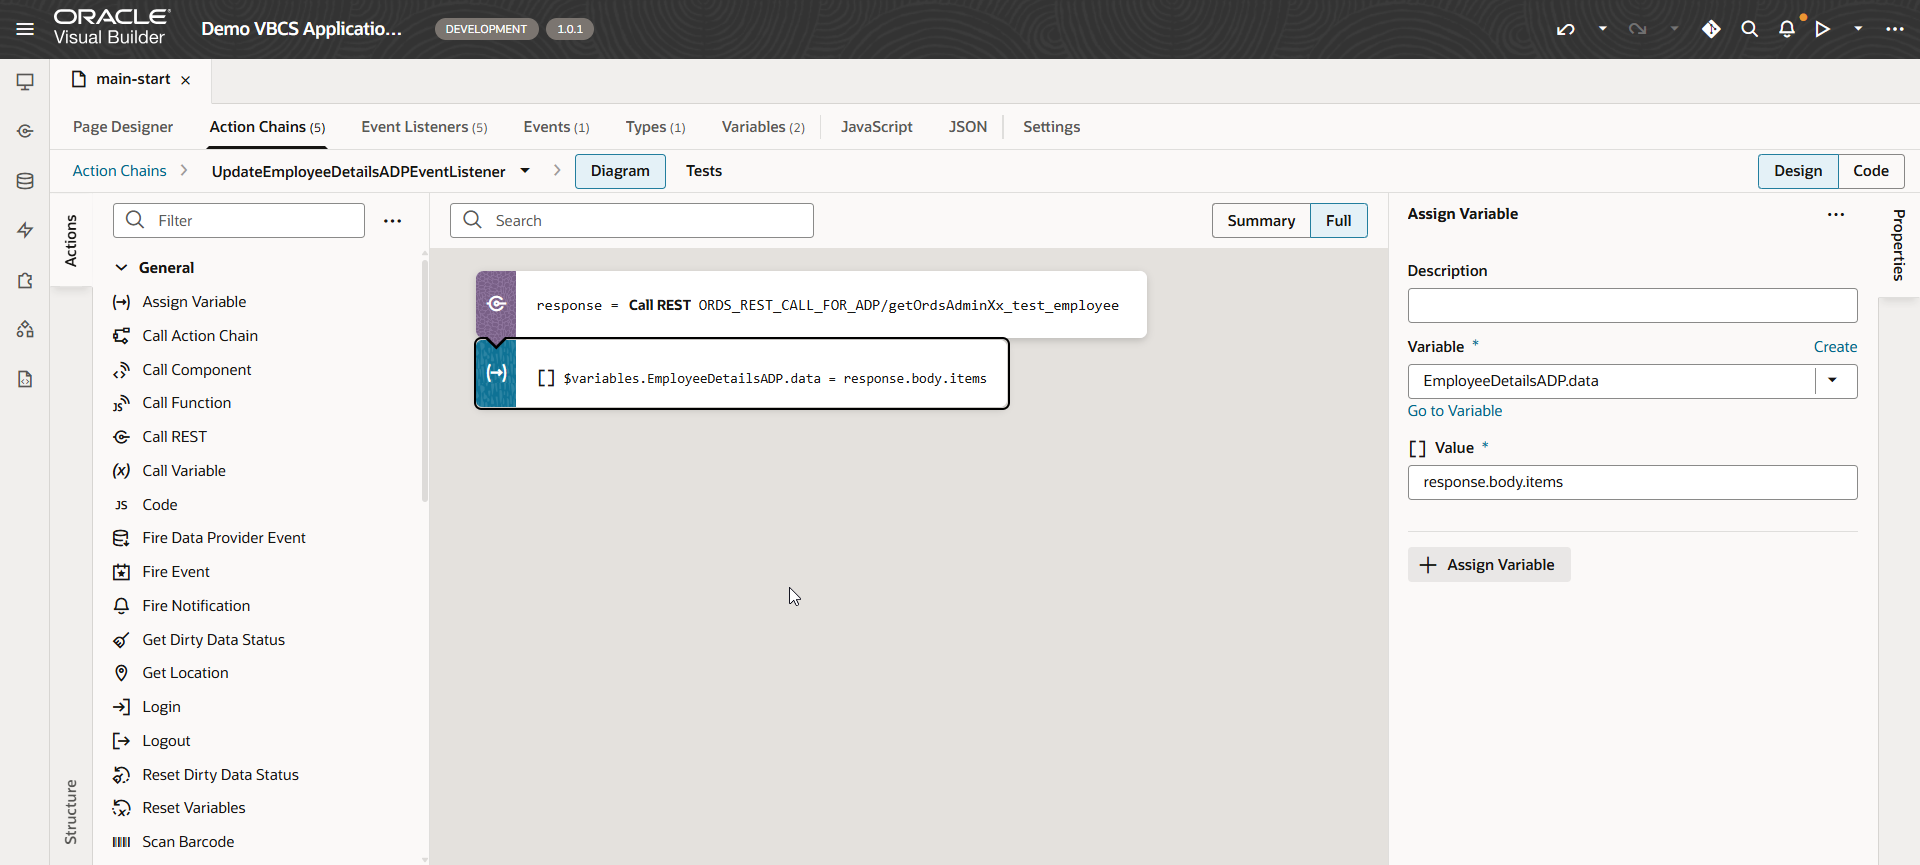
Add the logic below to action chain.
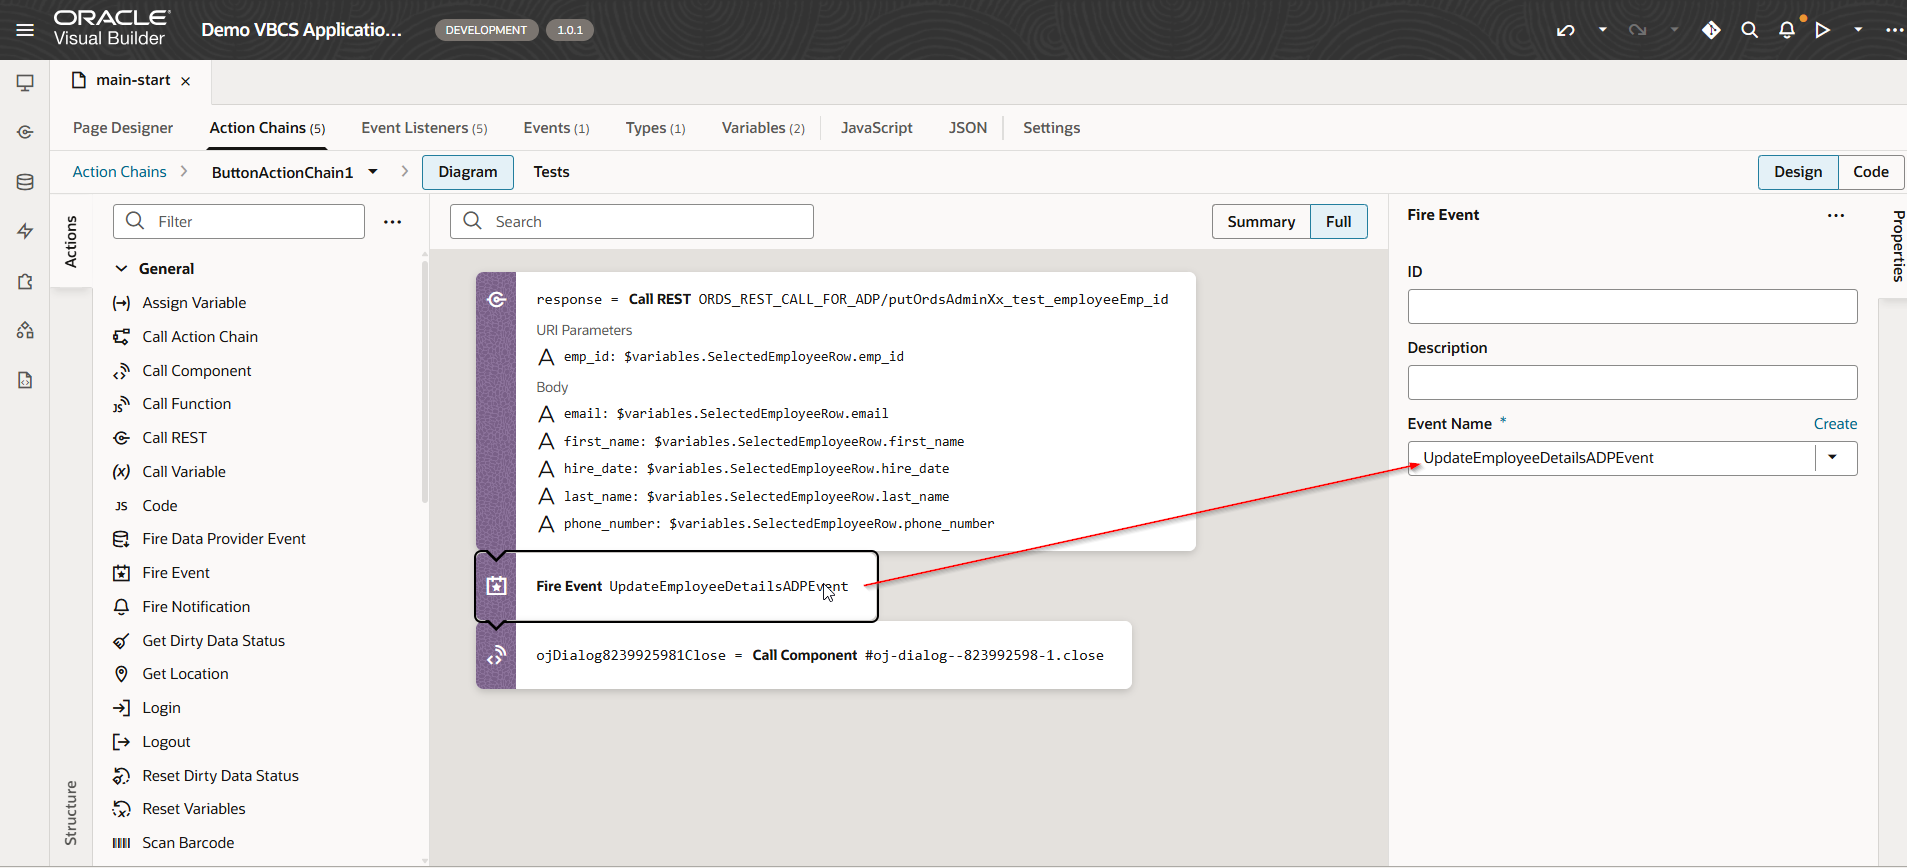
Now let us trigger this event on Save button.
Navigate to Save button action chain.
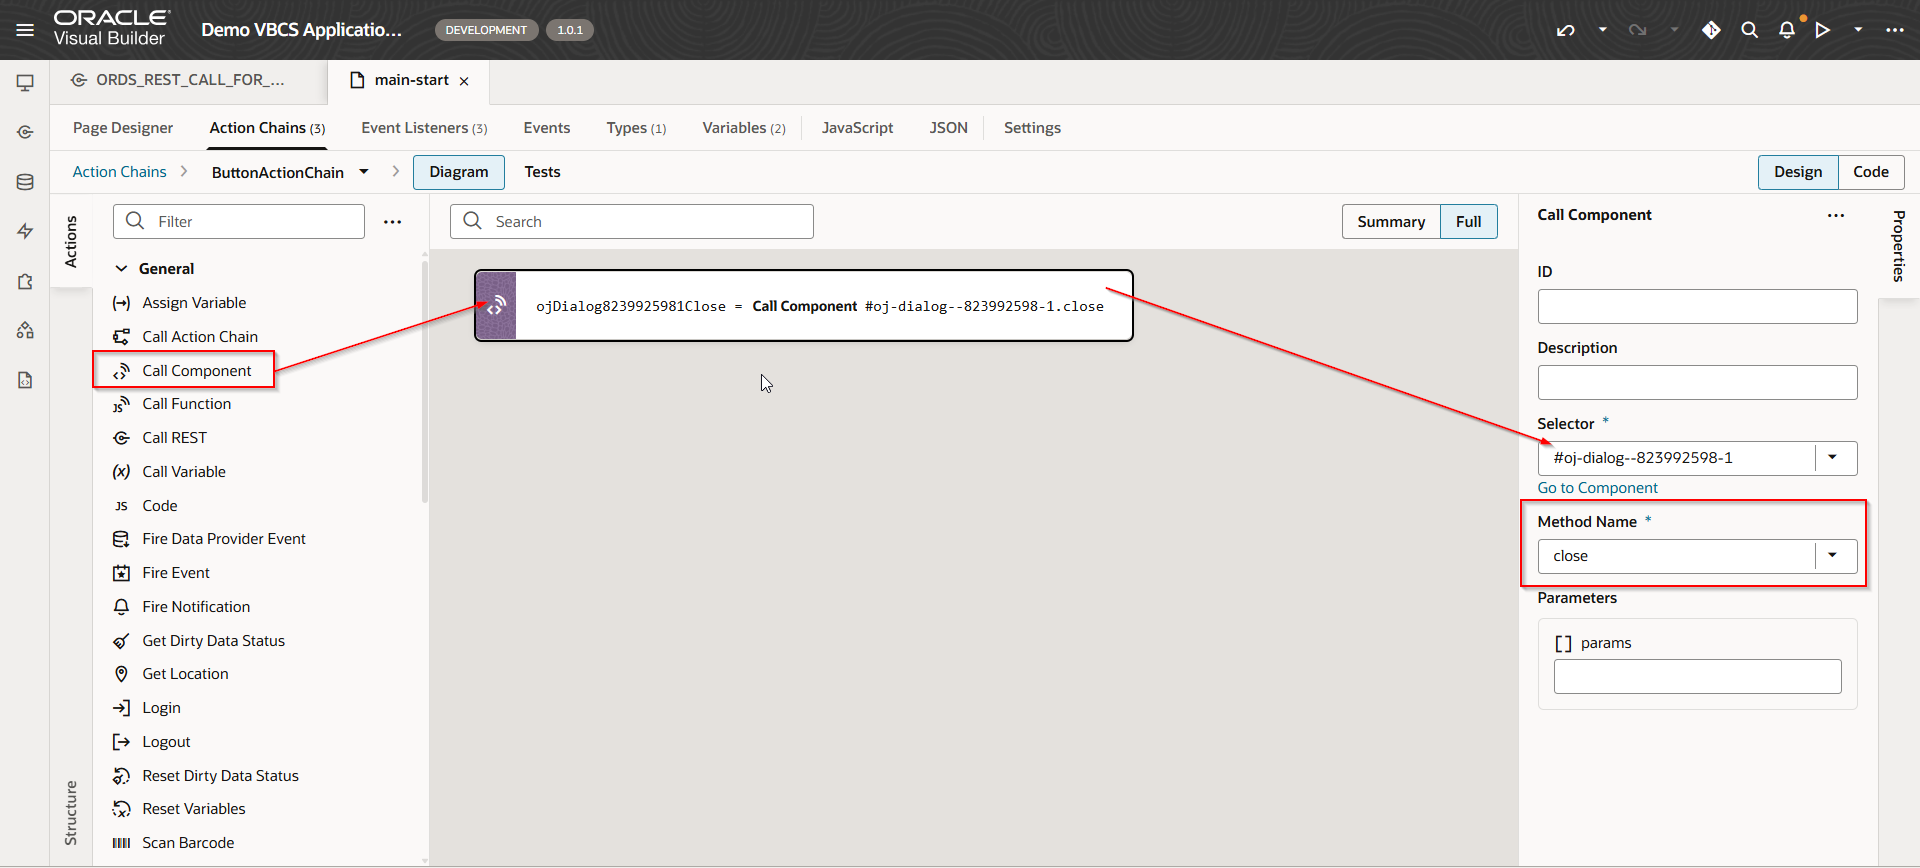
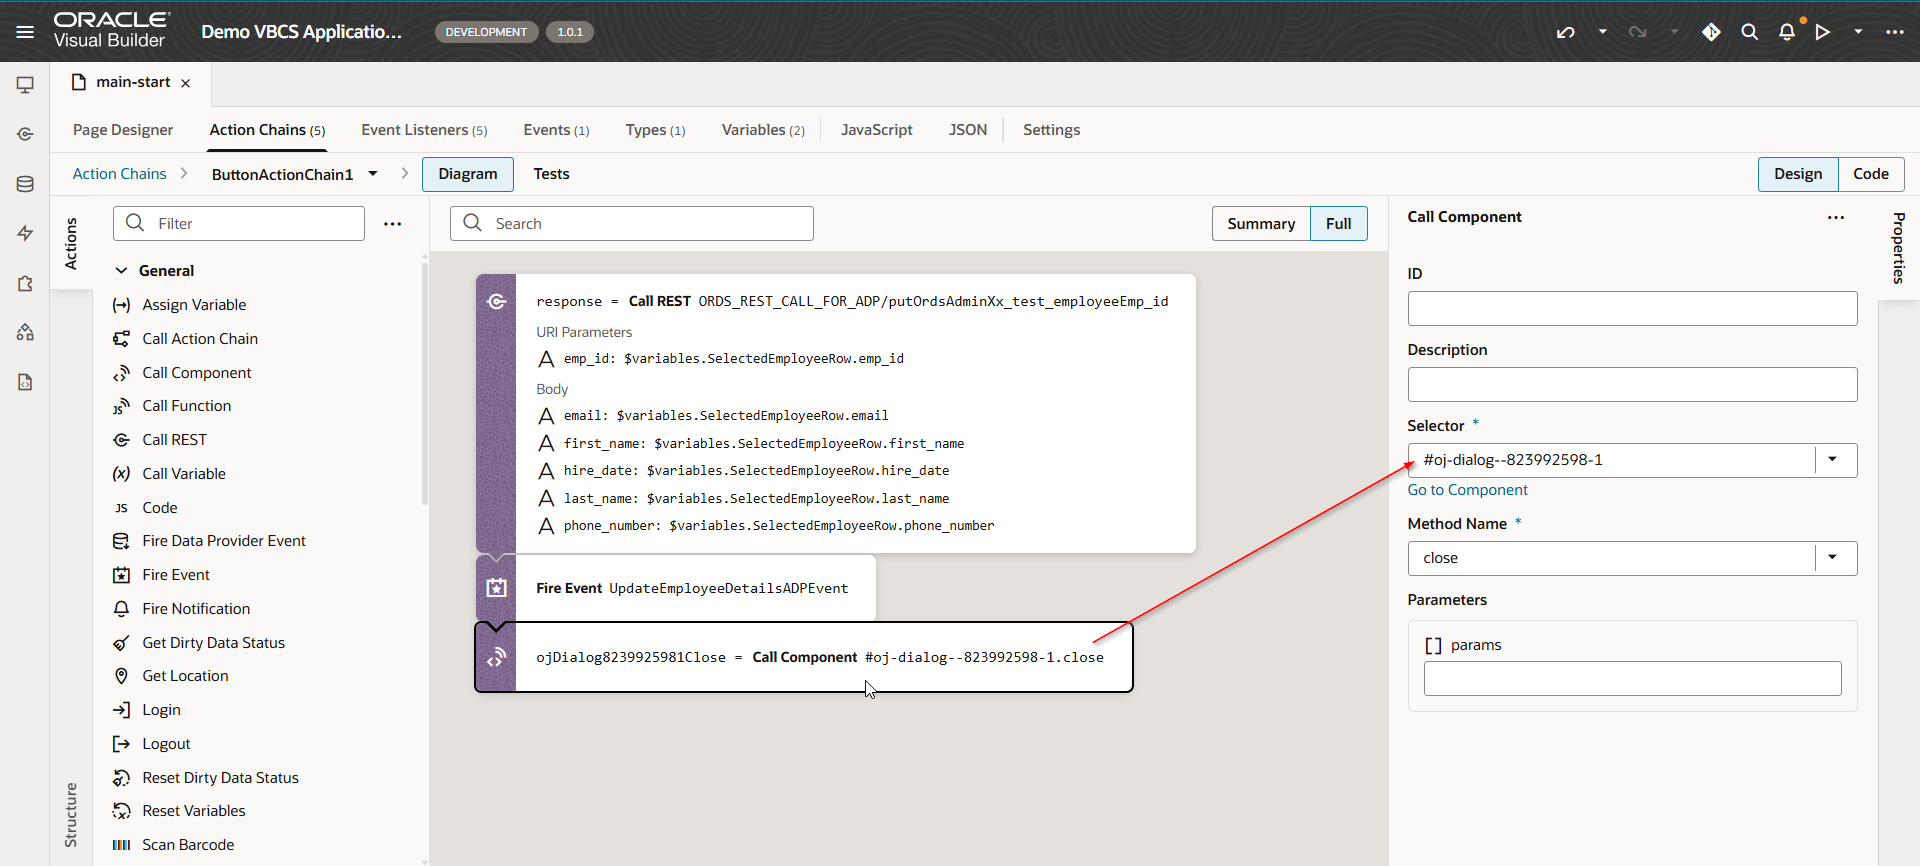
Add fire events and close dialog action.
Run the application.
Click on Save.