
How to Create Simple Process Approval Flow in Oracle Process Automation (OPA)
In this post, we will see how to create simple process approval flow in Oracle process automation.
Oracle Process Automation (OPA) is a cloud-based solution from Oracle designed to help organizations to automate business processes with minimal coding. It is part of the Oracle Integration Cloud (OIC) suite and enables users, especially business analysts and non-developers, to model, automate, monitor, and optimize business workflows.
Let us create simple process approval flow in OPA step by step.
Step1: Create IDCS users for OPA
OPA is tightly integrated with IDCS, hence we need to create users in IDCS to define roles in OPA.
Let us create two users in IDCS:
Username | Purpose |
OPA_1_INITIATOR@testmail.com | User who will initiate approval process. |
OPA_2_APPROVER@testmail.com | User who will approve approval process. |
Login to IDCS console.
Navigate to Identity and Security –>Domains.
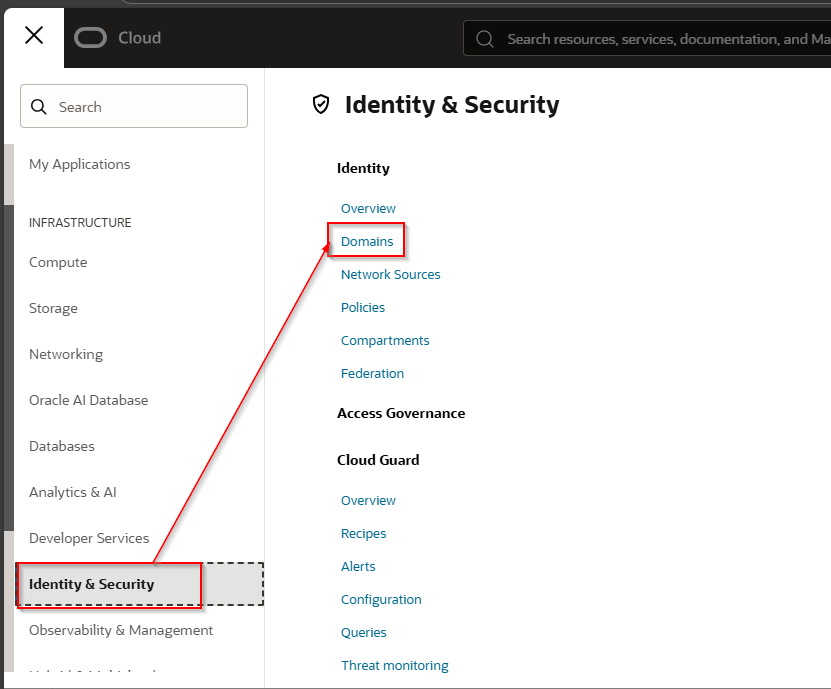
Select respective domain and click on User Management.
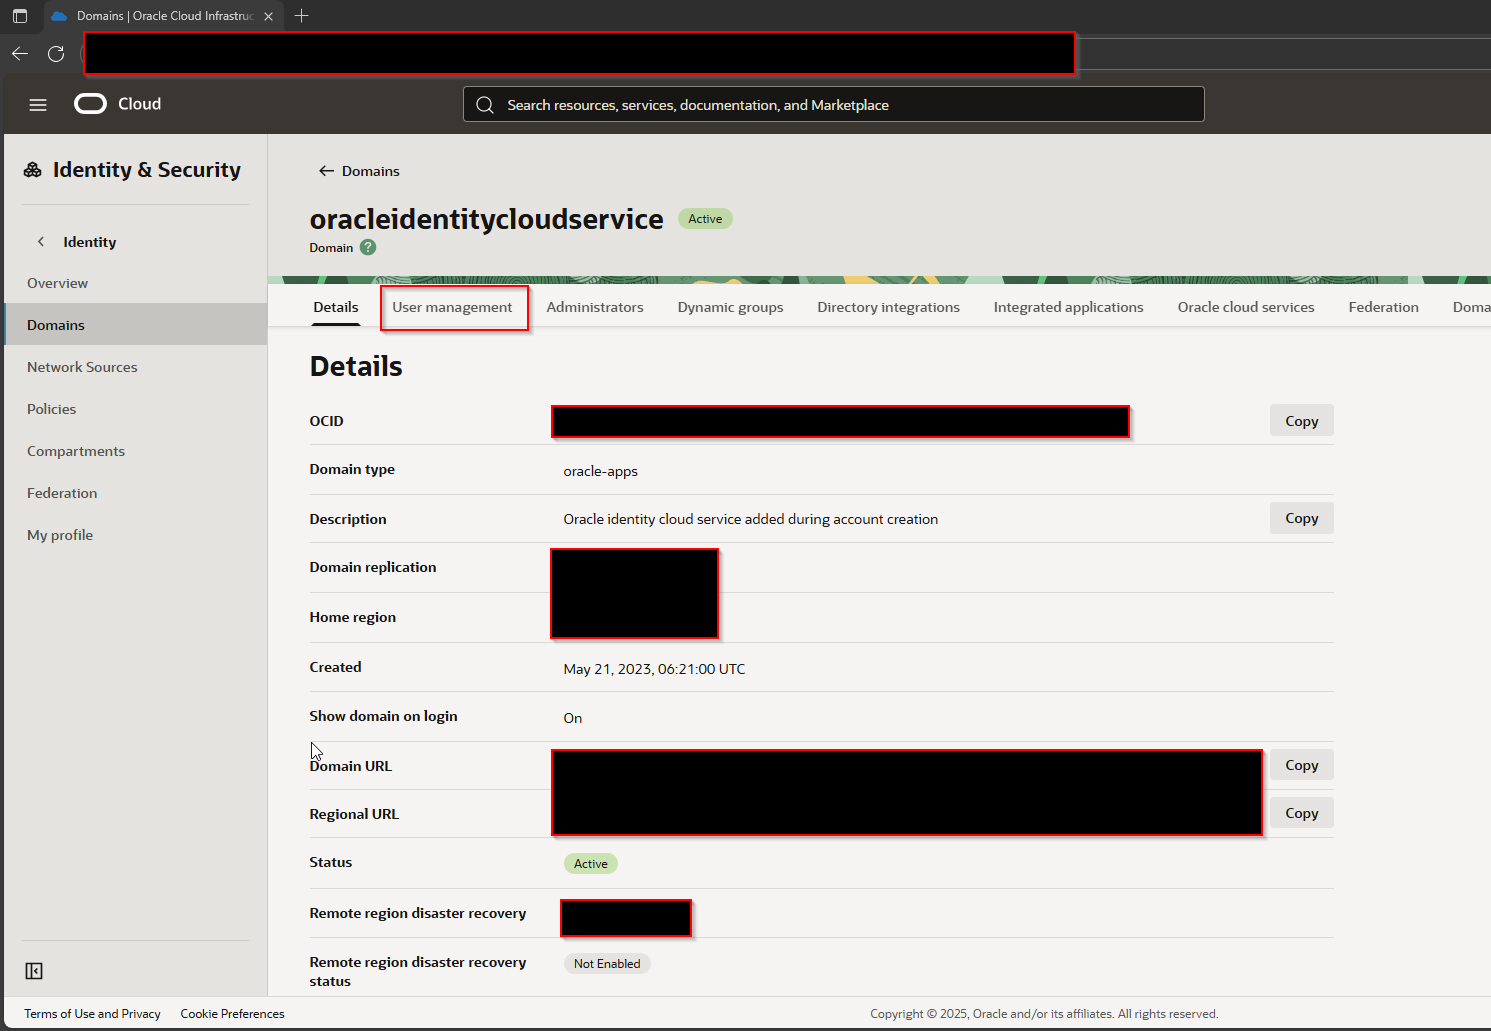
Click on Create User.
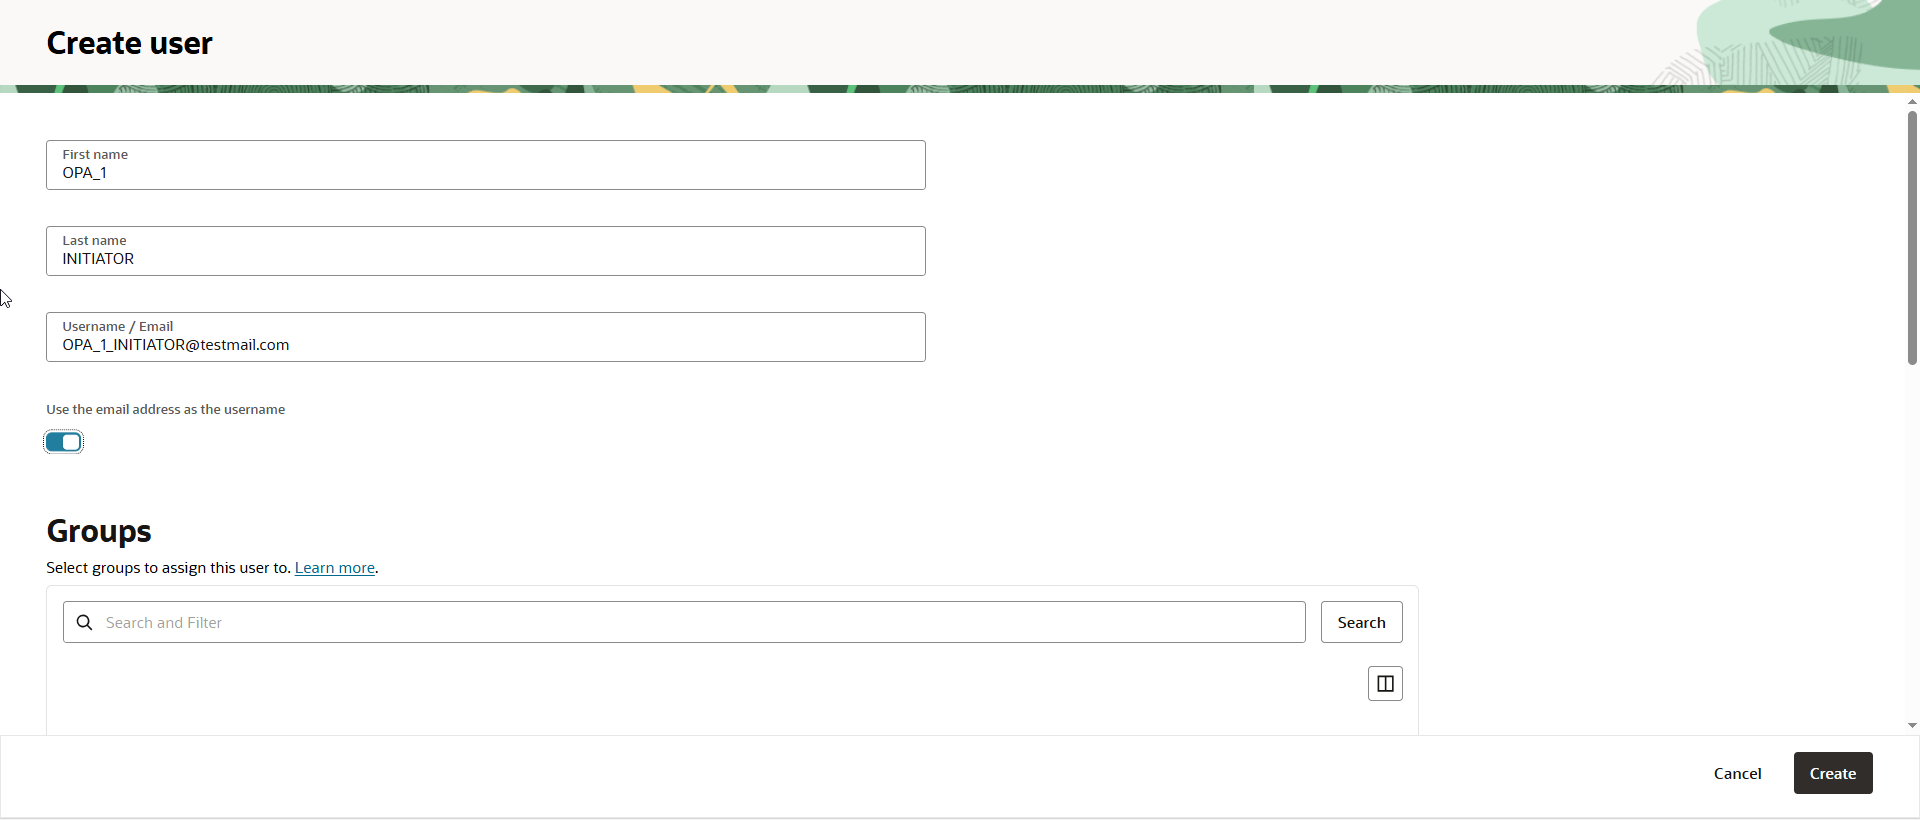
Similarly create user OPA_2_APPROVER@testmail.com.
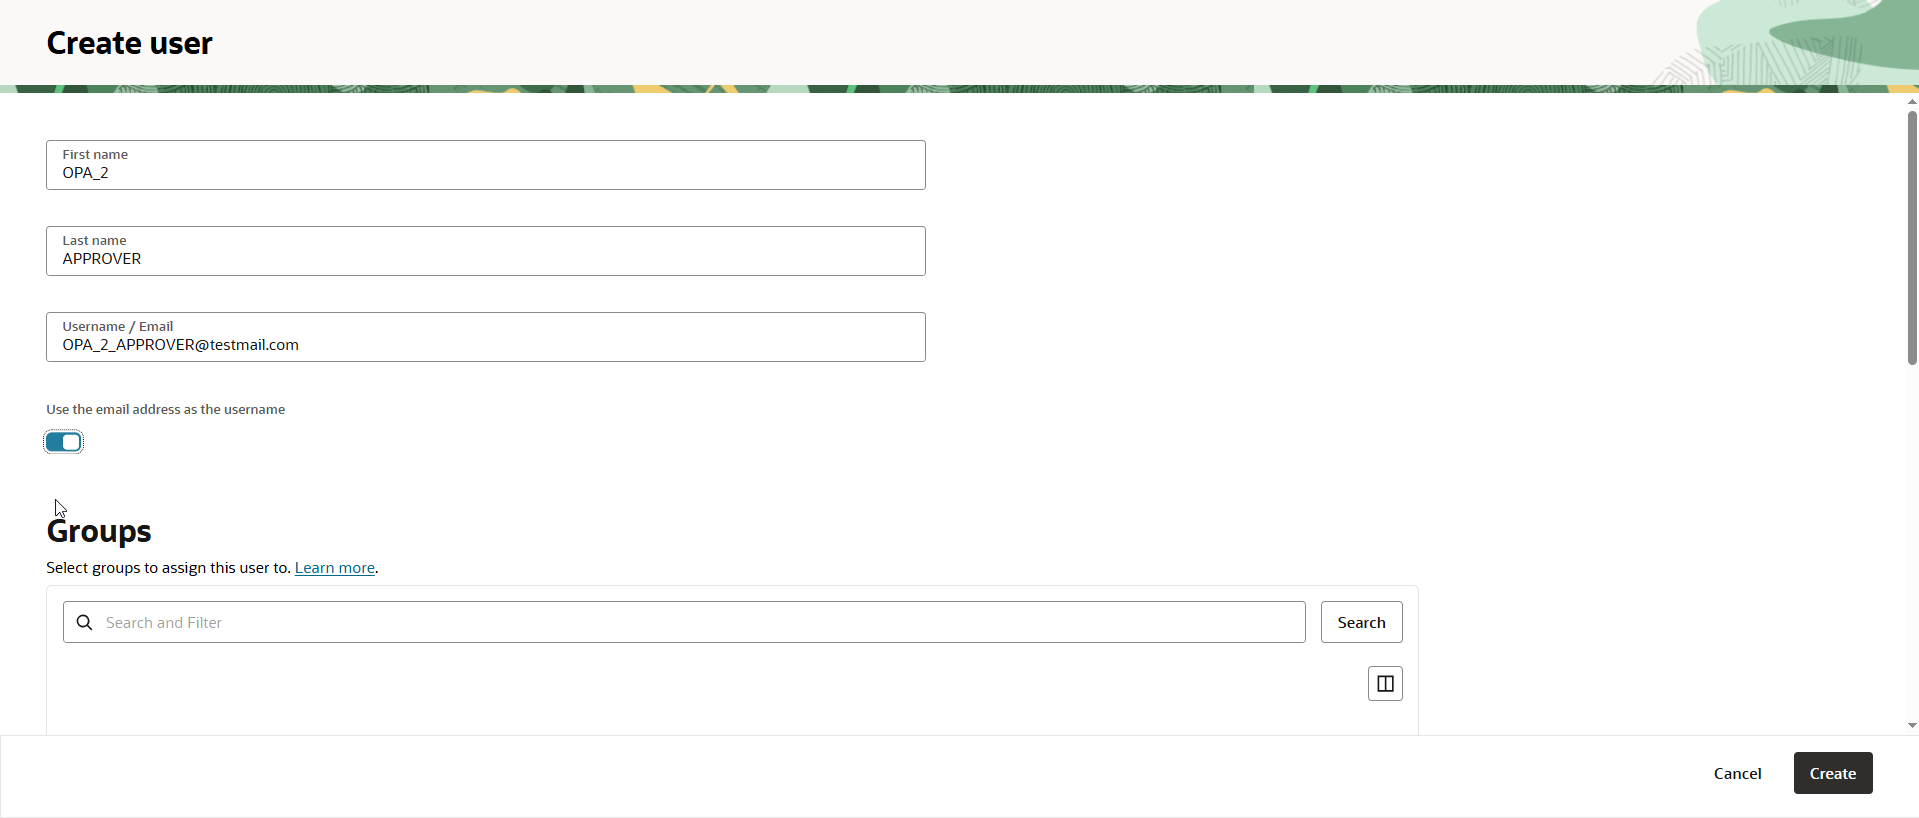
Once users are created, reset passwords for users.

Step2: Create Process
Login to Process Automation.
Navigate to Applications—> Click on Create-to-Create new application.
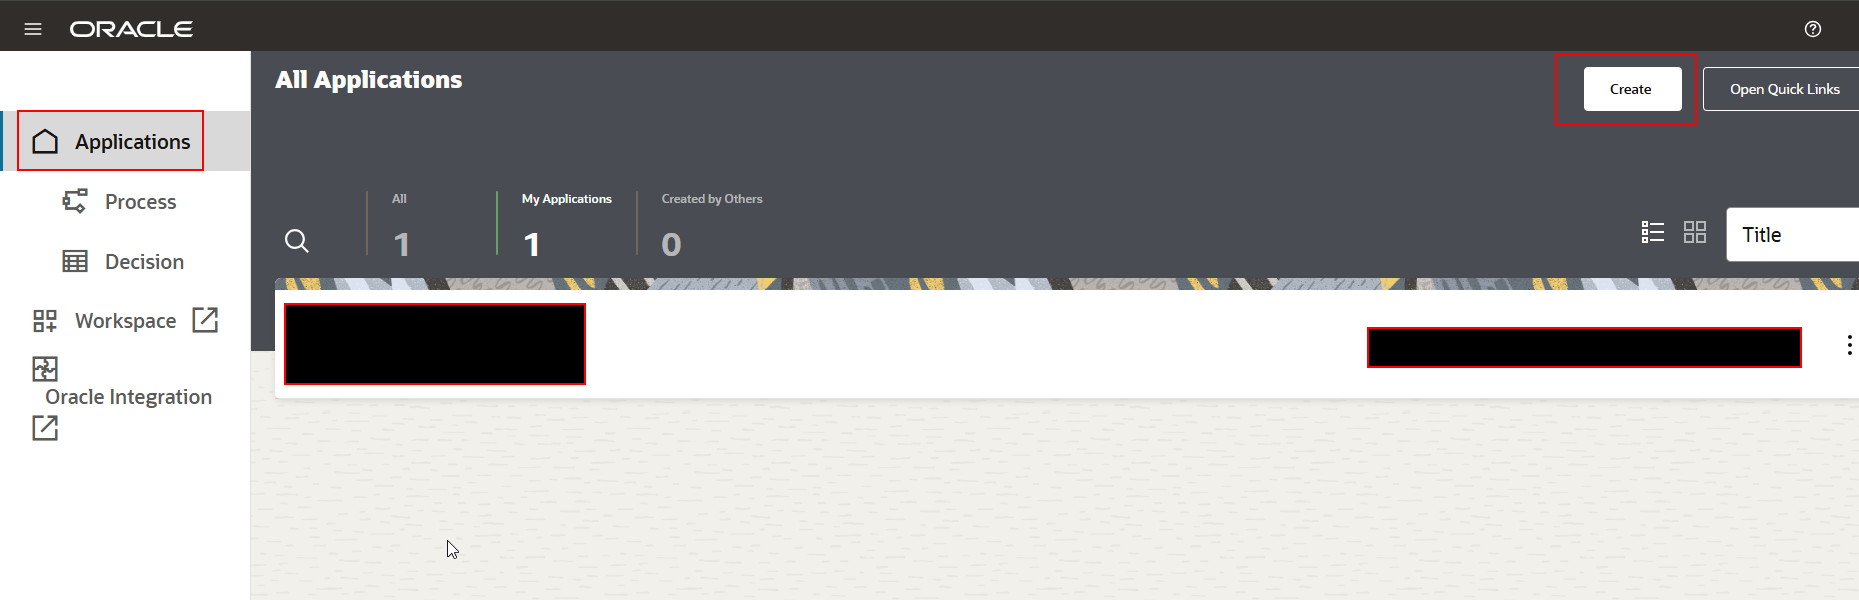
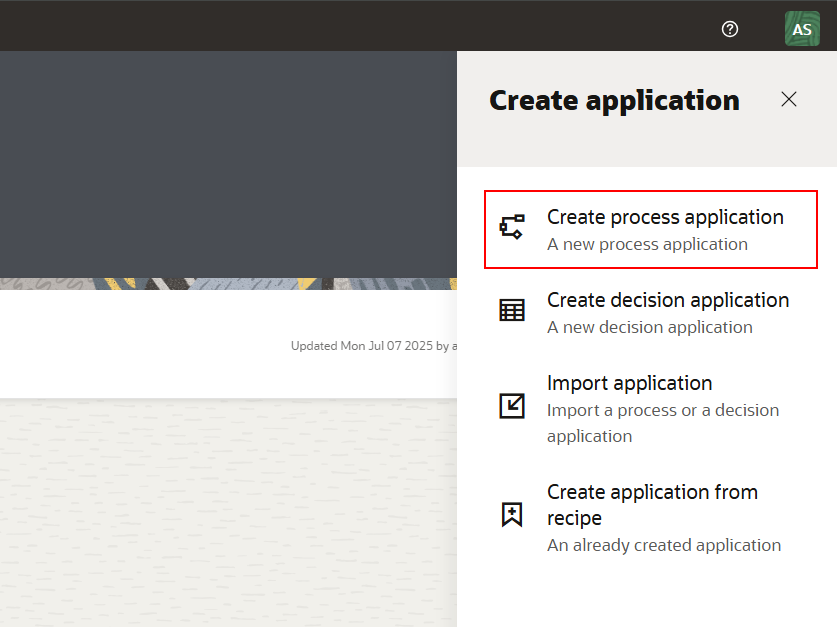
Select “Create Process application”.

Provide Title and Click on Create.
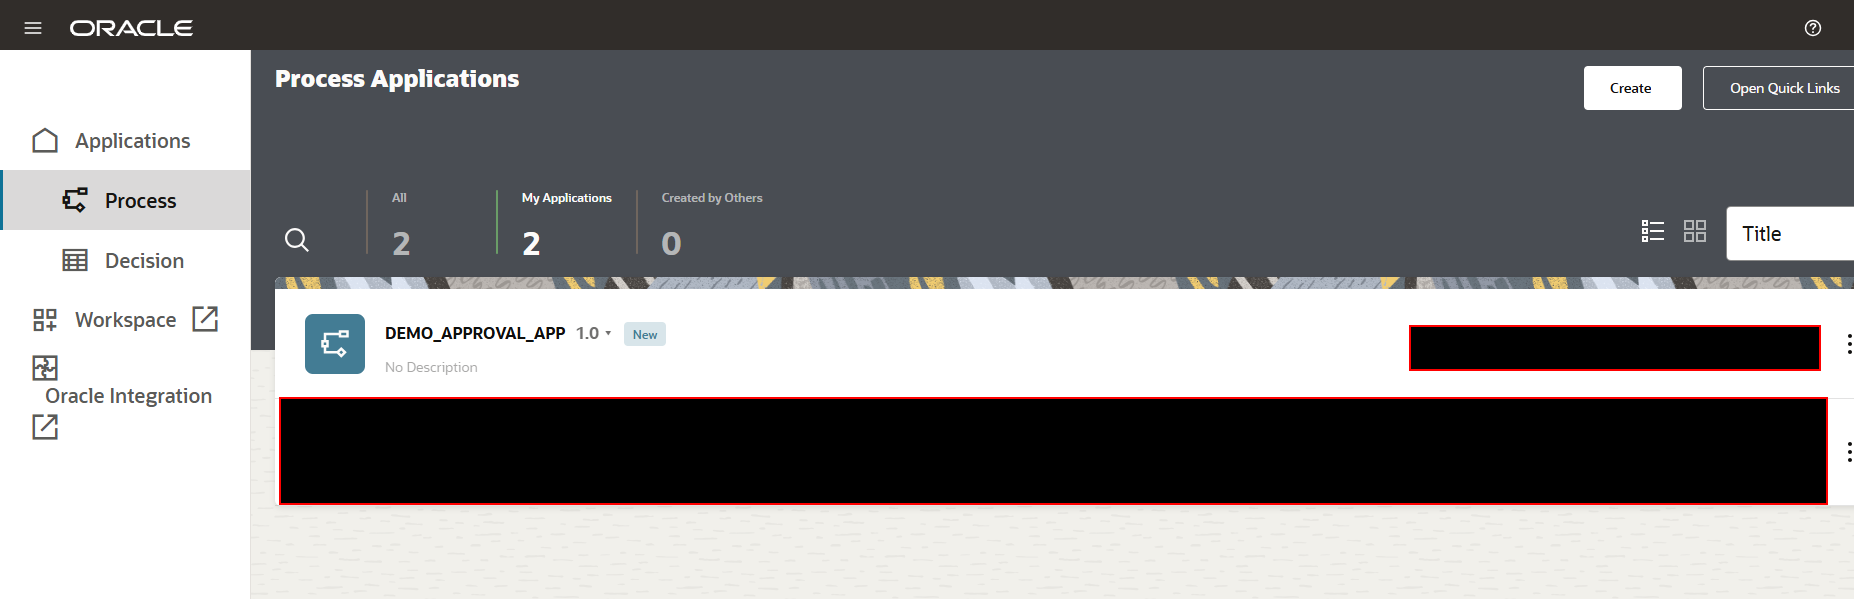
Application is created now.
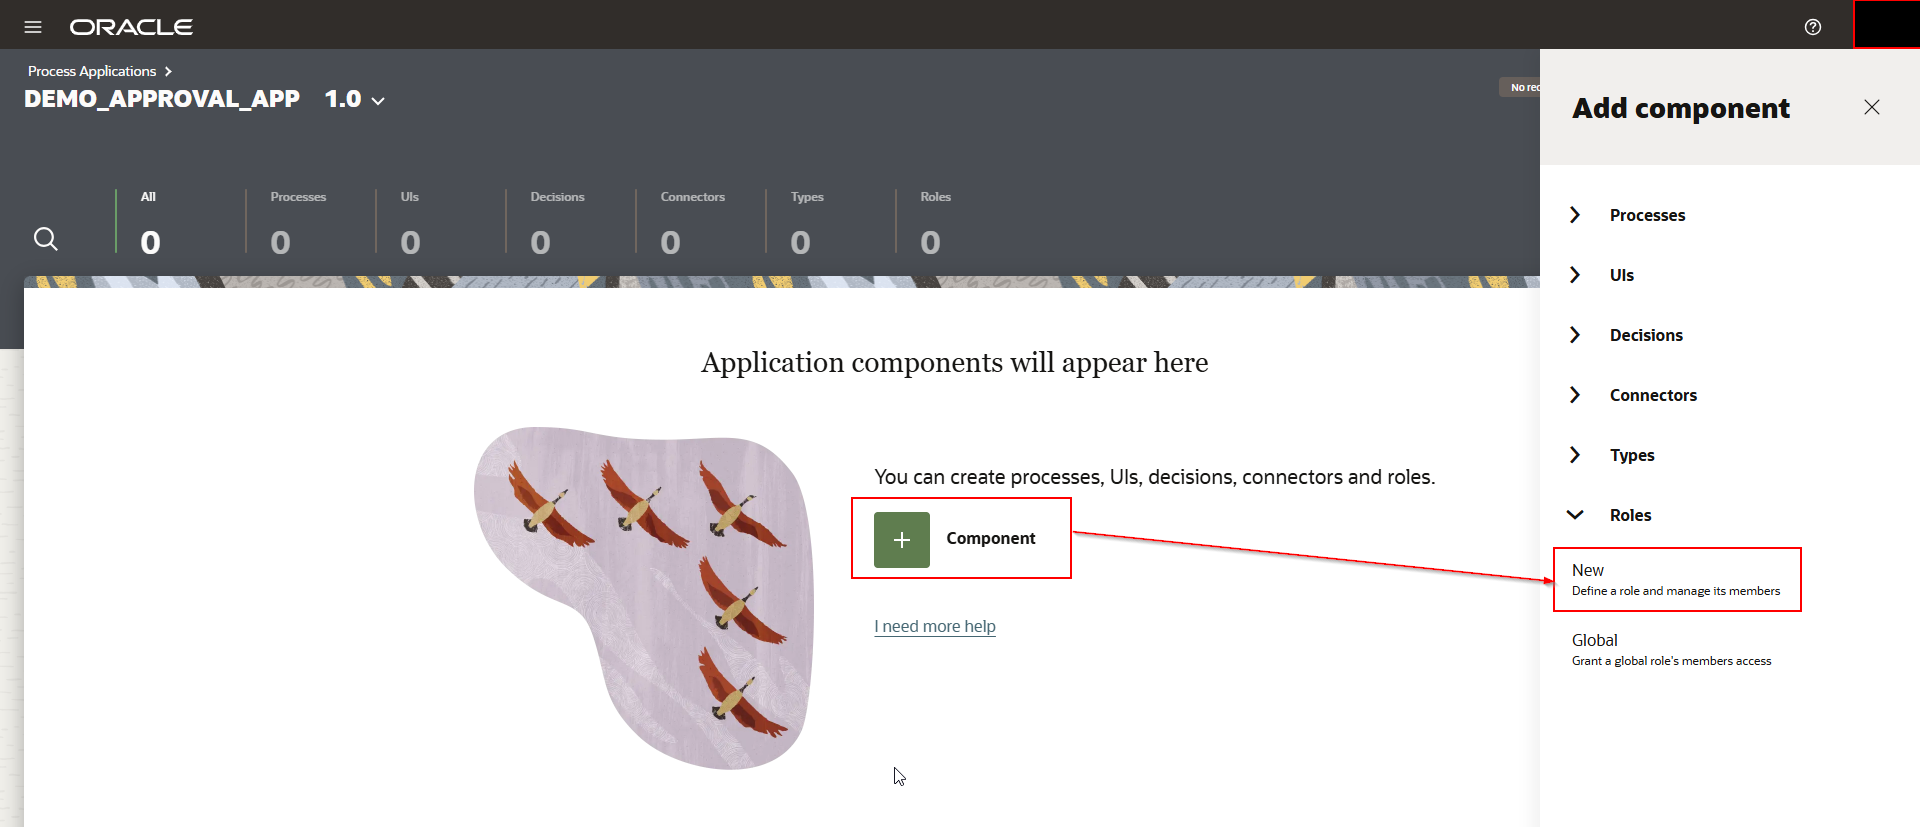
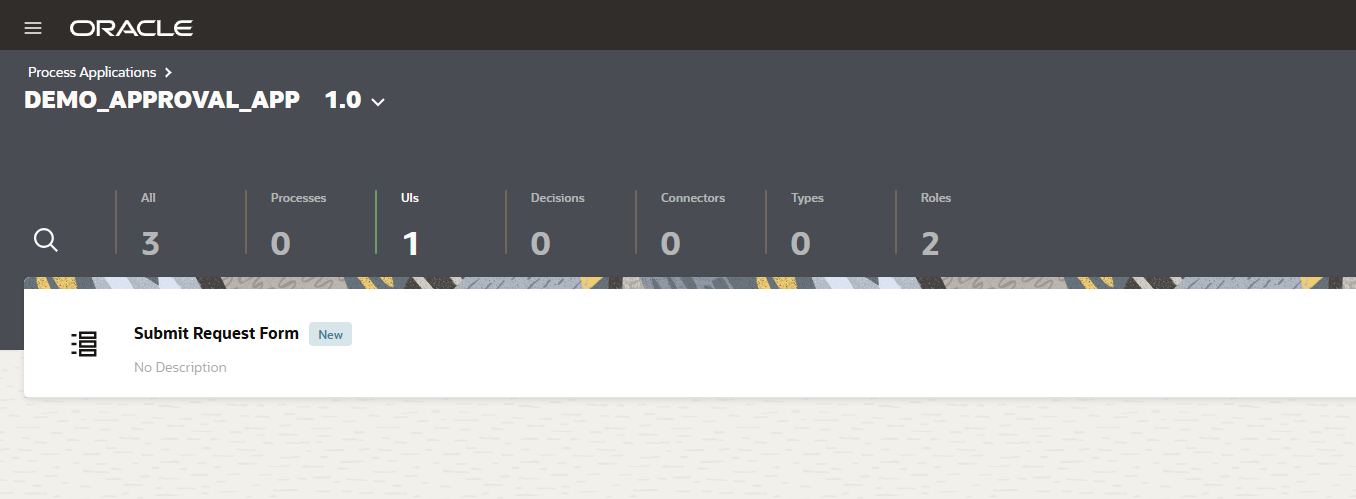
Each Process Application contains below 6 Components:
1.Processes
2.UIs
3.Decisions
4.Connectors
5.Types
6.Roles
Step3: Create Roles in OPA
We will create two roles now.
Role Name | Purpose |
INITIATOR_ROLE | This role will be used to initiate approval process flow. We will add OPA_1_INITIATOR@testmail.com user to this role. |
APPROVER_ROLE | This role will be used to approve approval process flow. We will add OPA_2_APPROVER@testmail.com to this role. |
Navigate to component—> Roles–>New
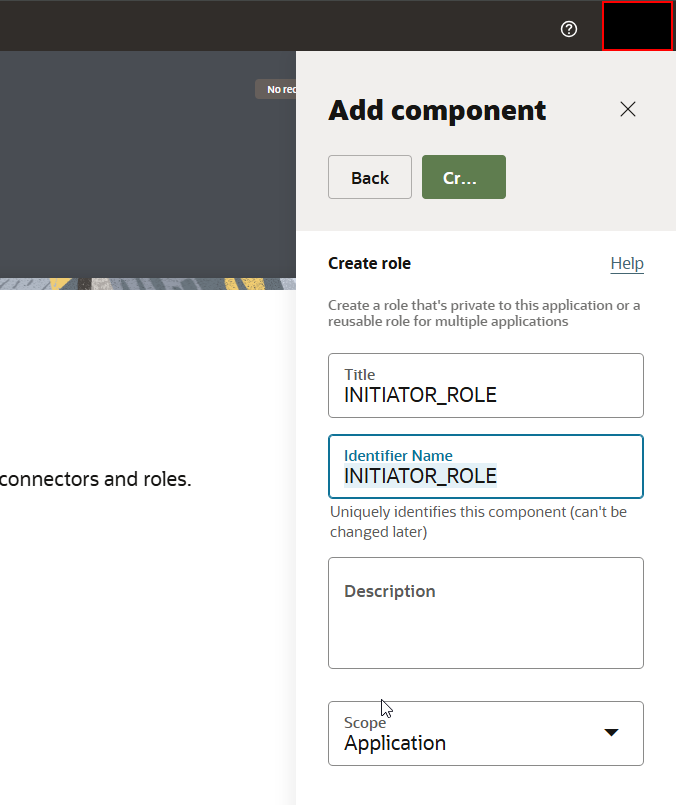
Provide Title as “INITIATOR_ROLE” and Click on Create.

Click on created role and add OPA_2_INITIATOR@testmail.com user to role as shown below:

Similarly create another Role APPROVAL_ROLE and add OPA_2_APPROVAL@testmail.com user.

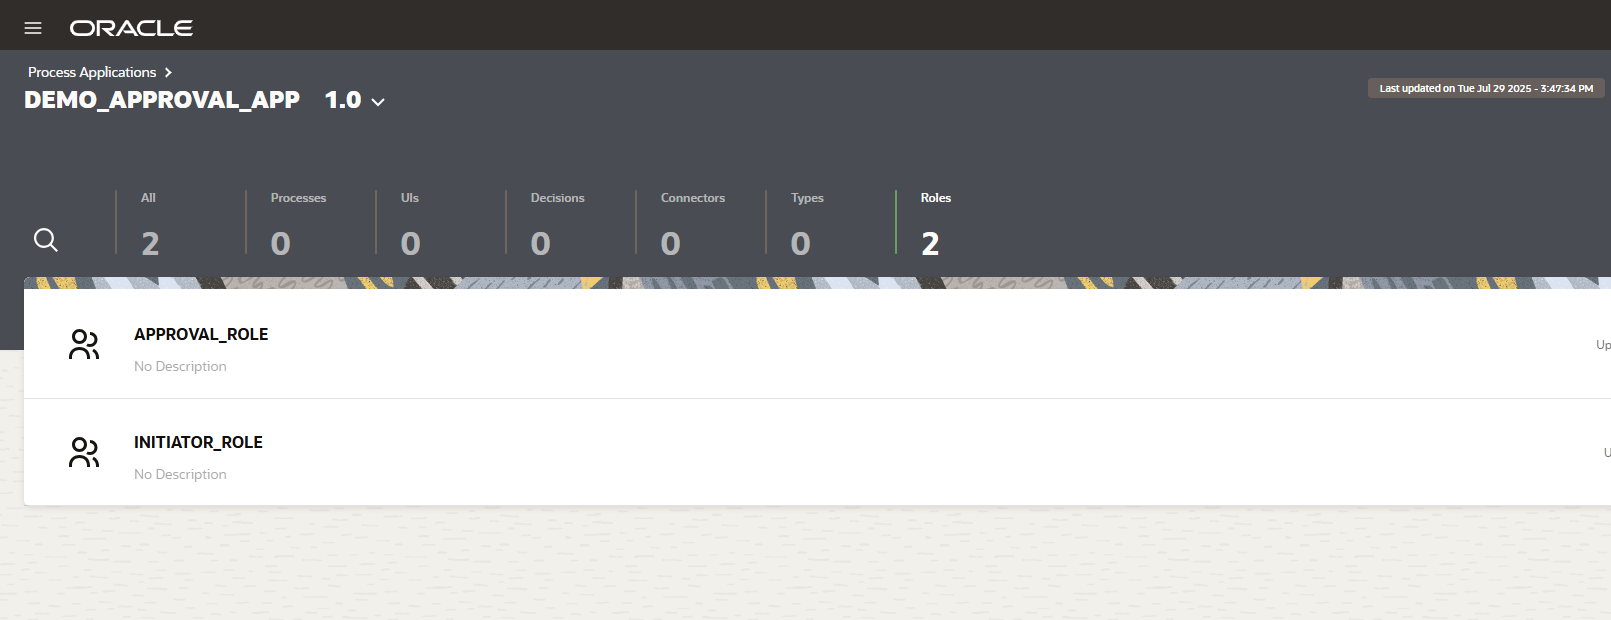
Here we can see Two roles are created successfully.
Step4: Crete UI Components
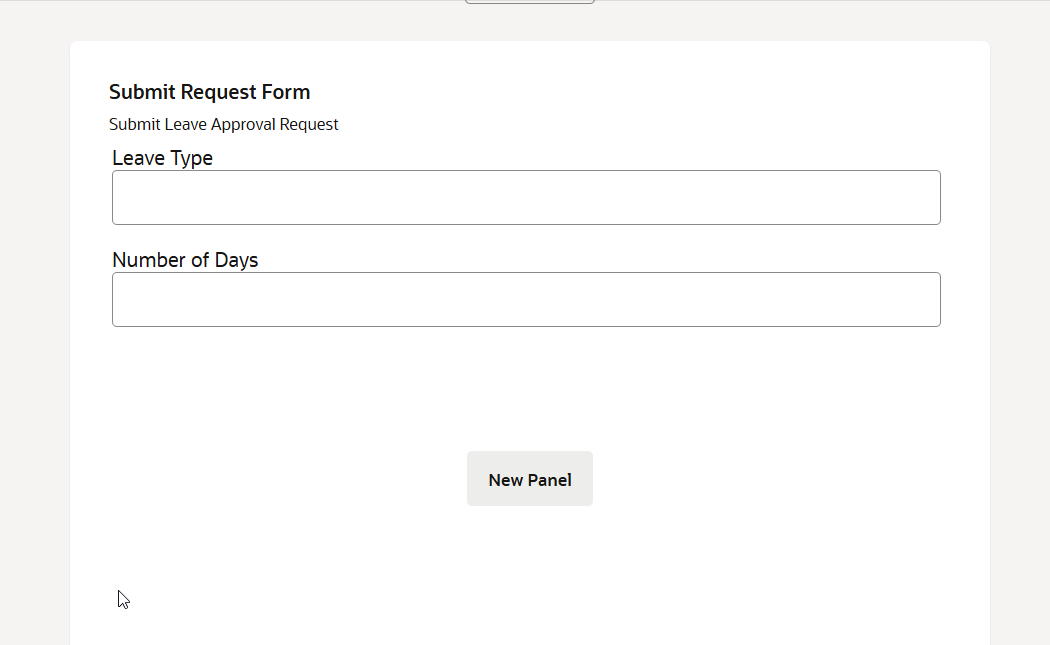
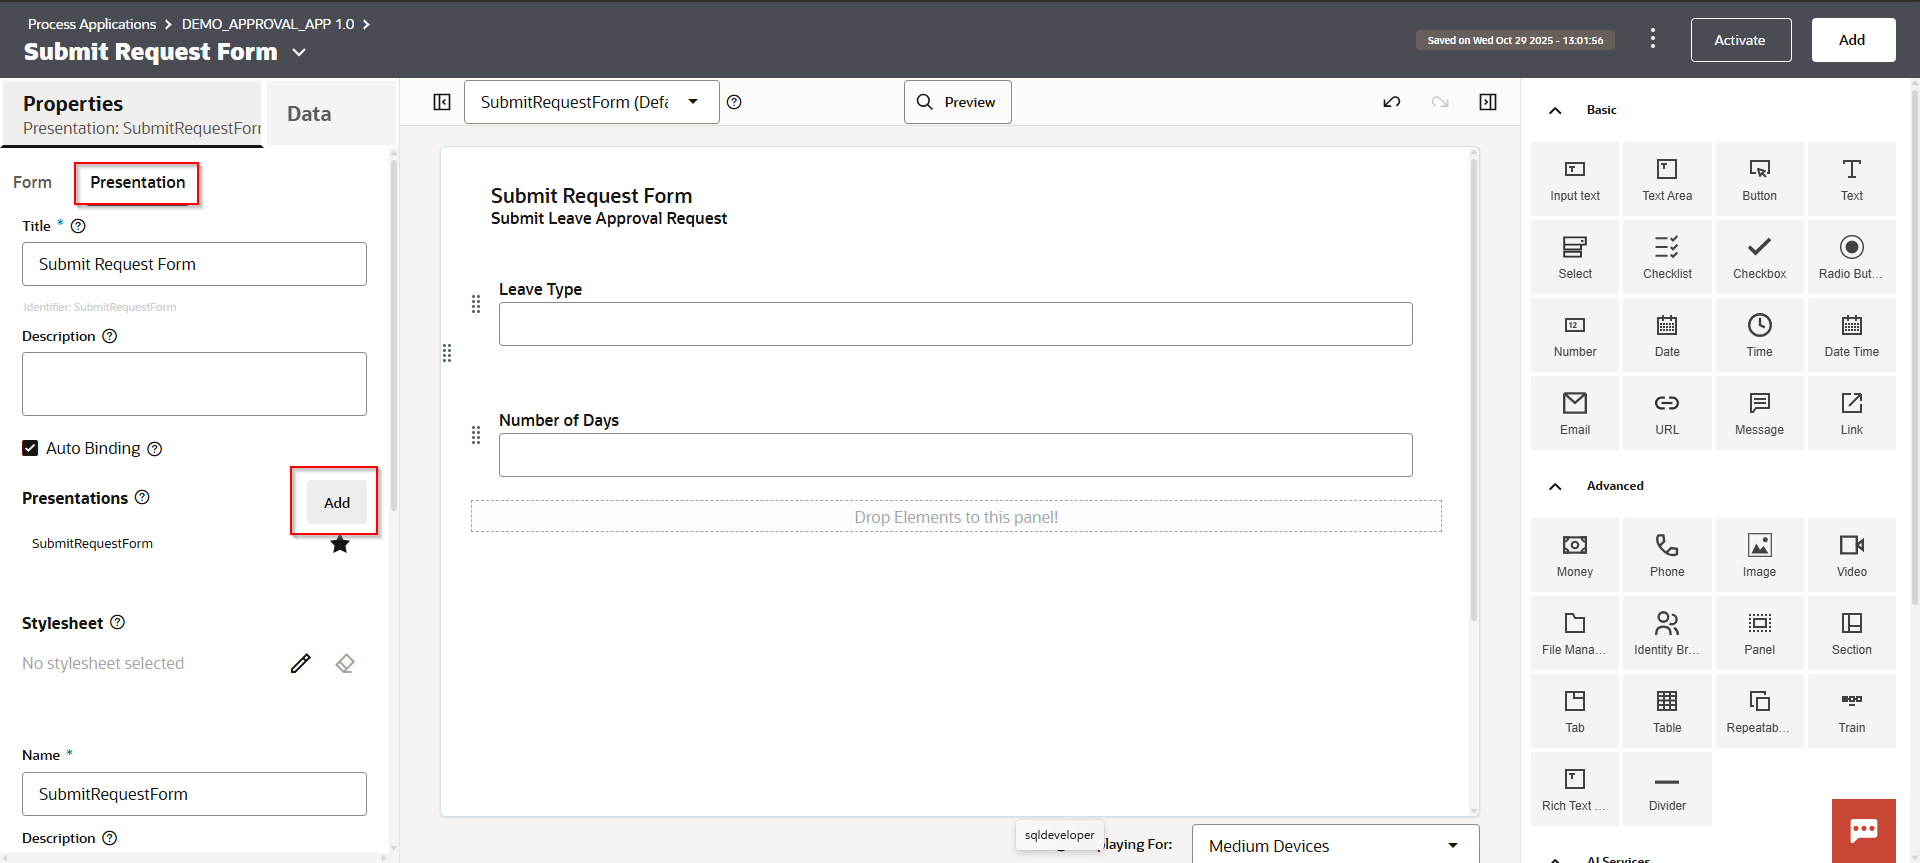
Let us create Quick form for initiator now to enter details while initiating approval process flow.
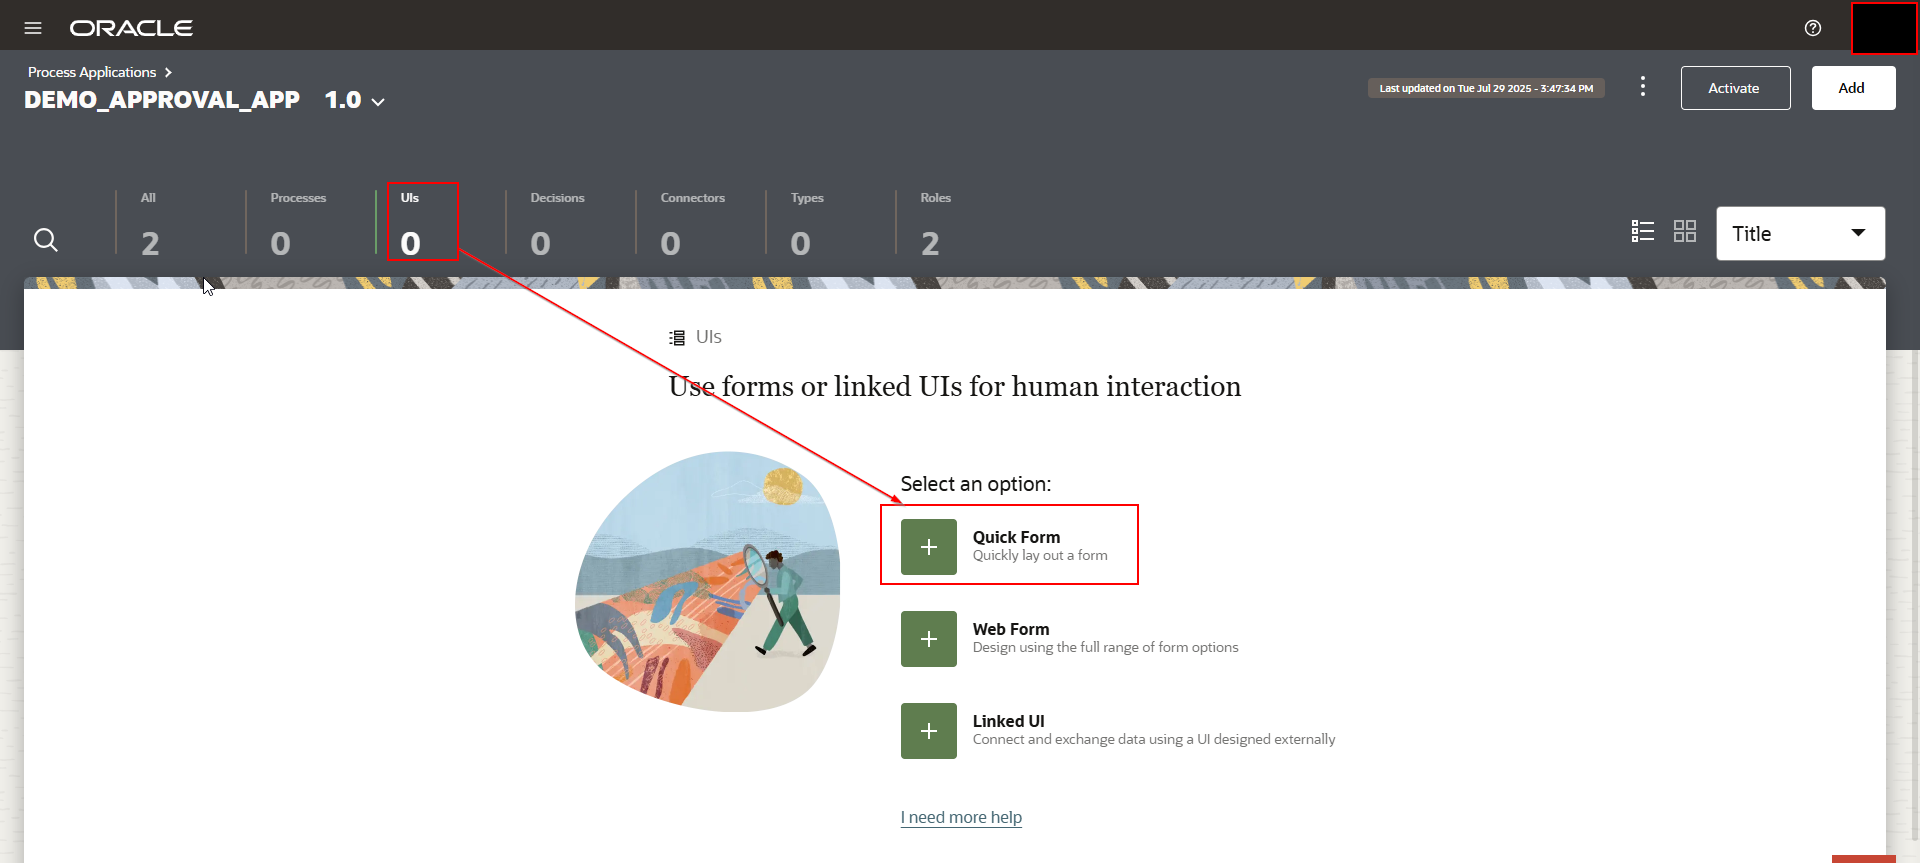
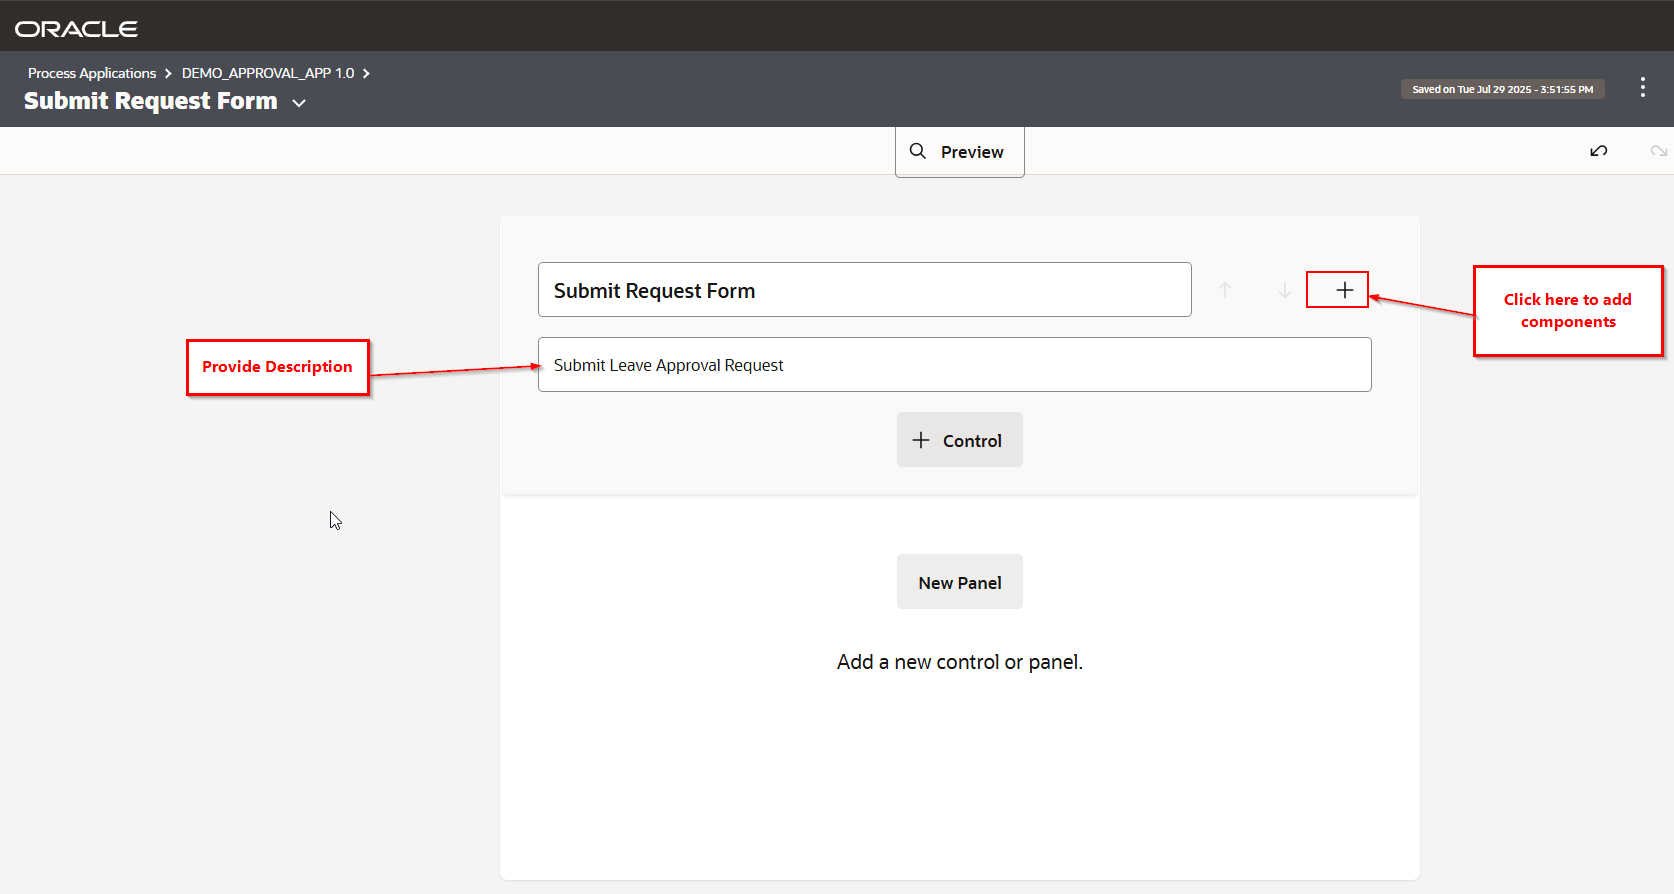
Navigate to components —>UIs —->Quick Form.
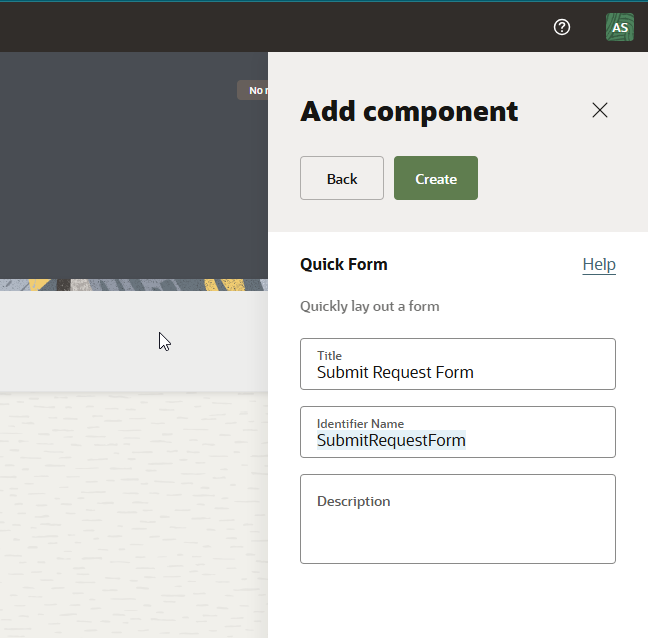
Provide Title as “Submit Request Form” and Click on Create.
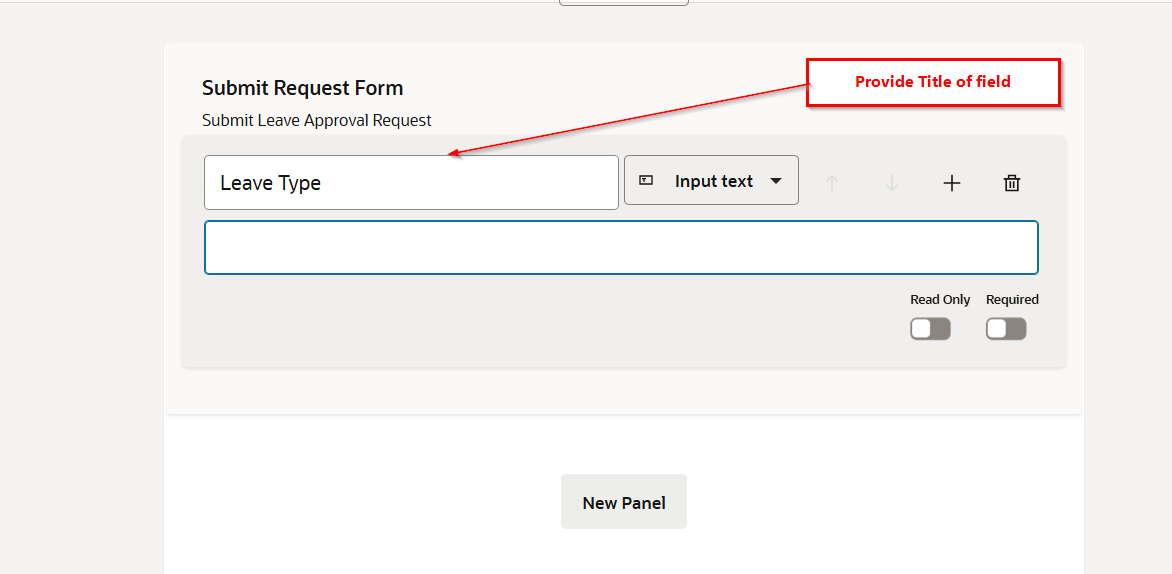
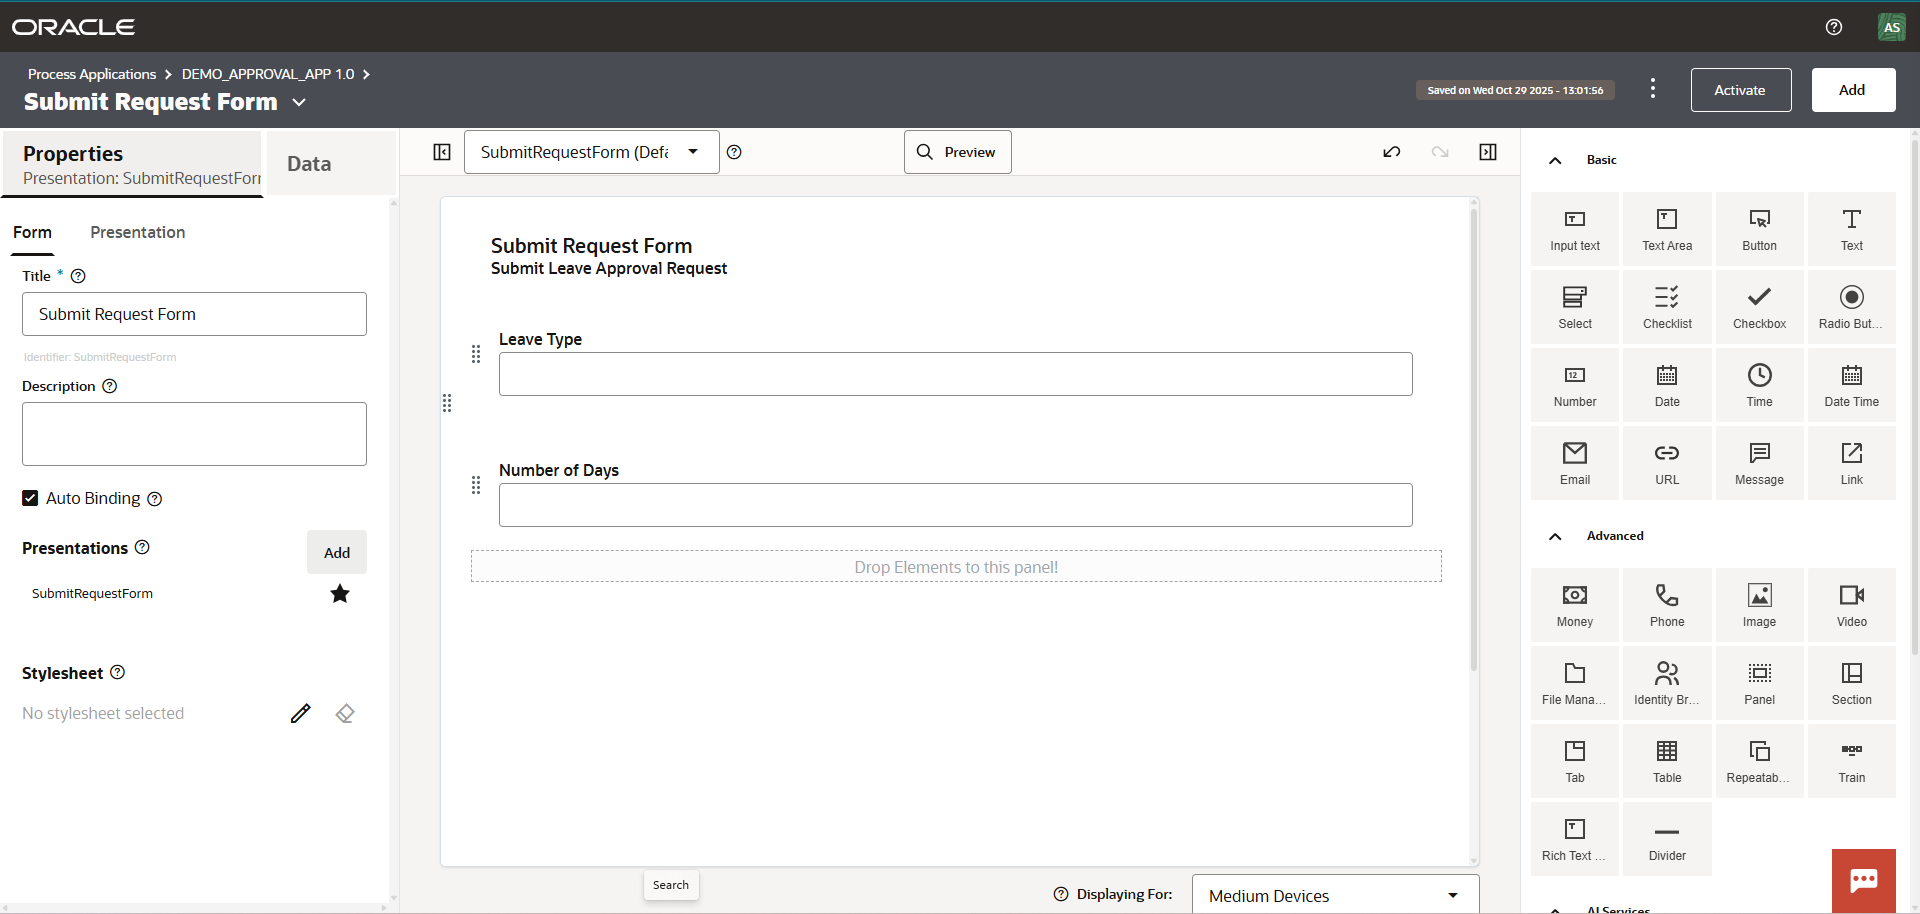
UI form is created successfully. Now let us add components to this form.
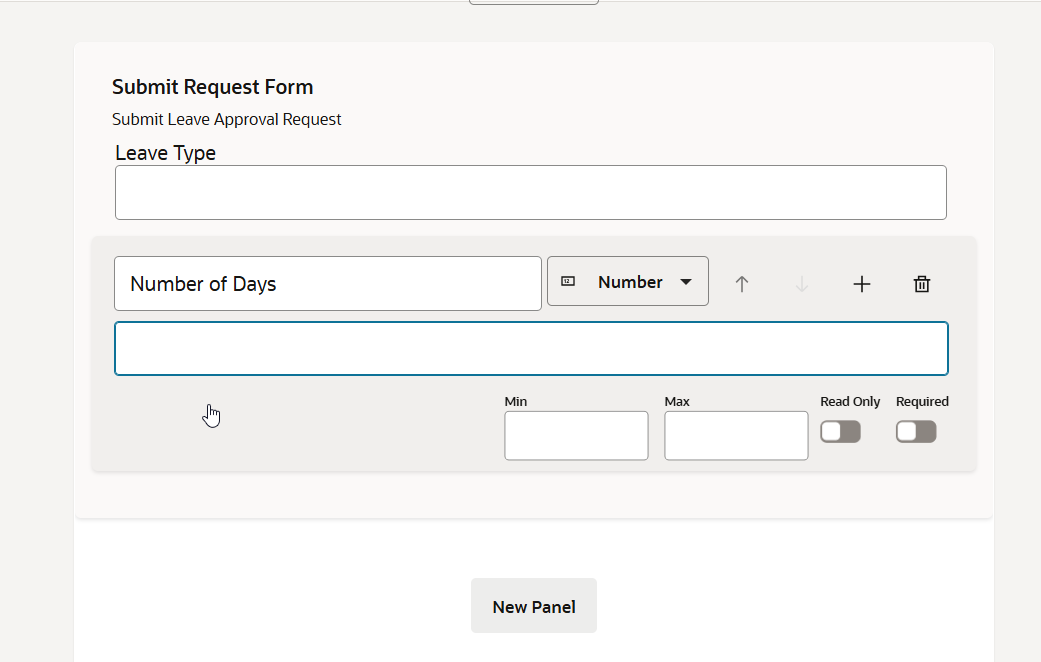
Similarly add another field for Number of Days.
Click outside and you will see like below:
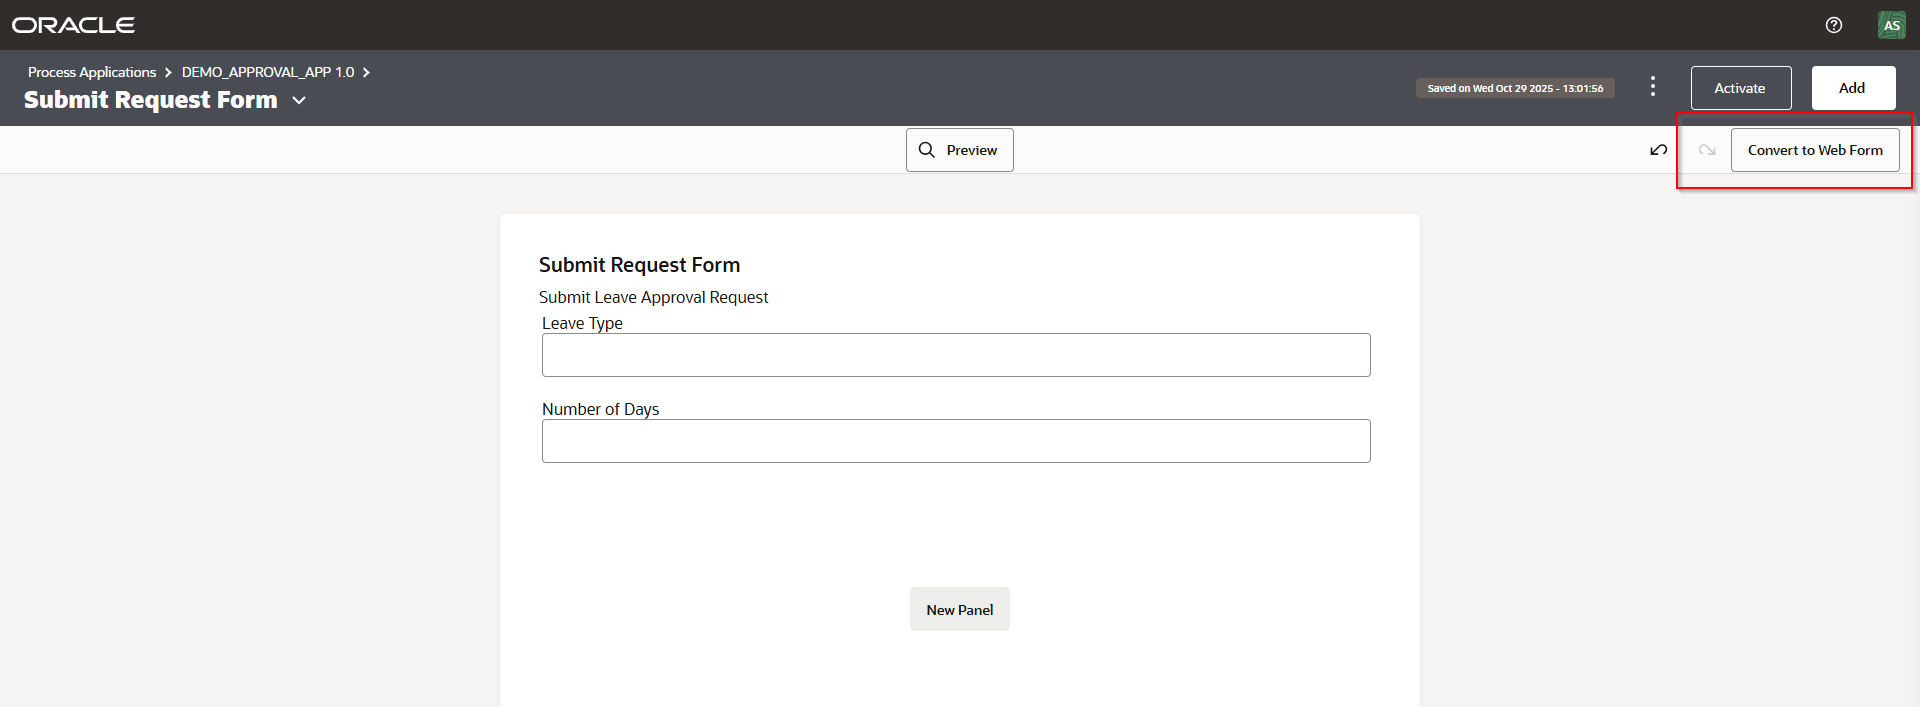
Click on “Convert to Web Form”.
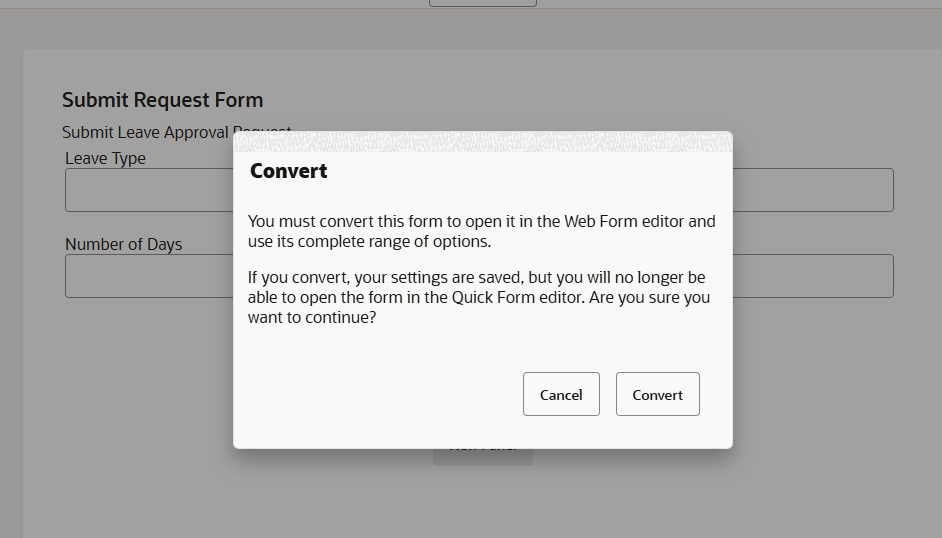
Click on Convert.
Like form UI, we need create Presentation UI for approver to see details about approver requests submitted by initiator.
Navigate to Presentation—-> Presentations —> Add.
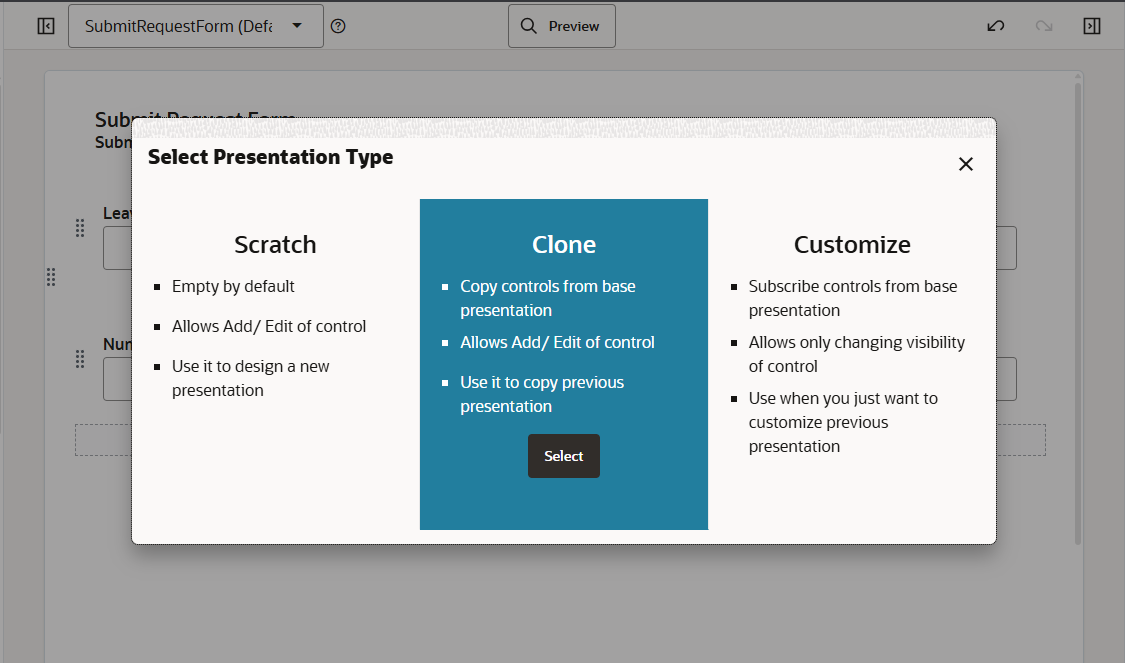
Select Clone.
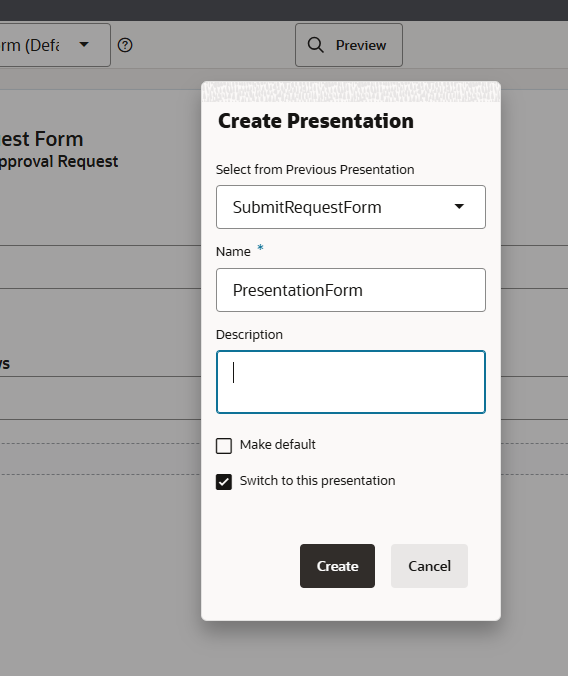
Click on Create.
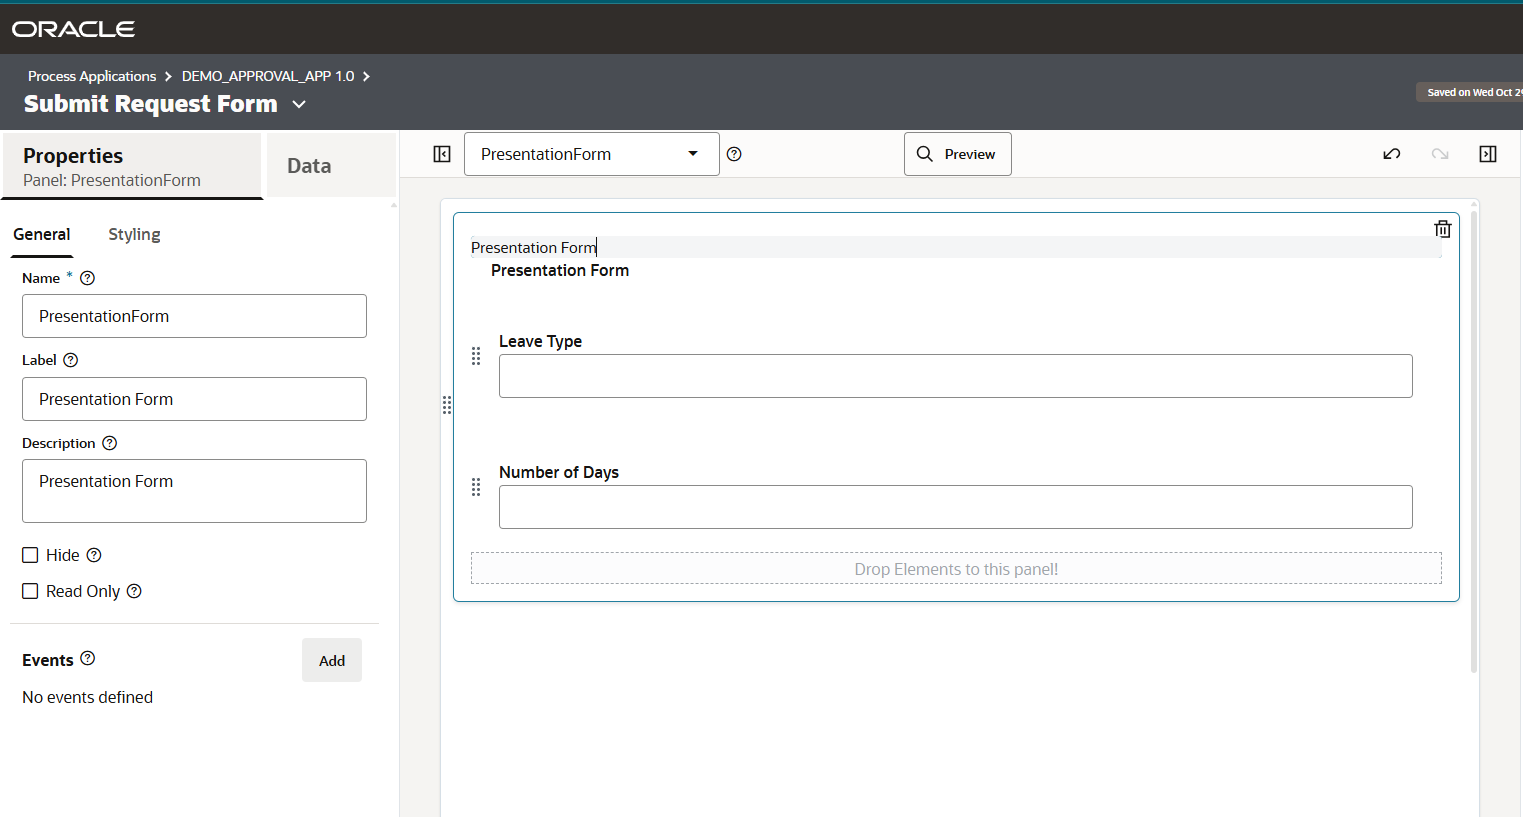
Change Name, Label and Description for Presentation form.
Now let us make Leave Type and Number of Days fields as Read only for Presentation form.
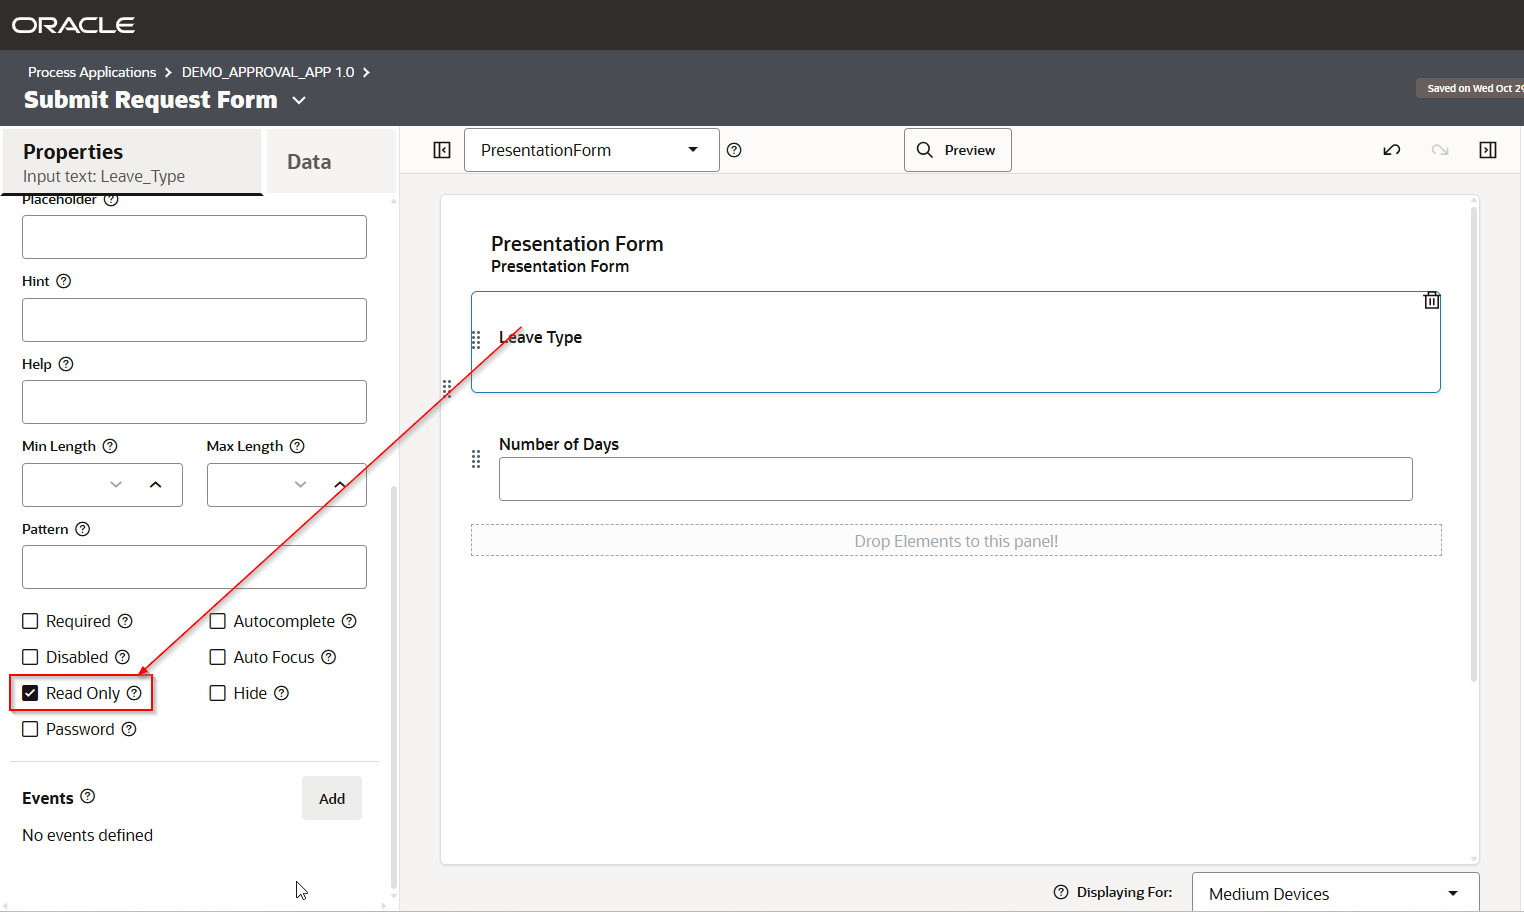
Similarly make “Number of Days” field Read only.
Step5: Crete Structured Process
Now let us create structured process.
Navigate to components —->Processes —>Structured.
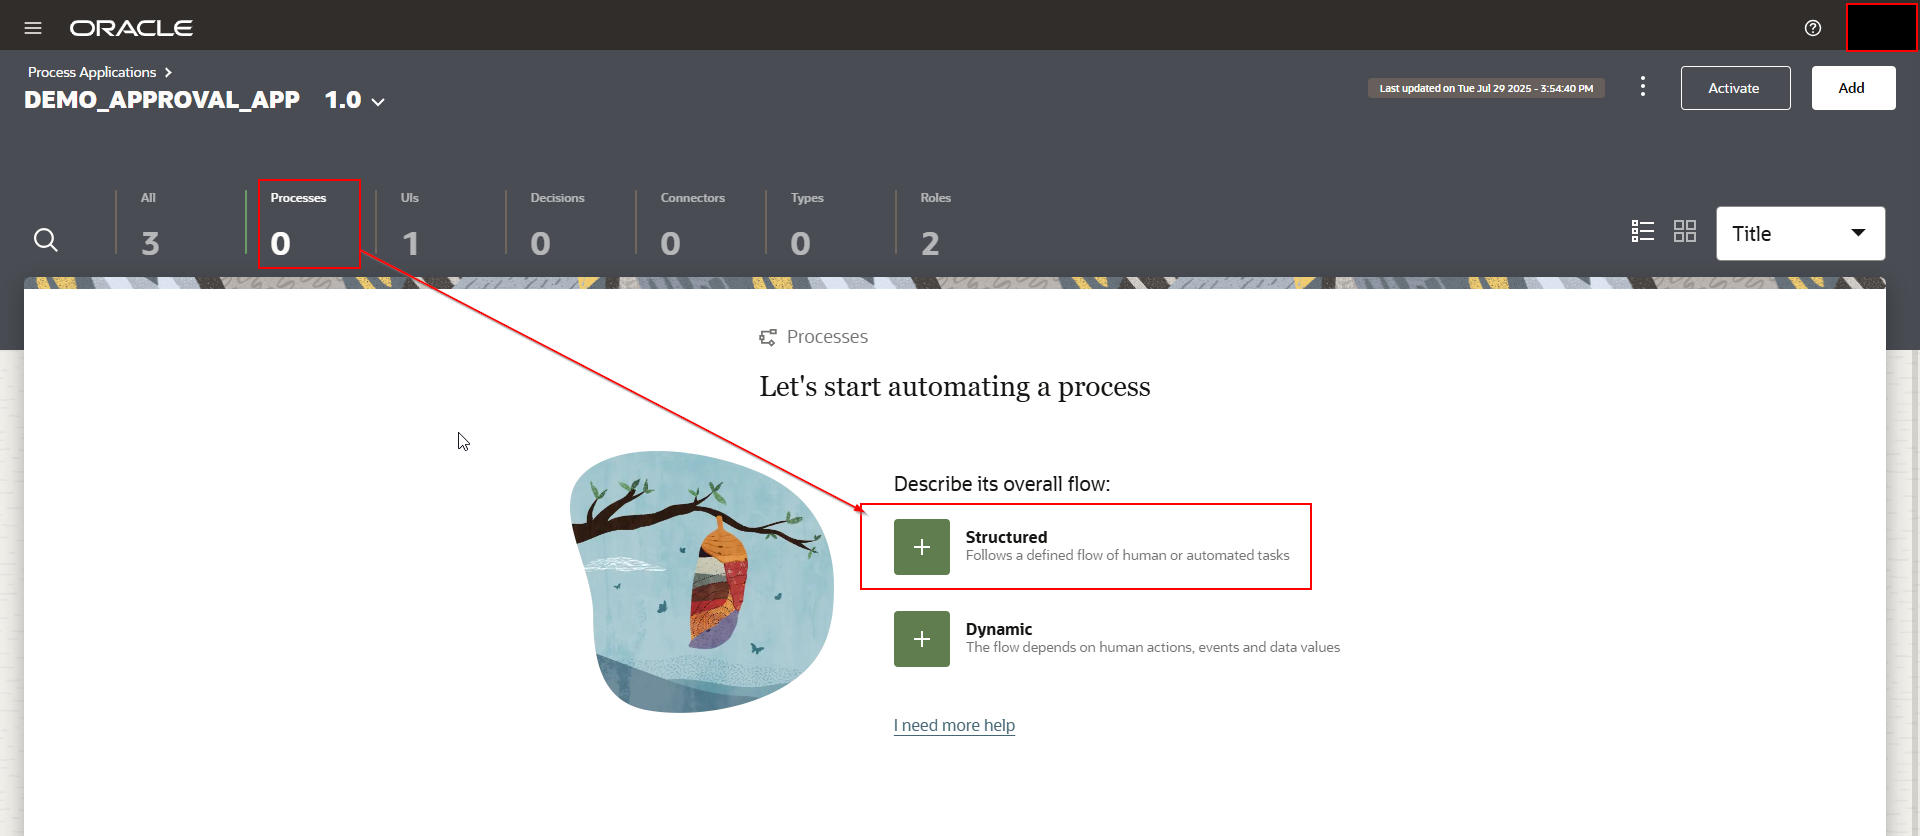
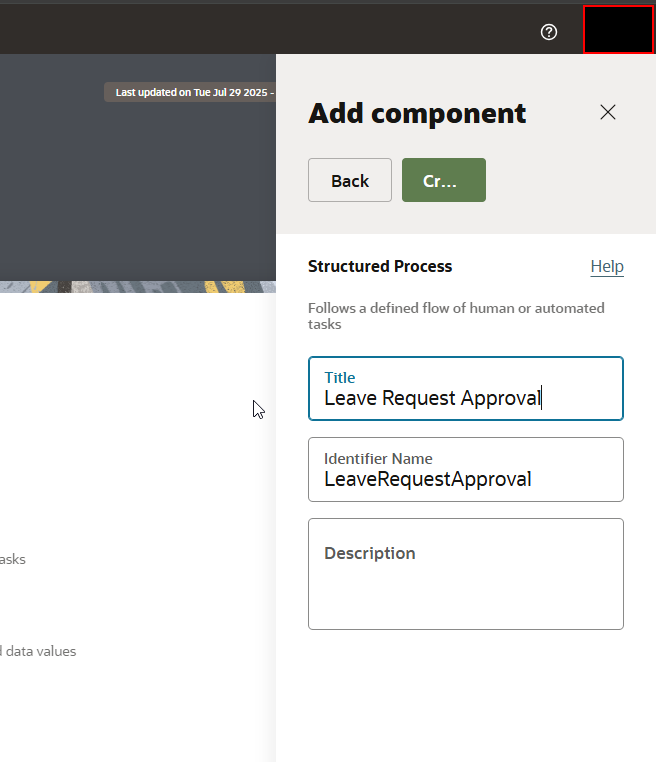
Provide Title as “Leave Request Approval” and Click on Create.
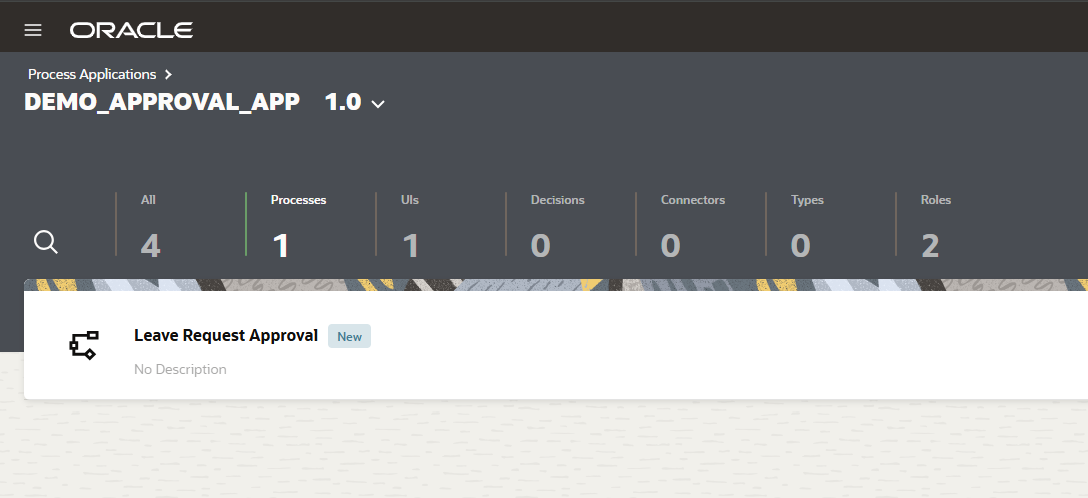
Open the process.
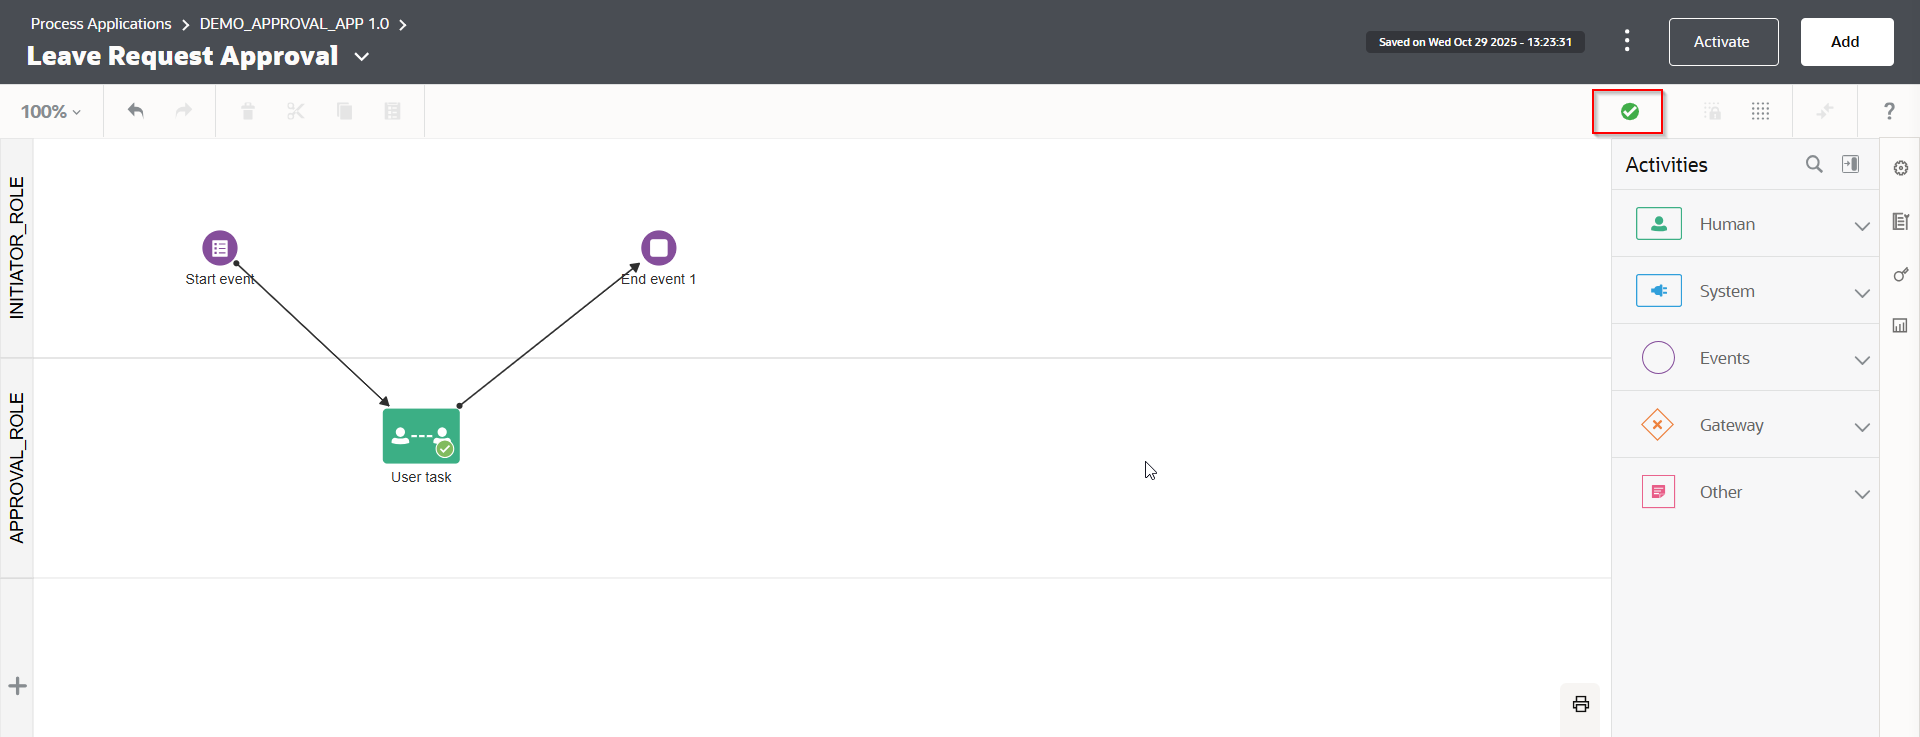
Whenever process is created, start event and End event are created by default as shown below:

Edit swim lane as shown below:


Select role as “INITIATOR_ROLE” which we have created earlier.
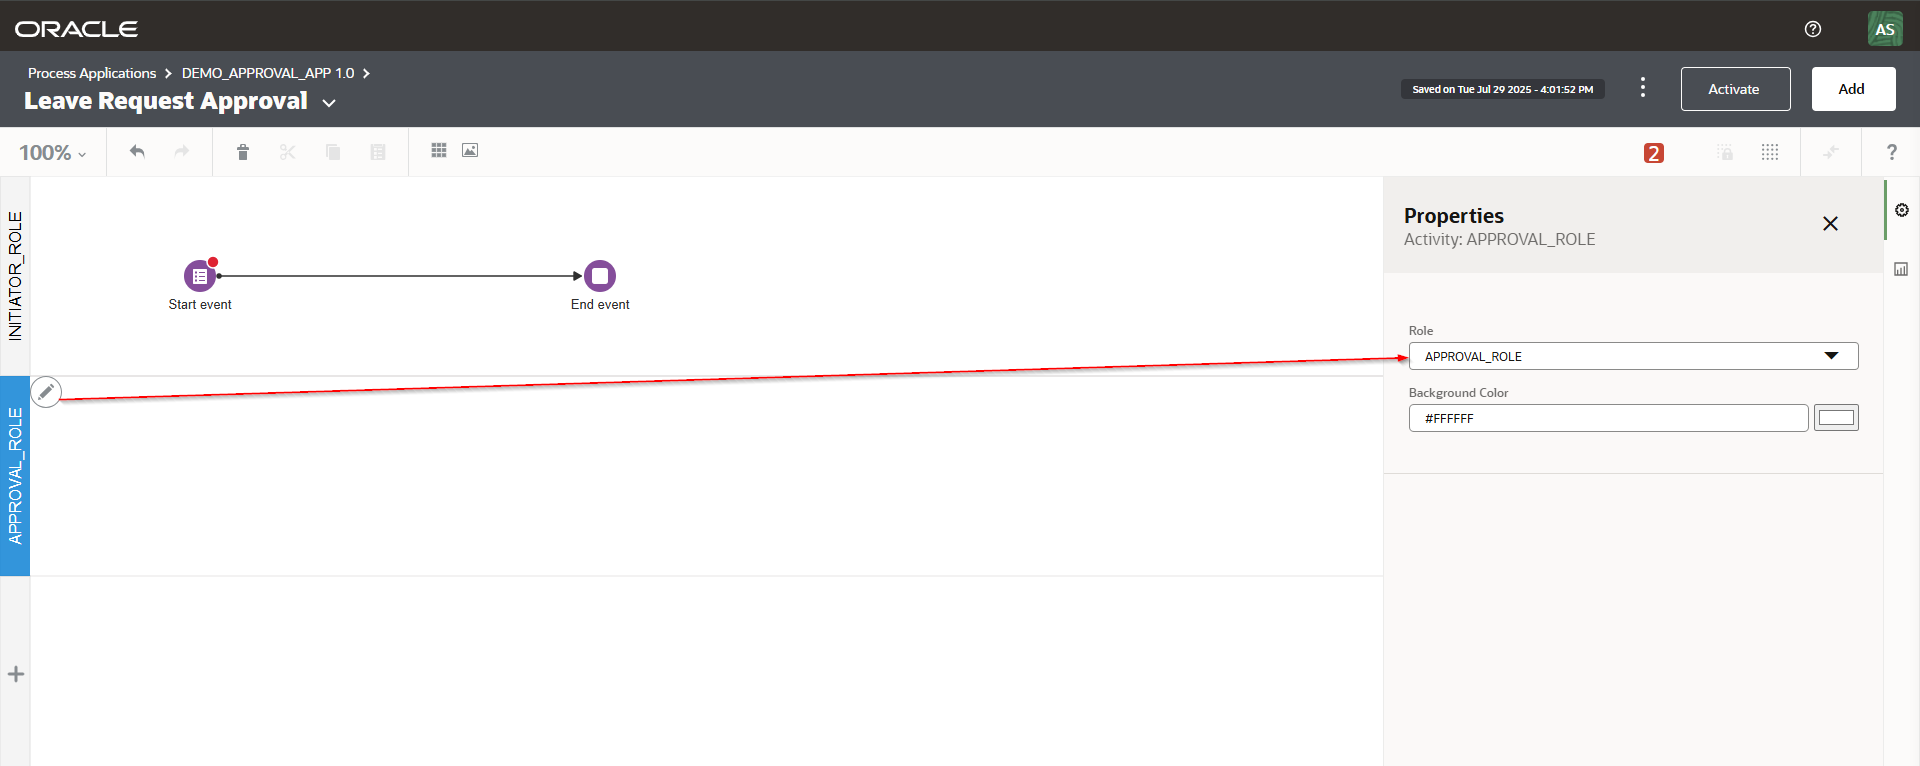
Select “APPROVAL_ROLE”.

Click on properties of Start Event.
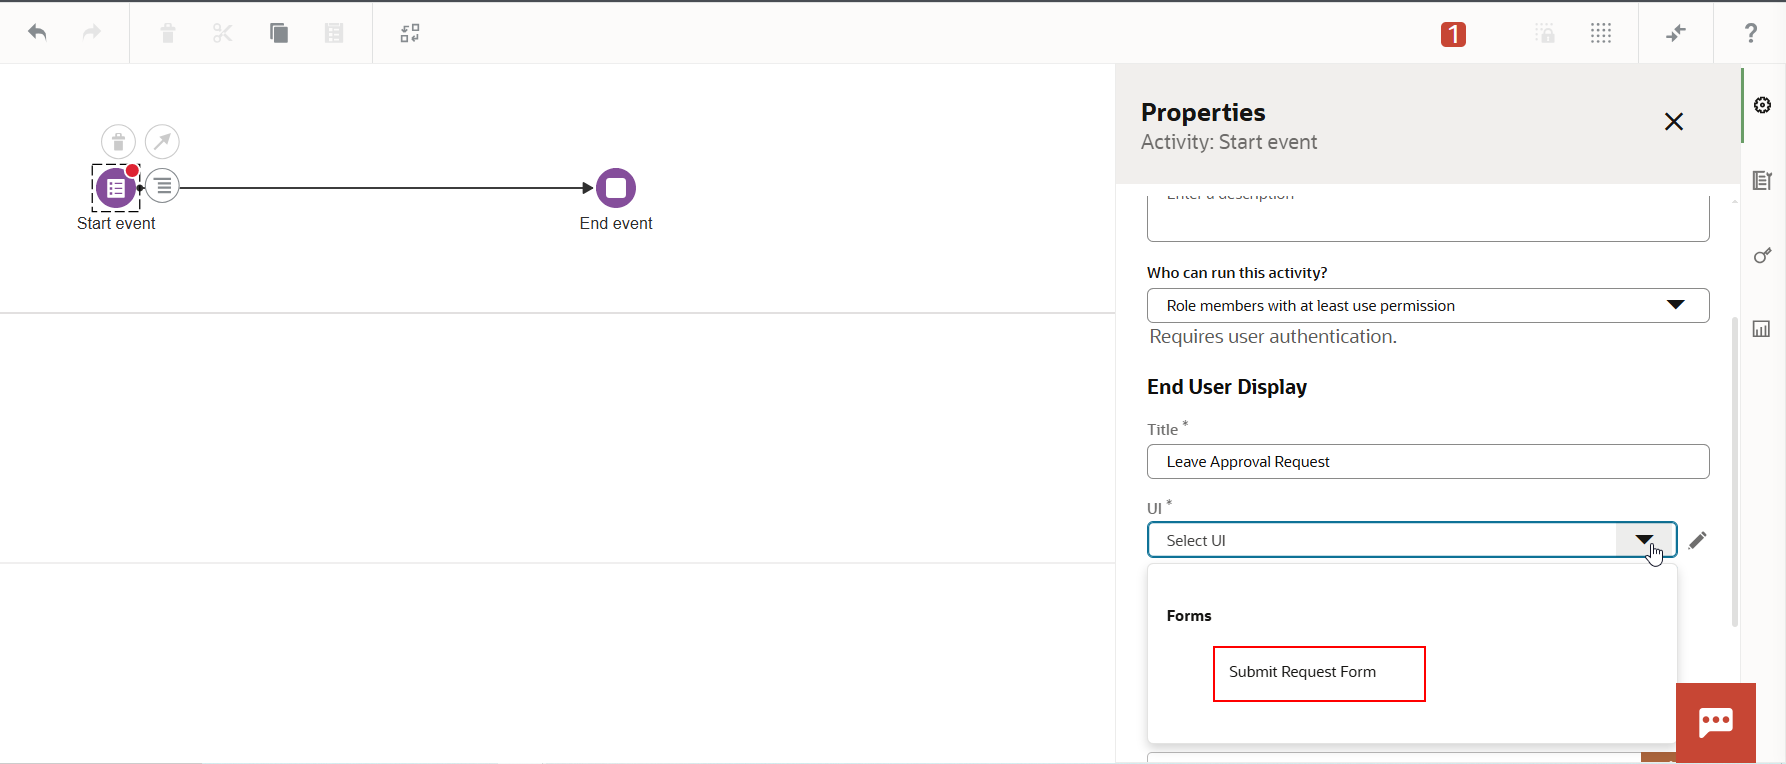
Provide Title and Select “Submit Request Form” for UI.
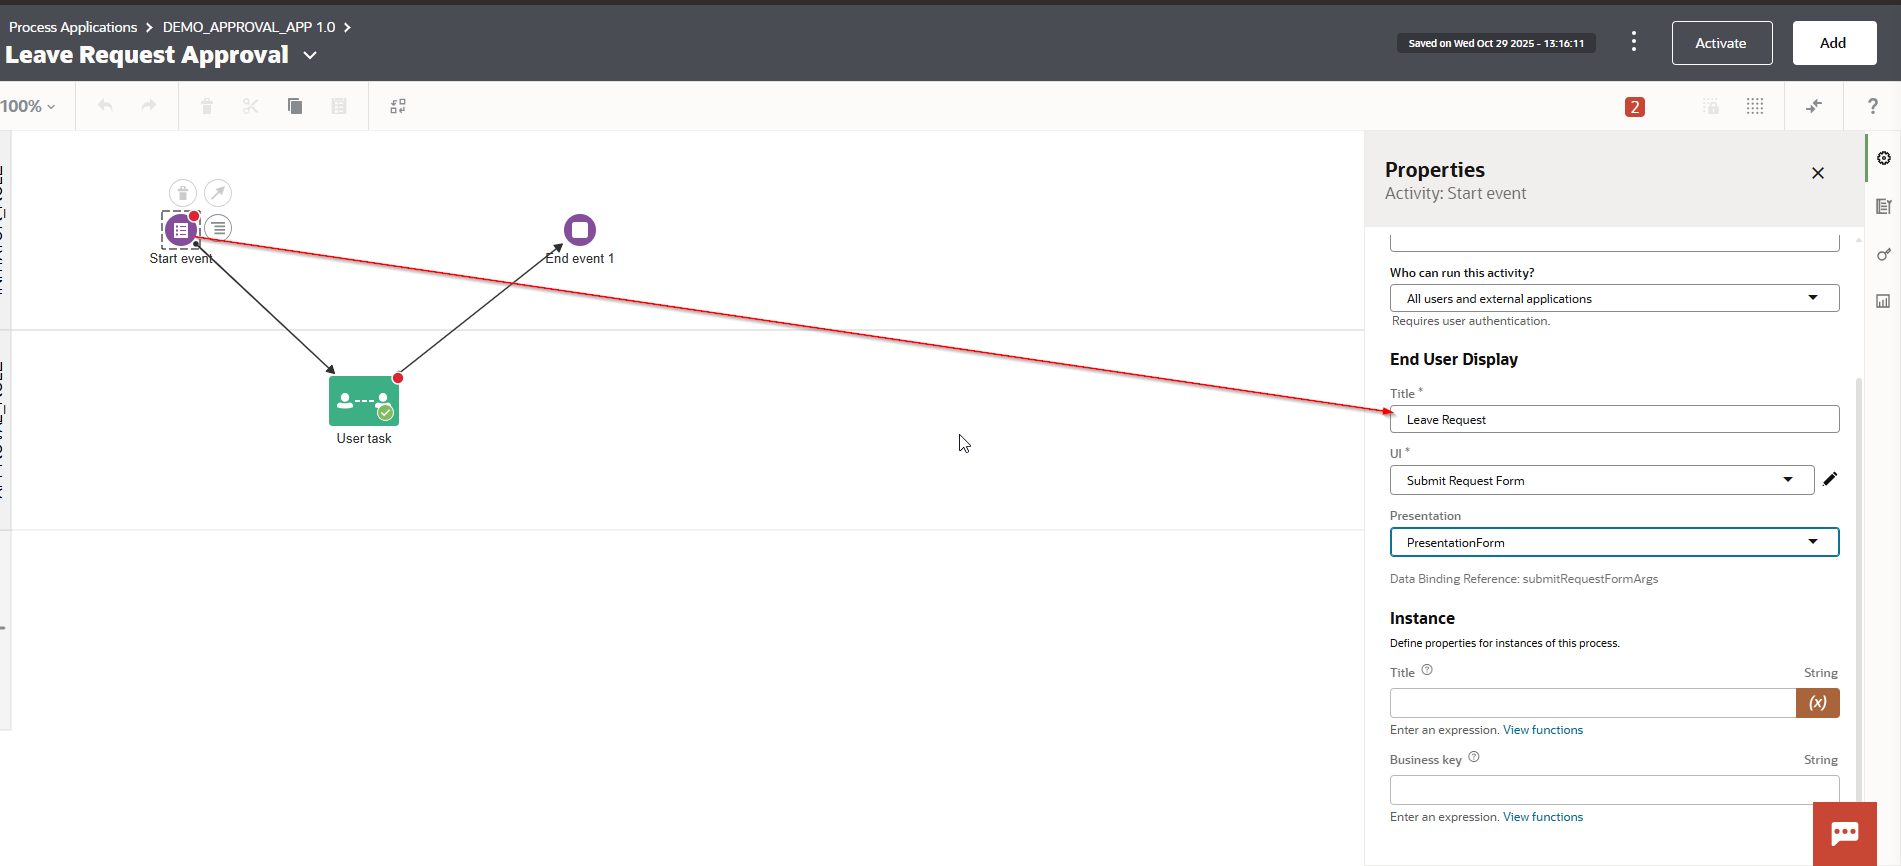
Select Presentation as “PresentationForm”.
Let us Add Approve action for Approval Role.
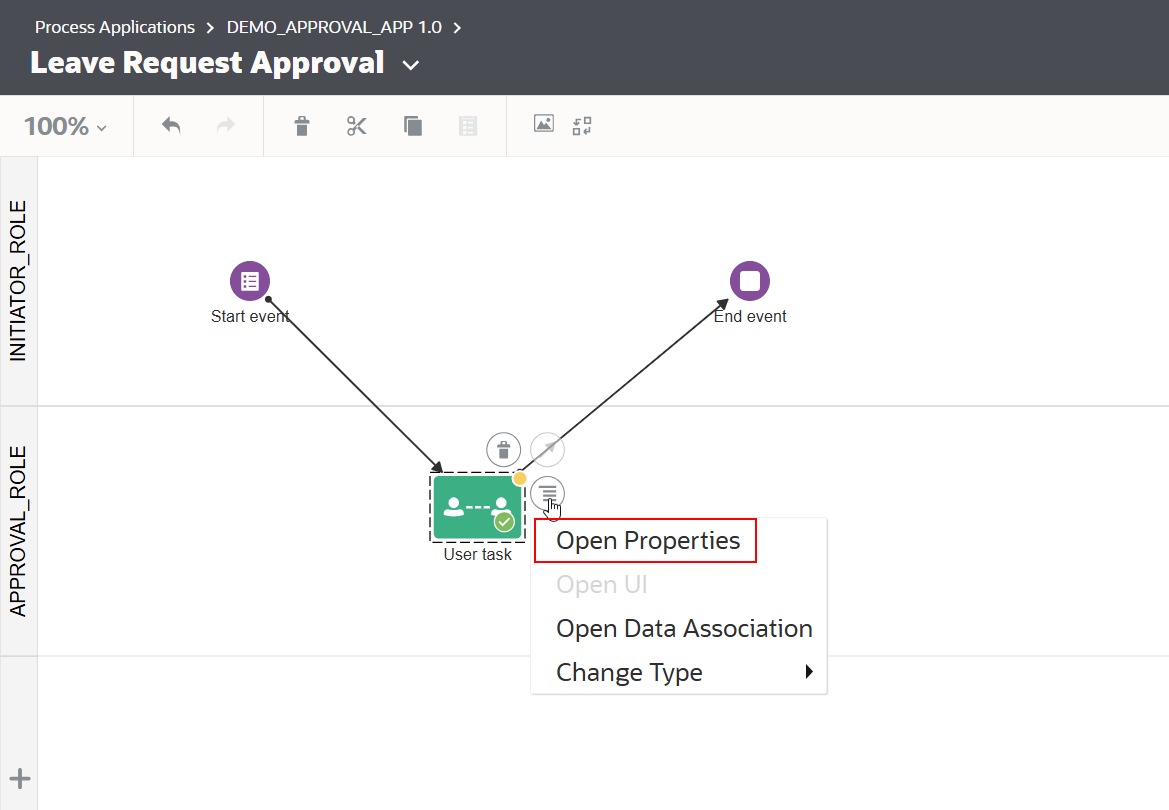
Drag and drop Approve activity to APPROVAL_ROLE swim lane.

Complete process flow by connection start Event —-> Approve Action —-> End Event as shown below:


Edit properties for Approve Activity.
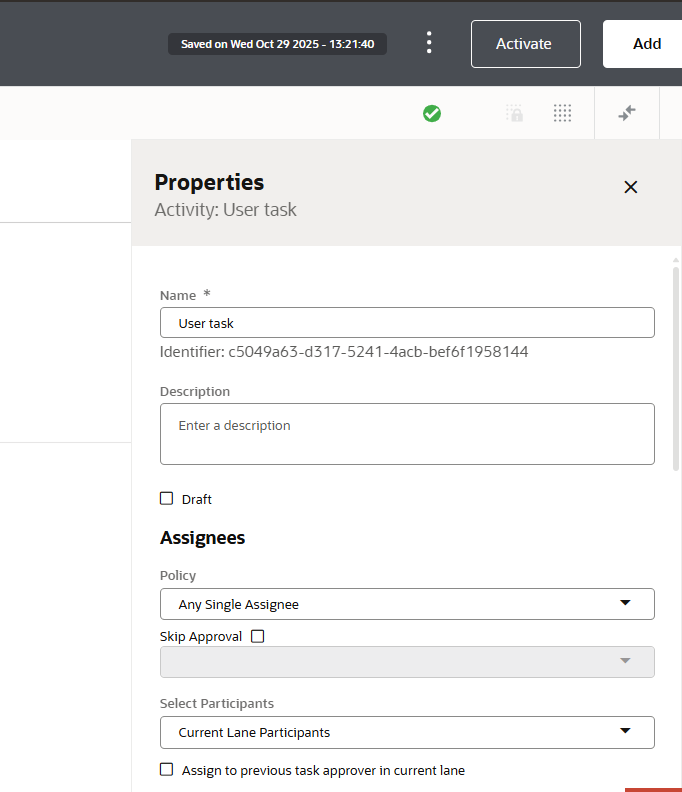
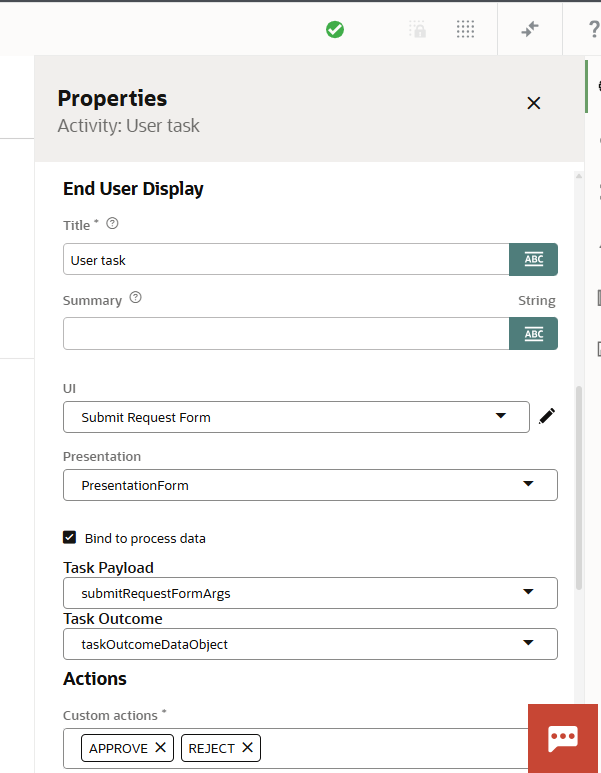
Provide value for UI and Presentation.
Select checkbox for “Bind to process data”.
Verify green tick mark at the top
Click on Activate.
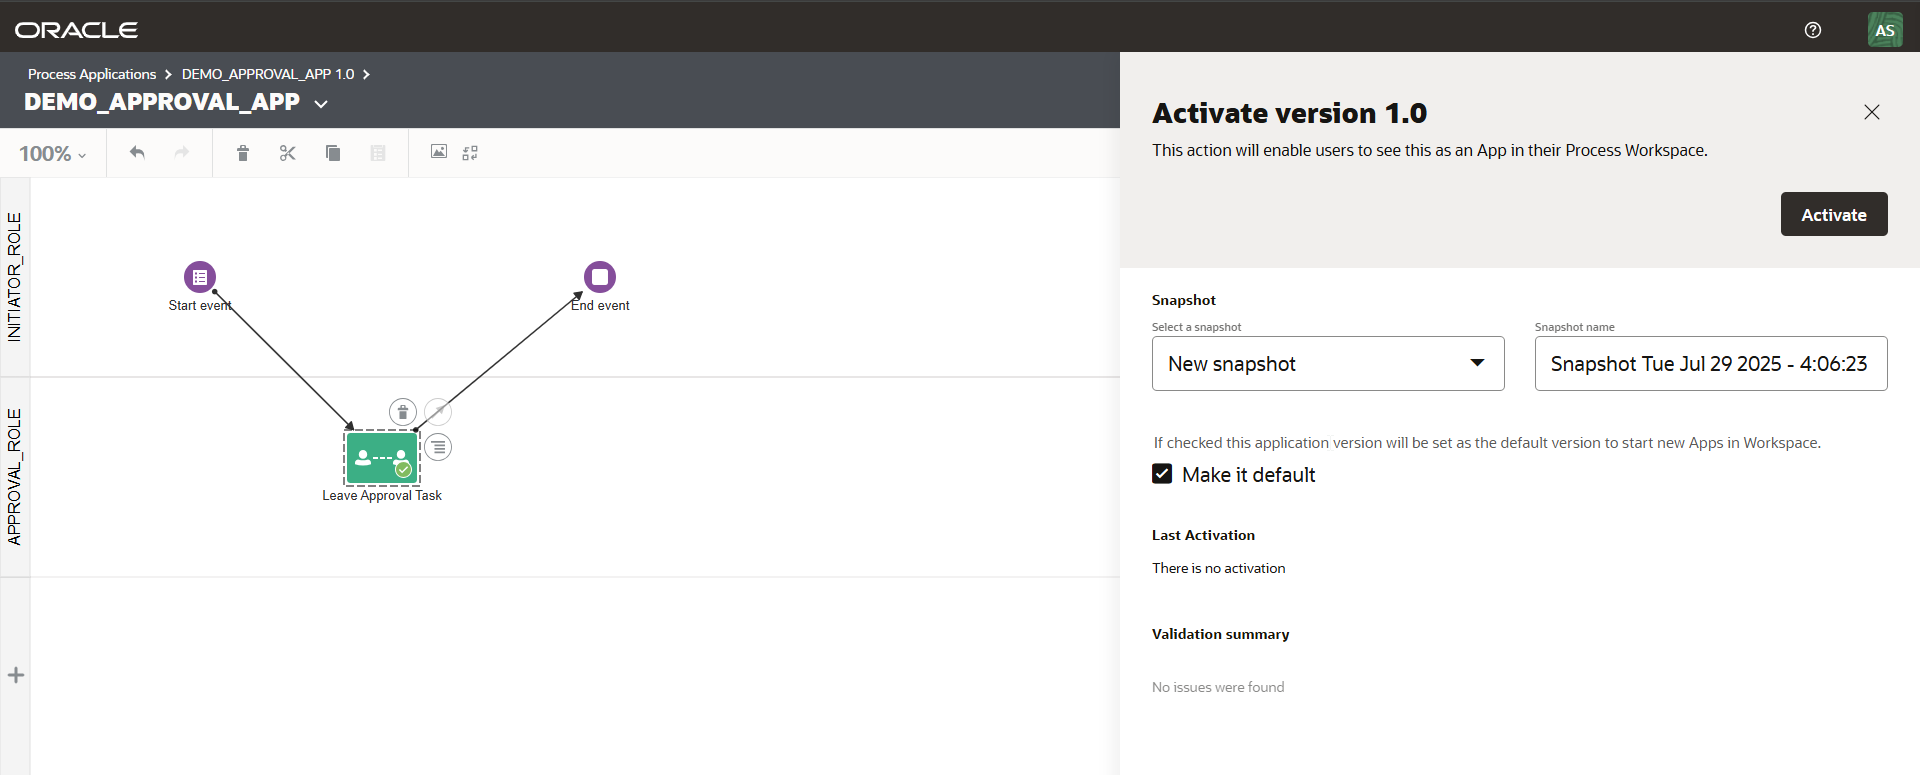
Click on Activate.

Step6: Test Approval process flow
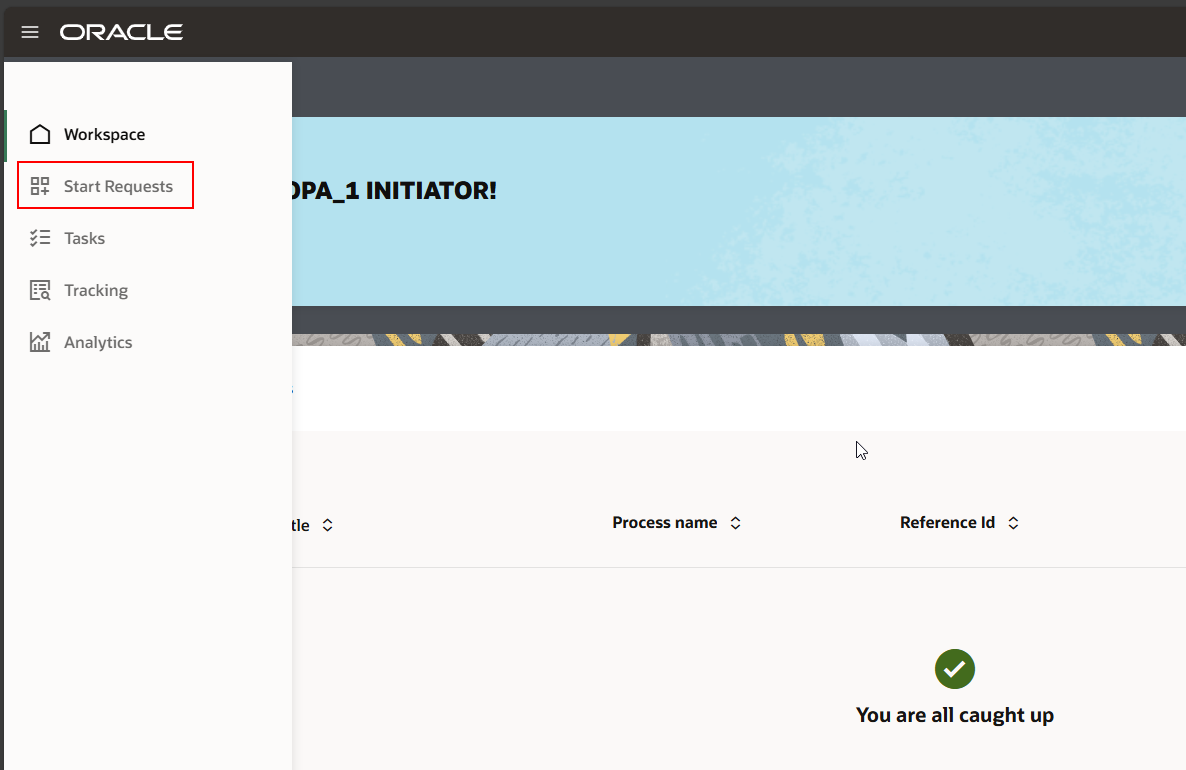
Now let us login to OPA instance with OPA_1_INITIATOR@testmail.com user to initiate approval requests.
Navigate to Workspace —->Start Requests
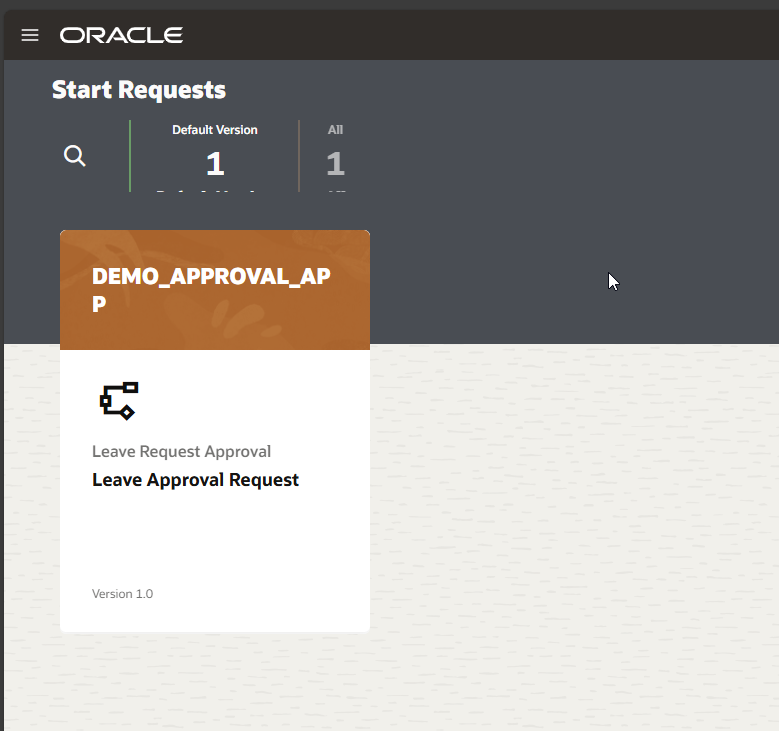
Click on Leave Approval Request Application.
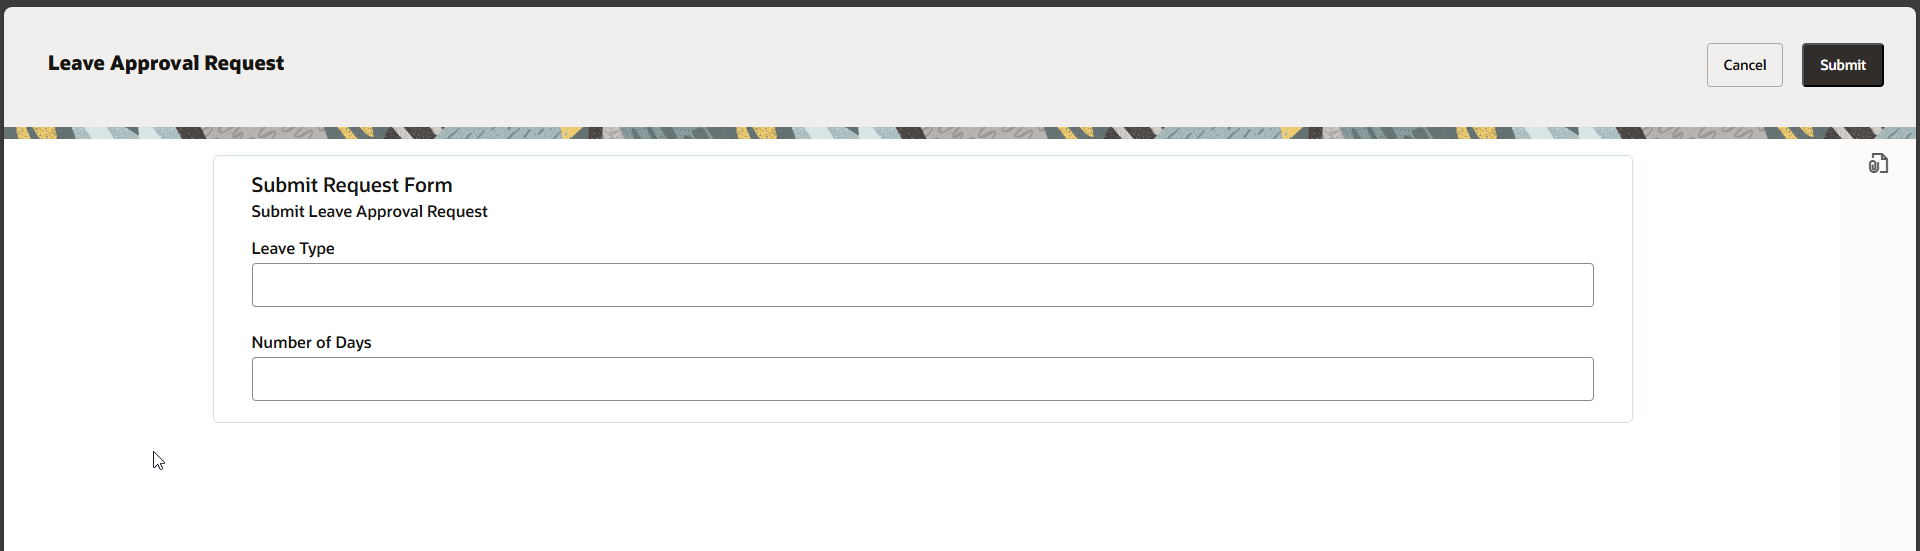
Provide details.
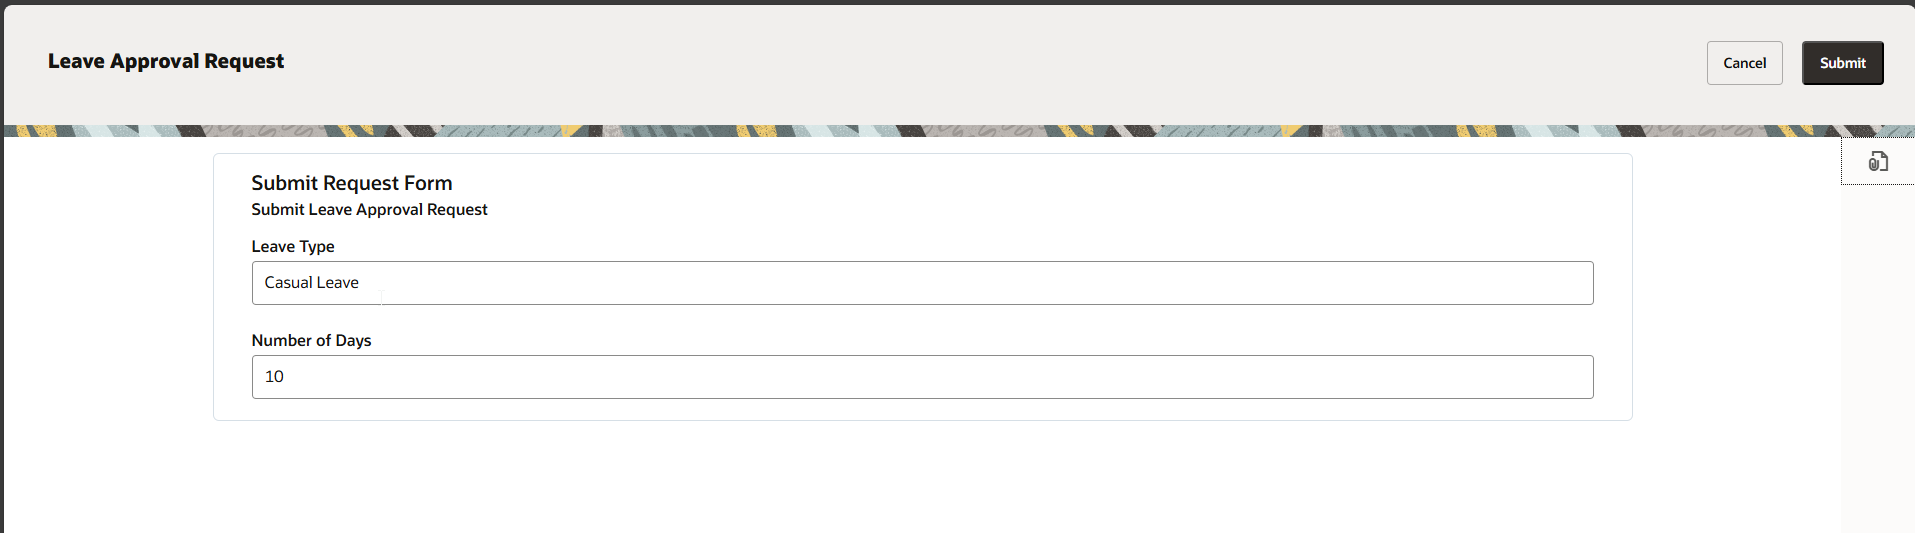
Click on Submit.
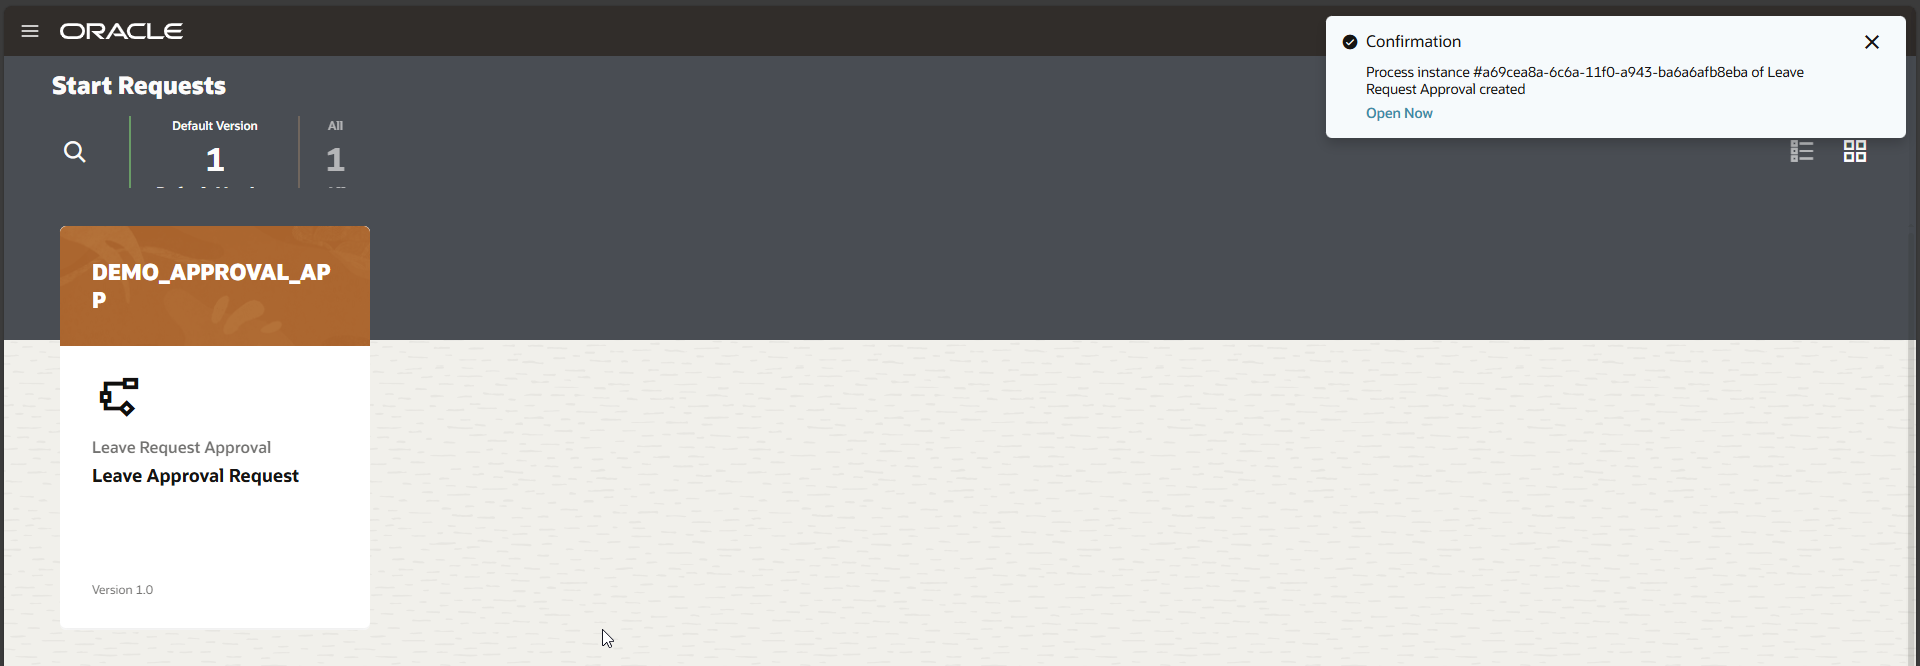
Leave Approval Request process is successfully submitted.
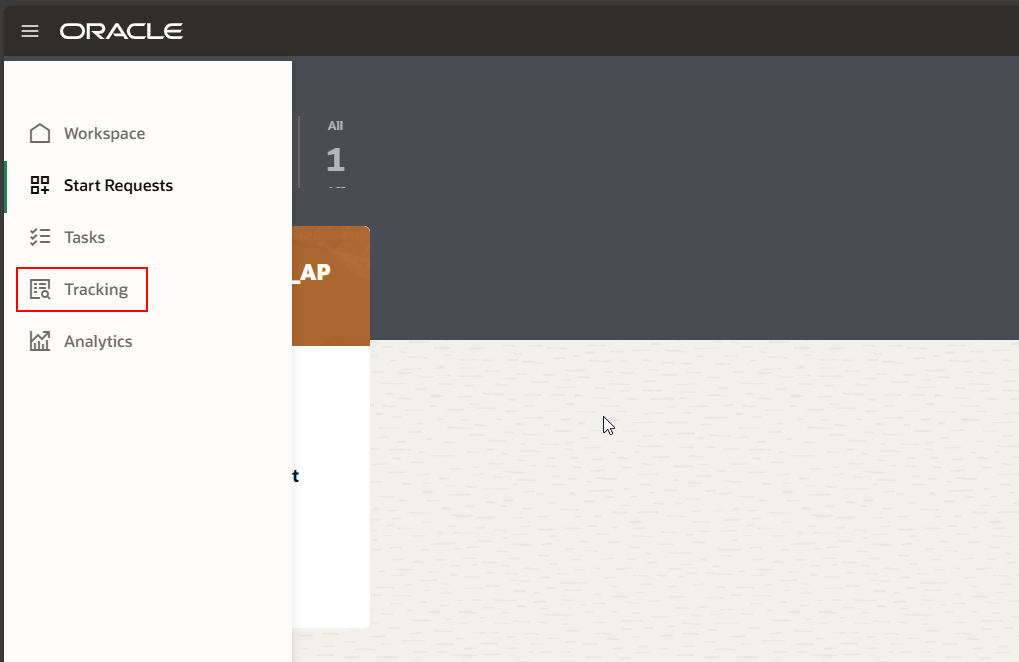
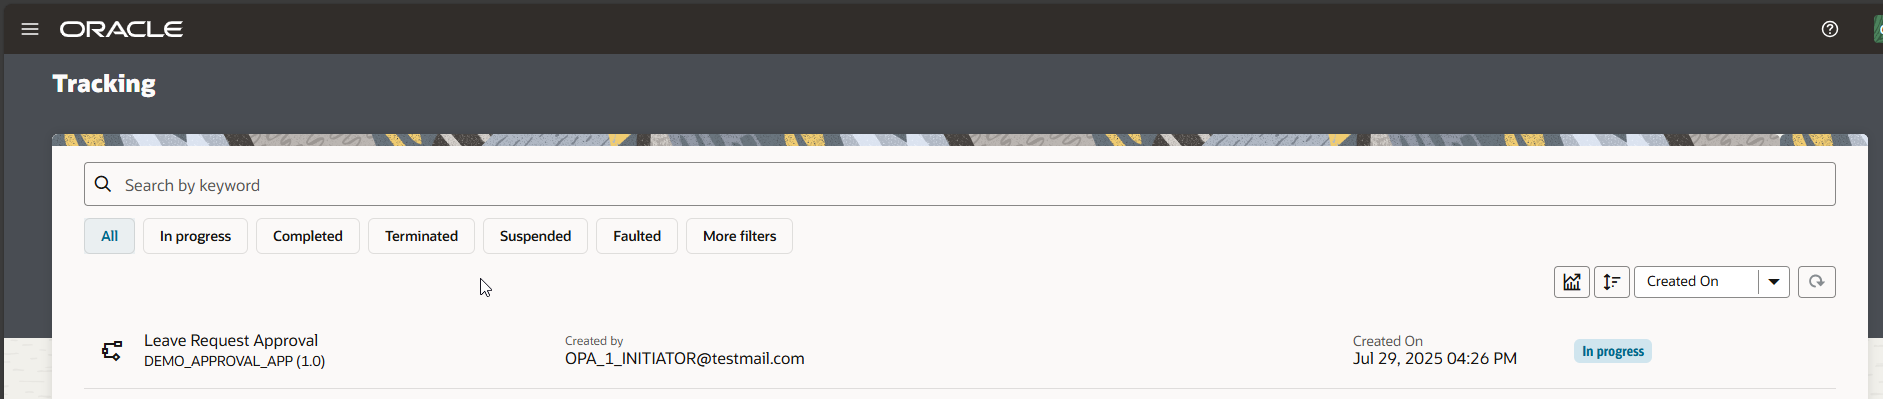
Navigate to Tracking.
Let us login with OPA_2_APPROVER@testmail.com user to approve the approval request.


Click on APPROVE.
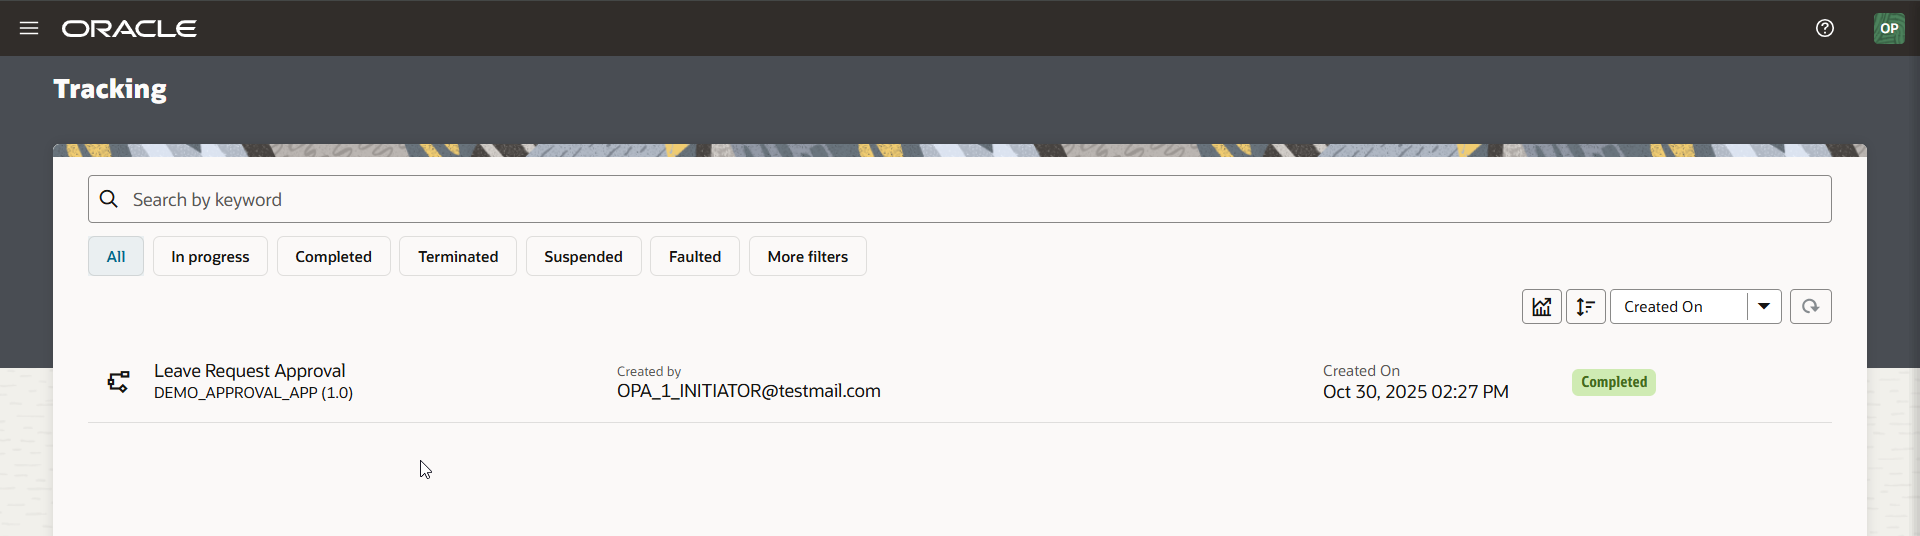
The Leave Approval request is approved and completed successfully.