How to Implement Row Level Edit for Table in VBCS
In this post, we will implement row level edit for table in VBCS.
Let us create new Web app as shown:
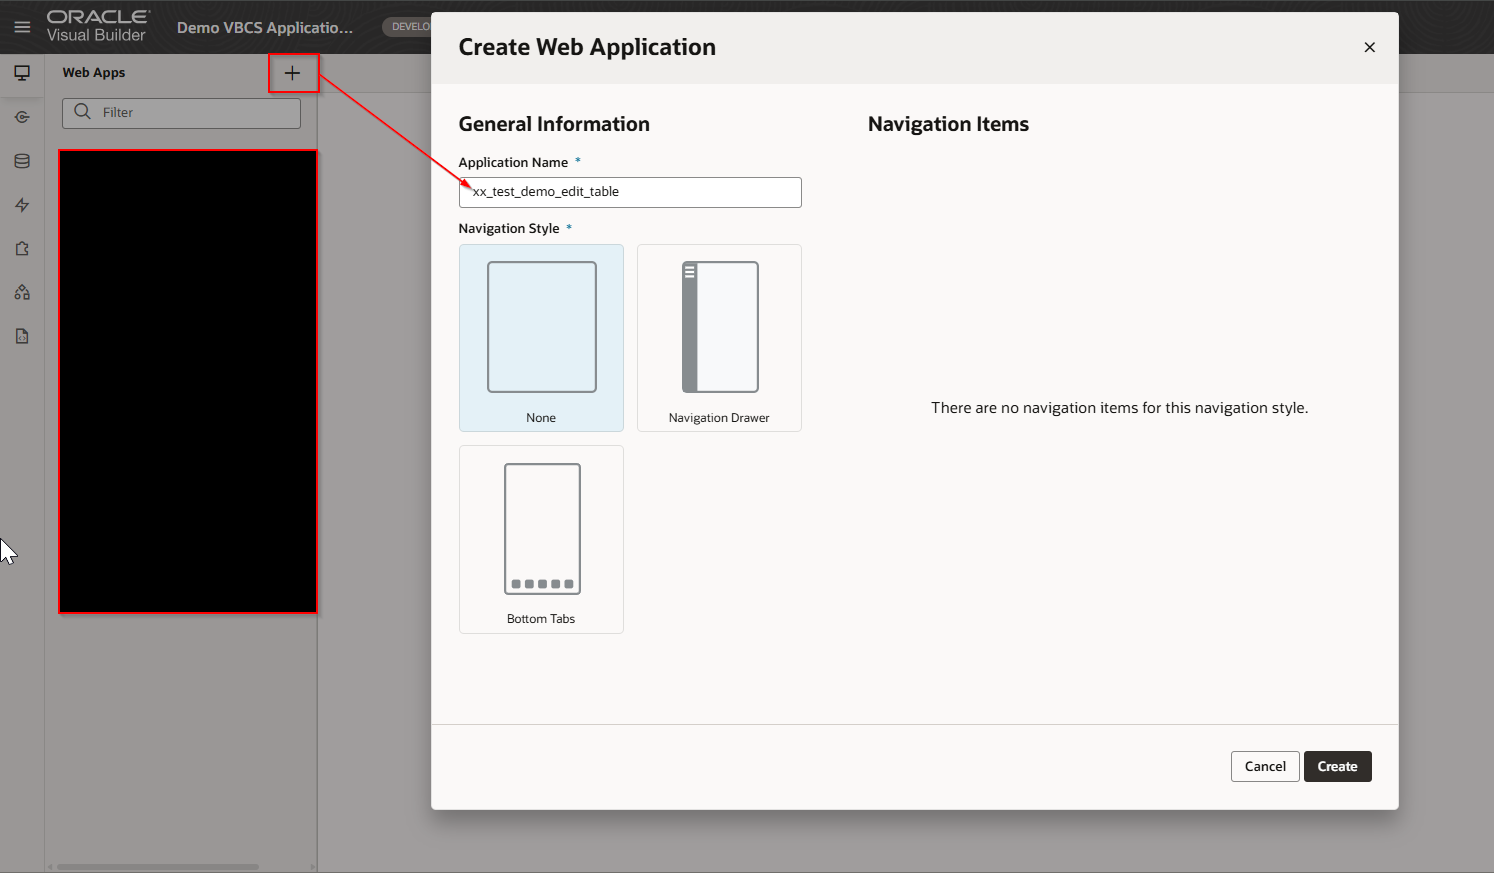
Click on Create.
We will use same service connection based on ORDS data source.
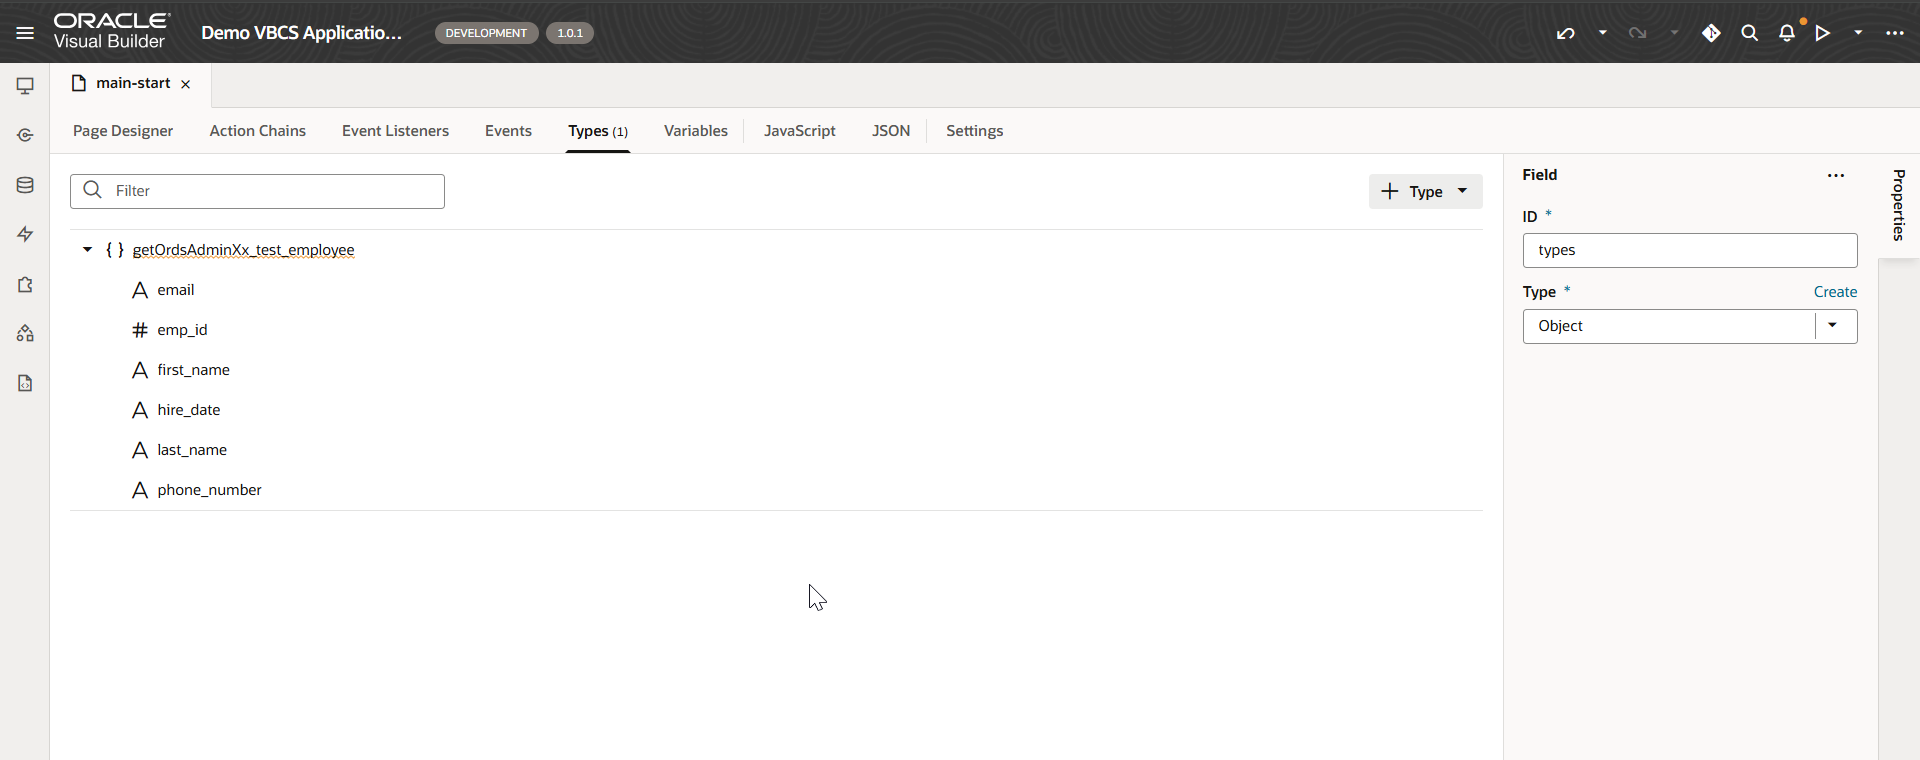
Create new types.
Navigate to Types —>From Endpoint.
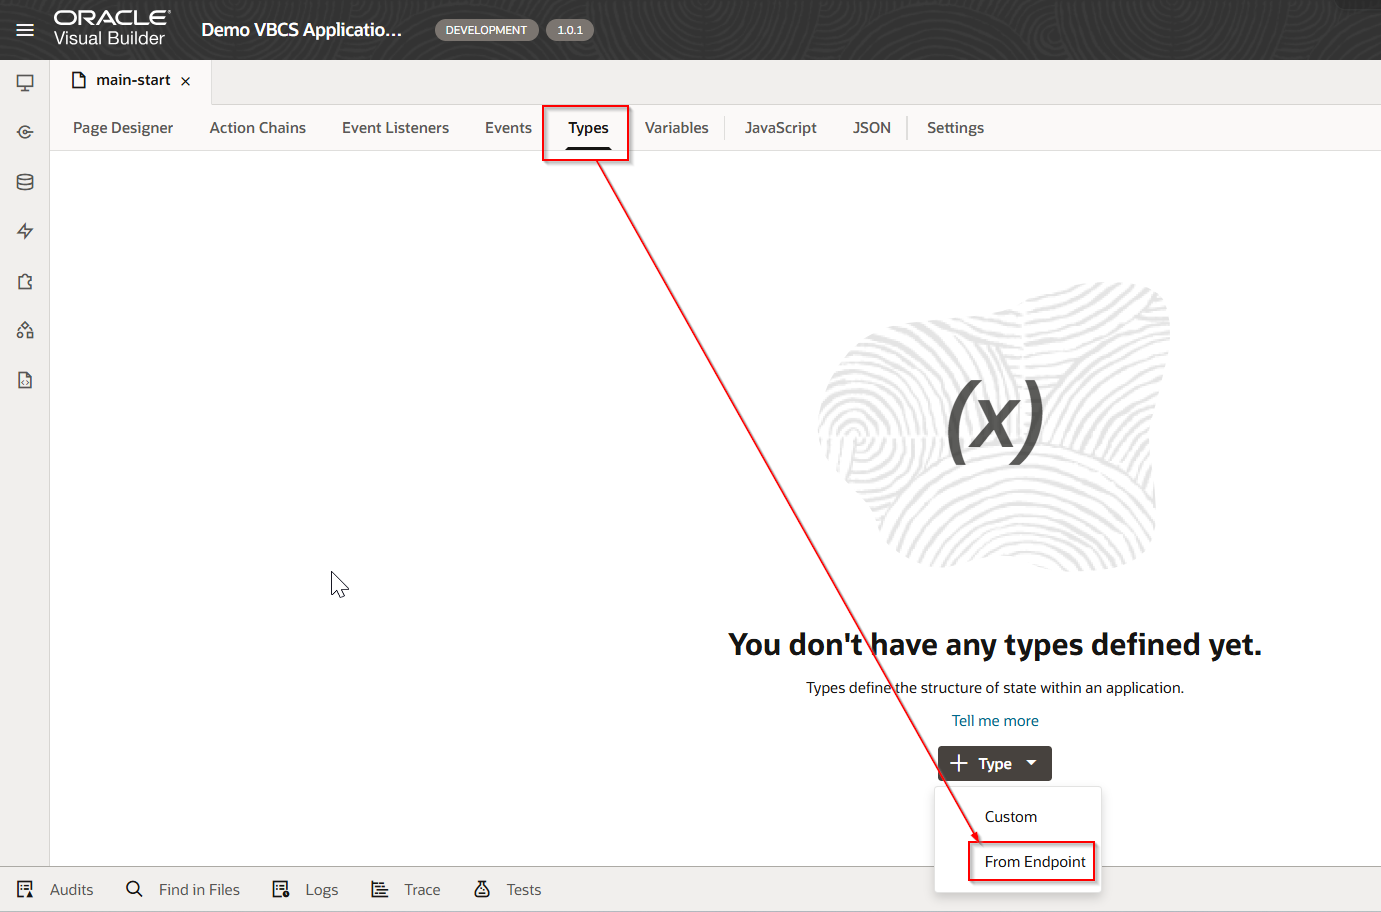
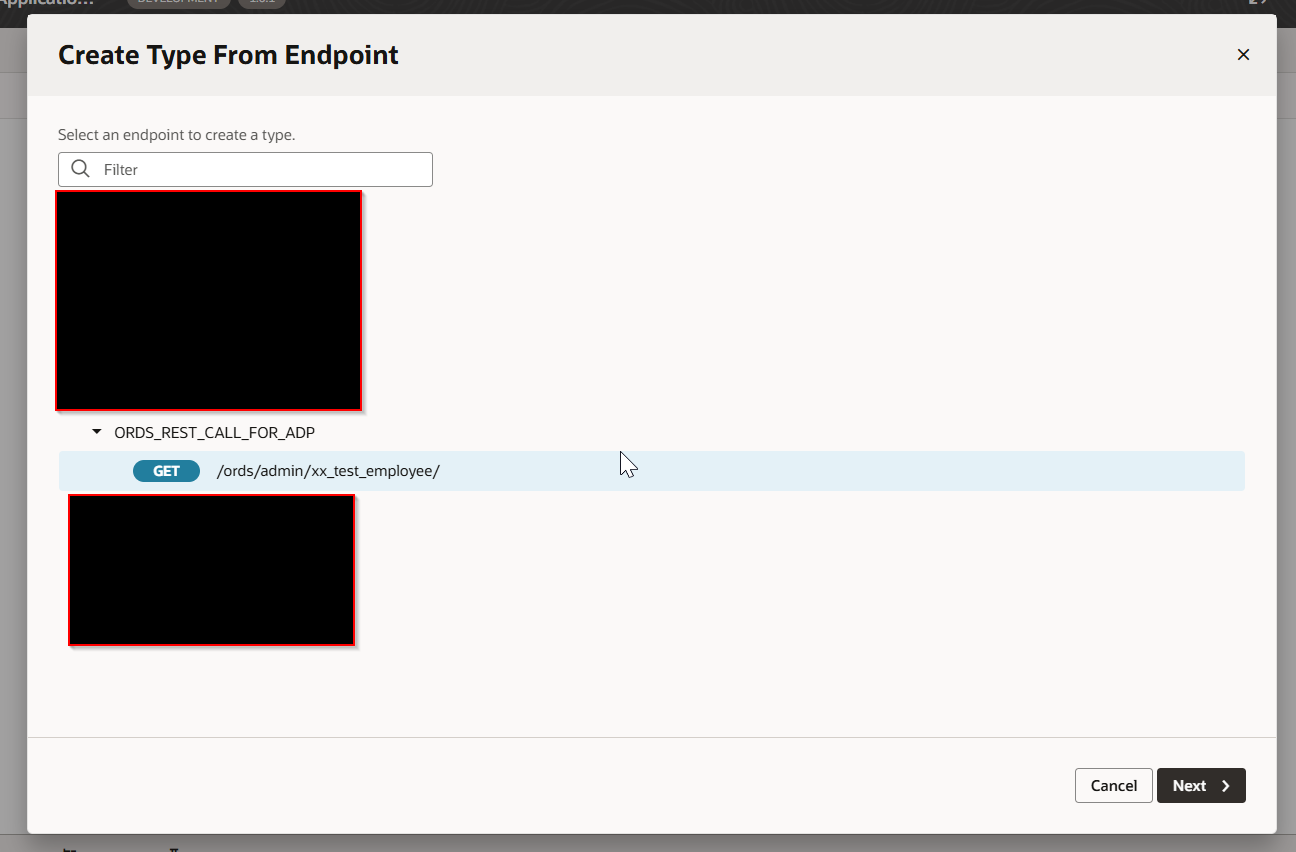
Click Next.

Click Finish.
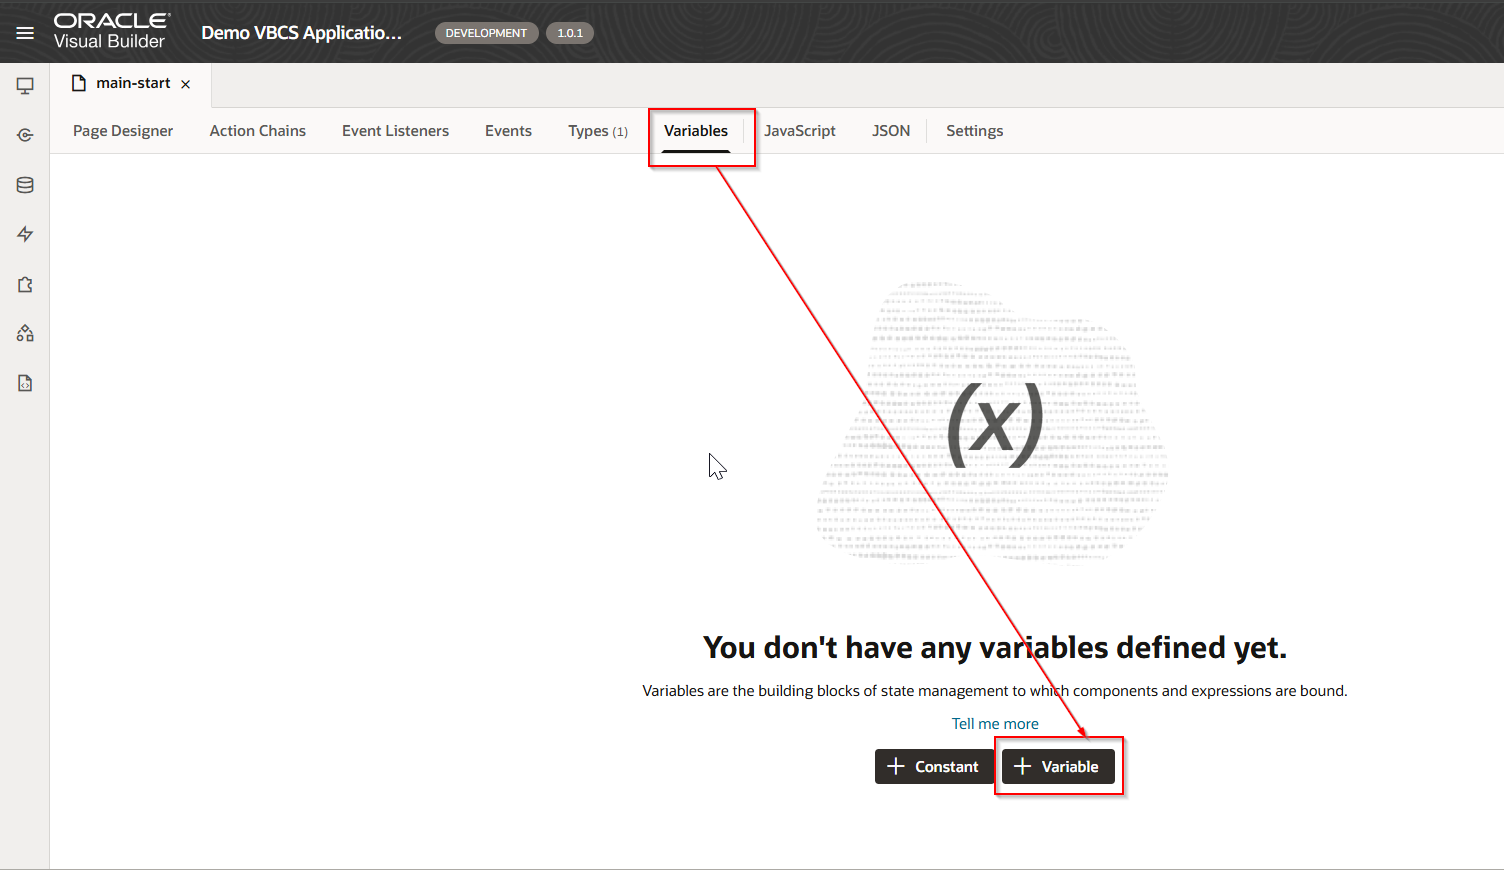
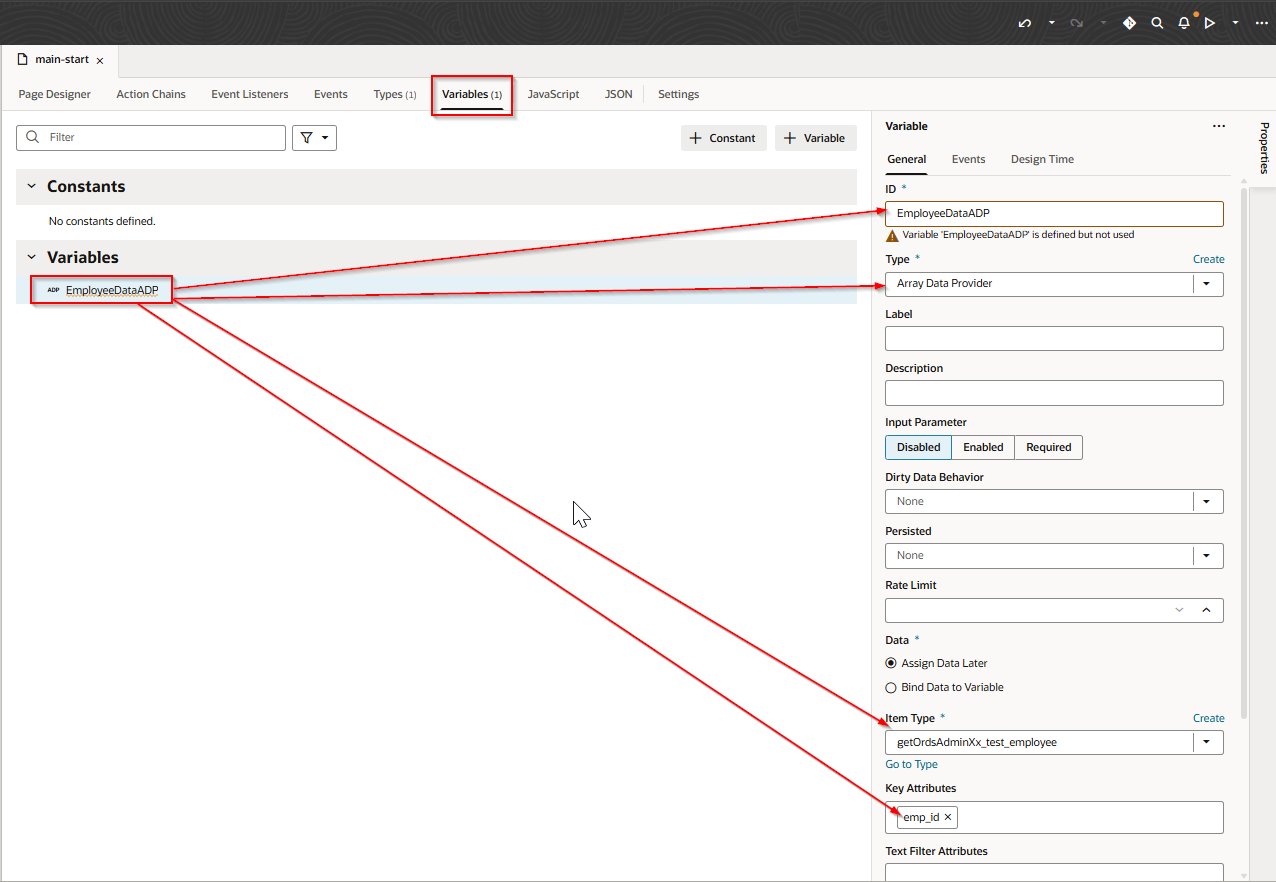
Create new ADP Variable.
Navigate to Variables —>Variable
Create table in VBCS page and assign ADP variable to table.

Create VB Enter event to populate ADP variable when page loads
Navigate to Event Listeners —->Event Listener.
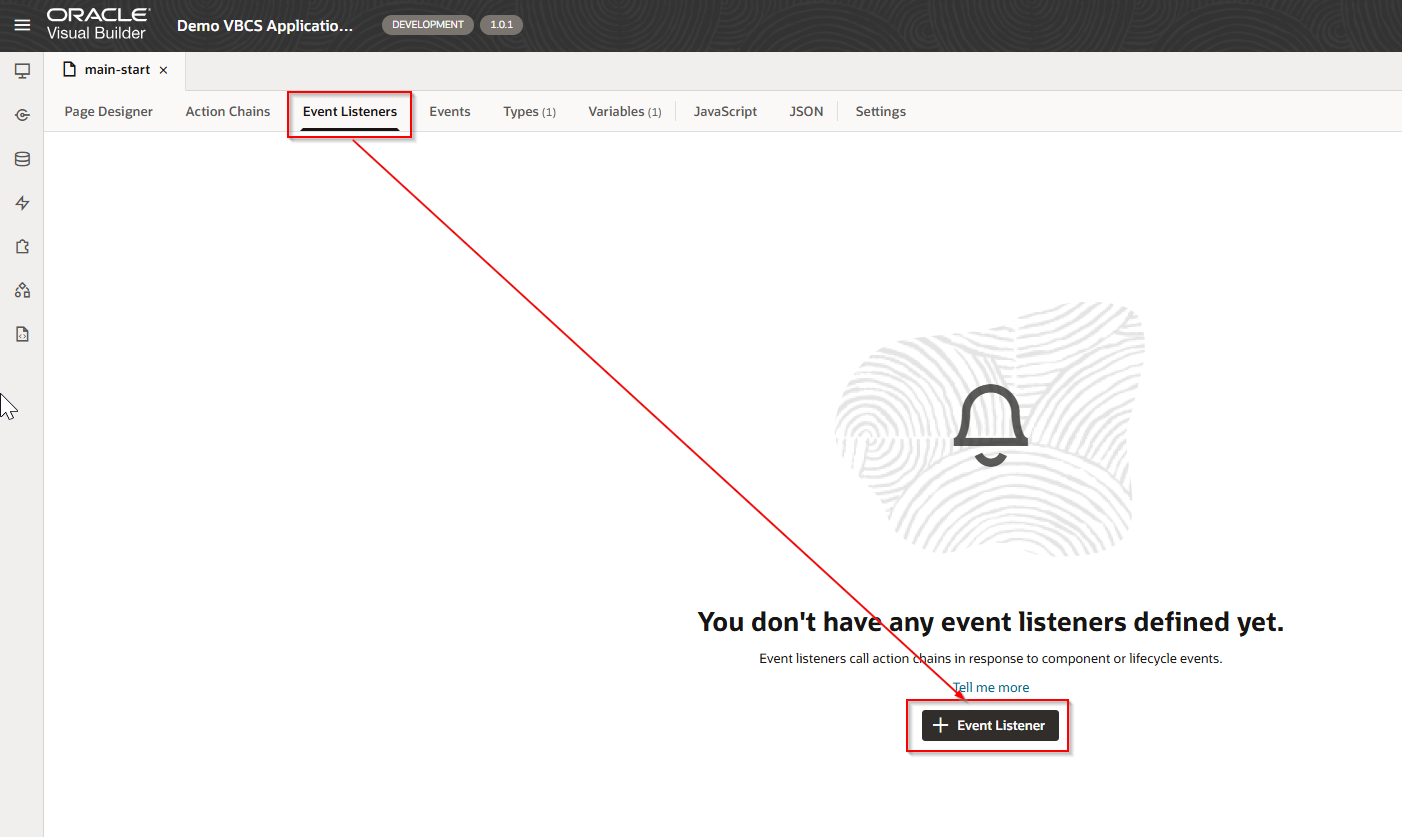
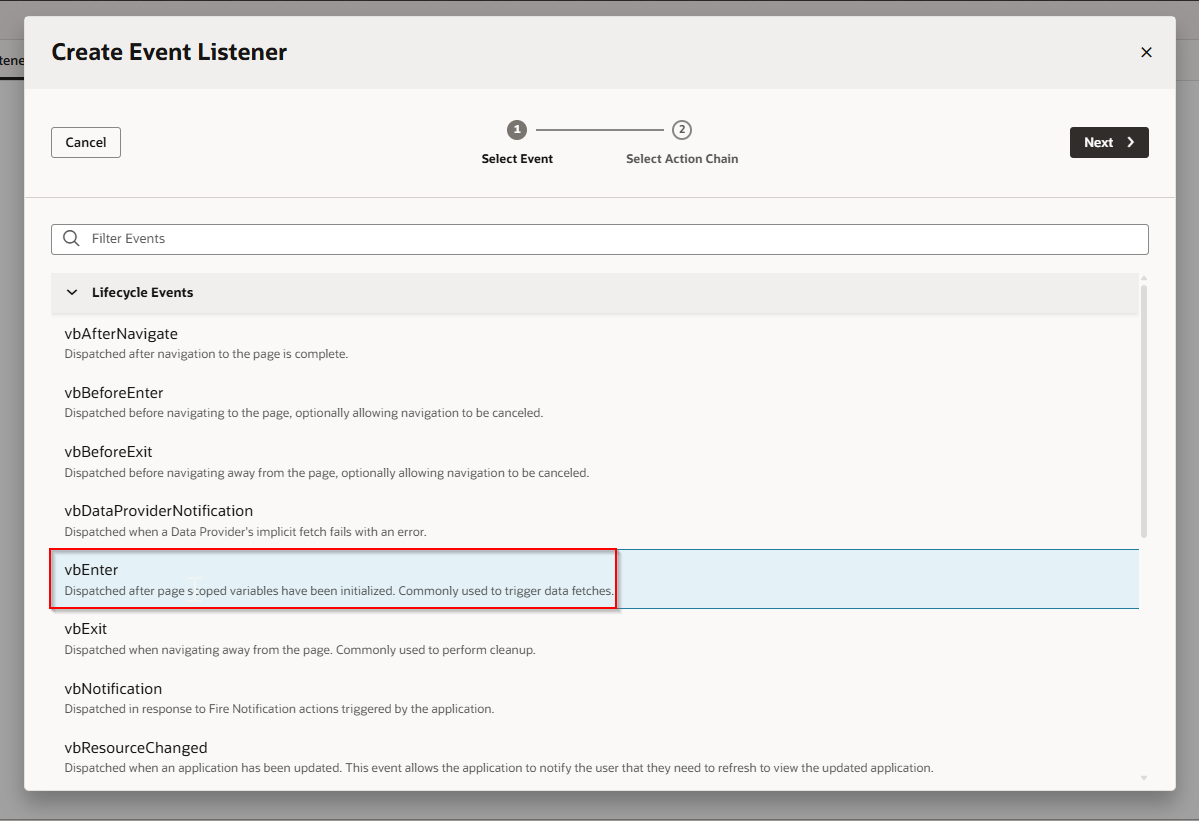
Select vbEnter and Click Next.
Select Create Page Action chain and click on Finish.
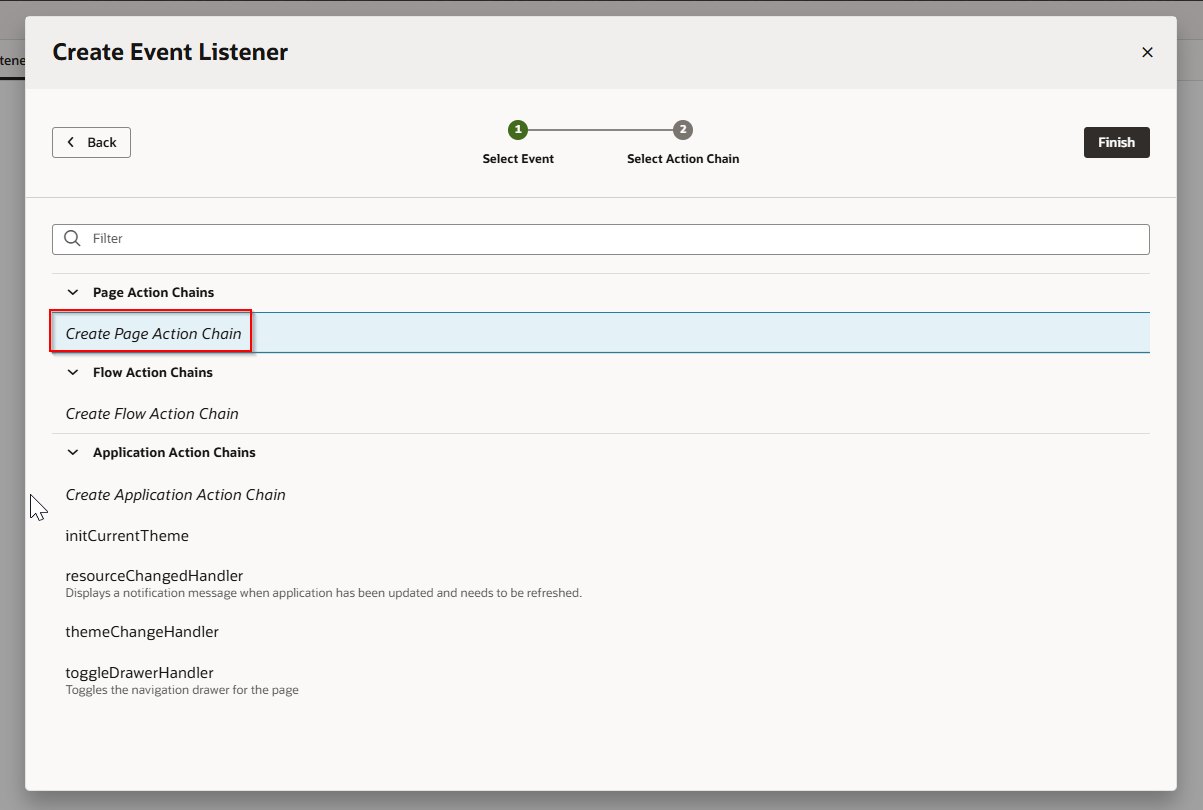
Click Finish.
This will create new action chain.
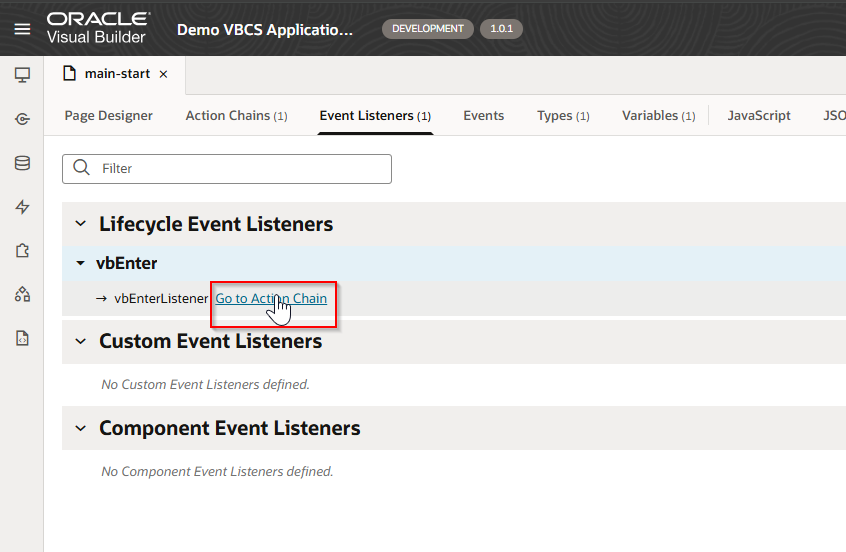
Click on “Go to Action Chain”.
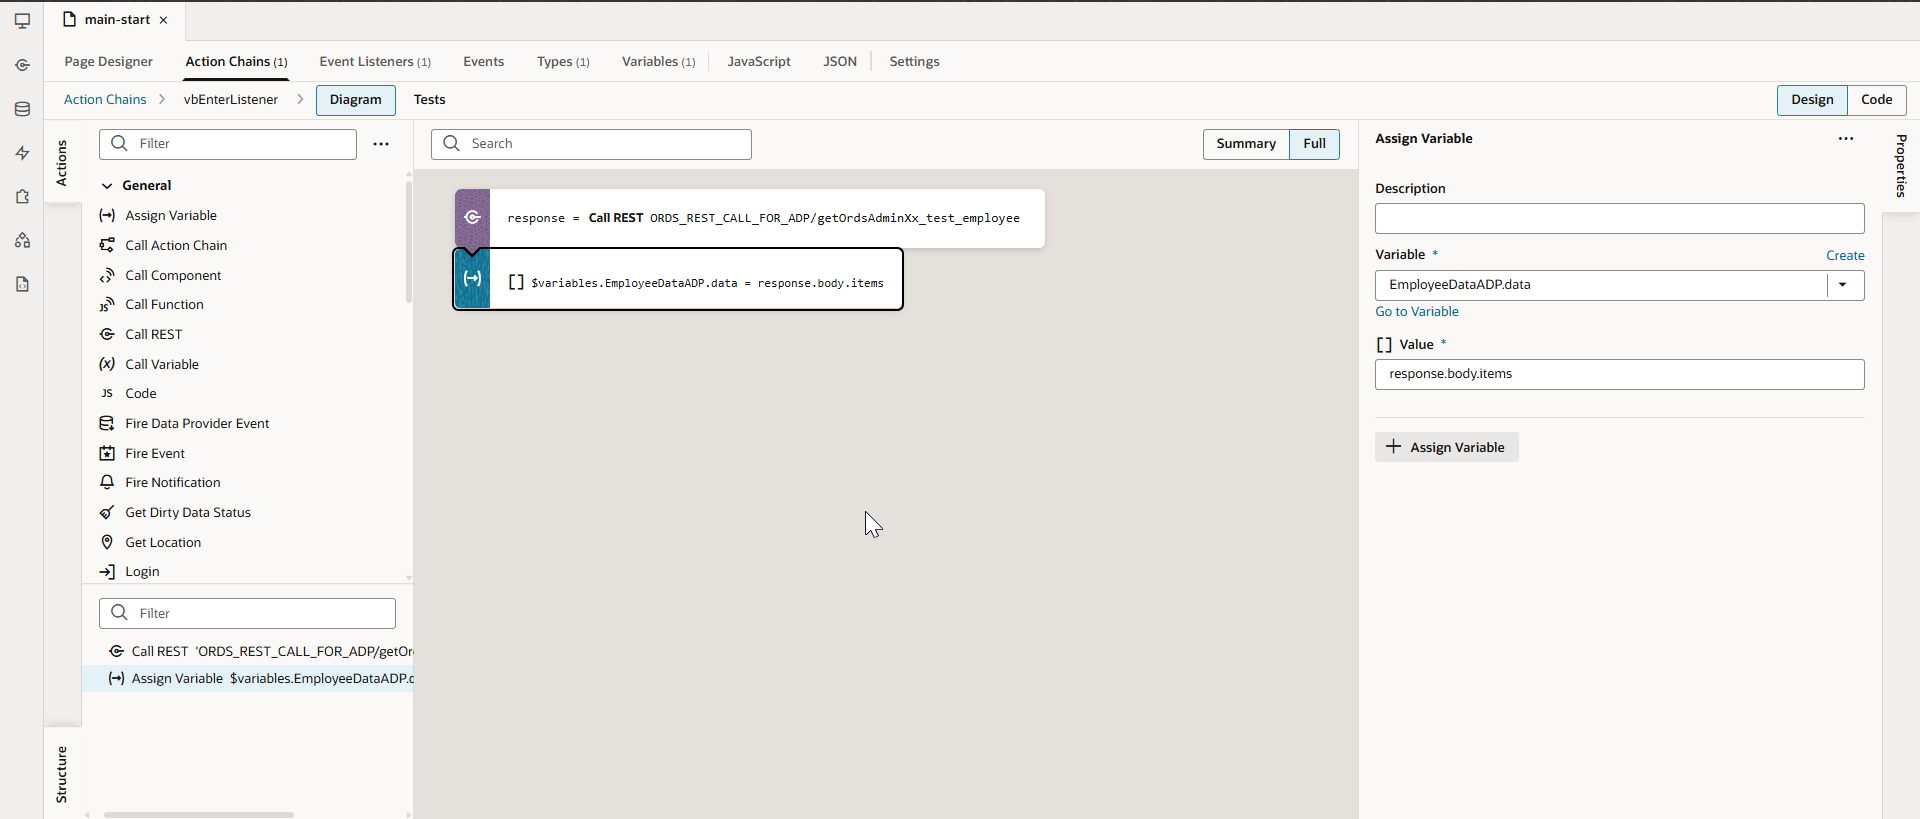
Add the logic below in the action chain:
Call ORDS REST API and assign response to ADP variable.
Run the application.
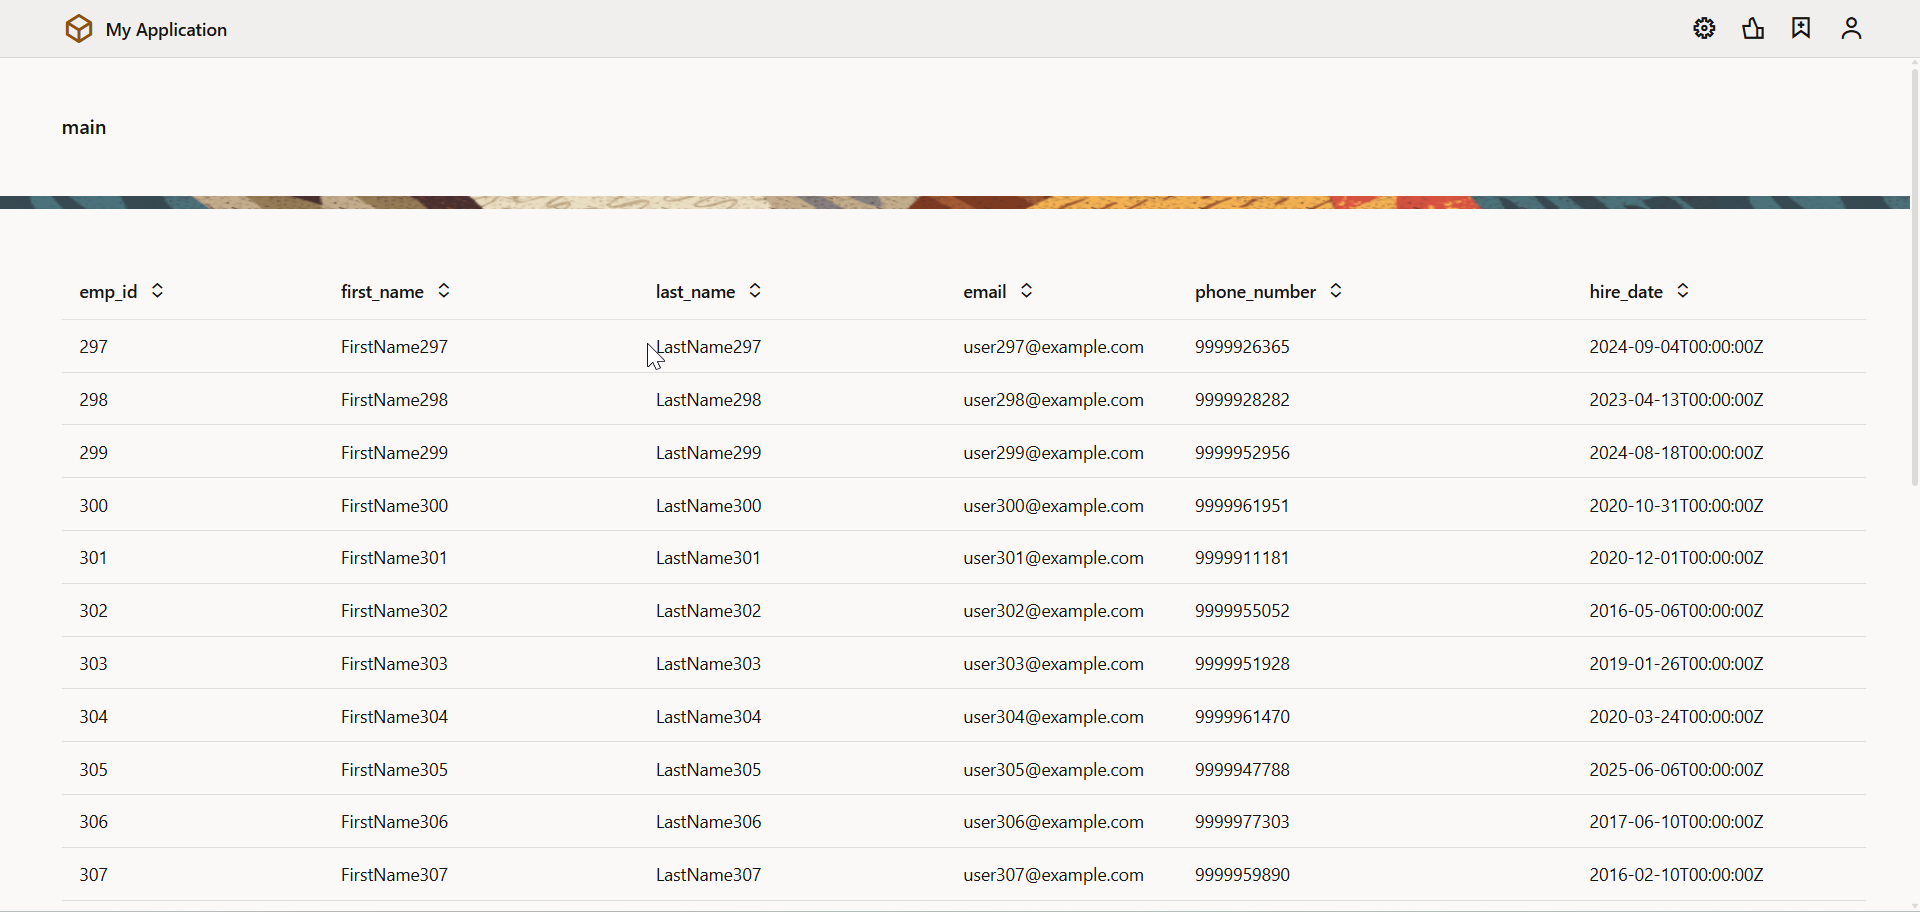
To make row editable, we need to change Edit Mode property of table to “Row Edit”

As all table fields are ready only, to make fields editable, we need to drag and drop Input Text component on Table columns.
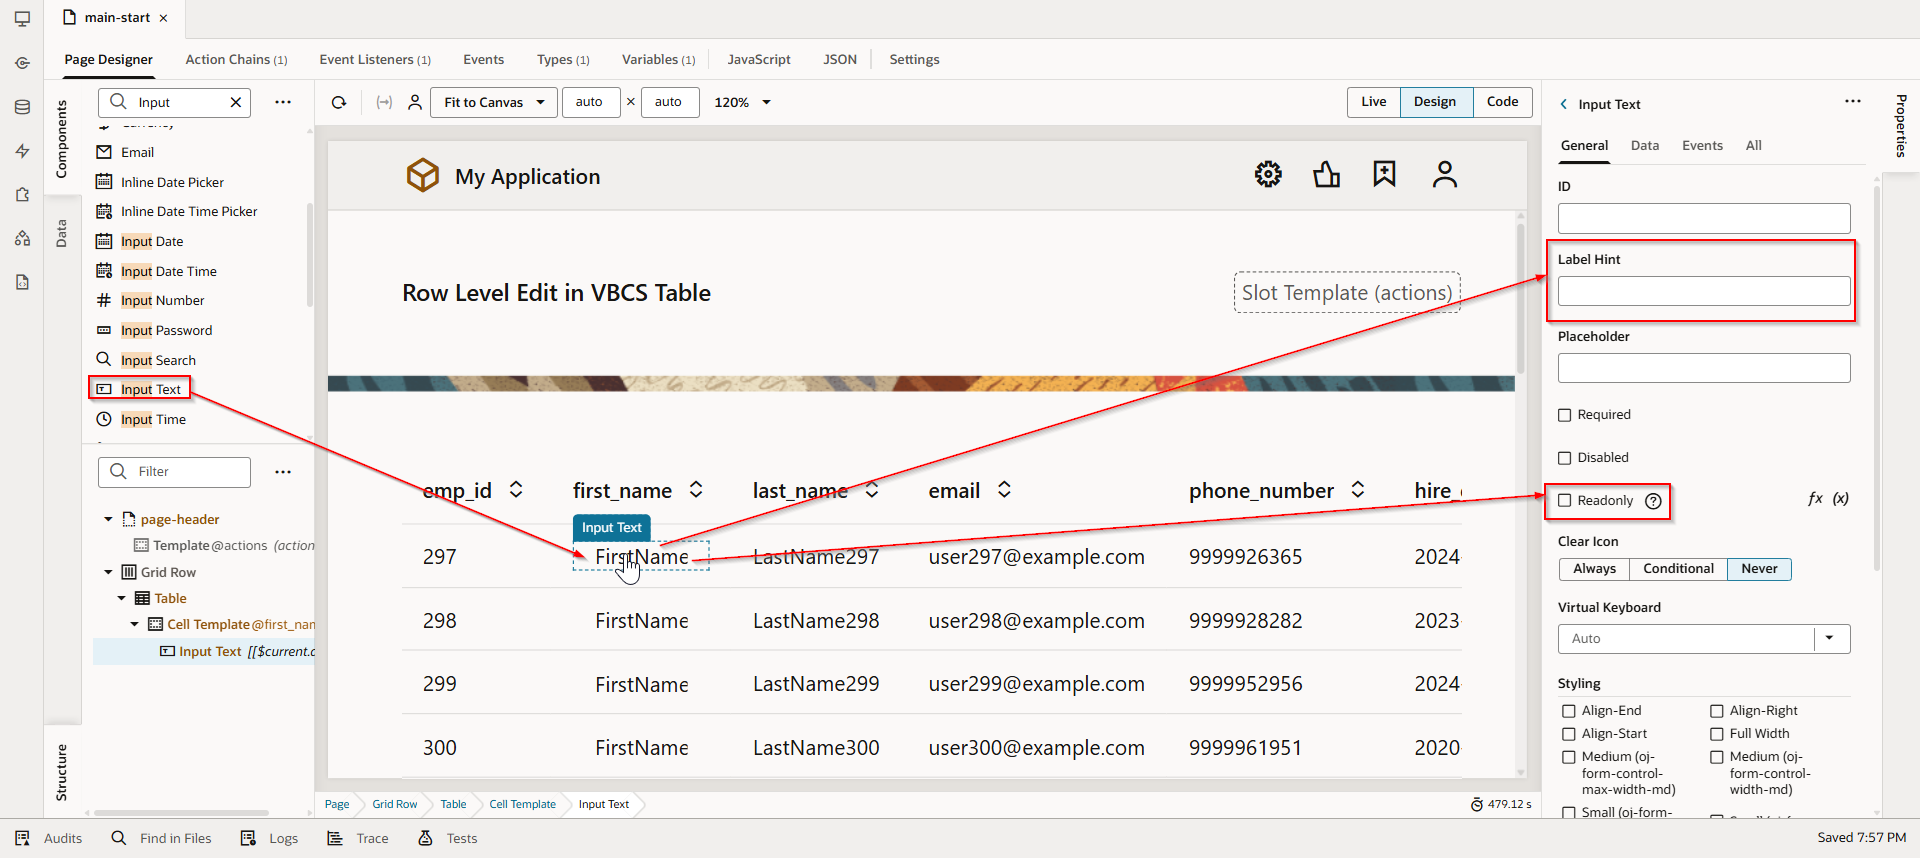
Similarly, do it for last_name and email fields.
Run the application.

When we double click on first_name, it will be editable now.
To capture selected row for editing. Let us create new variable as “CurrentSelectedRow”.
Navigate to Variables. This variable will be of type which we have created earlier.
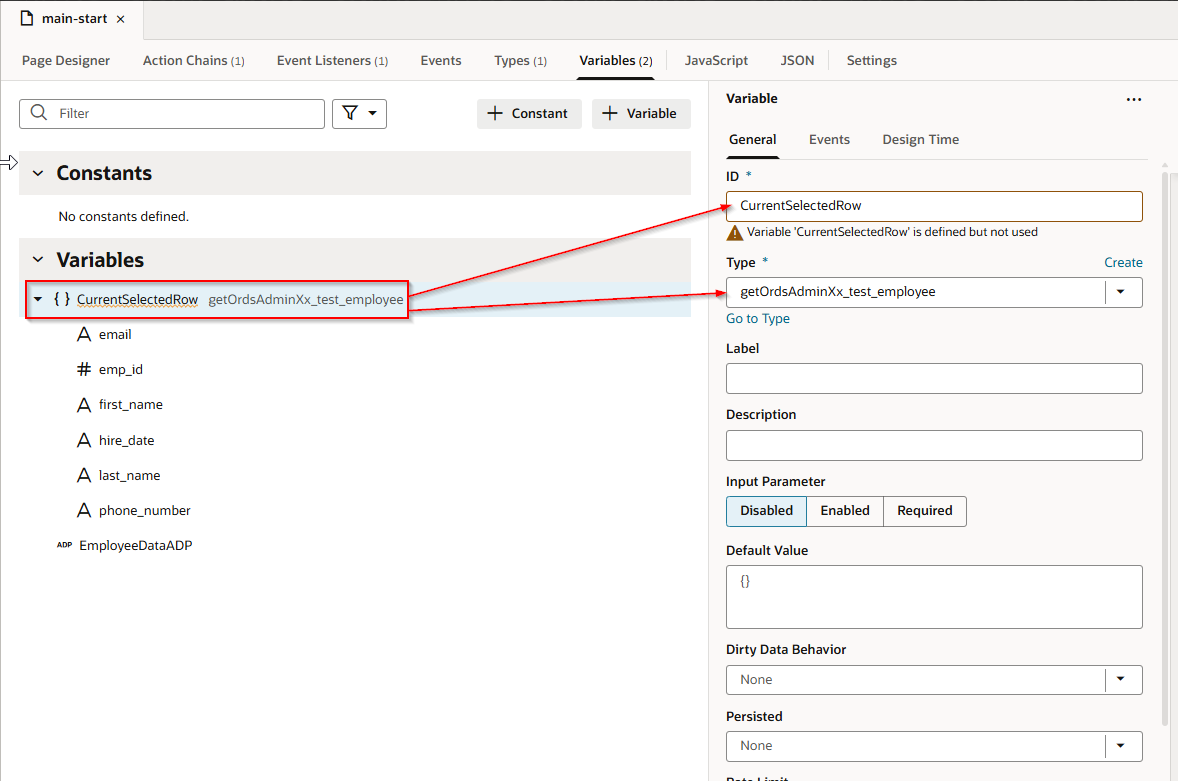
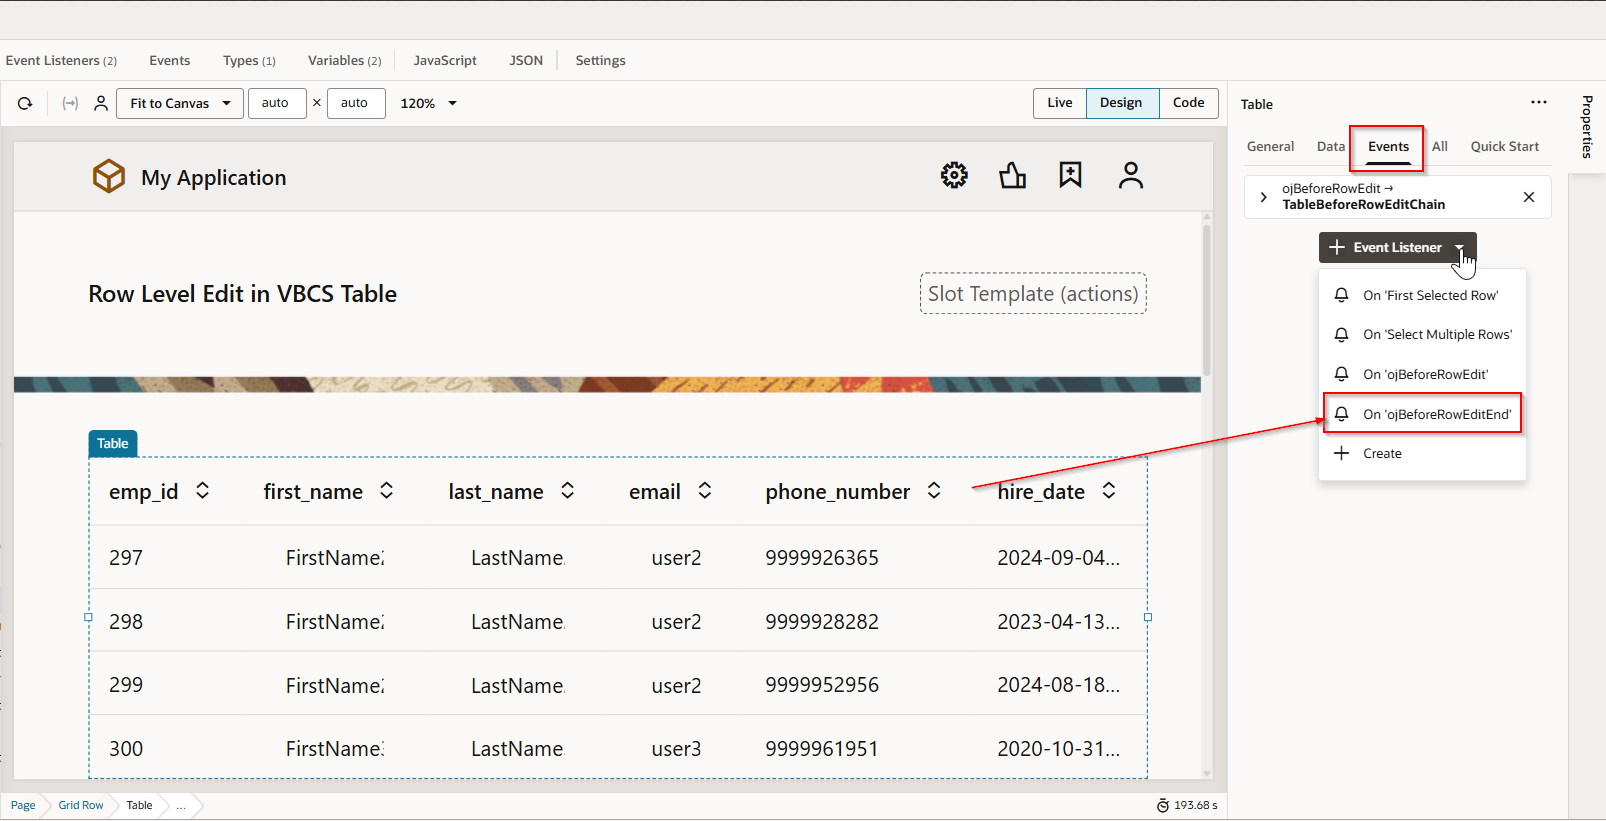
Table event “ojBeforeRowEdit” can be used to capture selected row into variable.
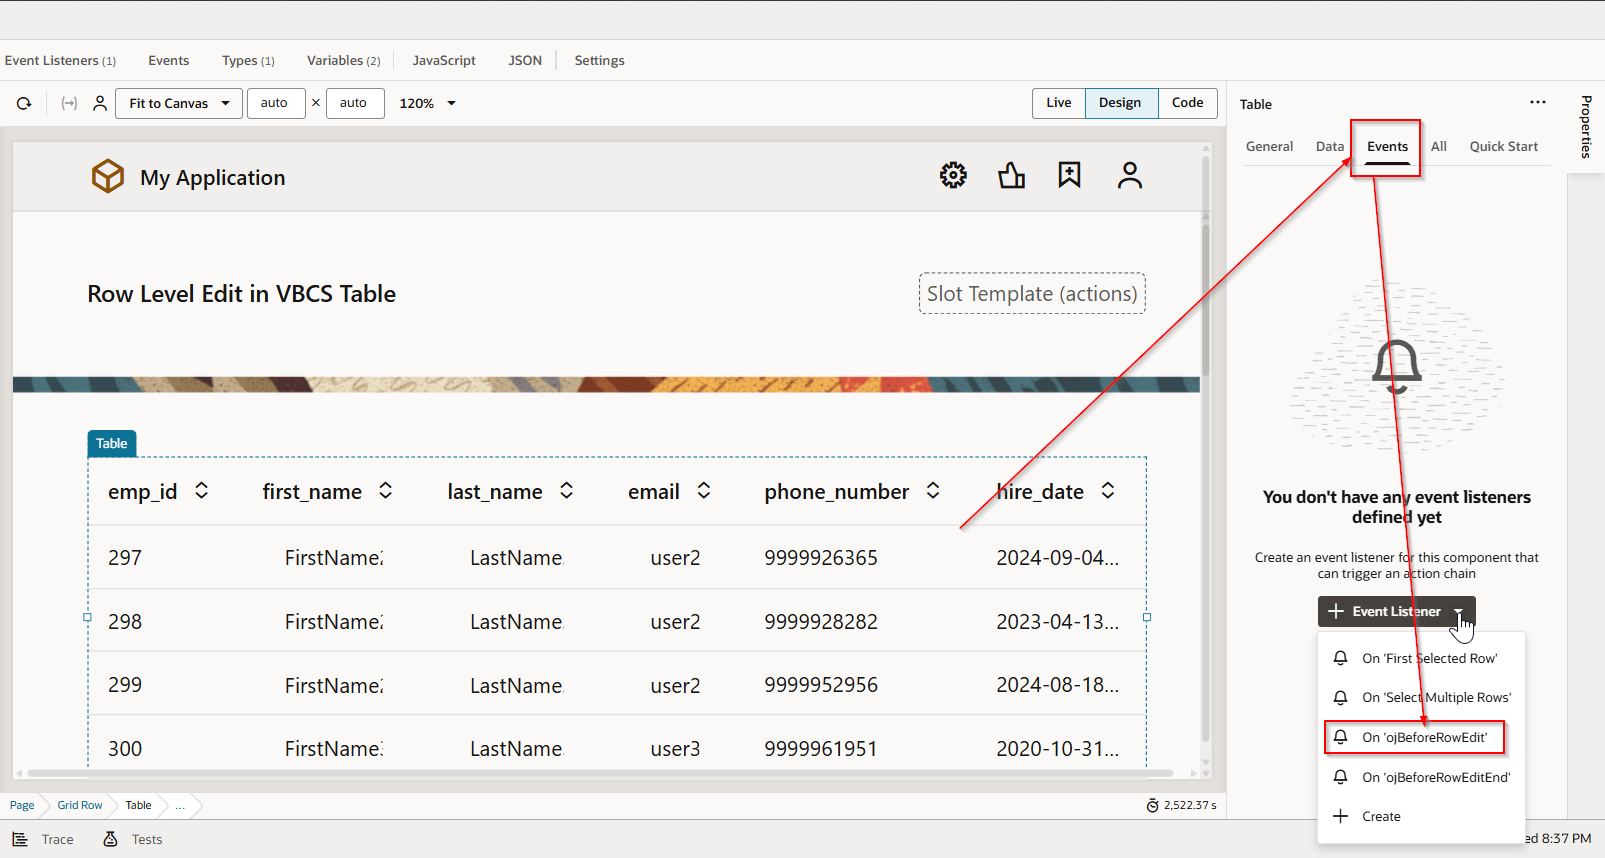
This event will create new action chain.
Assign selected row into variable with below logic.

As we have captured selected row for edit into variable “CurrentSelectedRow”.
We need to update table ADP variable with updated value.
This can be done using another table event.
Table event “ojBeforeRowEditEnd” can be used to update table ADP variable with new updated values.
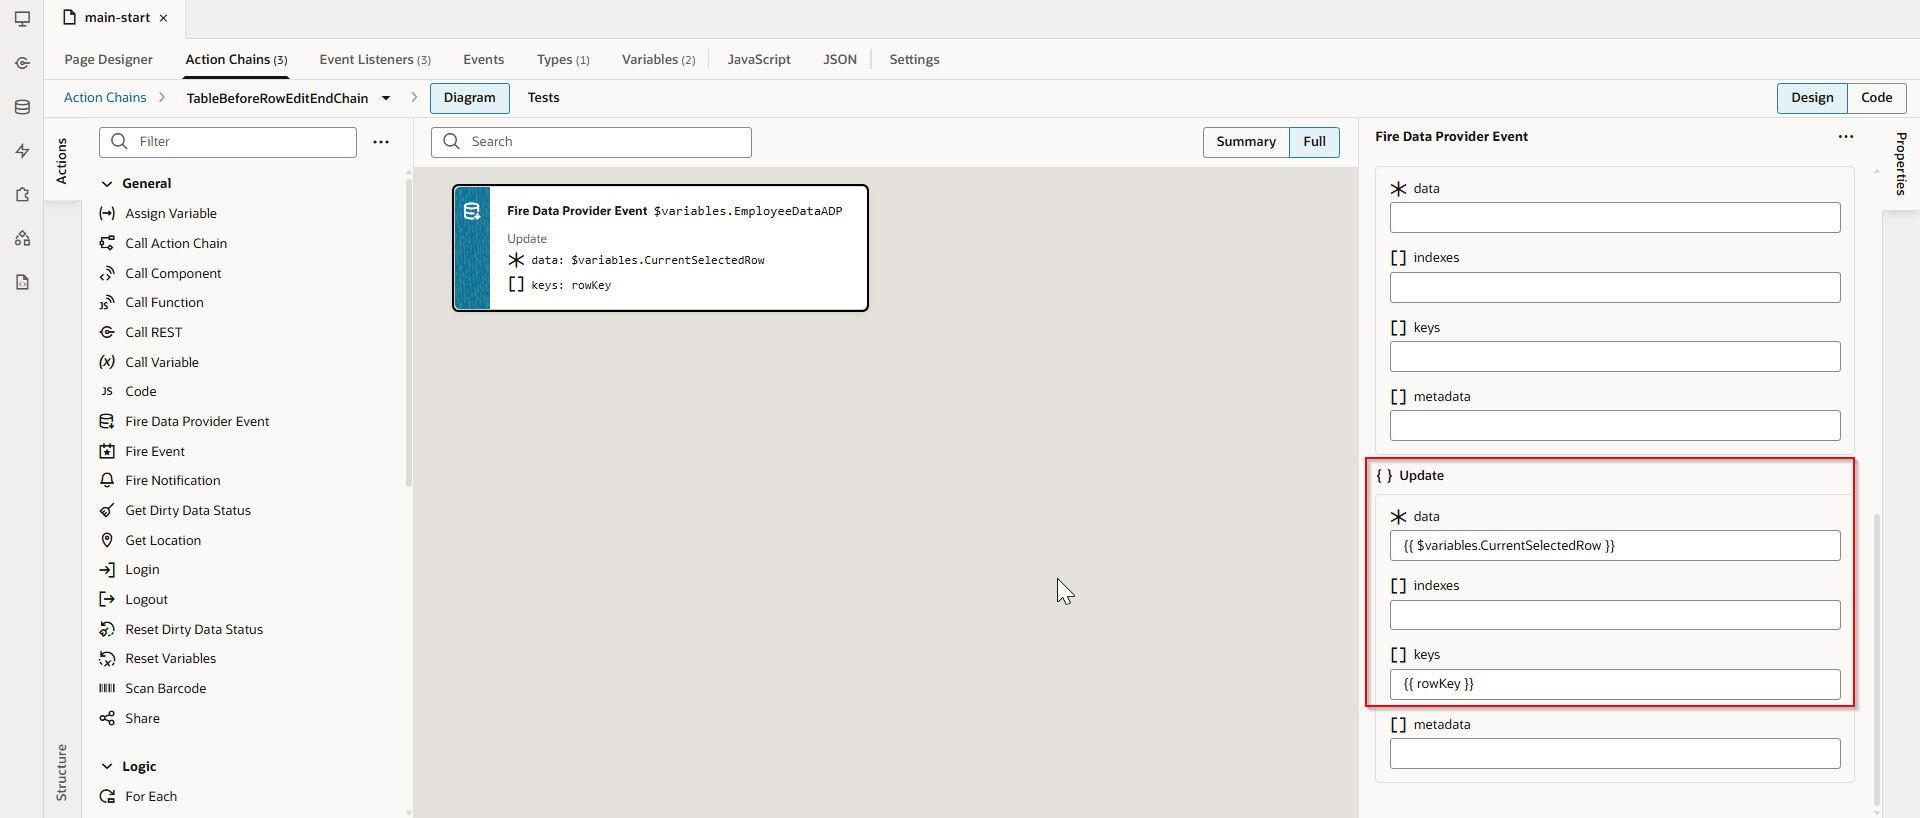
This event will again create new action chain.
Add below logic to action.
Fire Data Provider Event action can be used to update ADP variable.

Add below code changes at page designer level for navigation and edit mode.
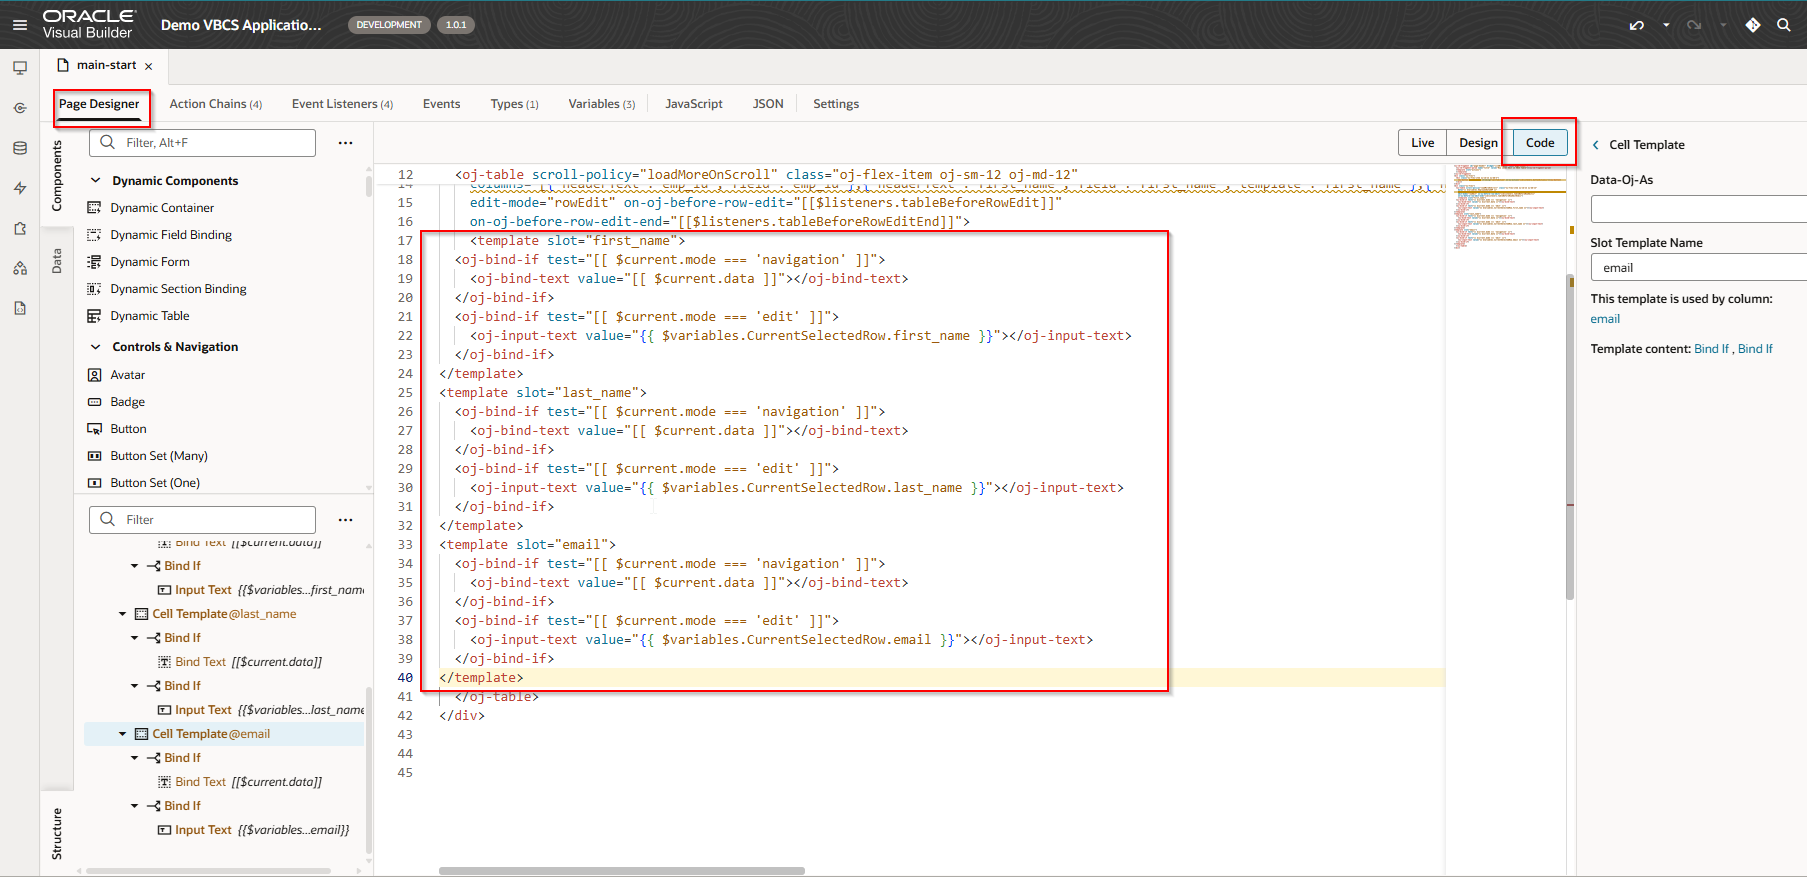
 <template slot="first_name">

    <oj-bind-if test="[[ $current.mode === 'navigation' ]]">

      <oj-bind-text value="[[ $current.data ]]"></oj-bind-text>

    </oj-bind-if>

    <oj-bind-if test="[[ $current.mode === 'edit' ]]">

      <oj-input-text value="{{ $variables.CurrentSelectedRow.first_name }}"></oj-input-text>

    </oj-bind-if>

  </template>

  <template slot="last_name">

    <oj-bind-if test="[[ $current.mode === 'navigation' ]]">

      <oj-bind-text value="[[ $current.data ]]"></oj-bind-text>

    </oj-bind-if>

    <oj-bind-if test="[[ $current.mode === 'edit' ]]">

      <oj-input-text value="{{ $variables.CurrentSelectedRow.last_name }}"></oj-input-text>

    </oj-bind-if>

  </template>

  <template slot="email">

    <oj-bind-if test="[[ $current.mode === 'navigation' ]]">

      <oj-bind-text value="[[ $current.data ]]"></oj-bind-text>

    </oj-bind-if>

    <oj-bind-if test="[[ $current.mode === 'edit' ]]">

      <oj-input-text value="{{ $variables.CurrentSelectedRow.email }}"></oj-input-text>

    </oj-bind-if>

  </template>
Run the application.
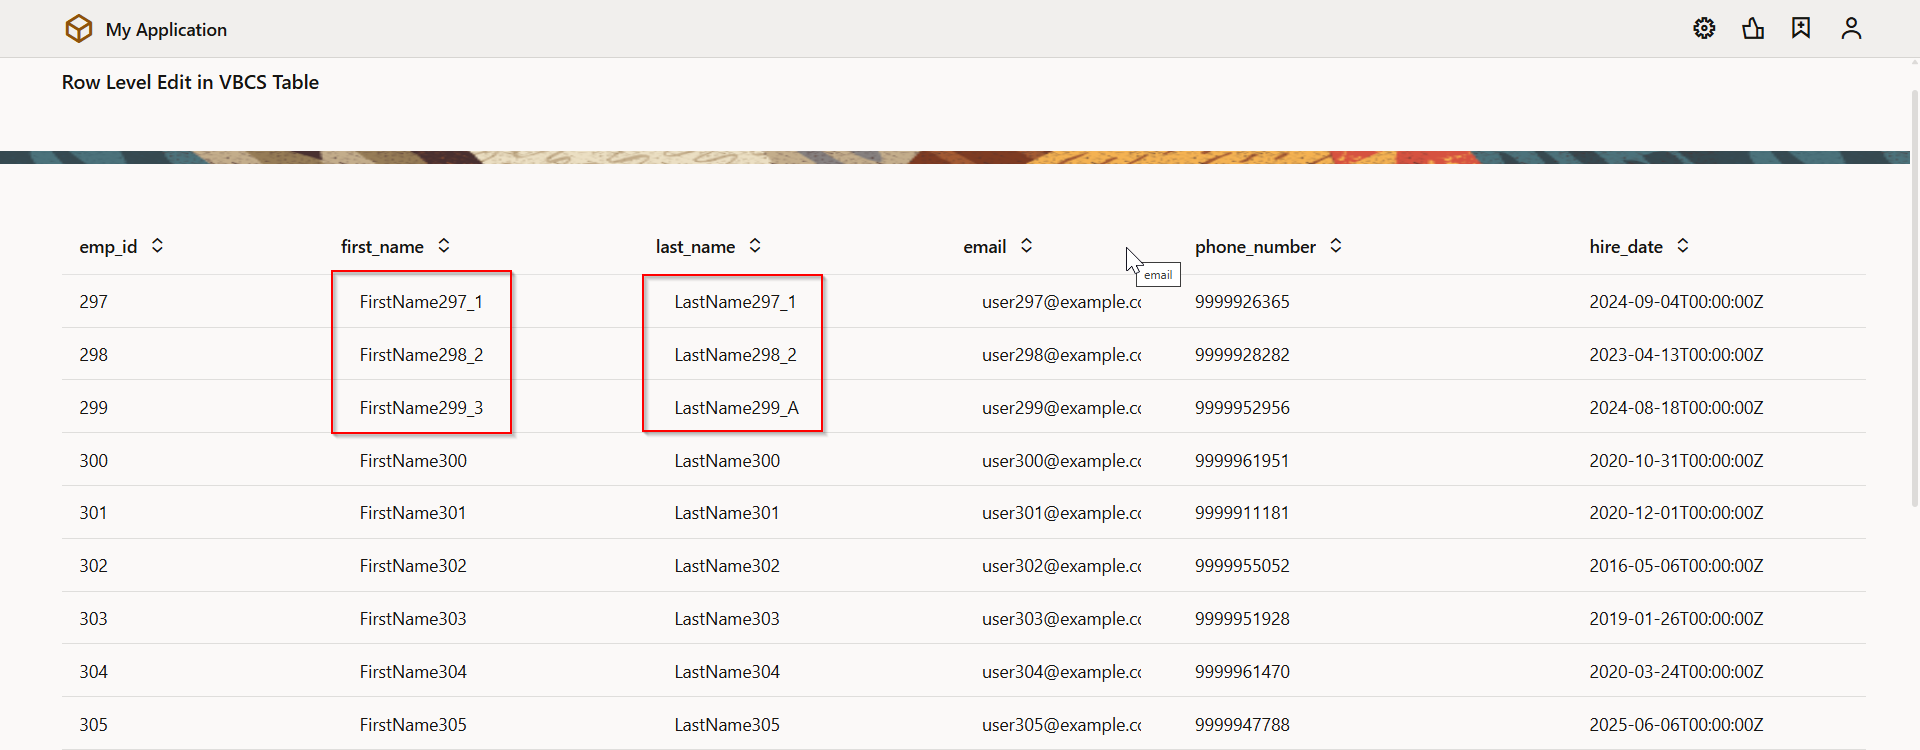
Table ADP variable is updated now with new values.
Now we will make these changes to database table using ORDS REST API.
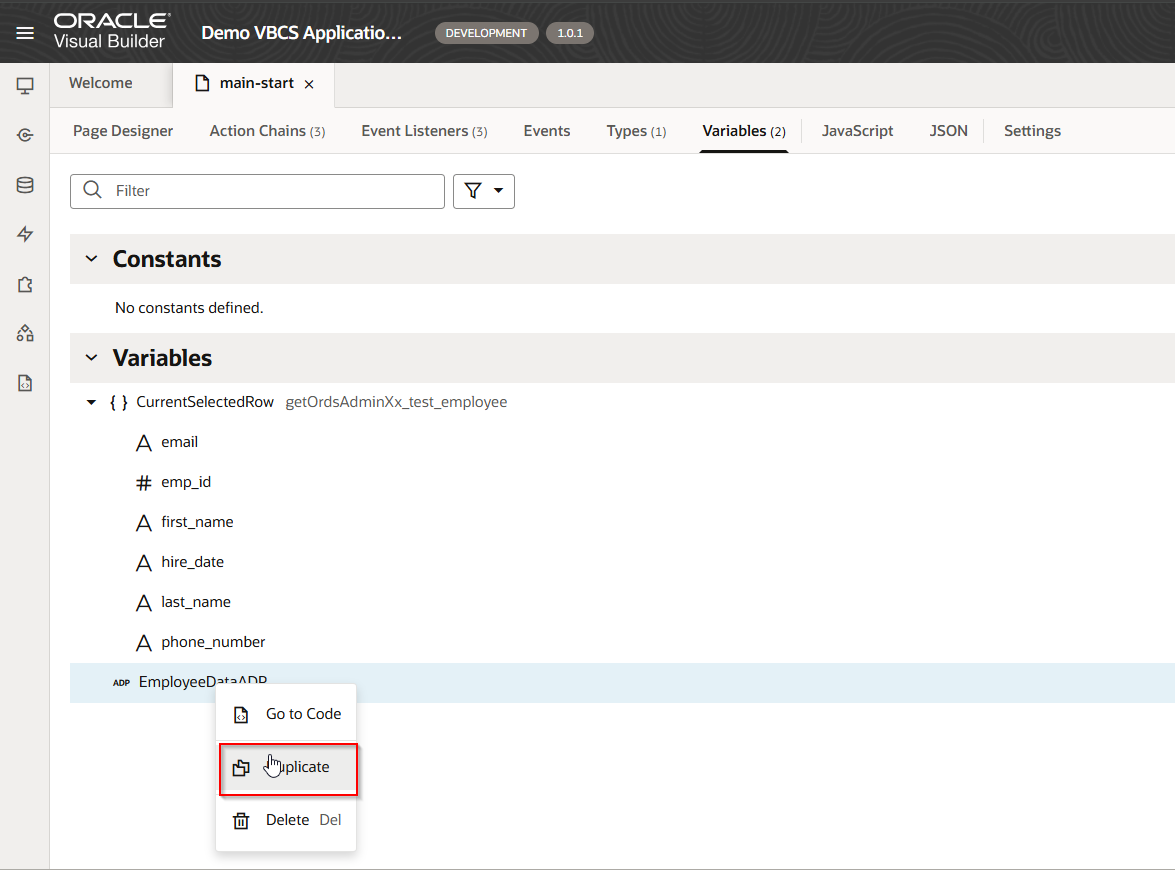
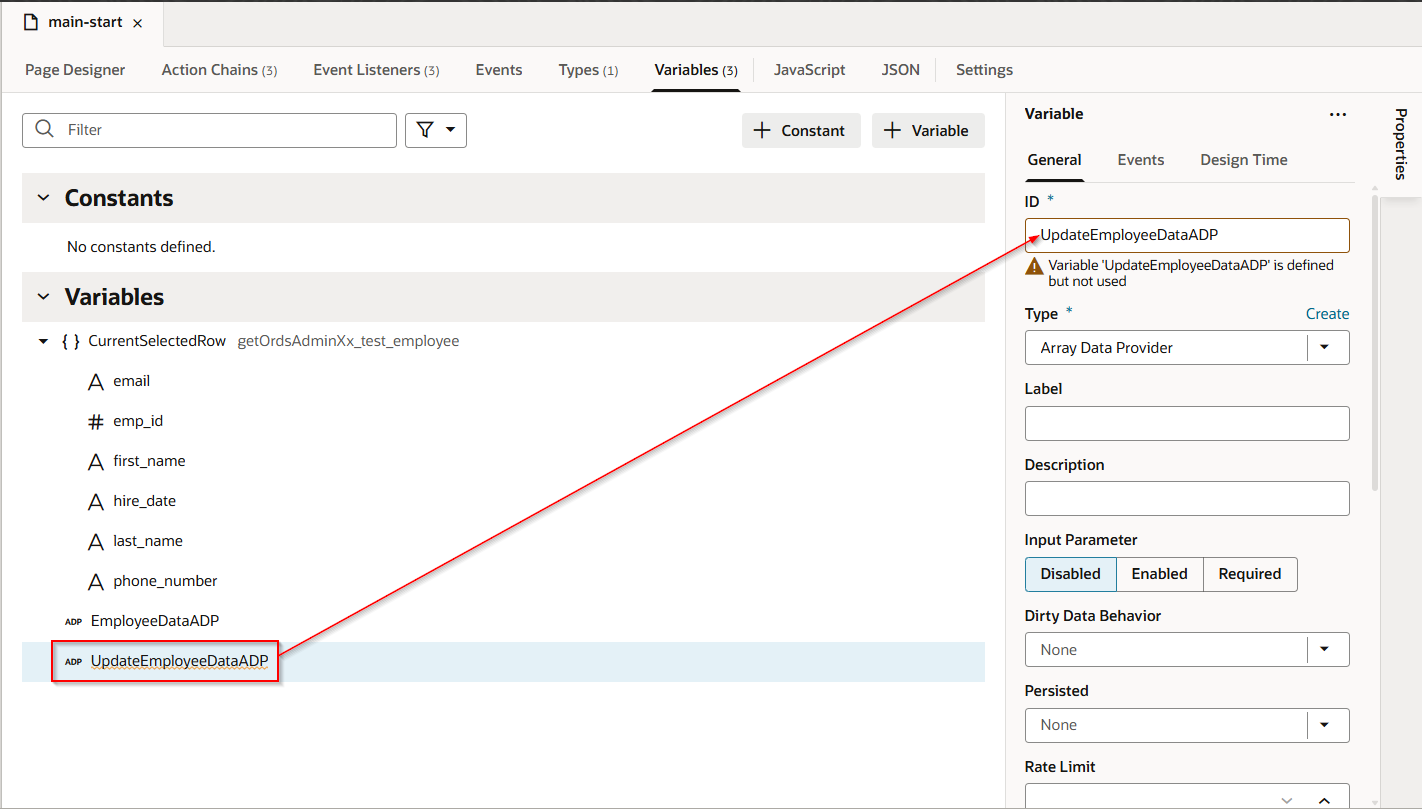
To update values to database table using ORDS REST API, we need to create new ADP variable (UpdateEmployeeDataADP) and add only updated row into the newly created variable so that we can iterate over that variable and call ORDS REST for updating data into tables.
Create new ADP variable.
Navigate to Variables—>Variable.
Navigate to Action Chains —>TableBeforeRowEditEndChain

Add the logic below in action chain.
Fire Data Provider event action can be used with Type as Mutate –>Add.

Whenever row is updated, updated row will be added into new ADP variable.
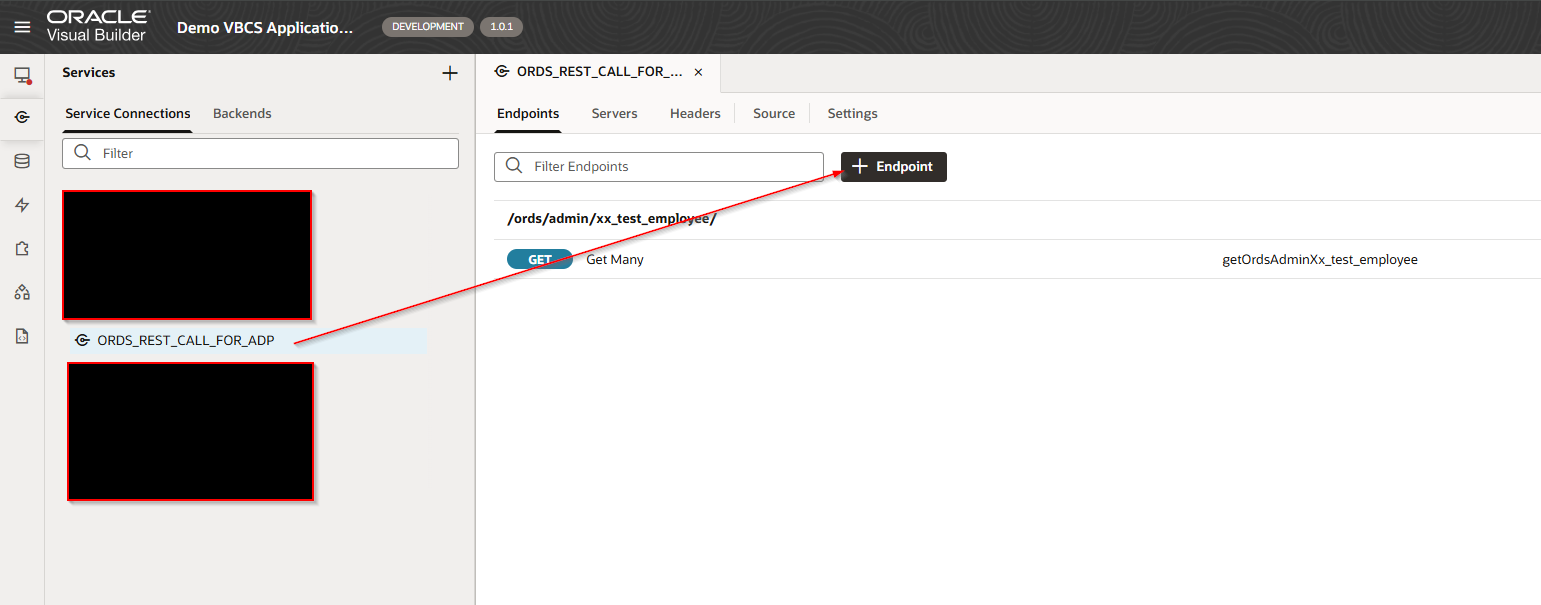
Let us modify service connection to add new REST Endpoint.
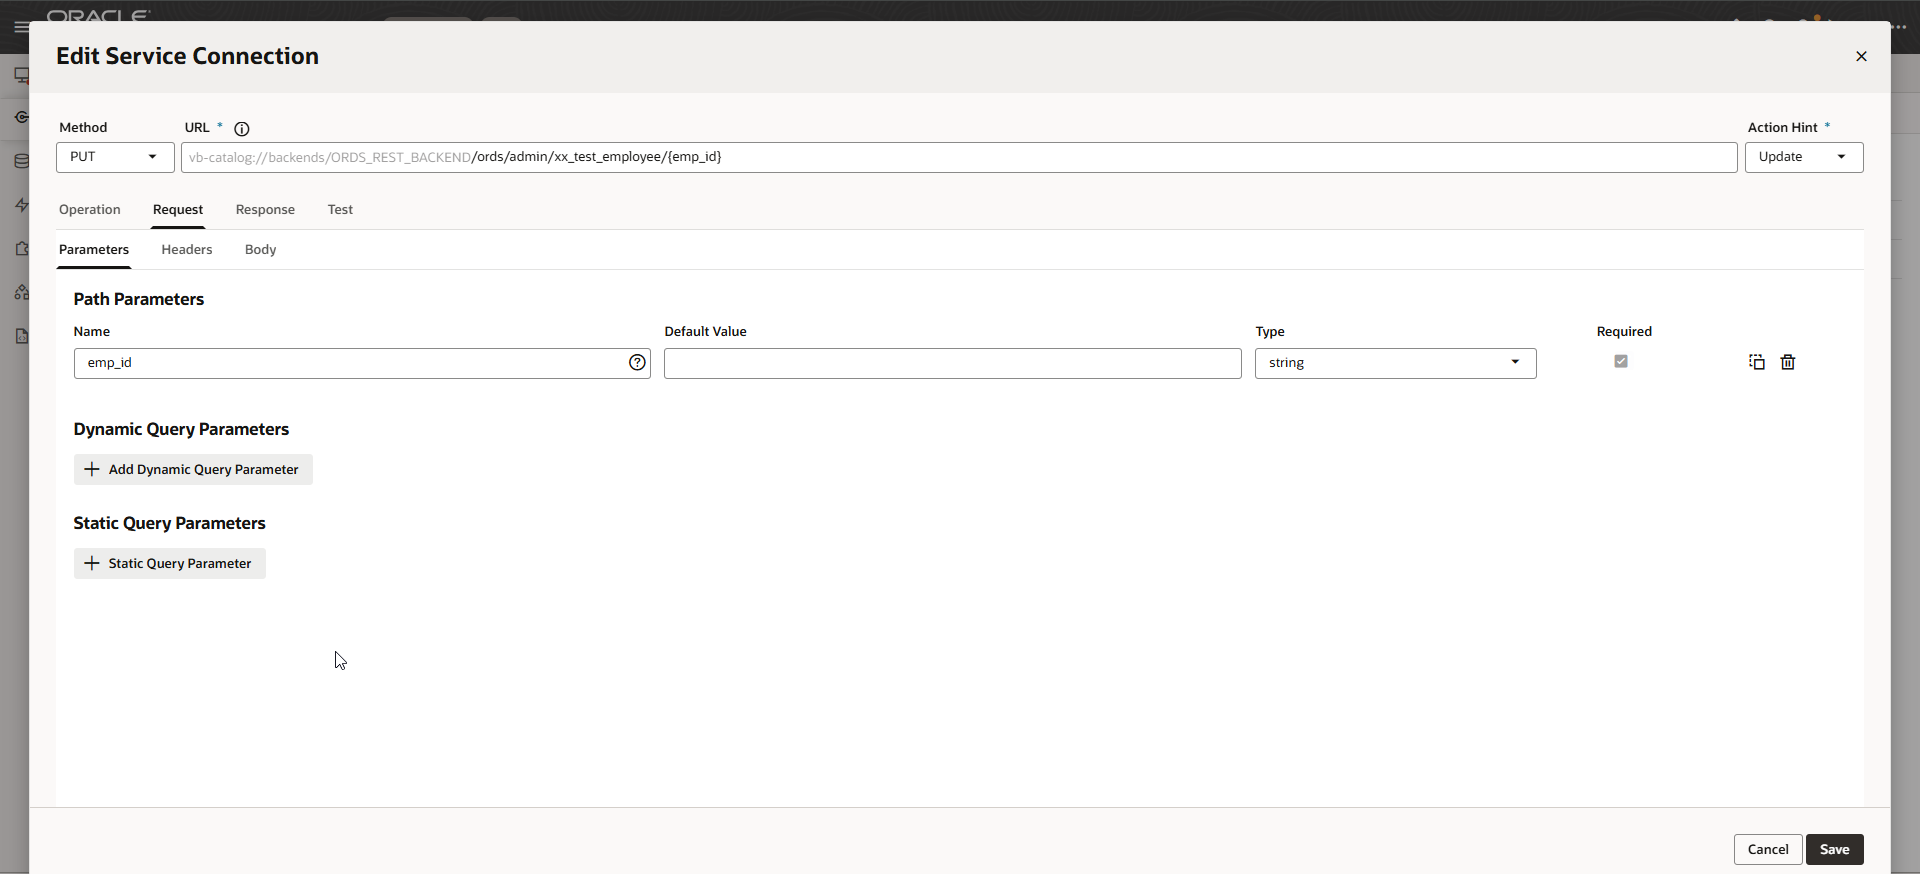
Add PUT endpoint to ORDS REST API.
Navigate to Service Connections —>ORDS_REST_CALL_FOR_ADP —>Endpoint.
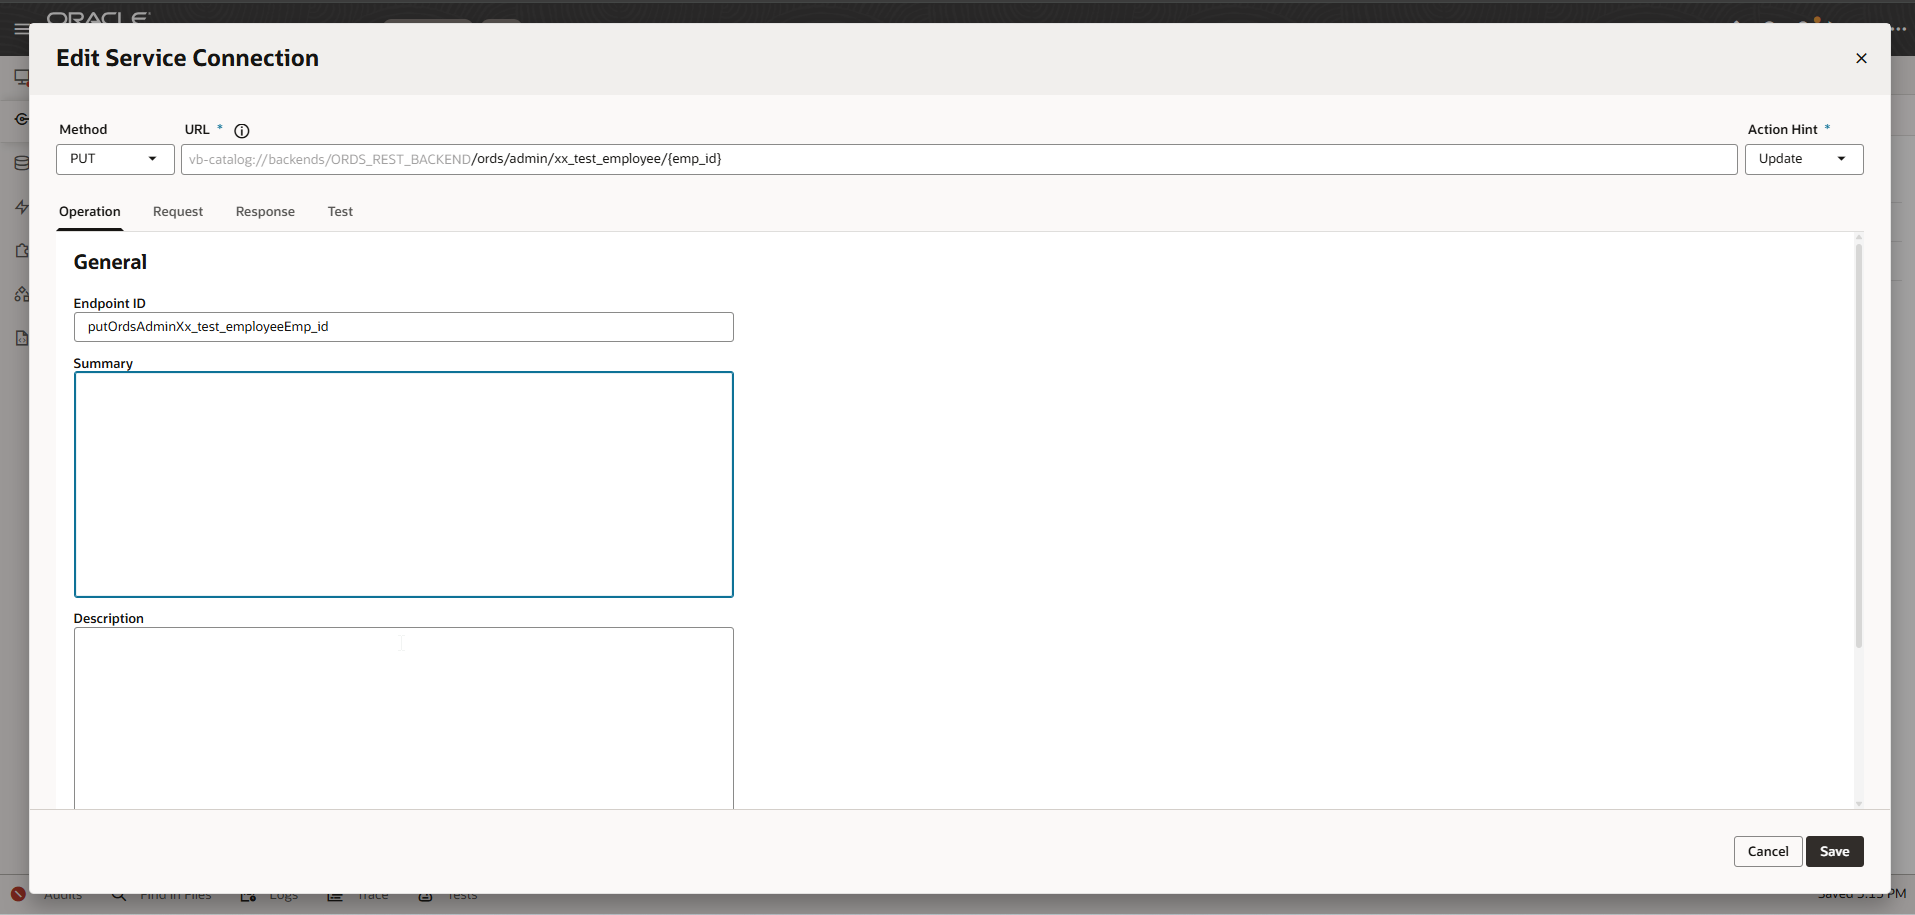
Provide Endpoint URL with path parameter and Method as PUT.
Go to Request tab:
Add sample request payload under Body.

Click on Save.
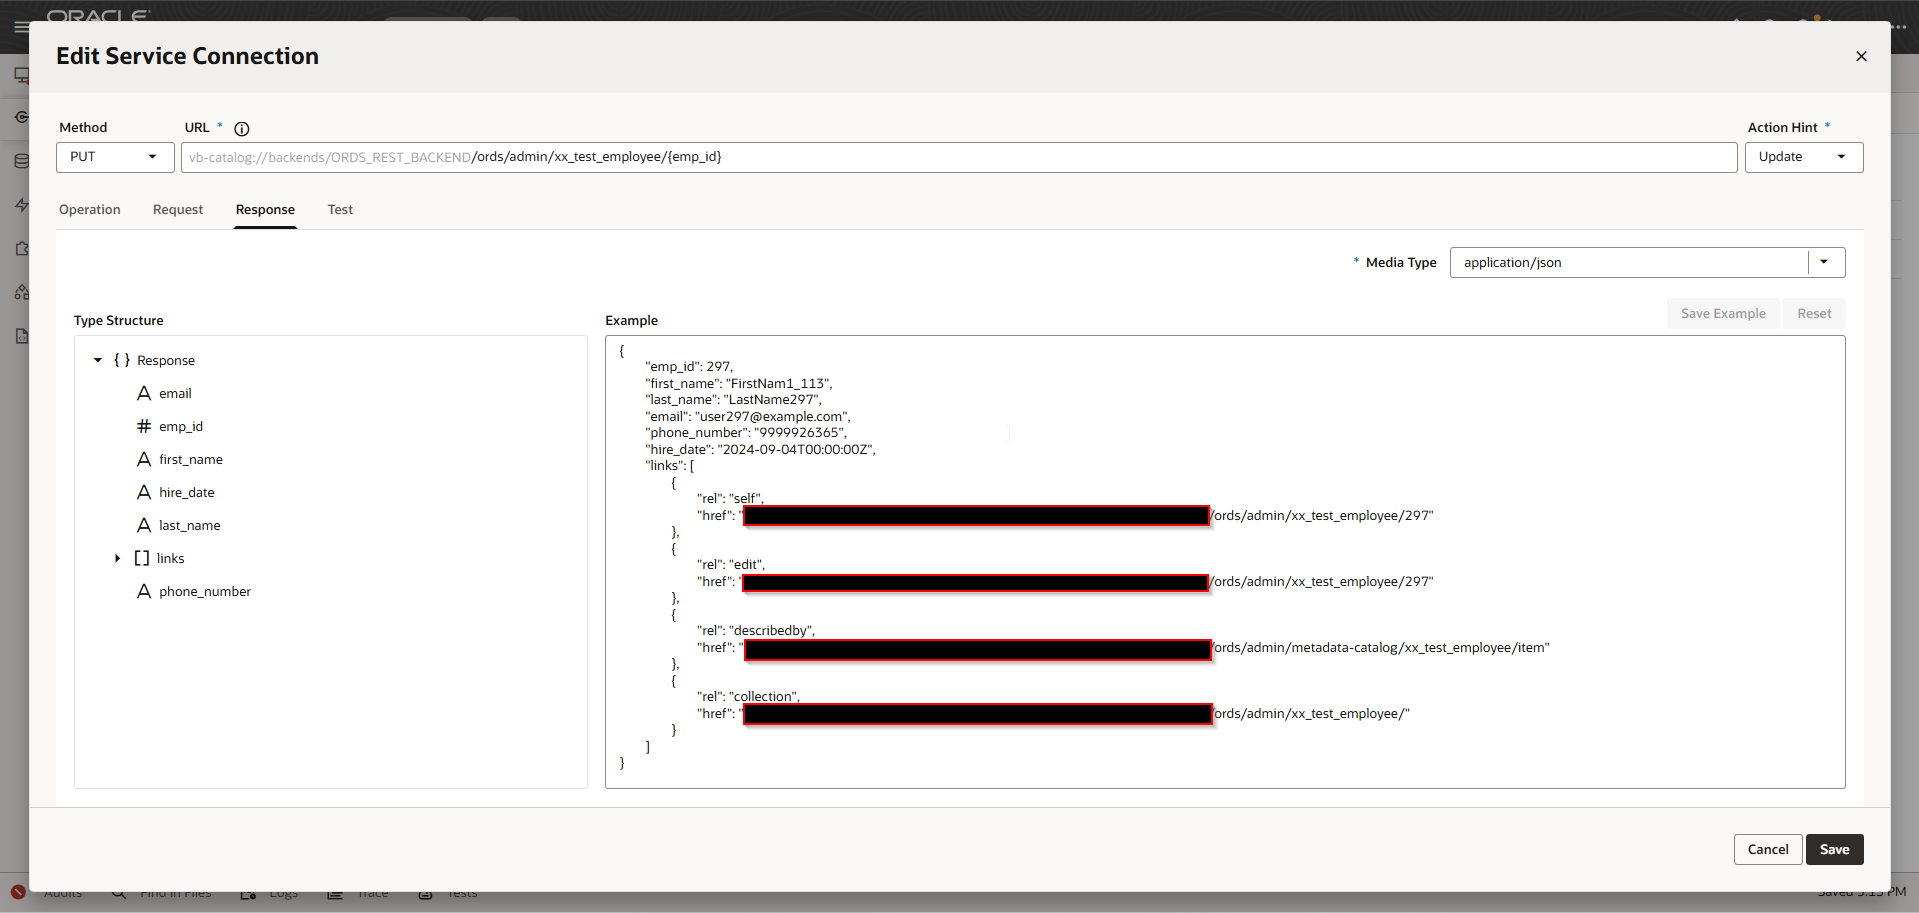
Go to Response tab:
Provide sample response and click on Save Example.
Go to Test tab:
Test for sample emp_id

Click on Save.
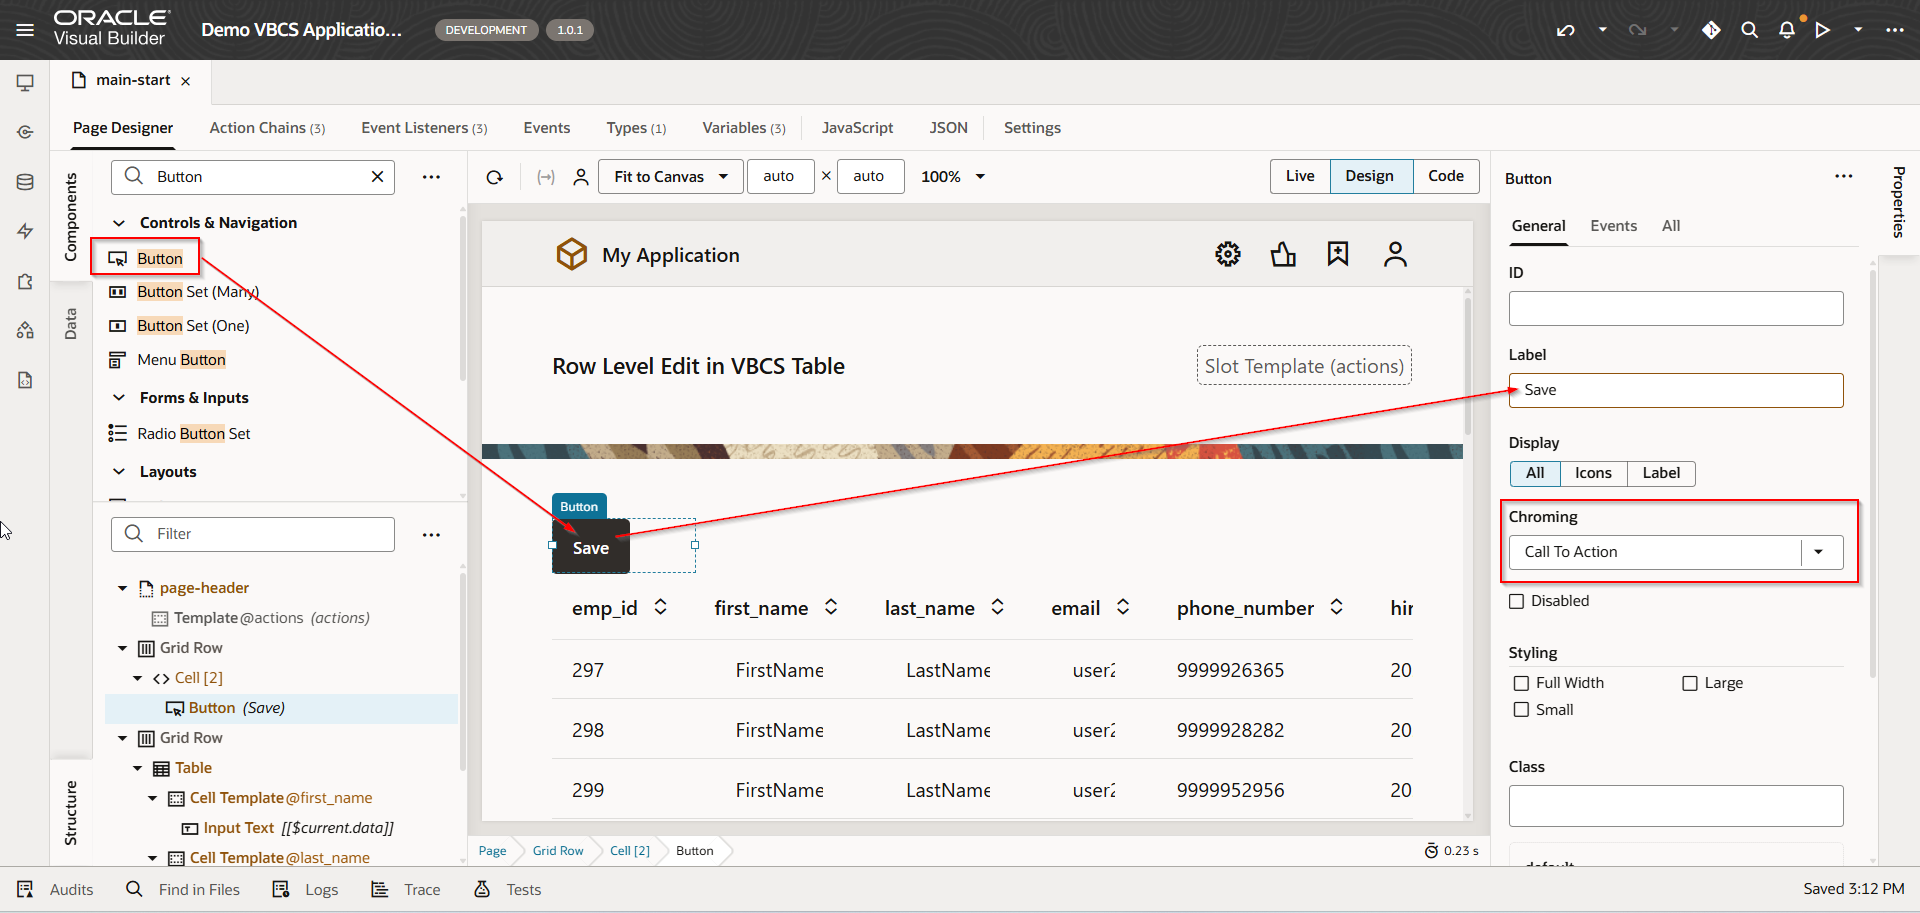
To call ORDS REST for updating values in database table, create Save button on page.
Navigate to Page designer.
Drag and Drop Button and change Label to “Save”.
Navigate to button Events.
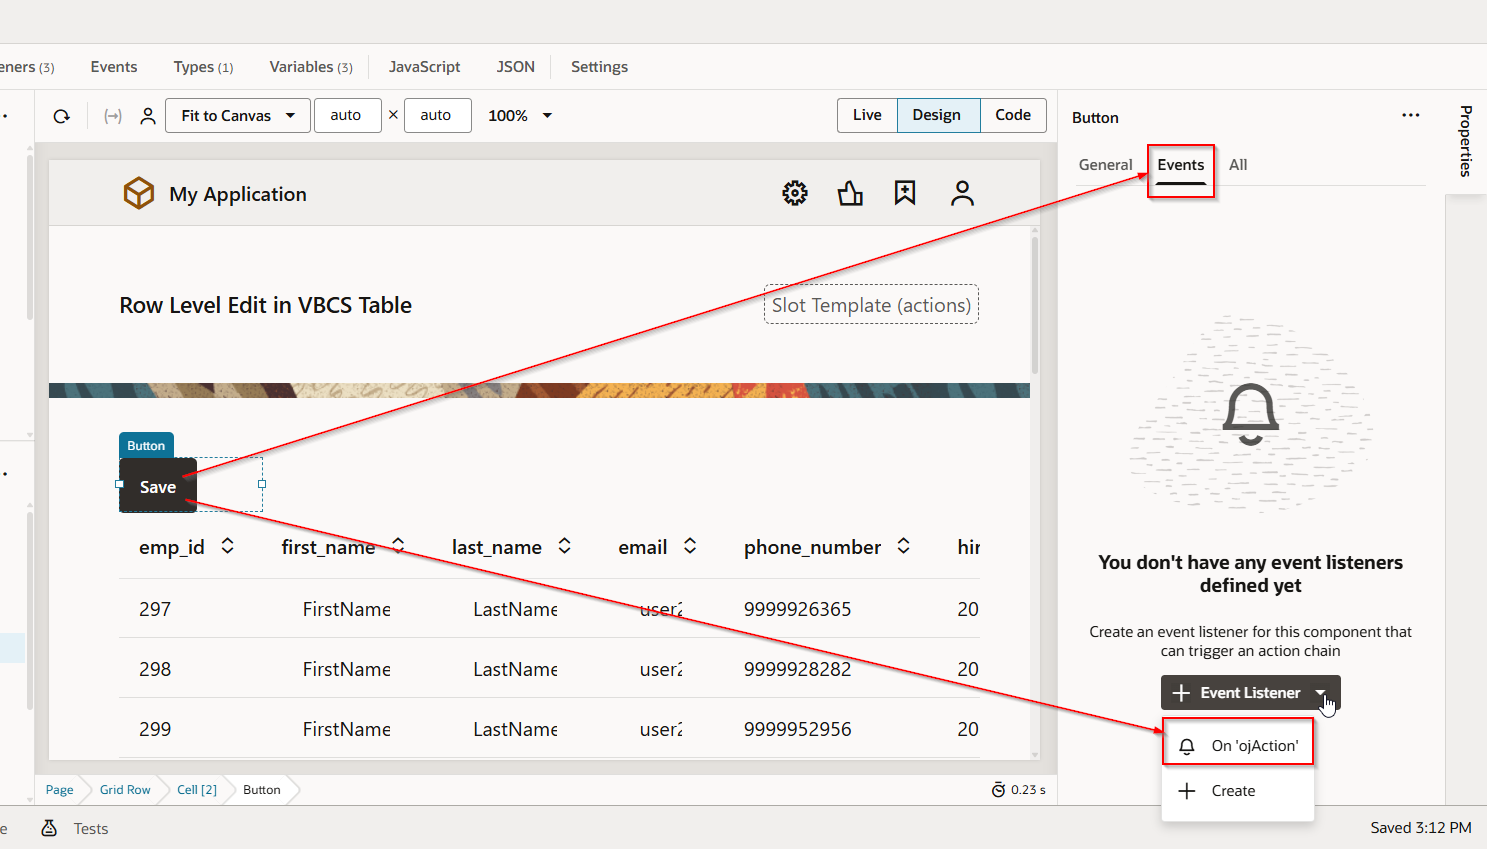
This will create new action chain.
Add the logic below in action chain.
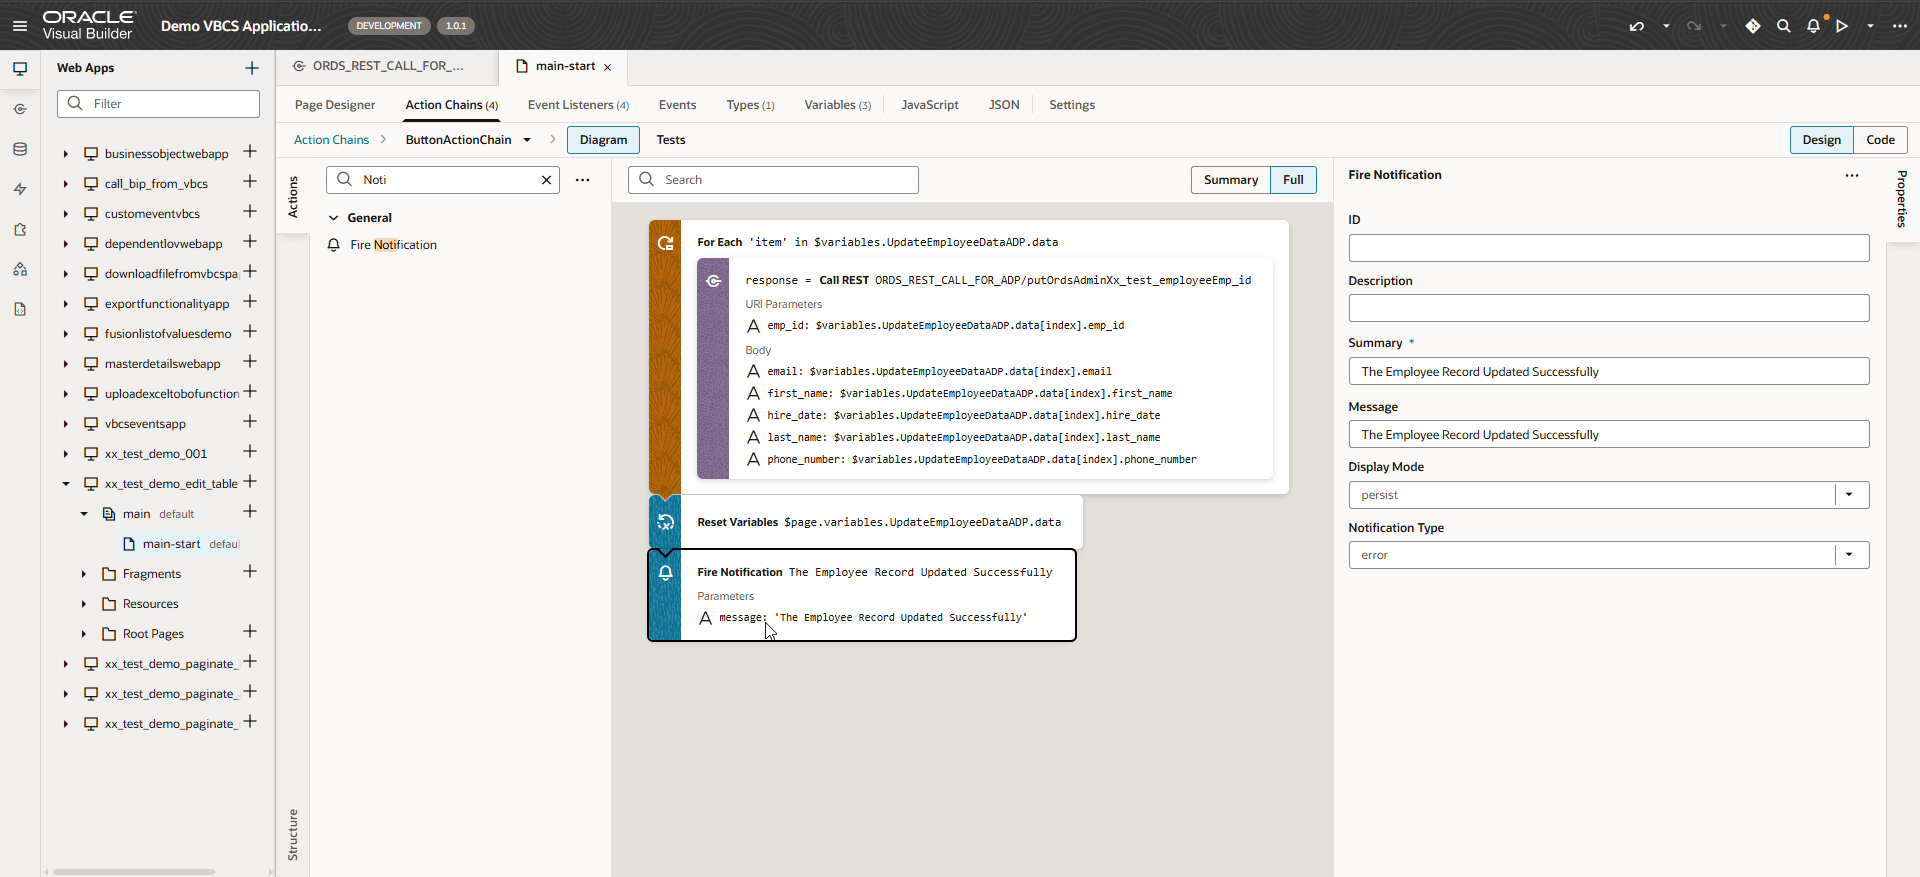
Run the application
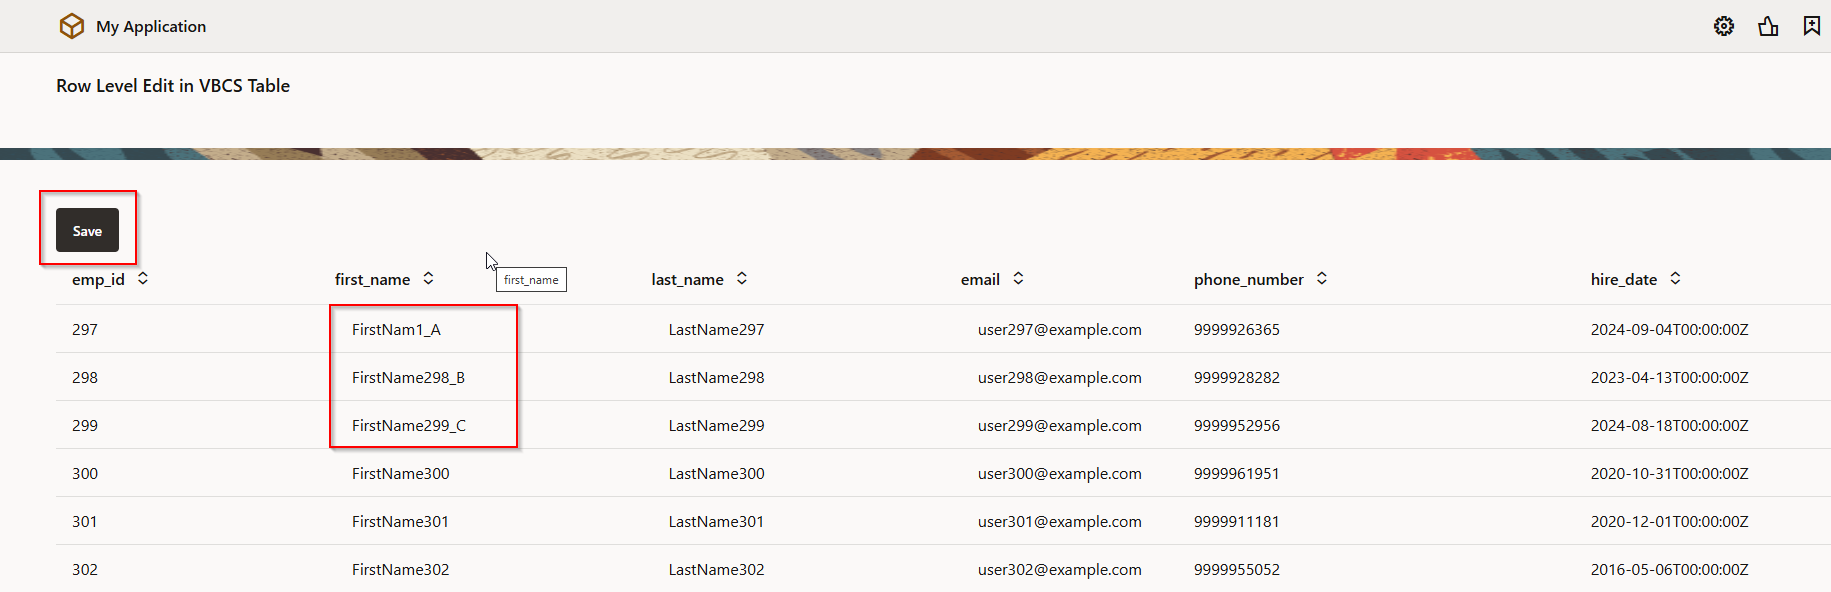
Change the values for “first_name” for above row and Click on Save.

Let us check result in database:
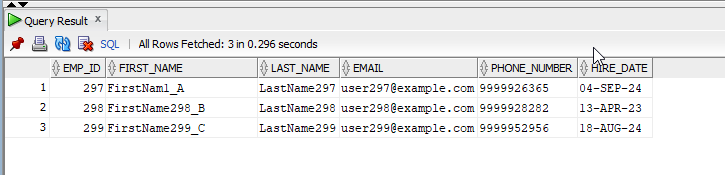
Records are updated now.