In earlier posts, we have seen how to implement pagination in VBCS using SDP variable and ORDS as data source.
In this post, we will see how to implement pagination in VBCS with ORDS and ADP variables.
Let us create new VBCS application:

Click on Create.
Create new Service Connection for ADP variable.
Navigate to Service Connection and create new service connection.
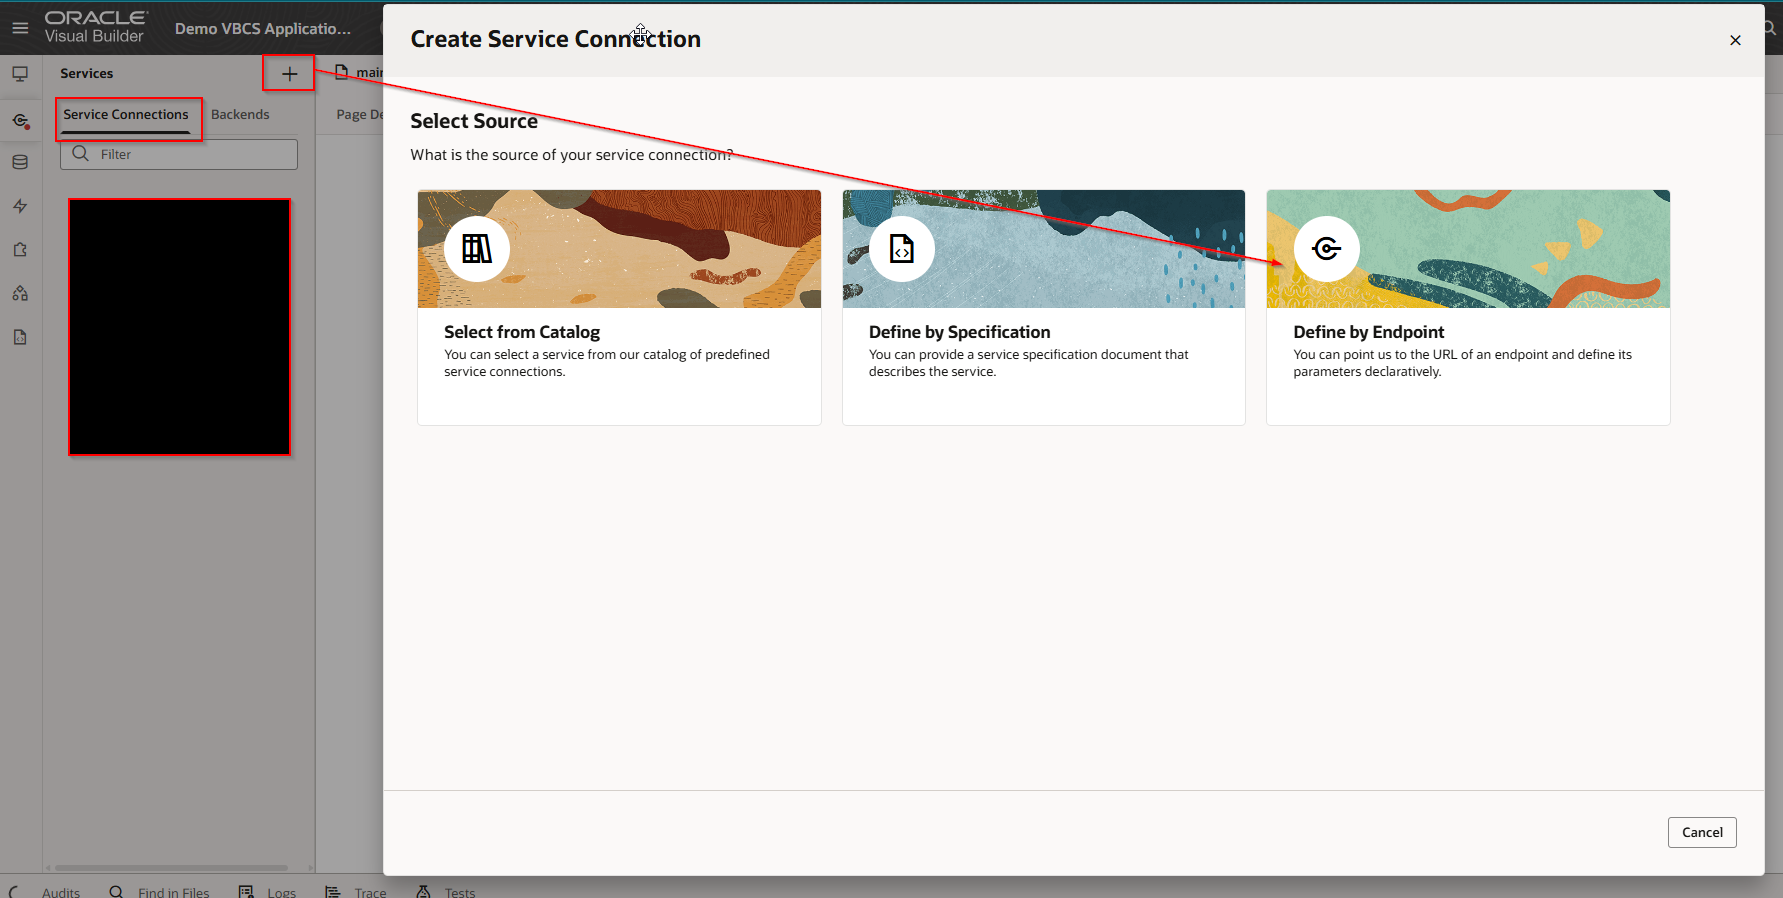
Select “Define by Endpoint”.
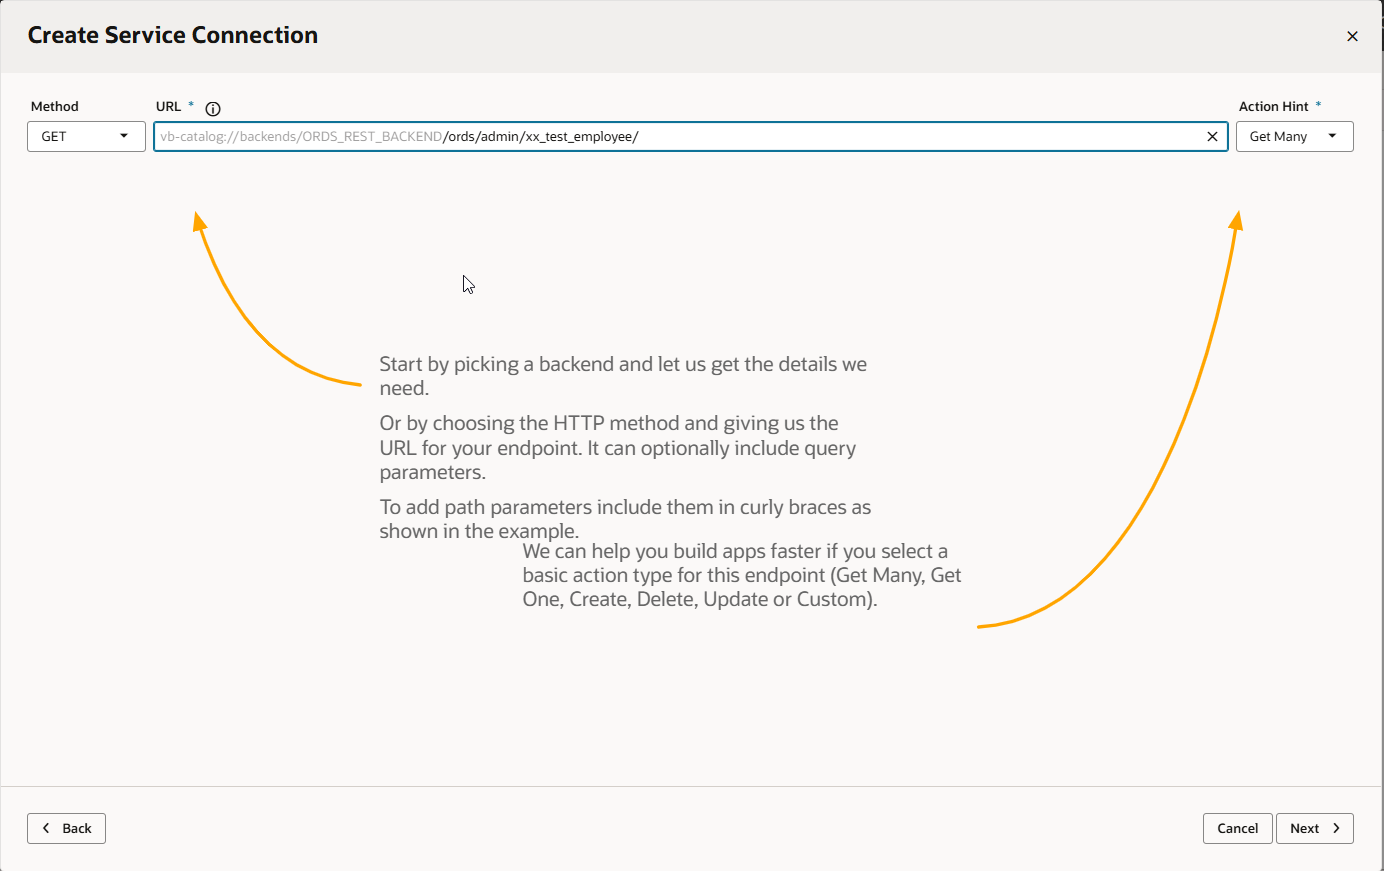
Provide endpoint URL for ORDS REST API and click on Next.
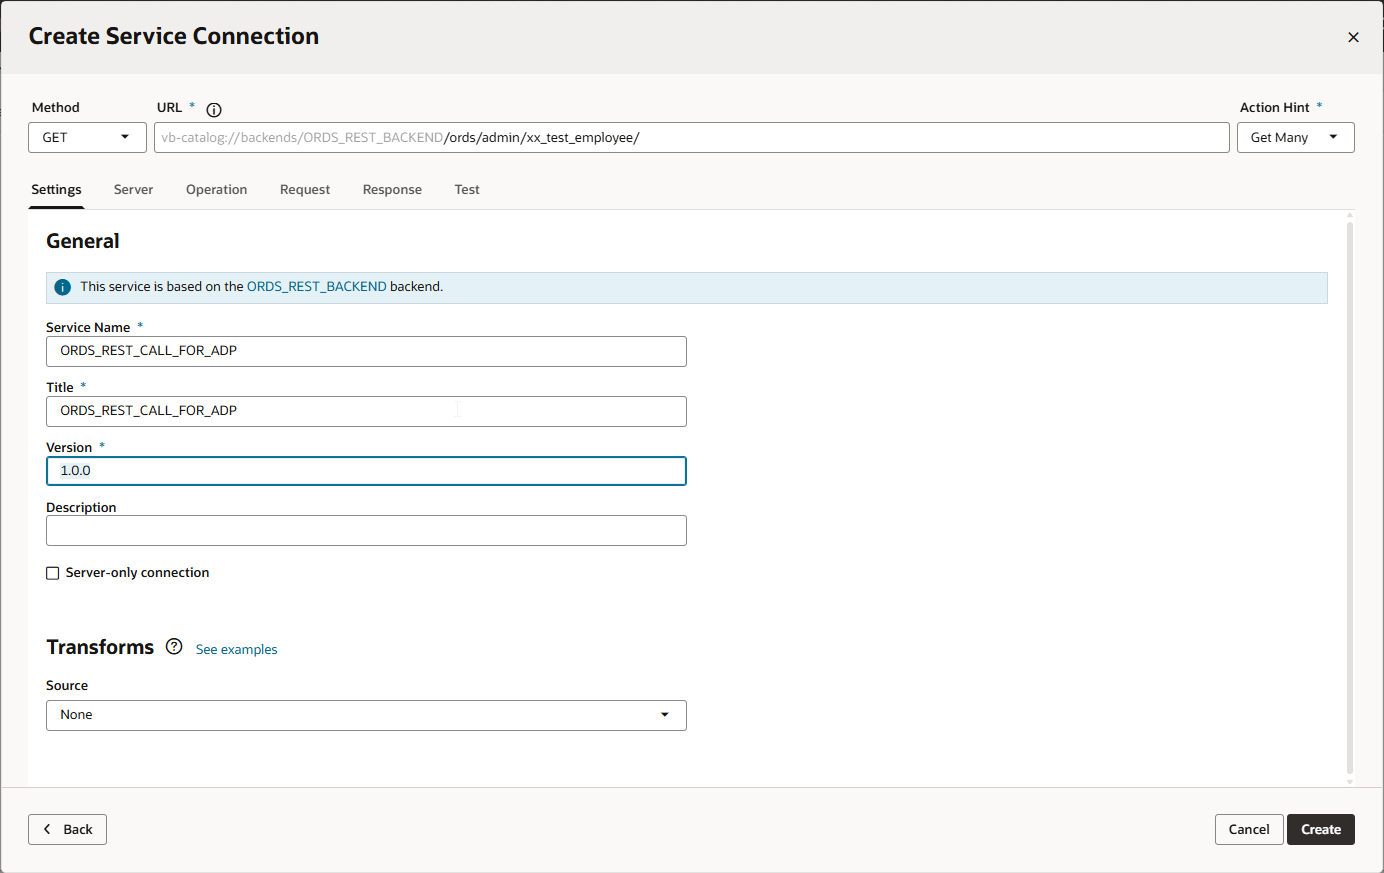
Click on Create.

Service Connection is created successfully.
Let us test this service connection.
Click on endpoint URL
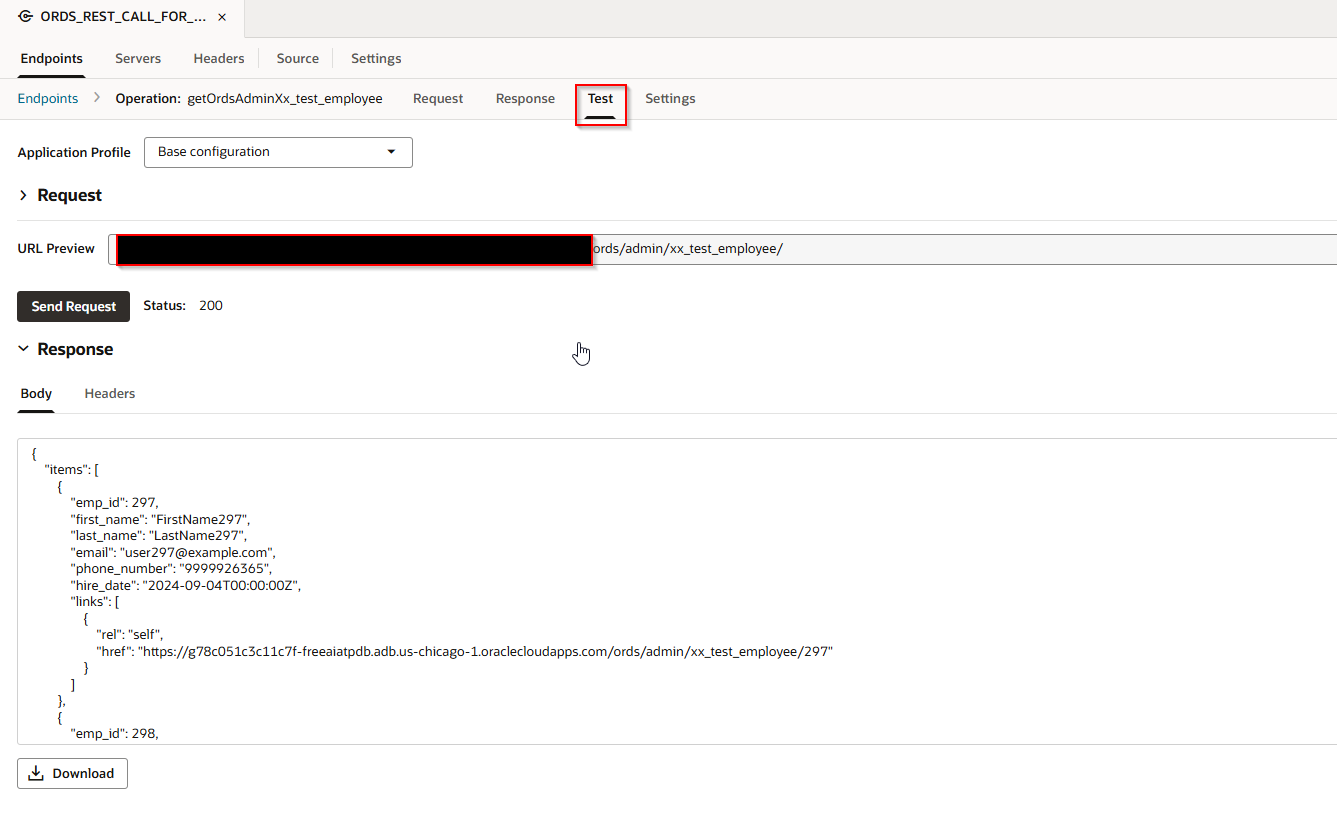
Service connection is tested successfully.
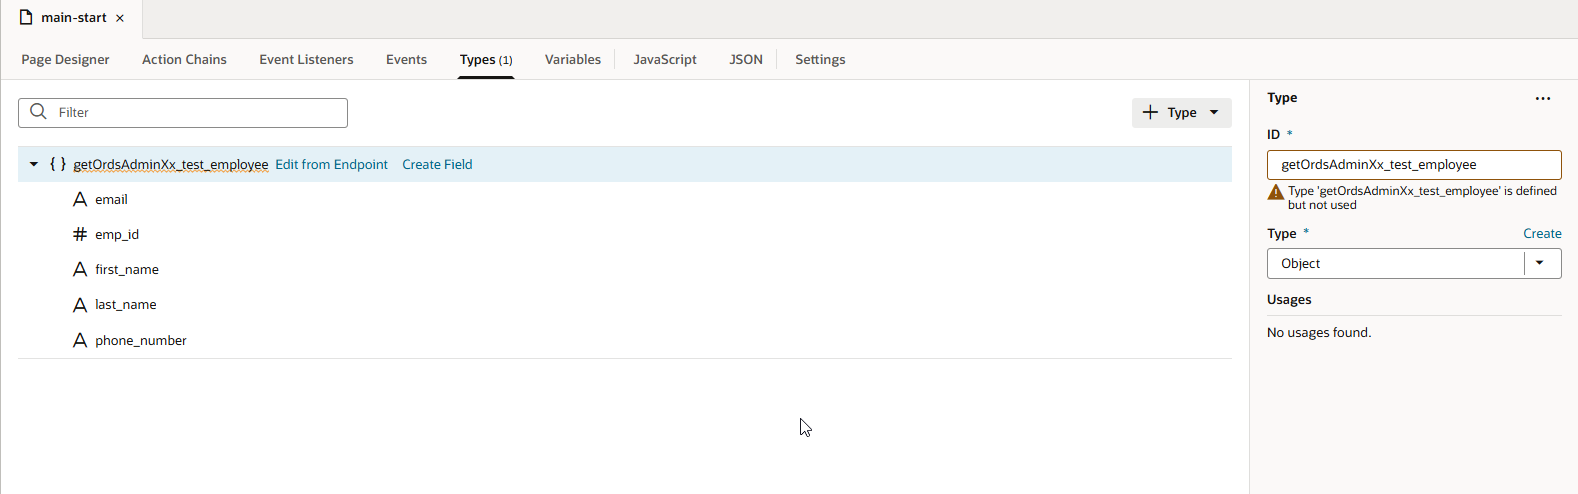
Create new Type based on this endpoint definition.
Navigate to application —>Types—>From Endpoint


Select the endpoint which was created earlier.
Click on Next.
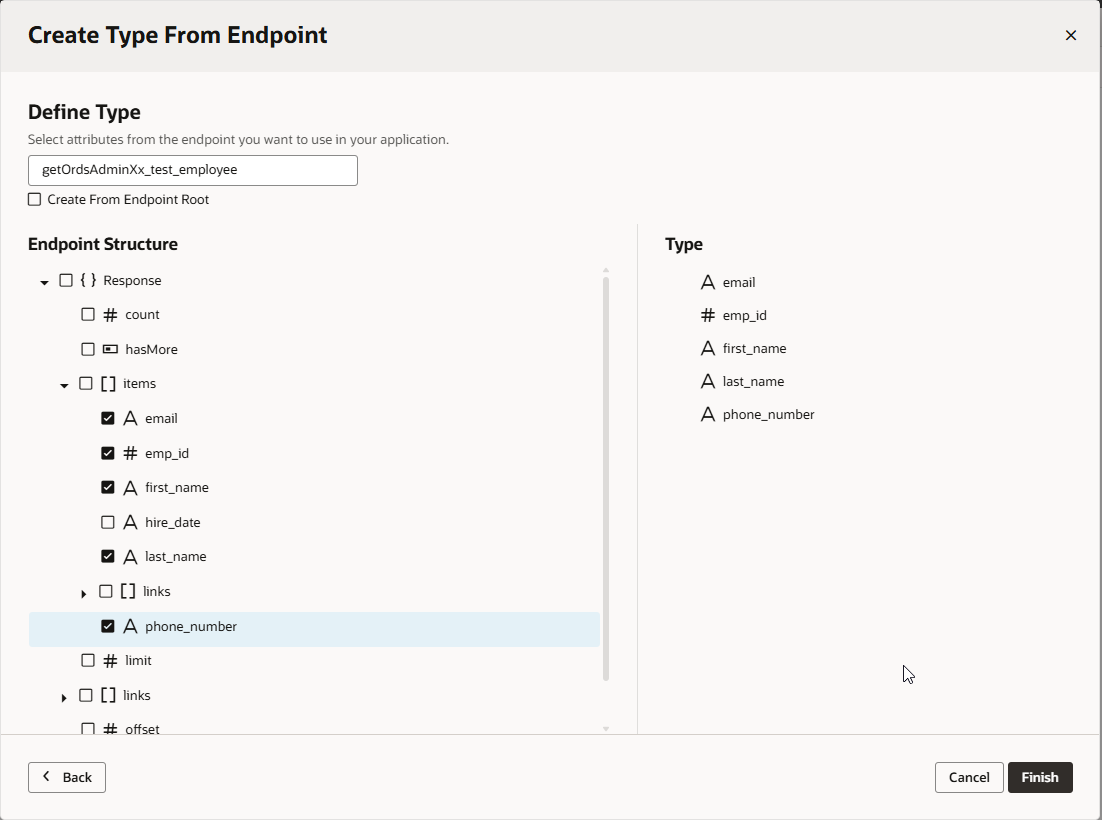
Click on Finish.
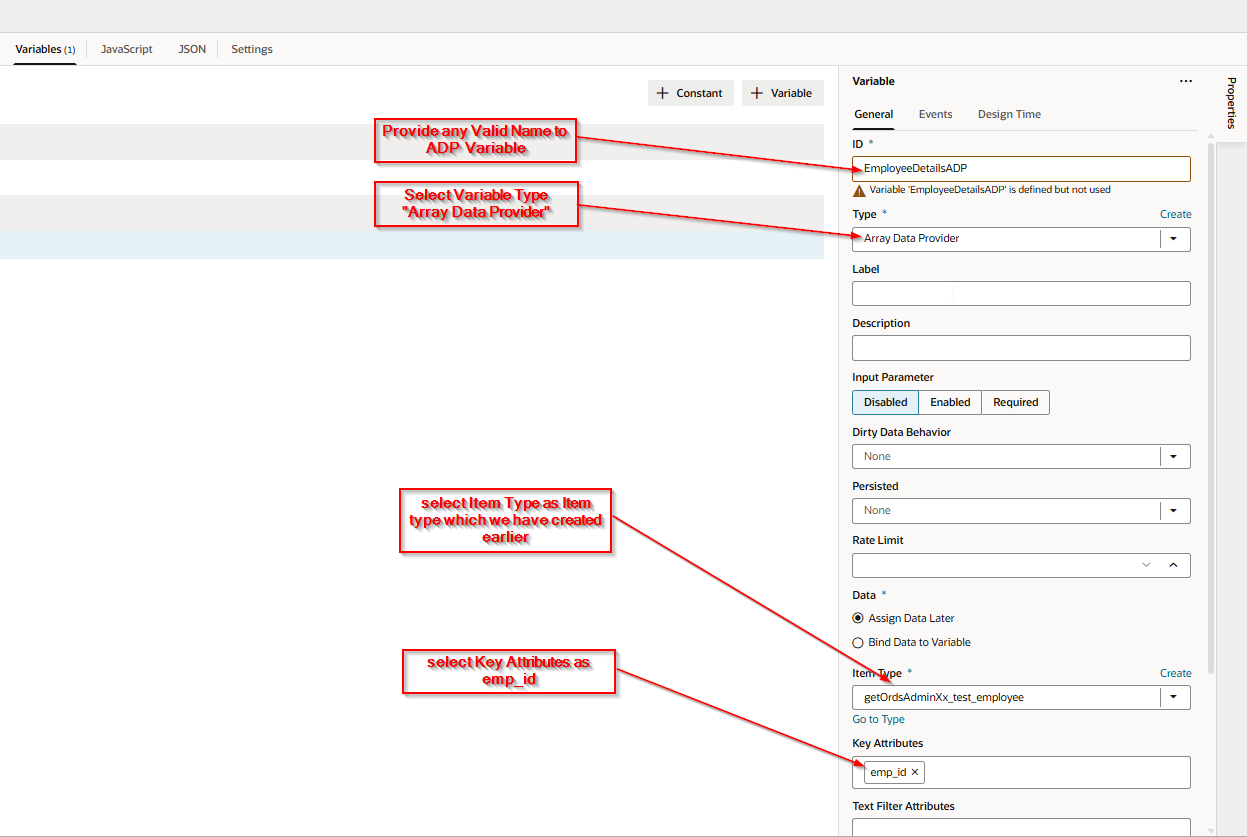
Create new ADP variable.
Navigate to Variables —->Variable.

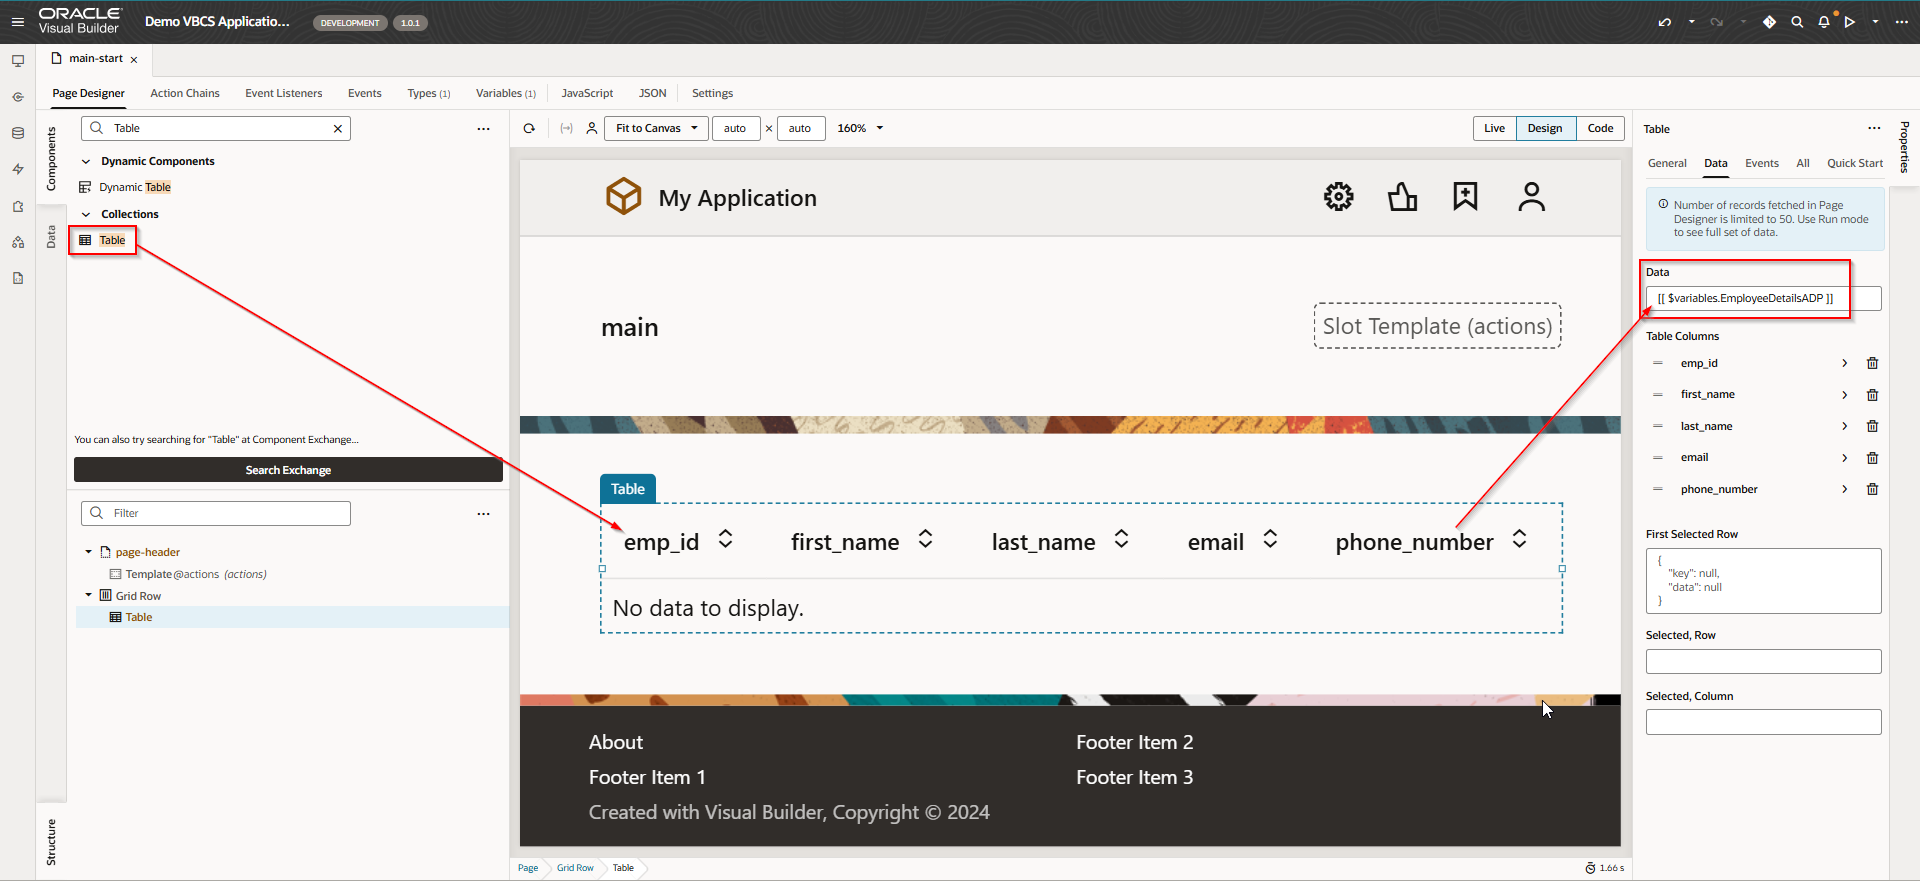
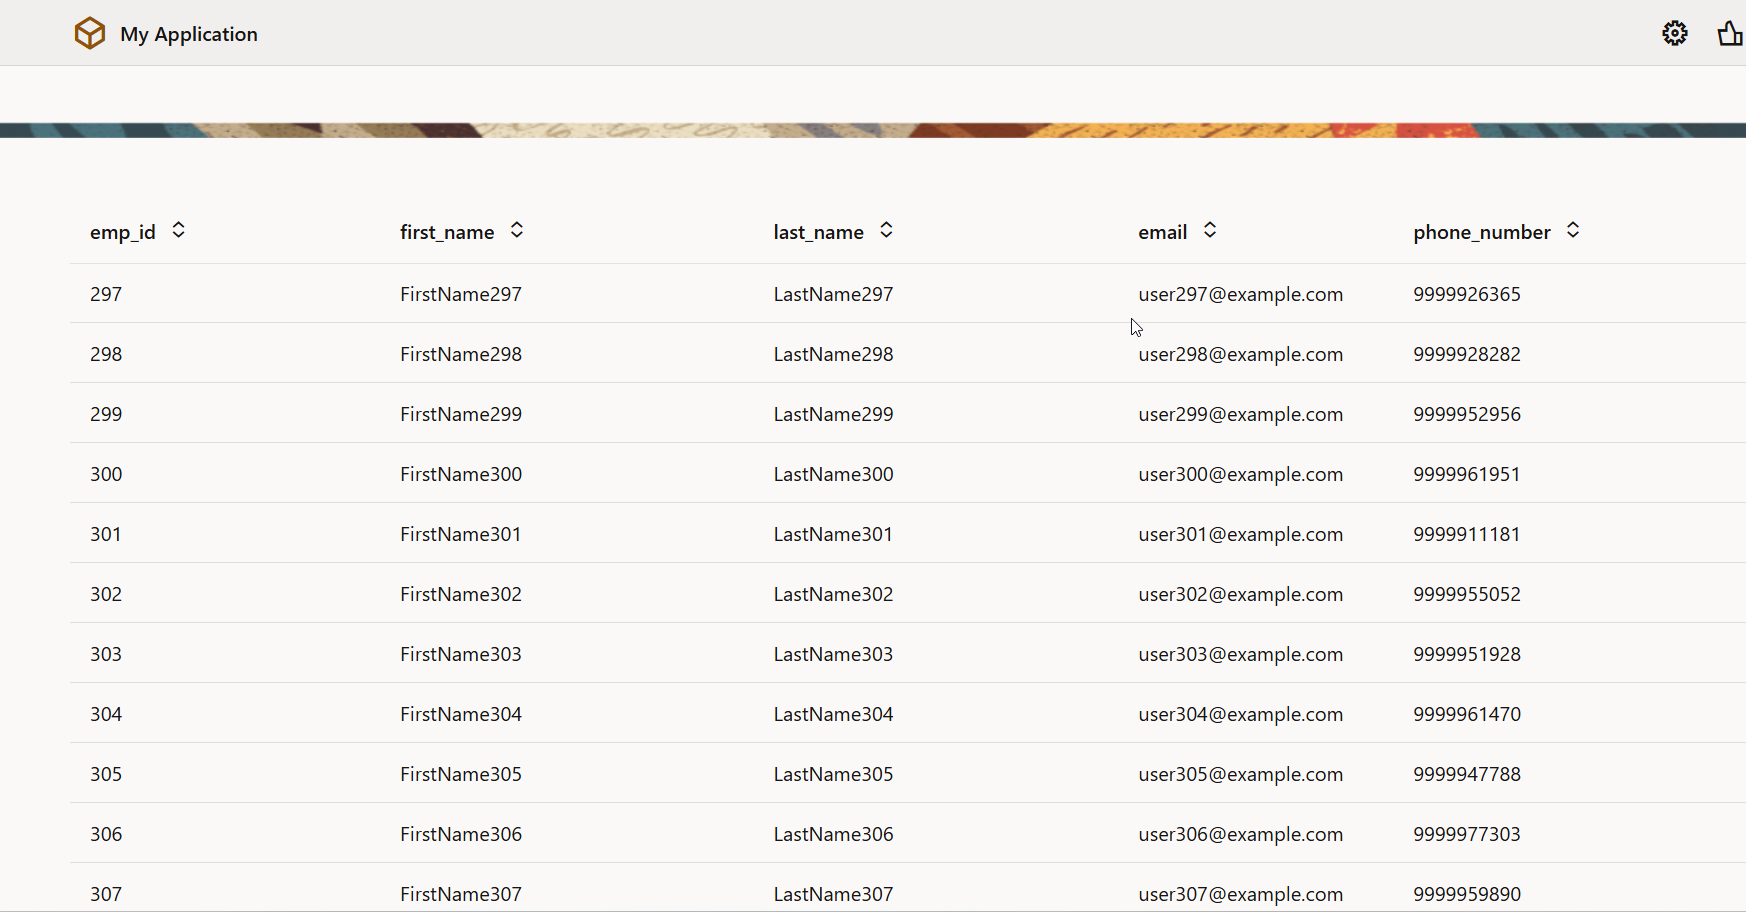
Create table on VBCS page and bind to ADP variable.
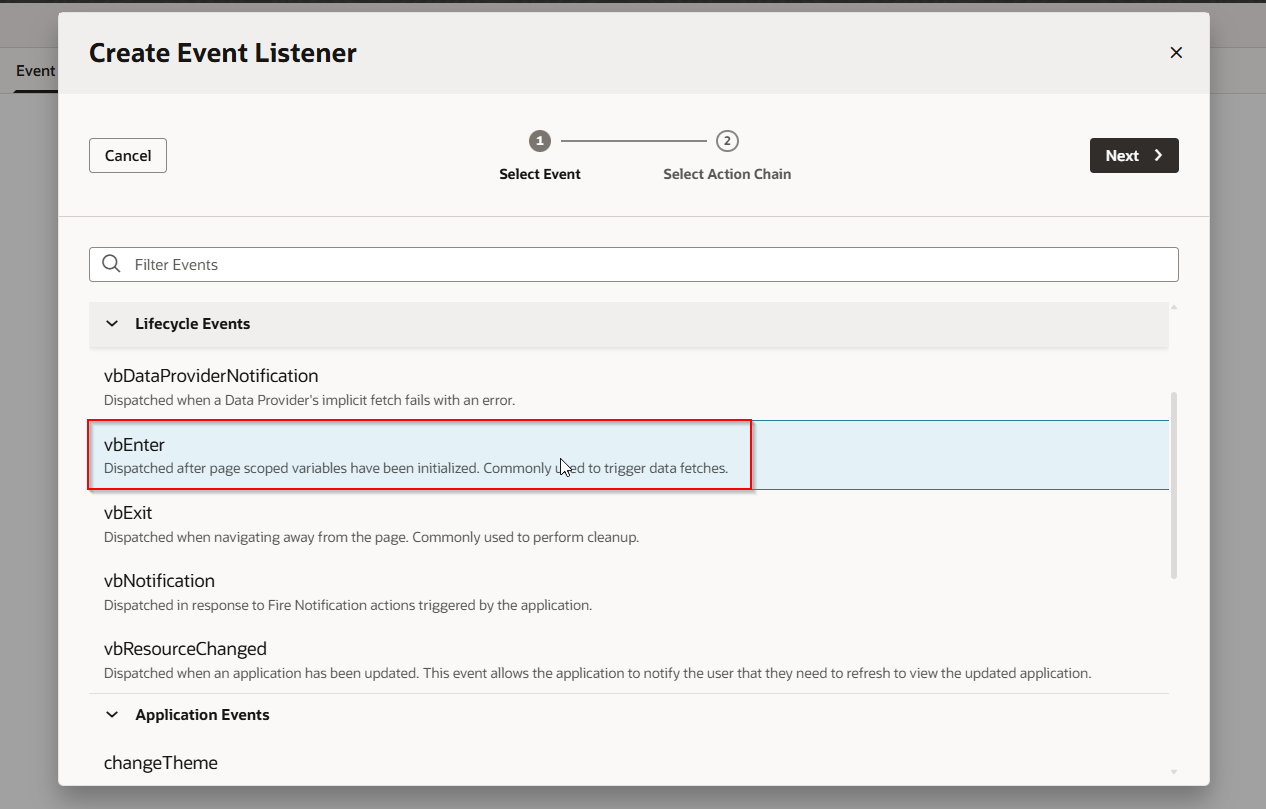
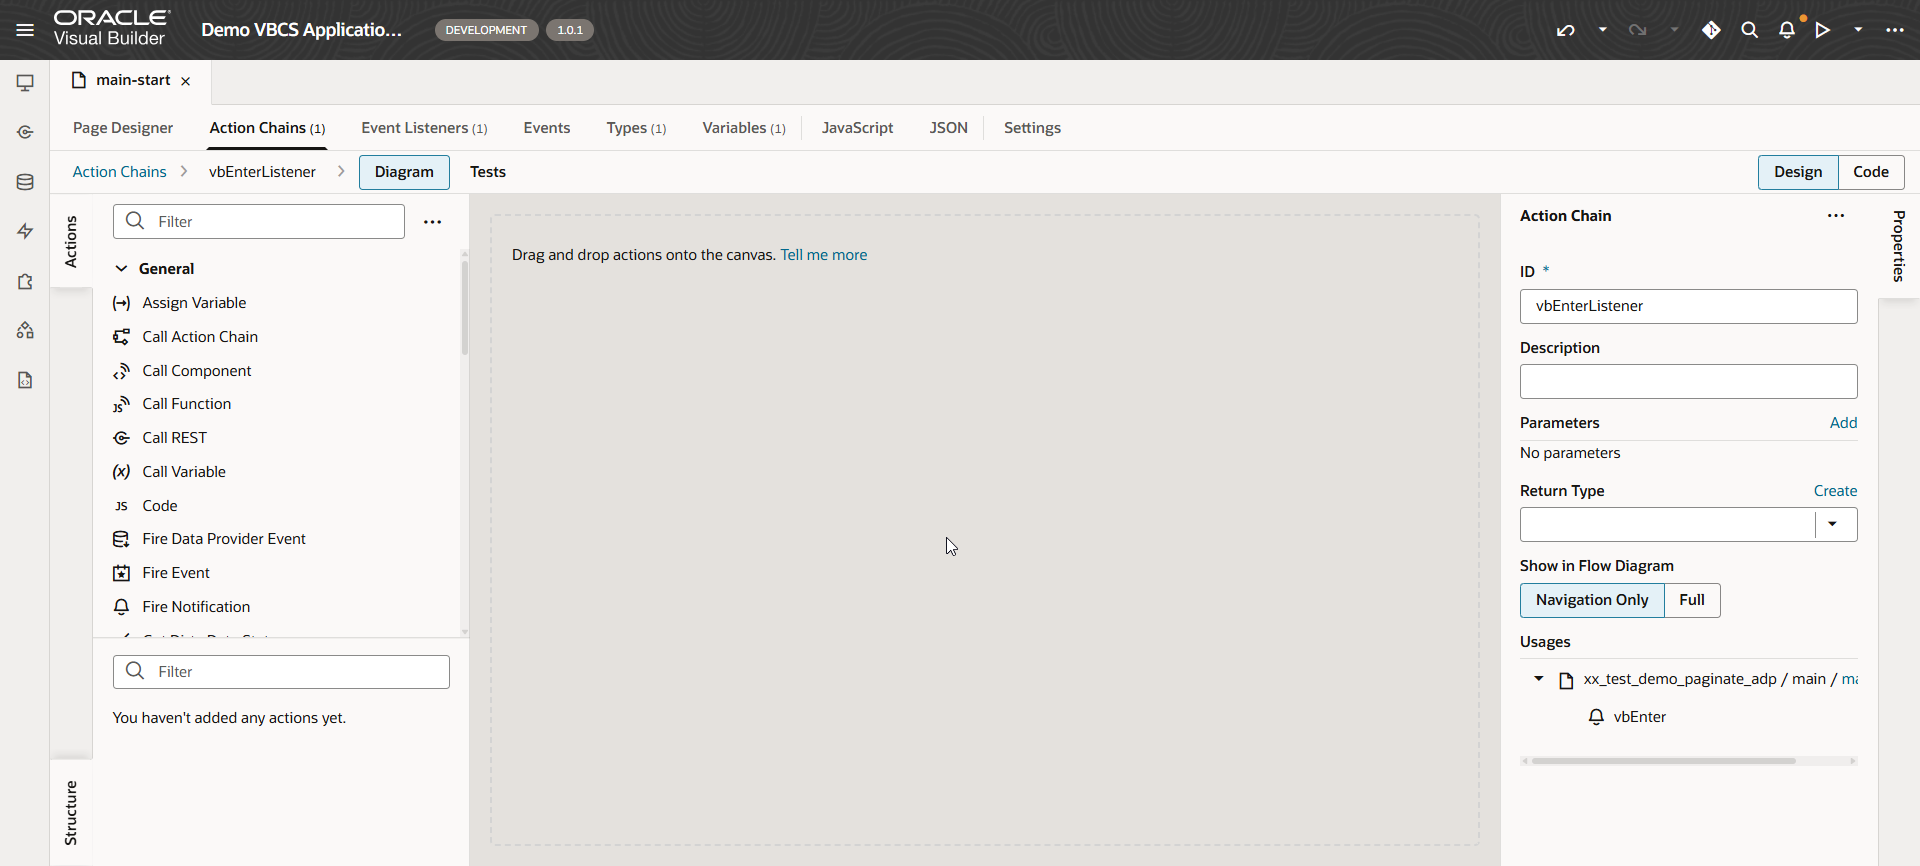
Create VB Enter event to populate ADP variable when page loads
Navigate to Event Listeners —->Event Listener.

Select Lifecyle Event as vbEnter and click on Next.
Select Create Page Action chain and click on Finish.

This will create new action chain.
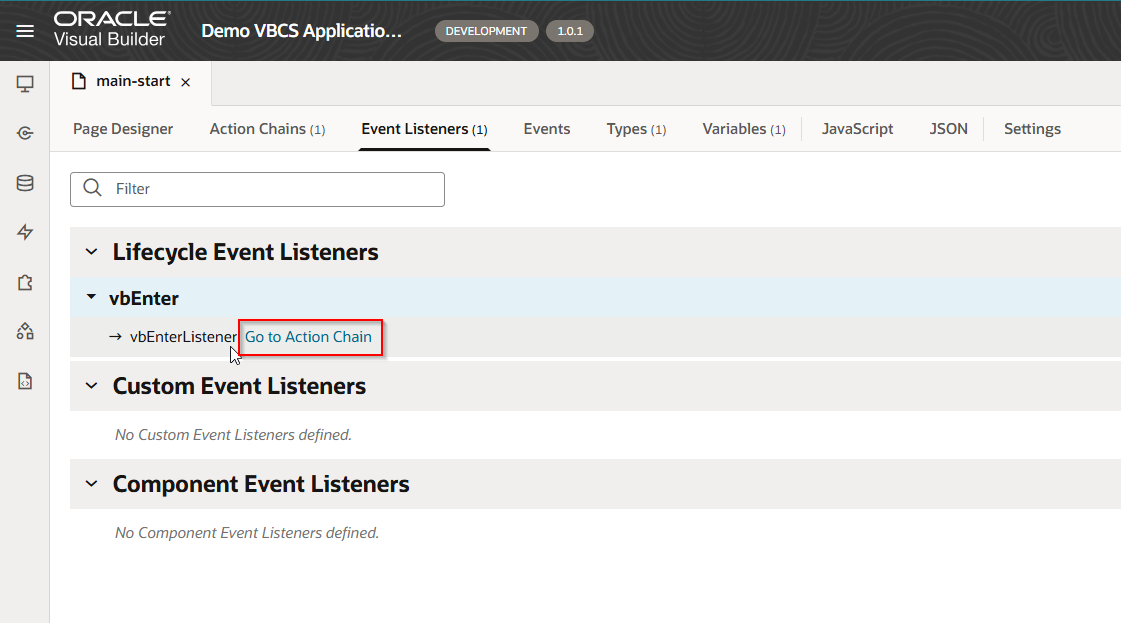
Click on “Go to Action Chain”.
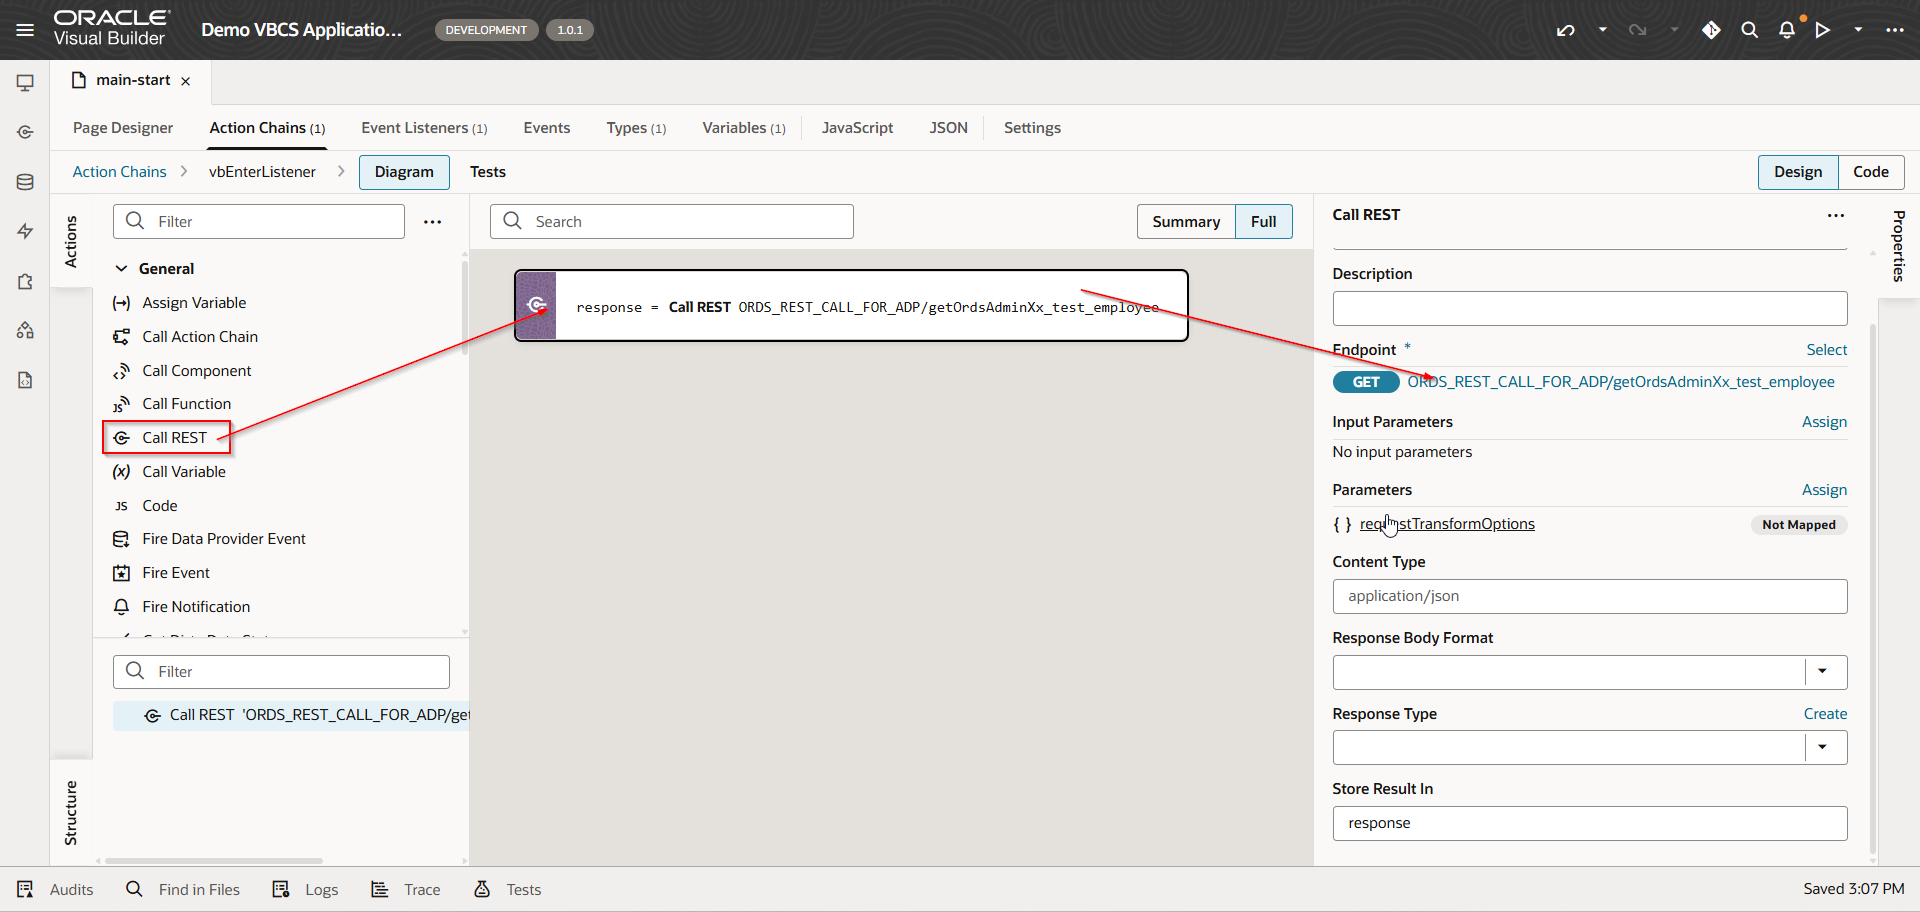
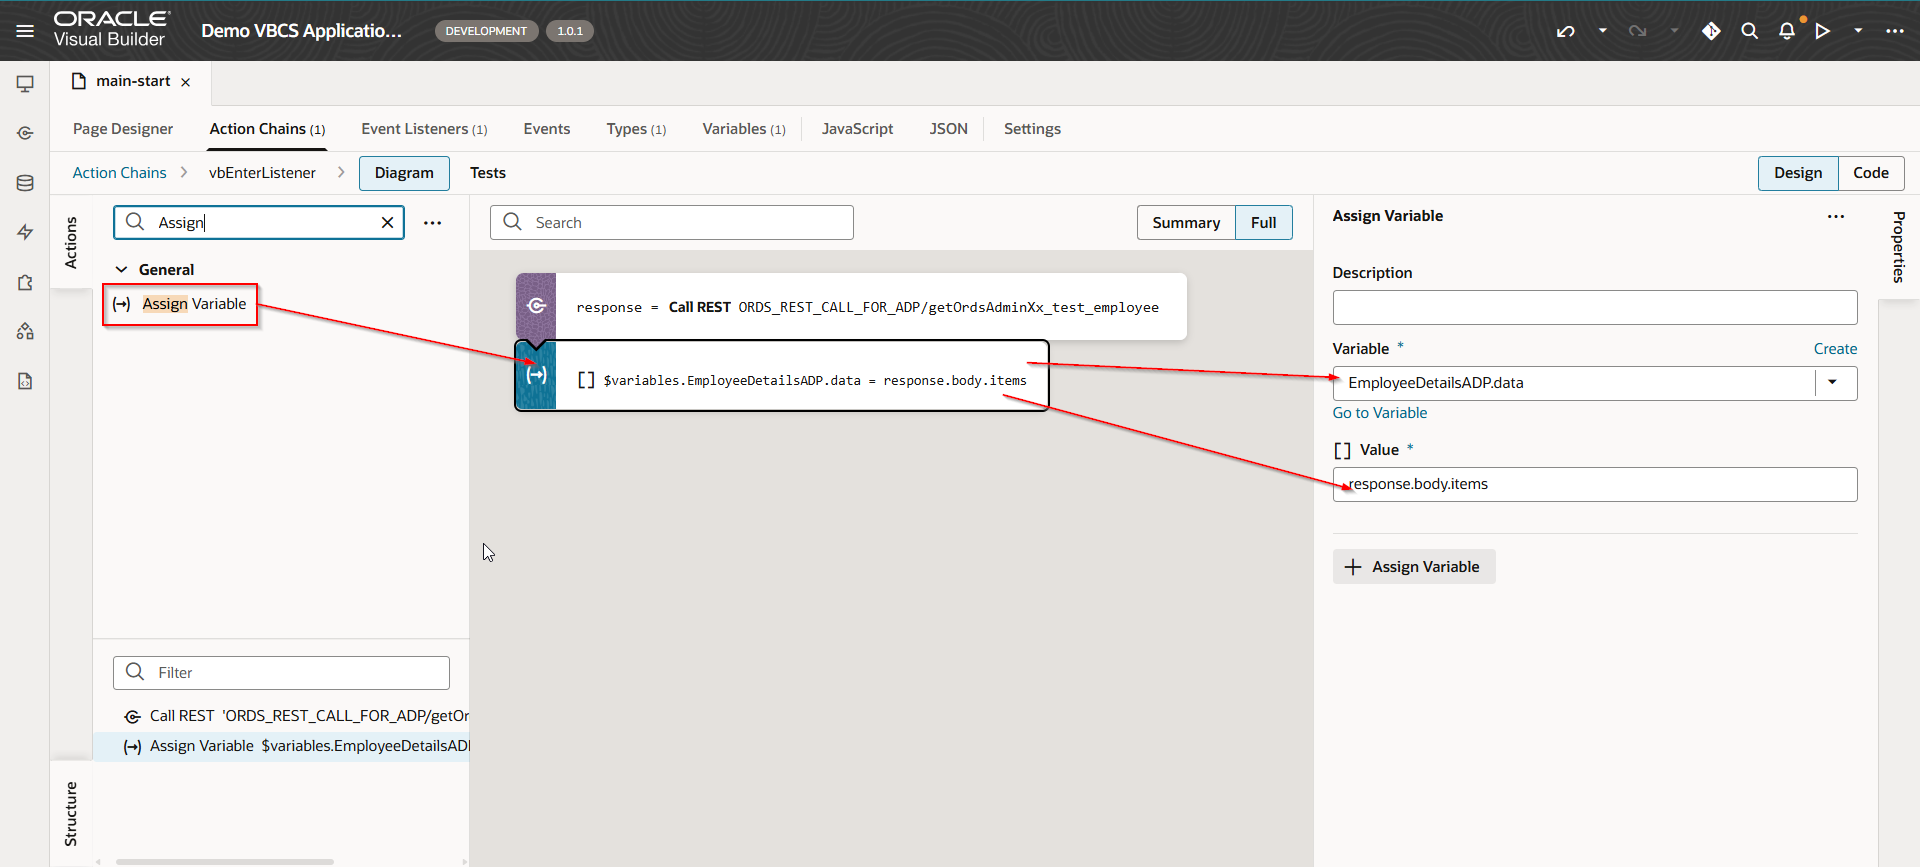
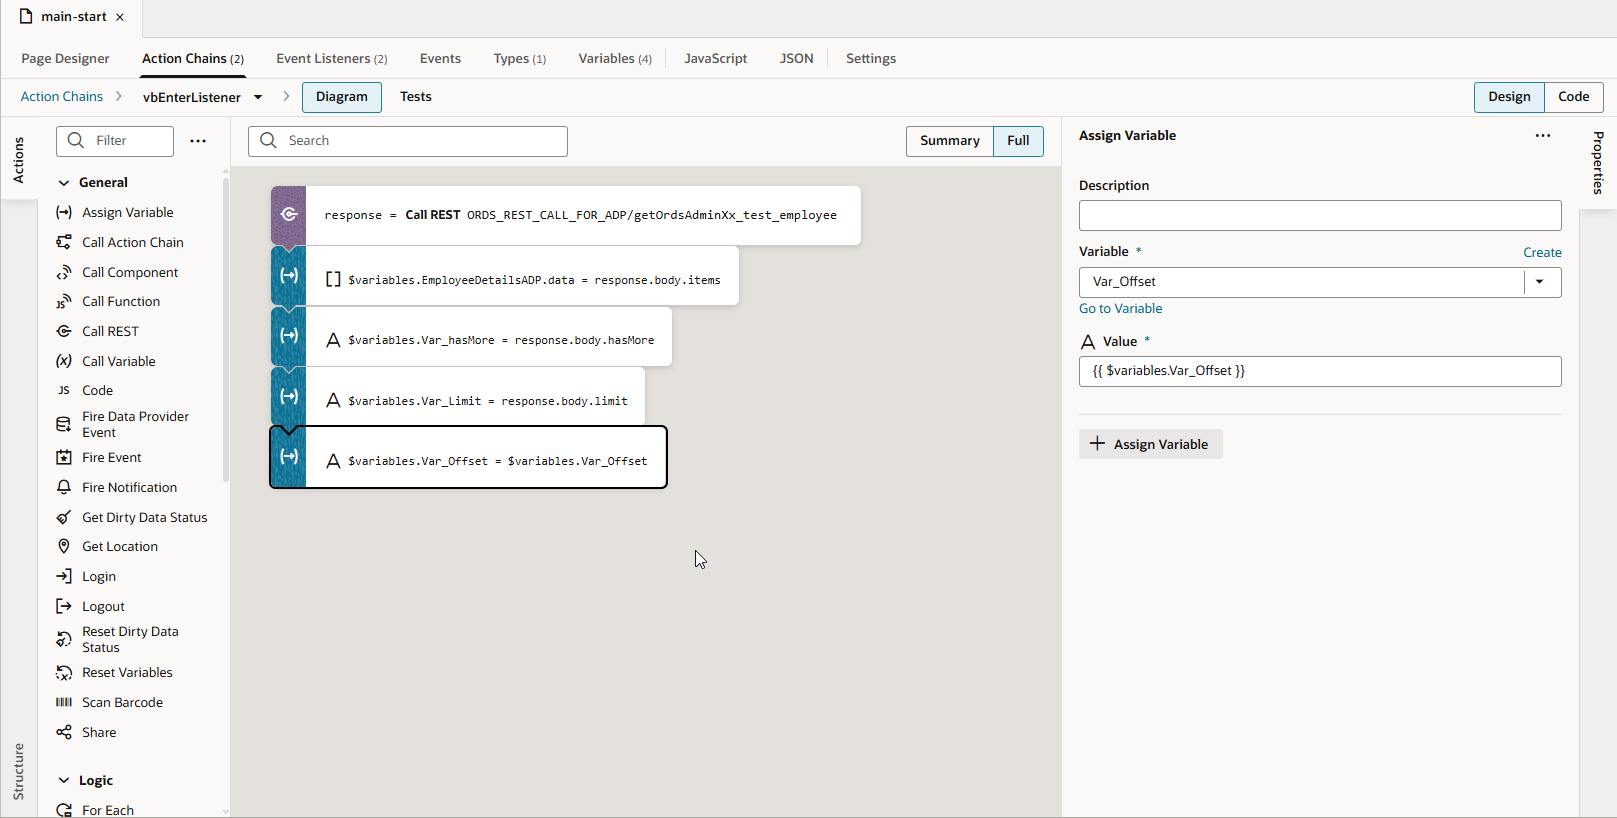
Let us call ORDS REST API in action chain and assign response to ADP variable.
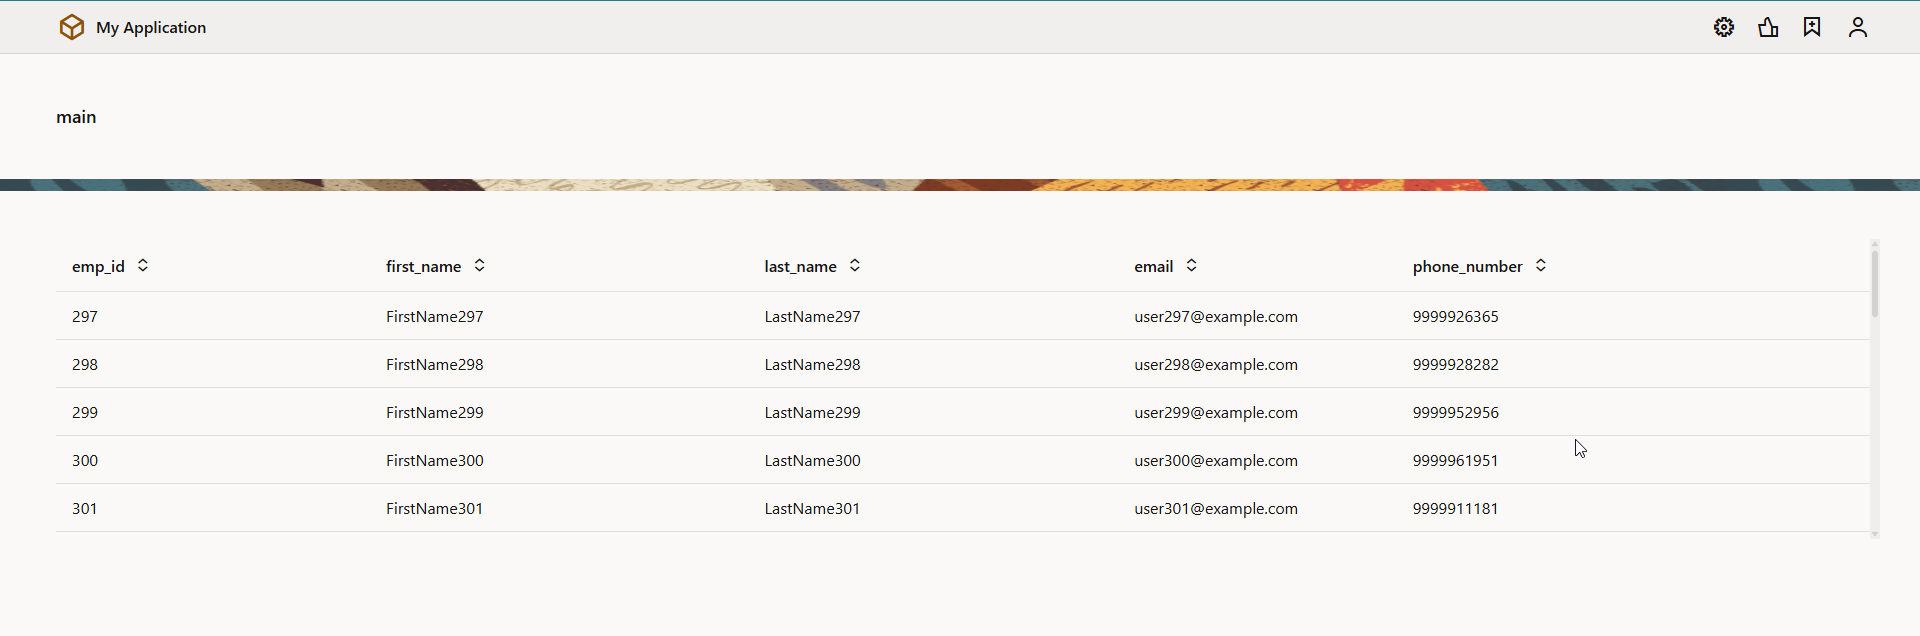
Run the application.
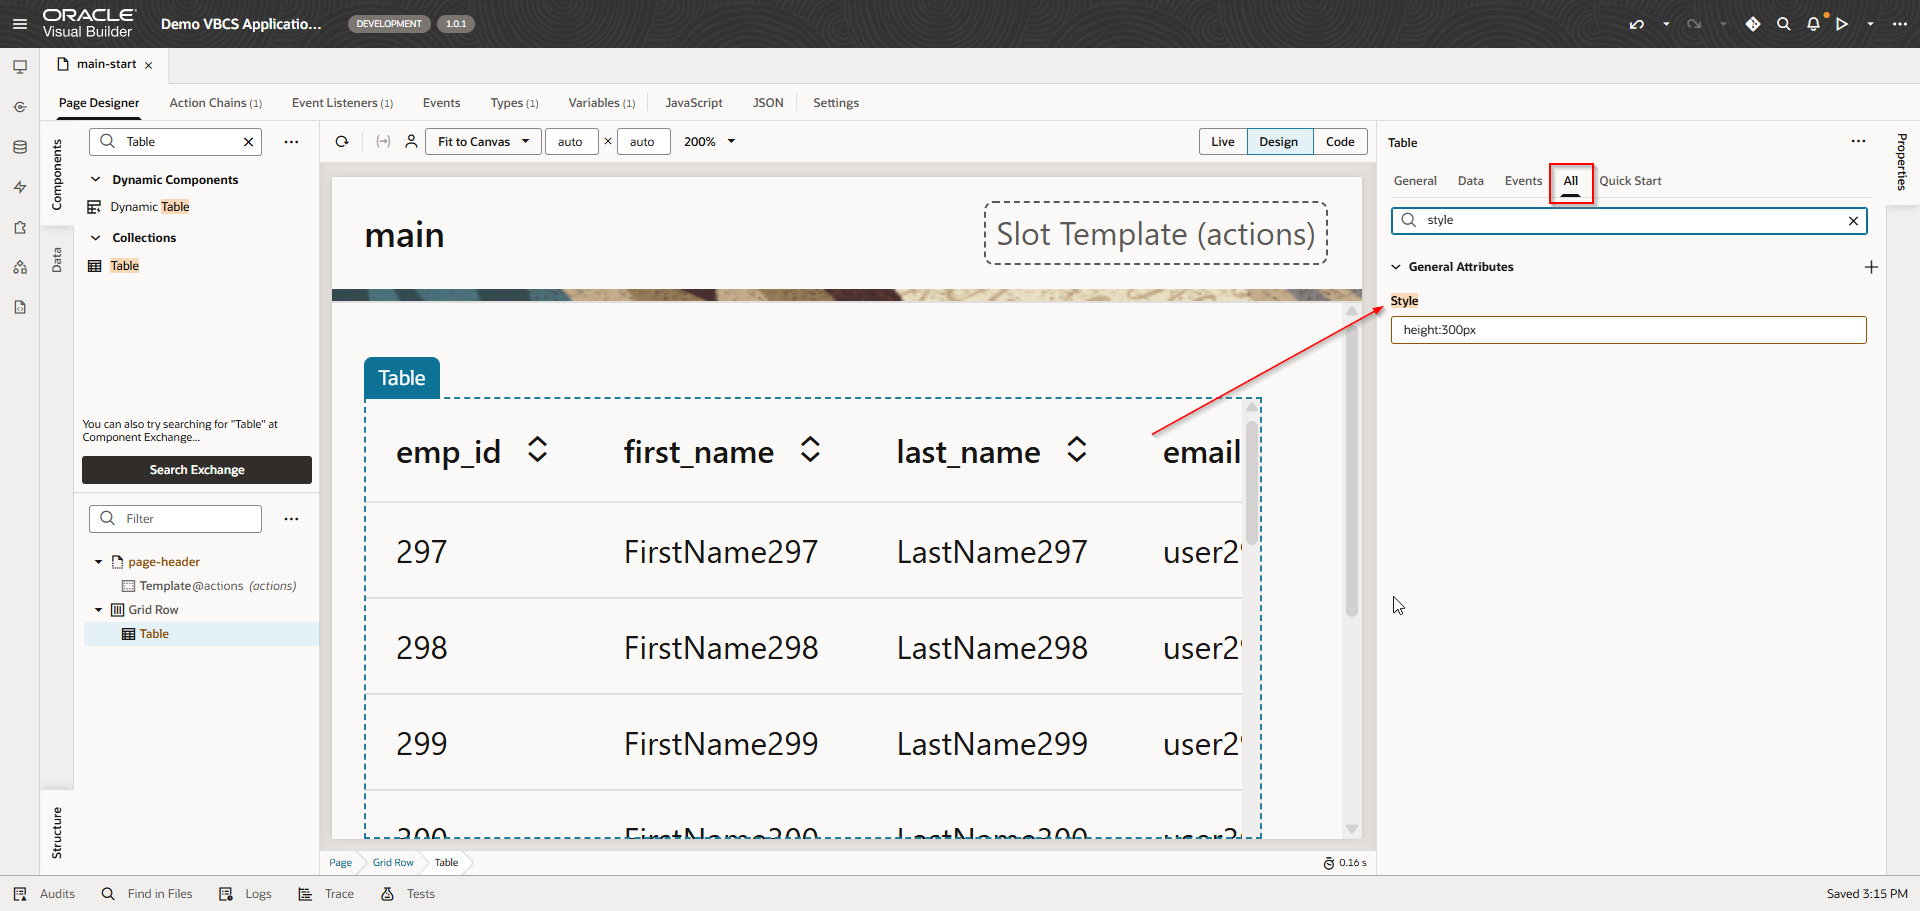
Set the height of table as 300px.
Run the application again.
Pagination for REST API can be achieved using limits, offset and hasMore parameters of REST API.
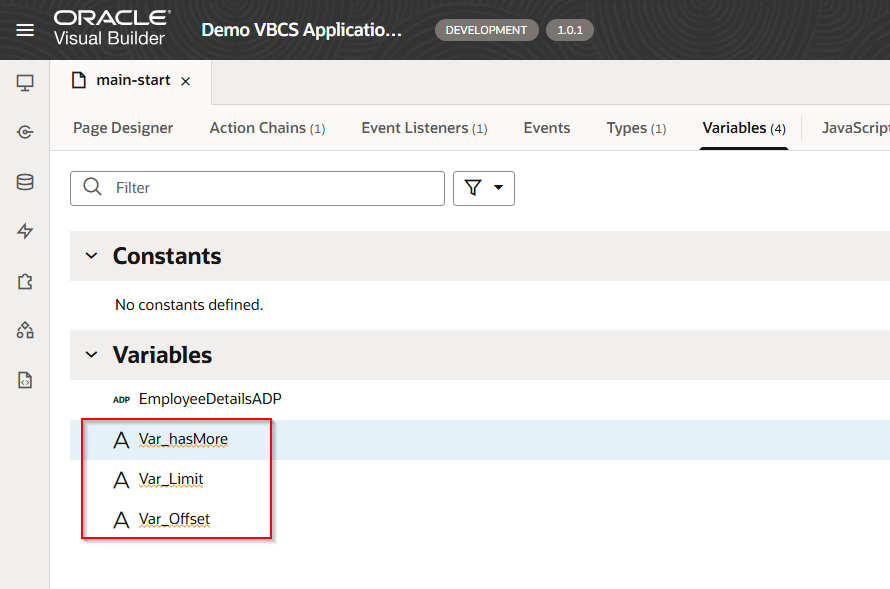
Create below three variables:
Variable Name | Data Type |
Var_Limit | Number |
Var_Offset | Number |
Var_hasMore | Boolean |
Navigate to Variables.
Assign value of hasMore from REST API response to Var_hasMore variable.
Assign value from REST API response of limit to Var_Limit variable.
Assign value from REST API response of offset to Var_Offset variable.
Action Chain: vbEnterListener
Create Two Buttons as “Next” and “Previous” for Records.
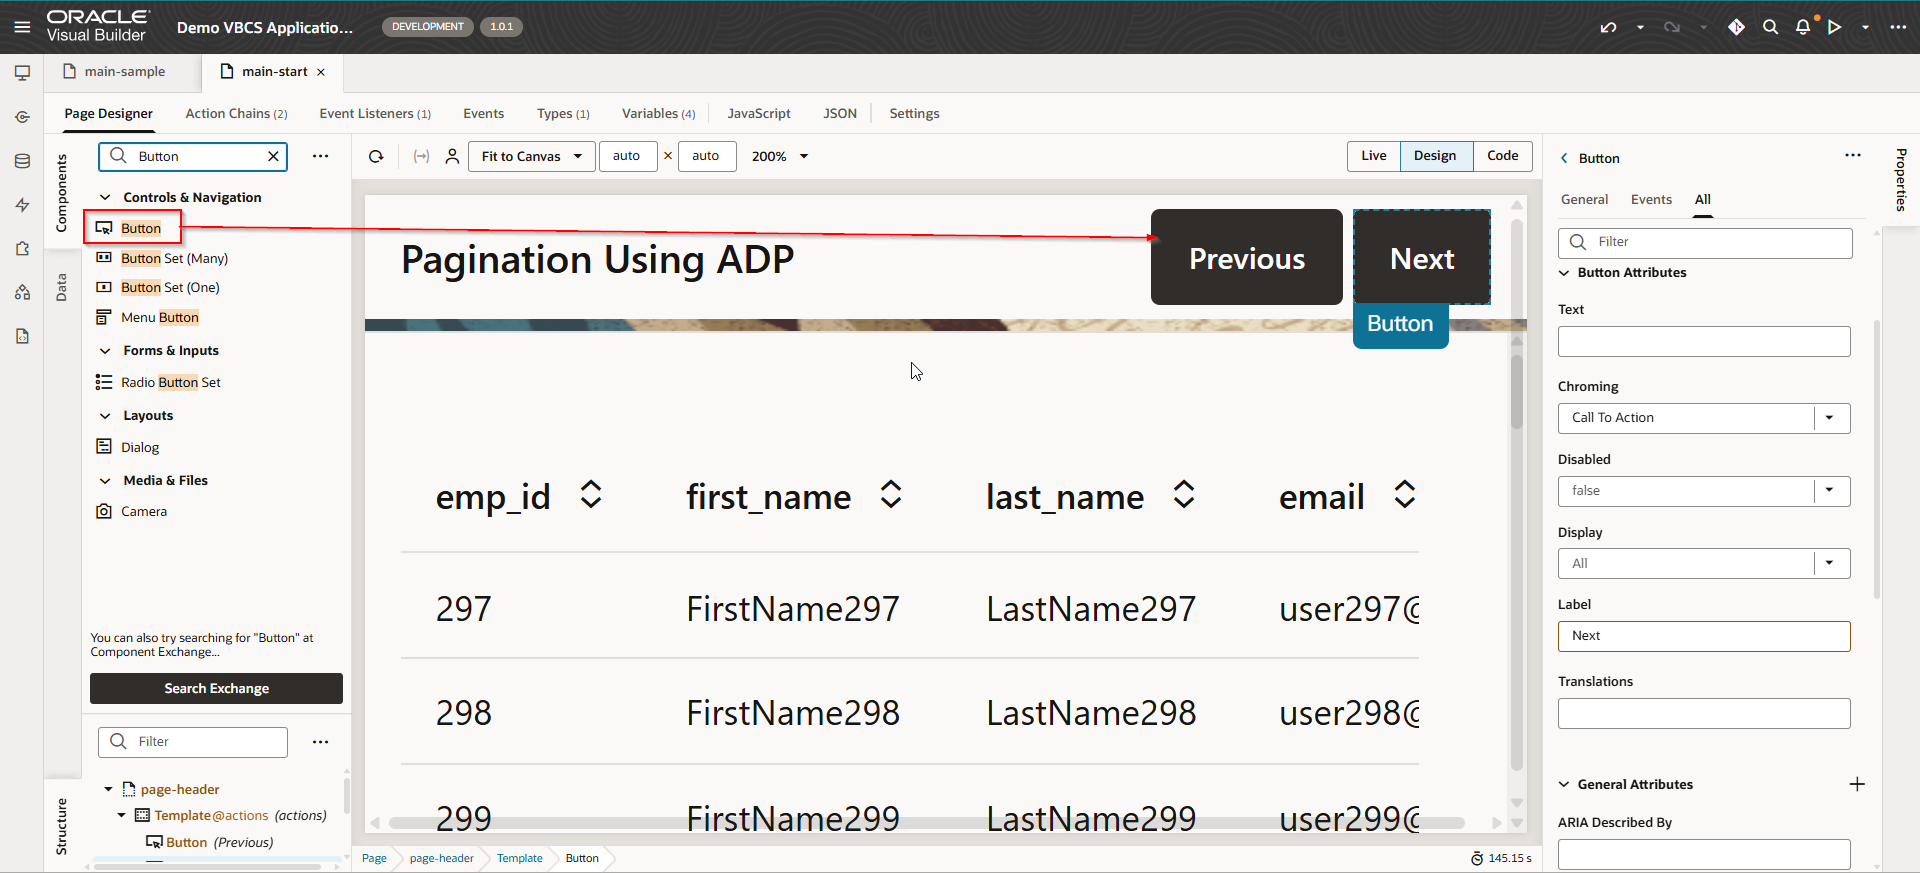
Create Event for Next Button.
Navigate to Next button —>Events —->Event Listener.
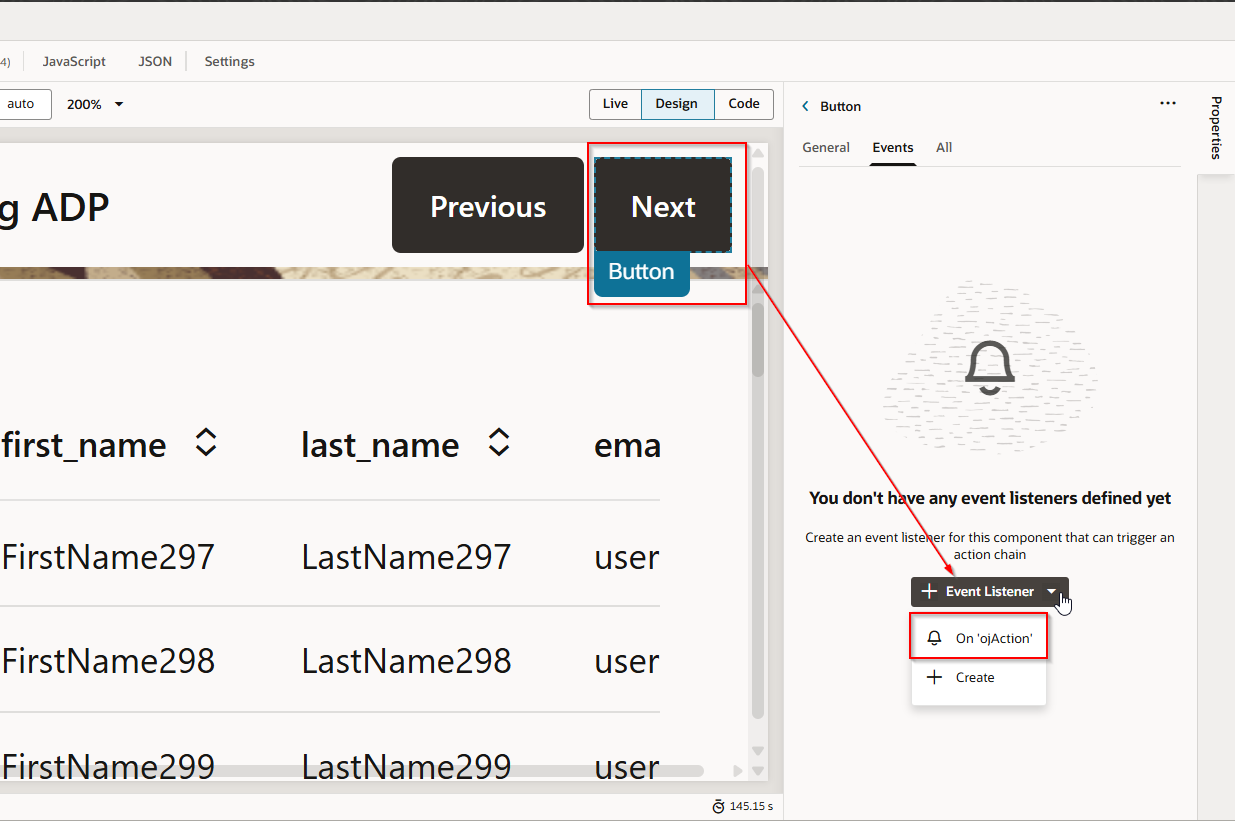
This will create new action chain.
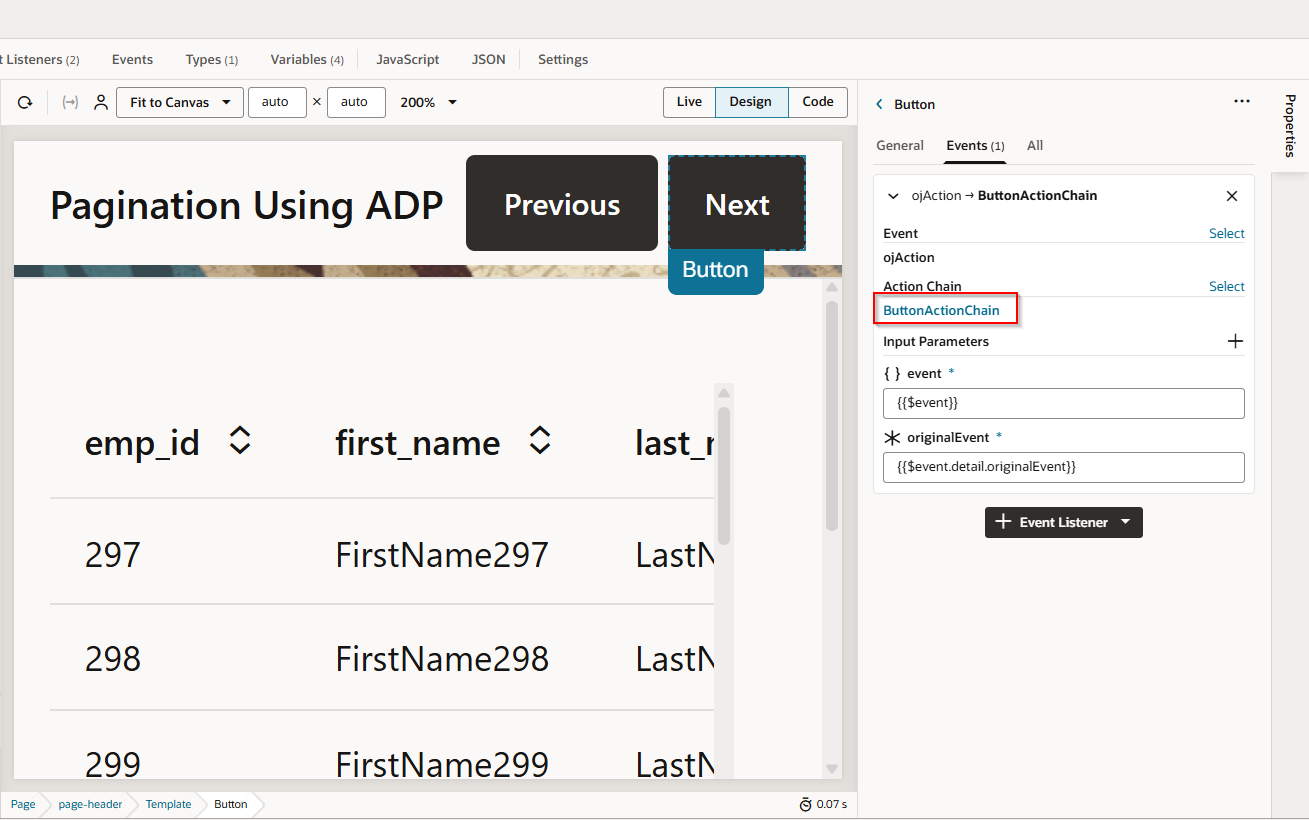
Navigate to Action chain for Next Button and add below logic.

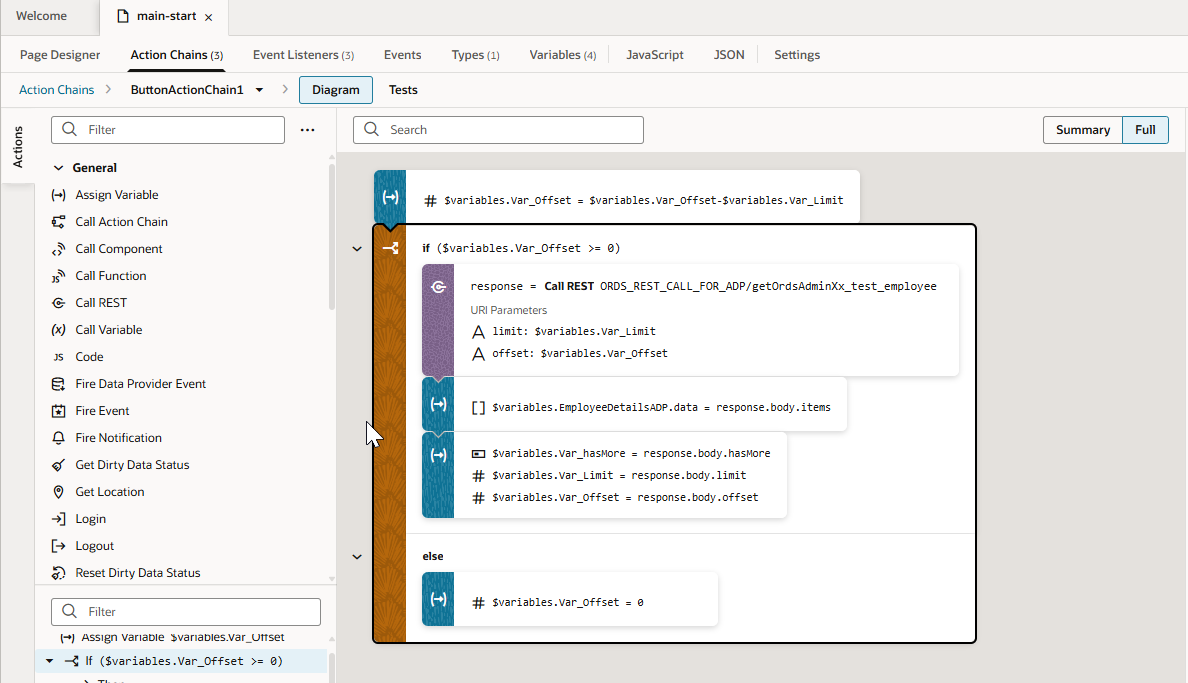
Create similar events and action chain for Previous Button with below logic:
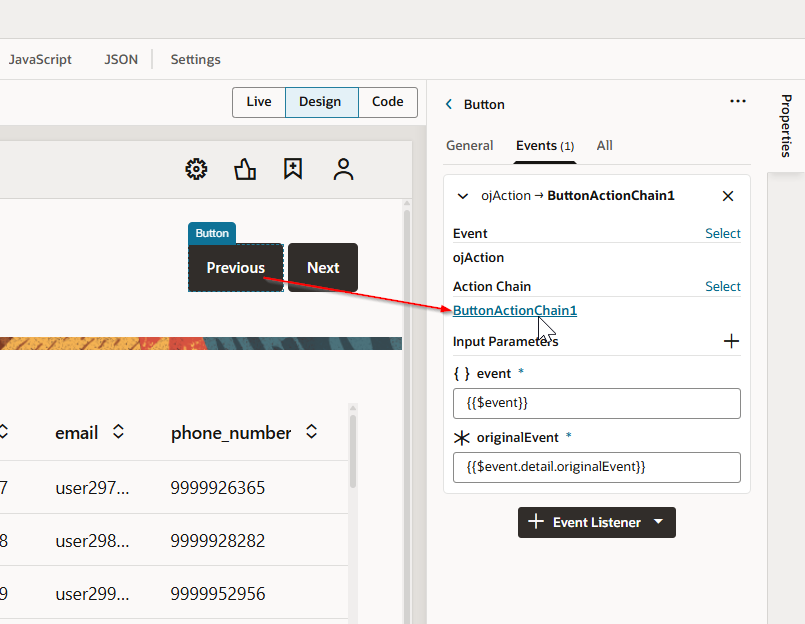
This will create new action chain.
Add the logic below in action chain.
Run the application.

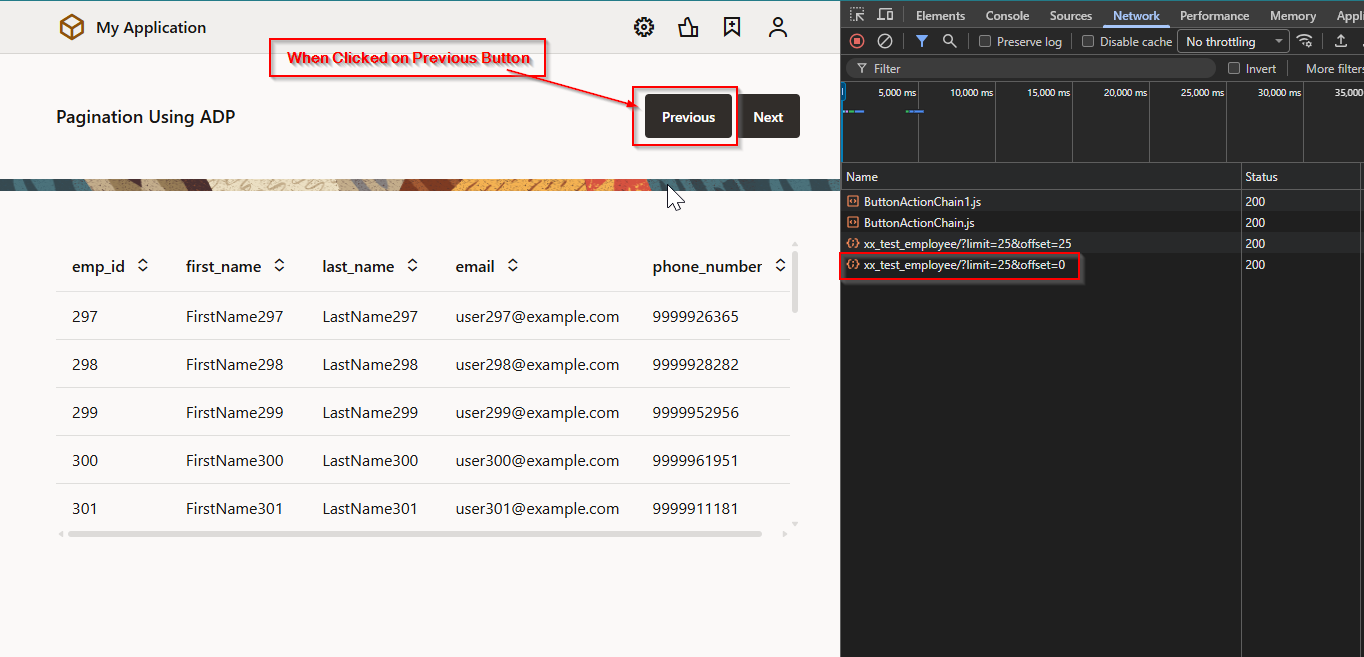
Now click on Previous.