How to Connect ATP Database with VBCS using Tenant Setting and Database Wallet
In this post, we will see how to connect ATP database with VBCS using Tenant setting and database wallet.
Step1: Provision ATP Database in OCI.
Login to OCI Console and click on navigator.
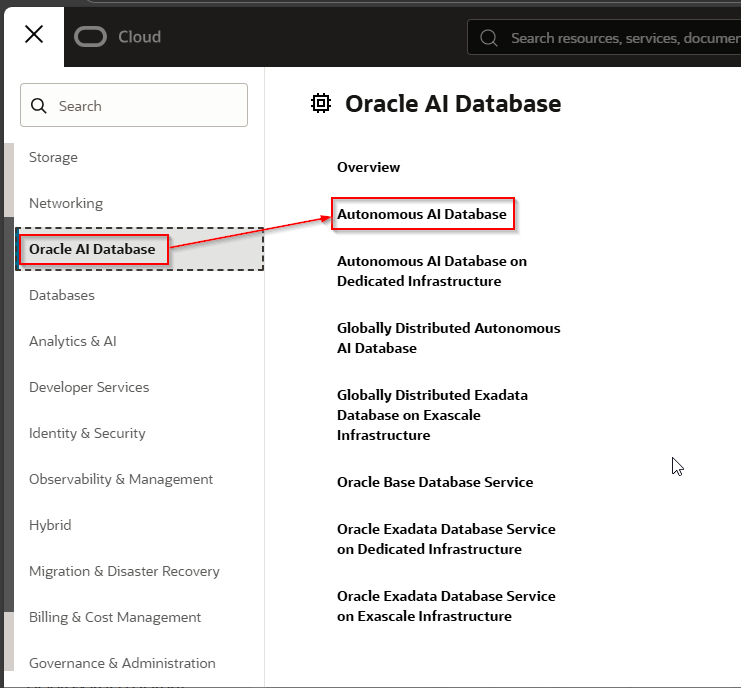
Navigate to Oracle AI Database —>Autonomous AI Database
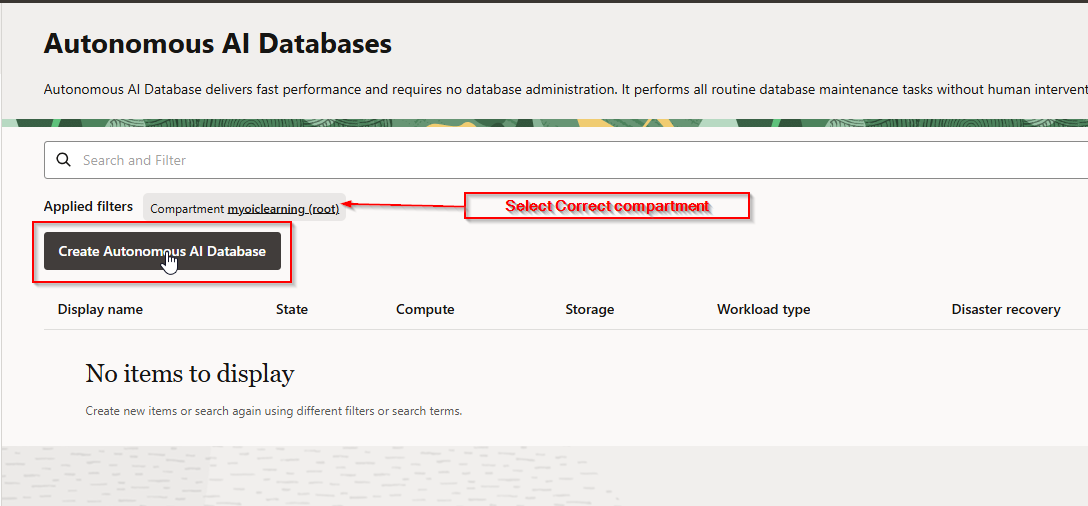
Select required compartment and then click on “Create Autonomous AI Database”.
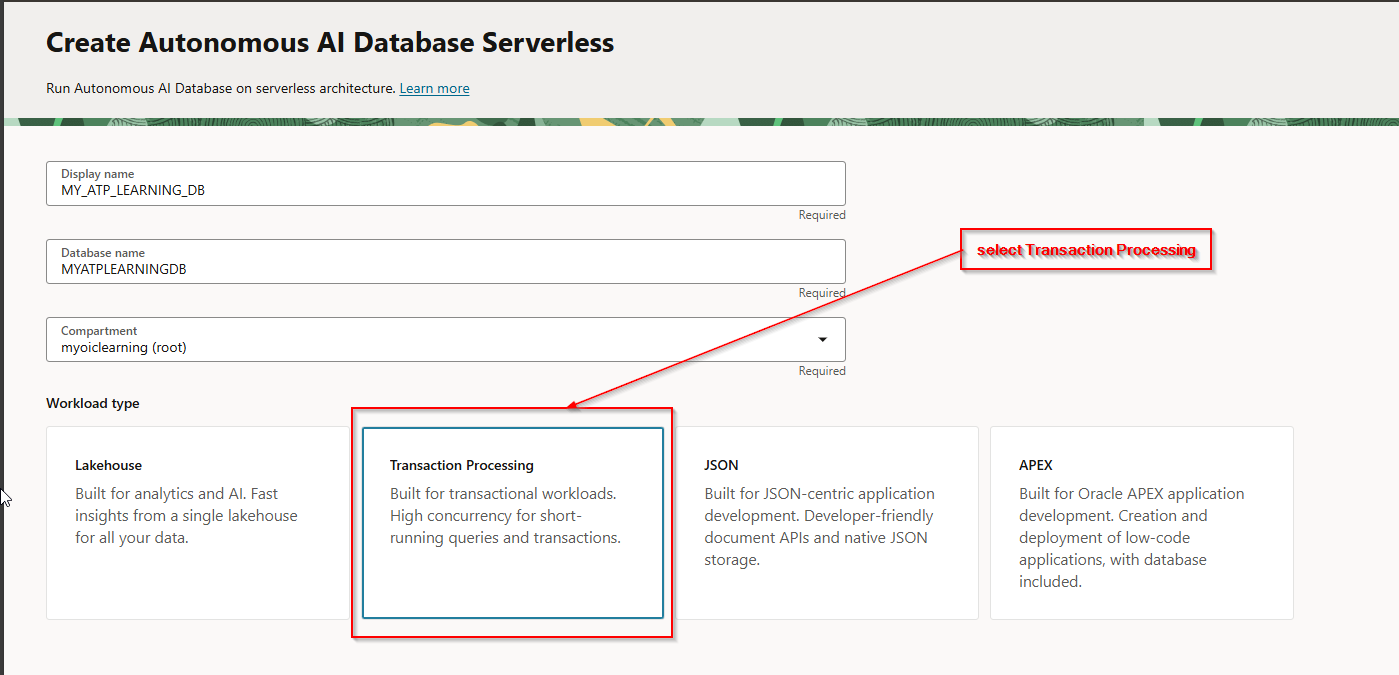
Provide display name, database name and select workload type as “Transaction Processing”.
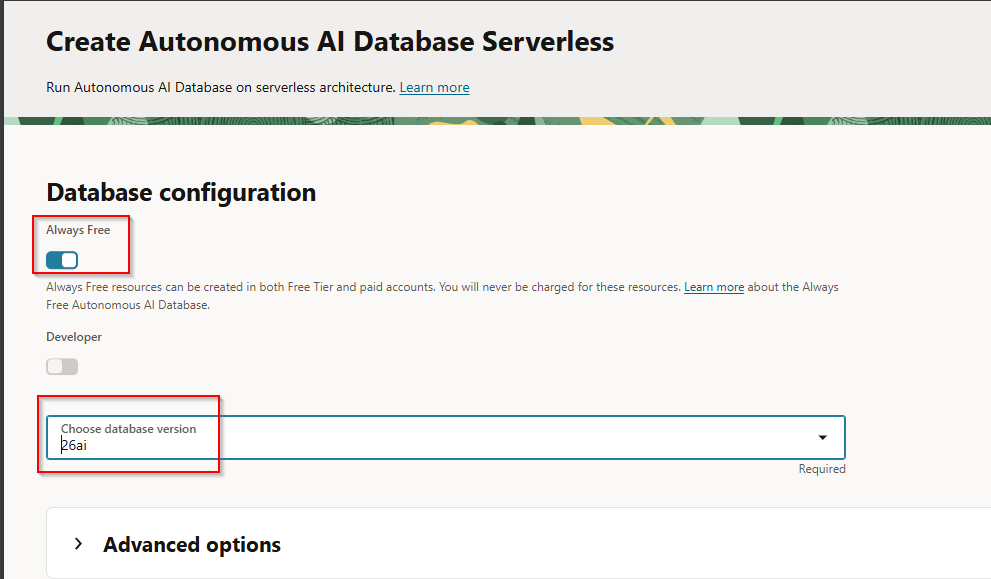
Enable “Always free” option and select database version as “26ai”.
Provide valid passwords for ADMIN user.
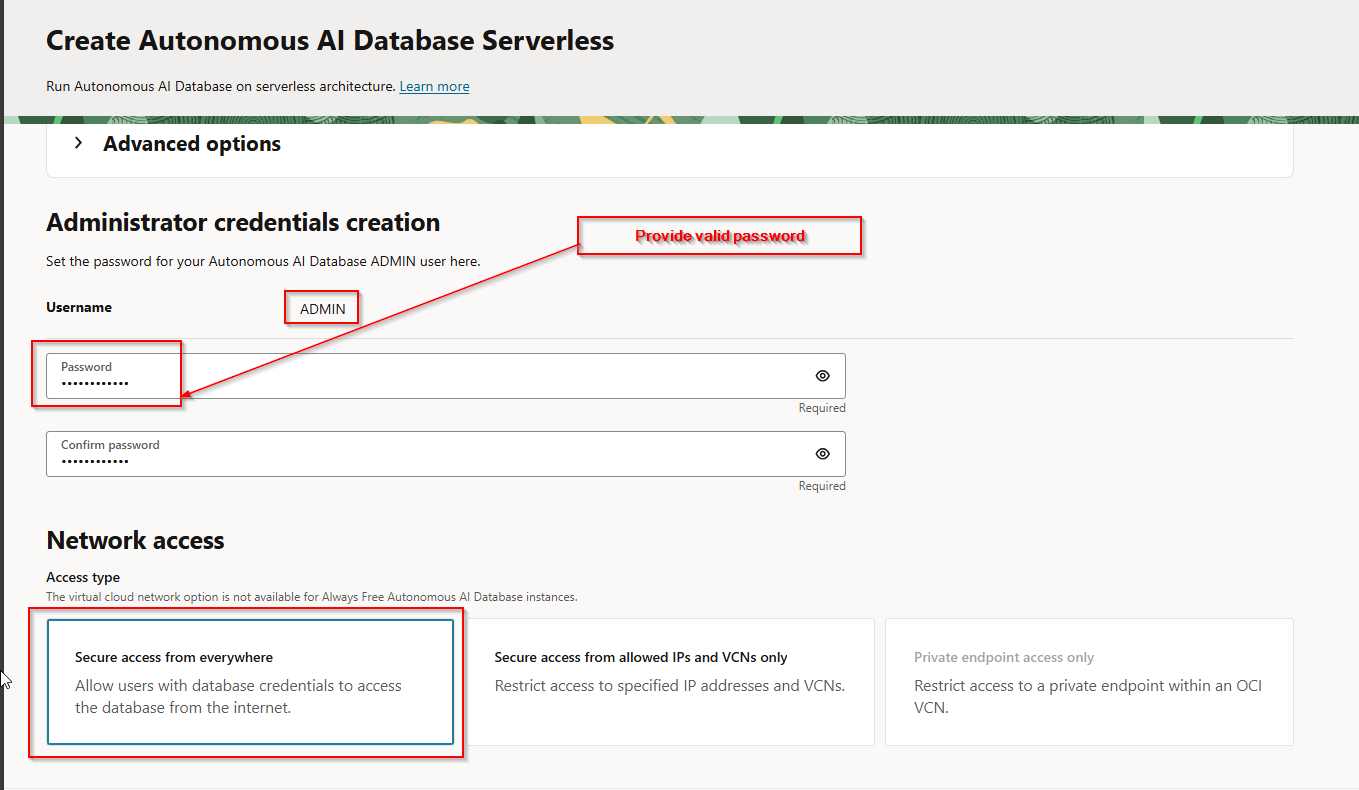
Select Access Type as “Secure access from everywhere”.
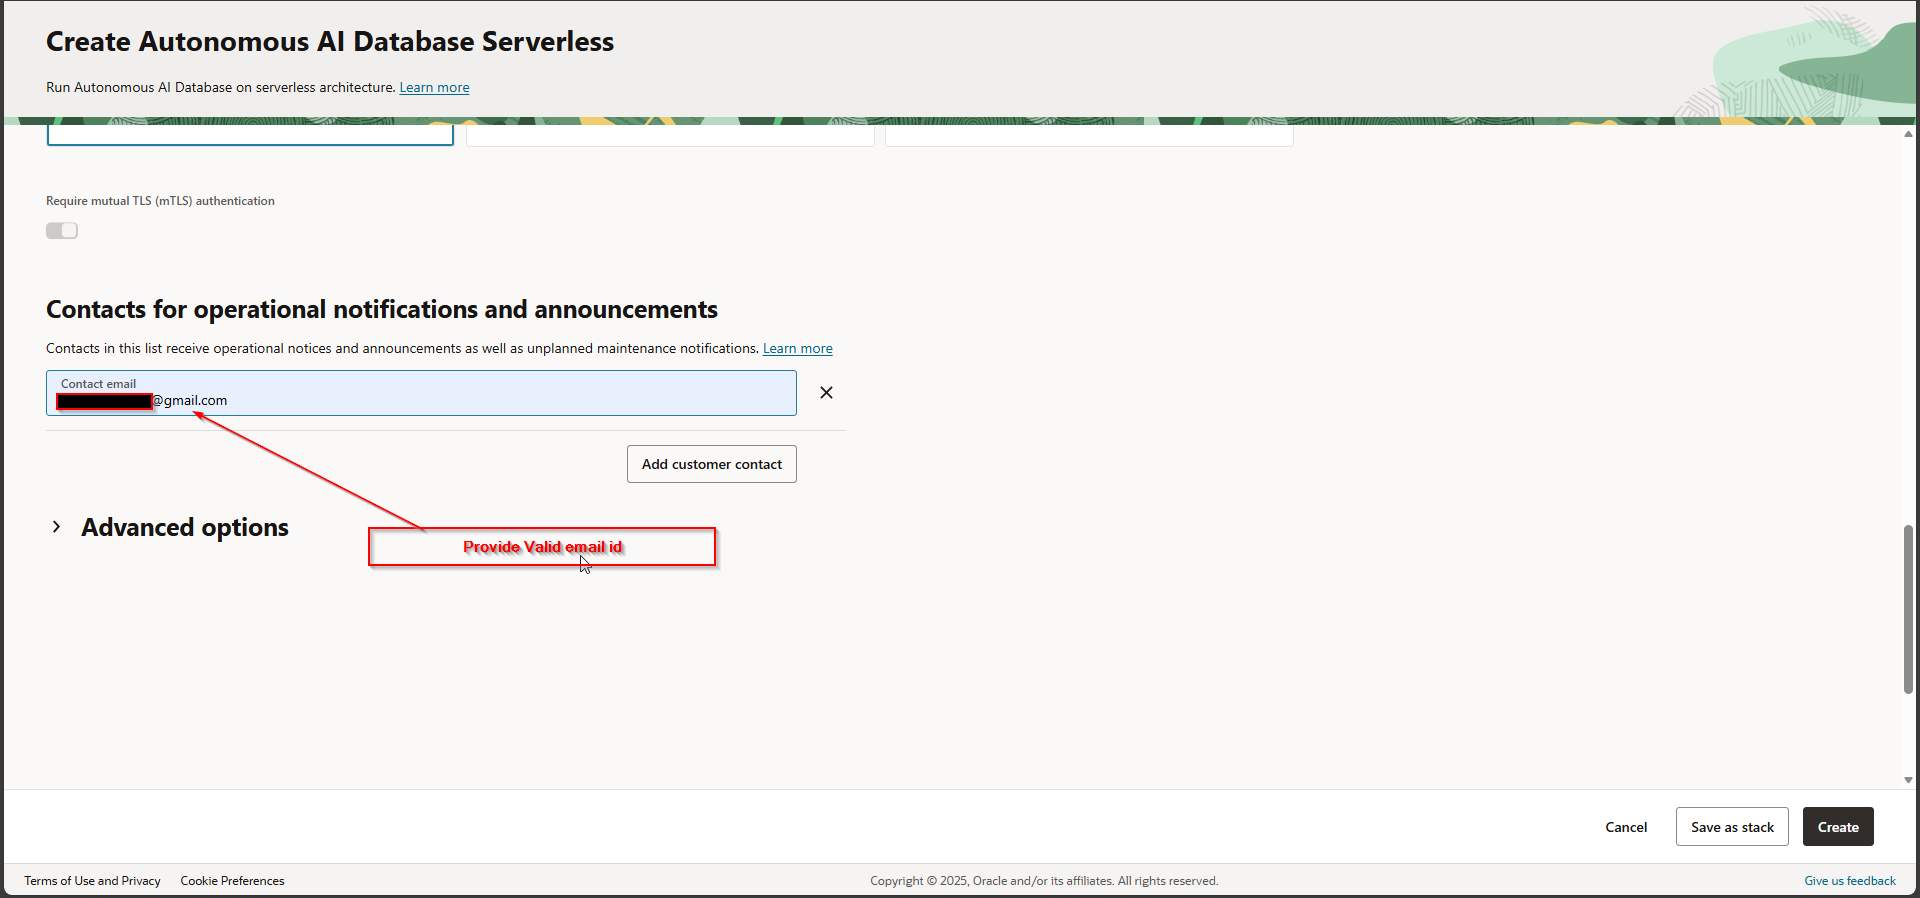
Provide valid email address and then click on Create.
This will create new ATP Database Instance as shown.
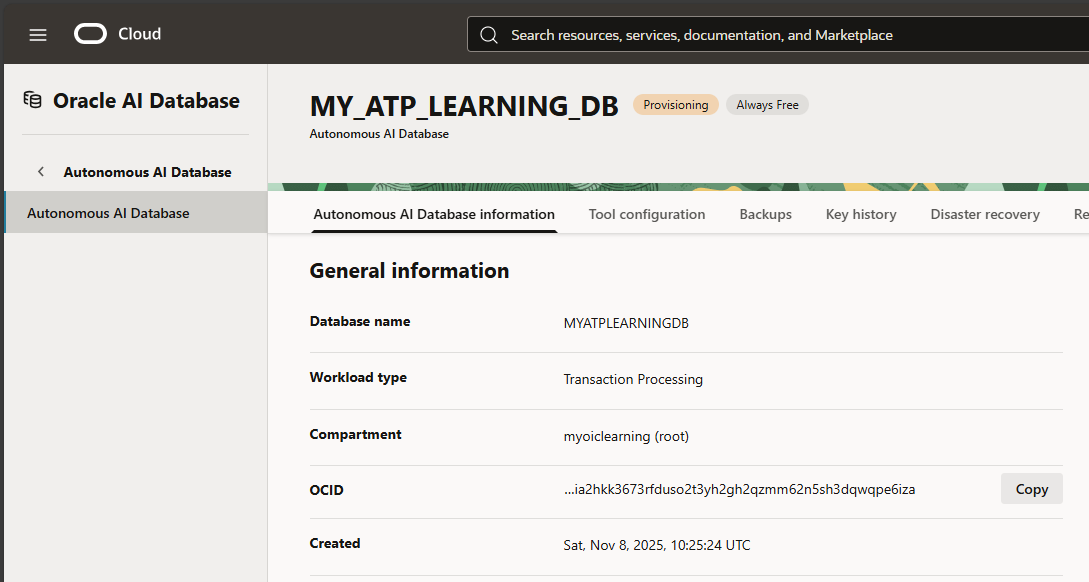
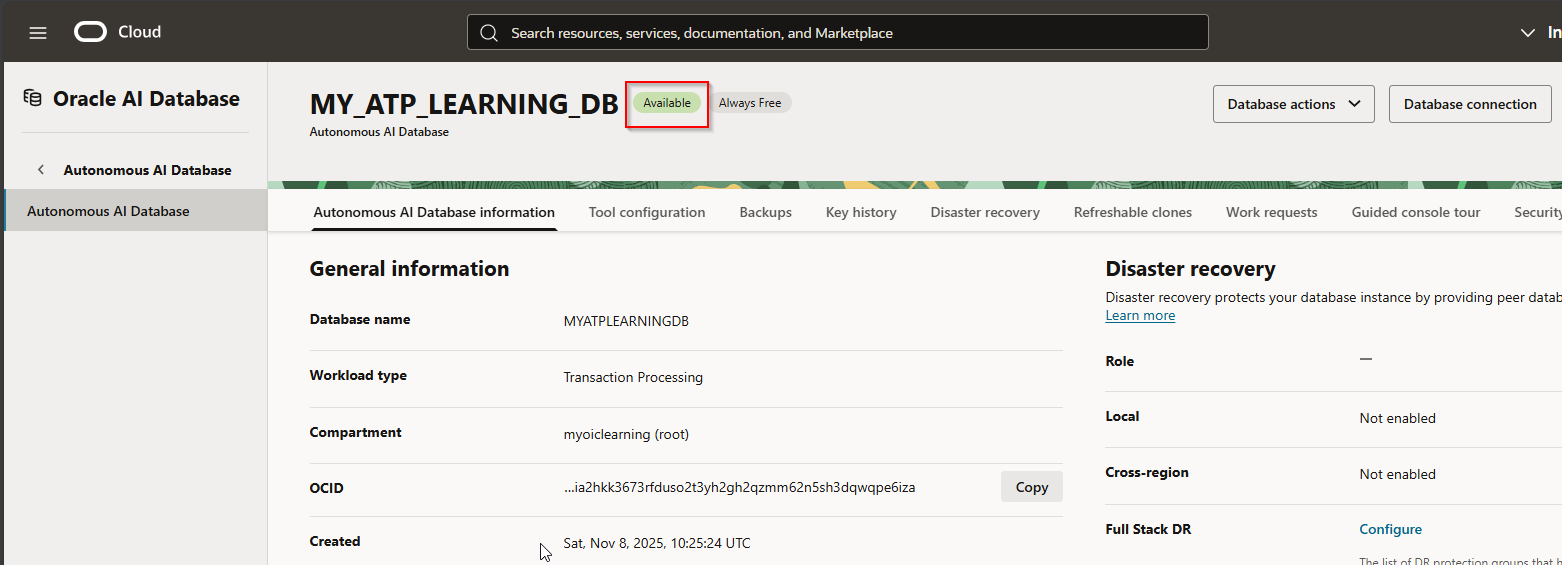
Status will show processing but, in some time, status will change to Available.
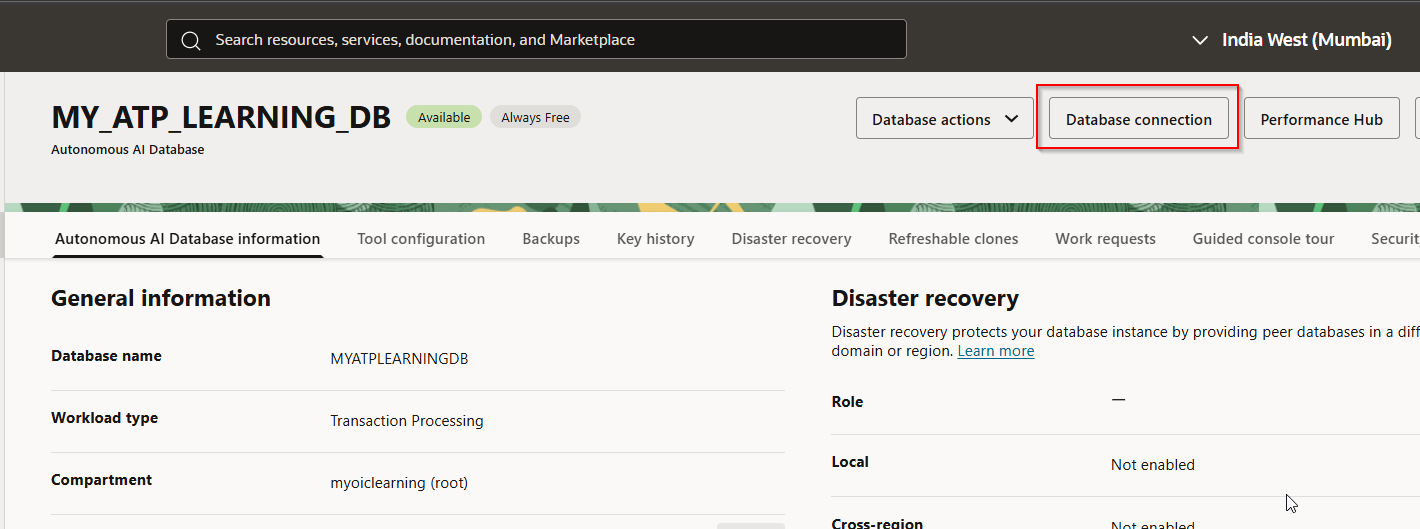
Step2: Download Database wallet.
To connect to ATP database from SQL developer or from VBCS, we need to download database wallet.
Click on “Database Connection”
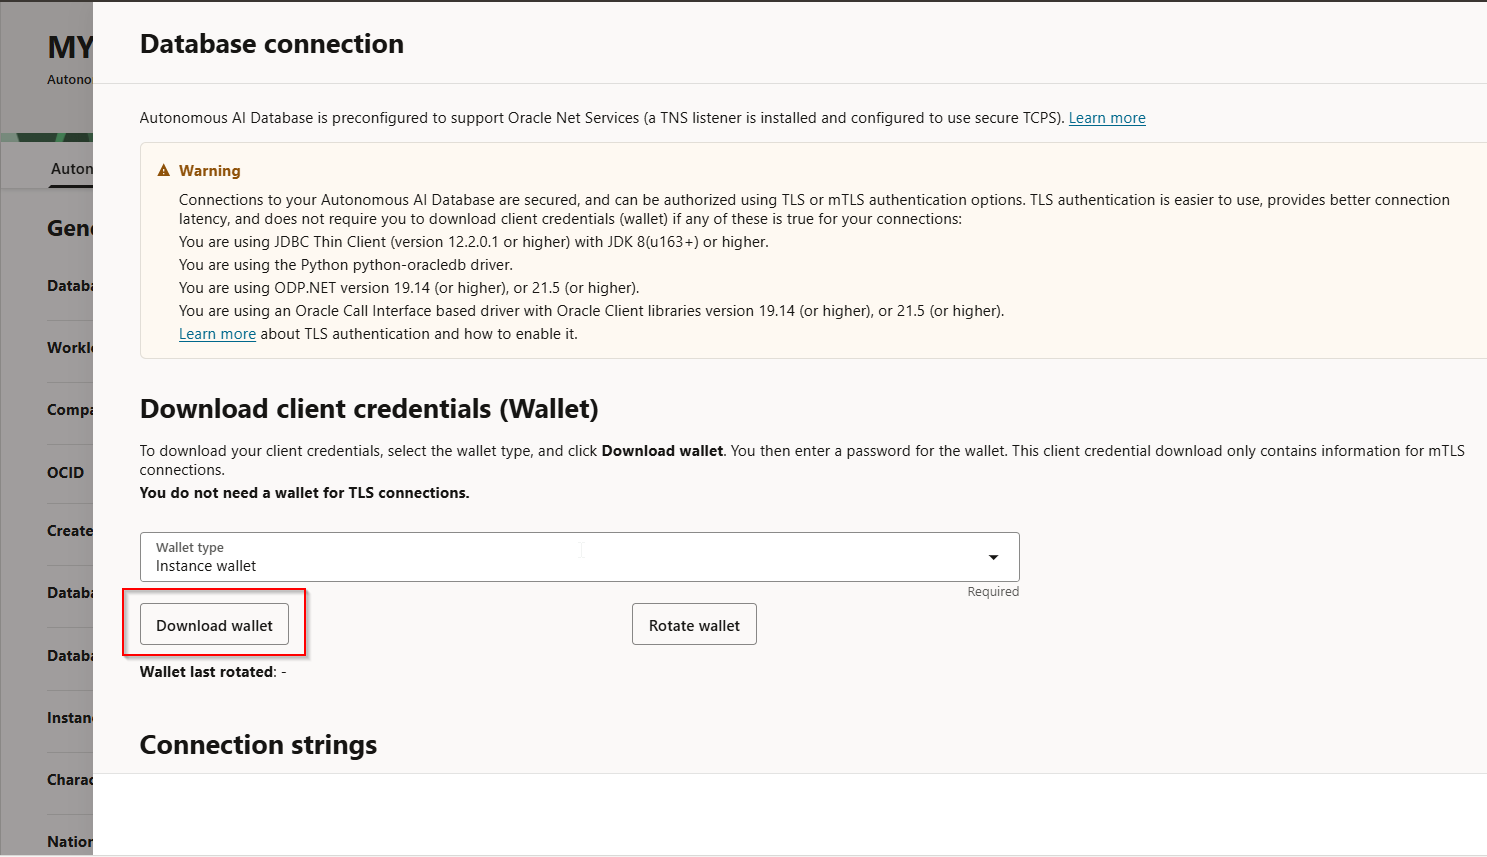
Click on Download Wallet.
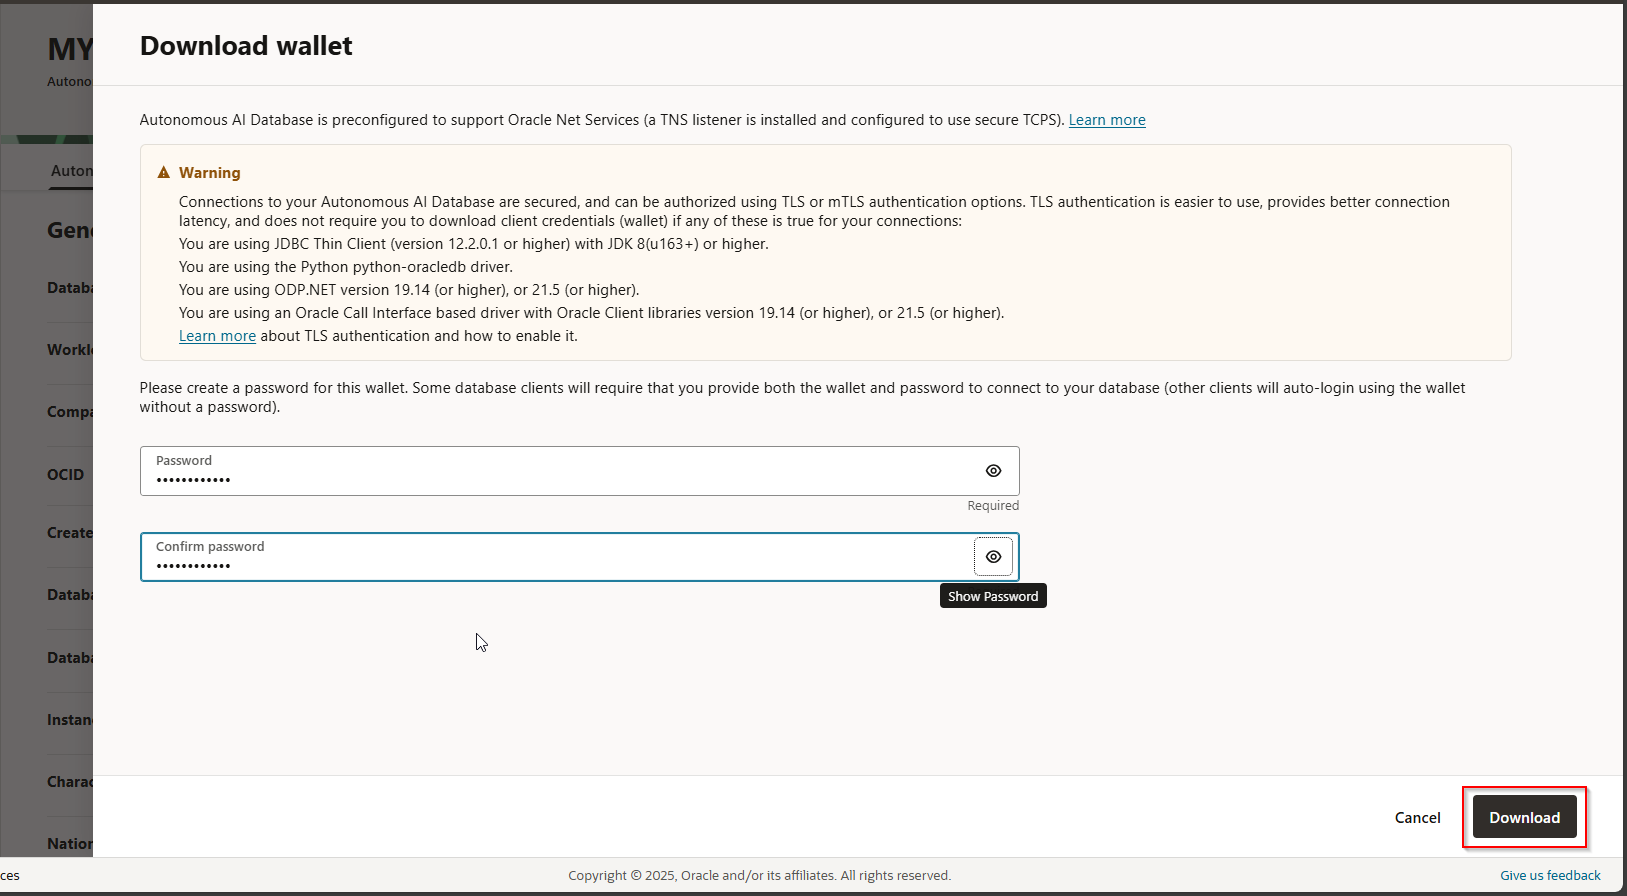
Provide valid password for wallet and click Download.
Wallet zip file will be downloaded.

Step3: Connect ATP DB from SQL developer using wallet.
Now let us open SQL developer.
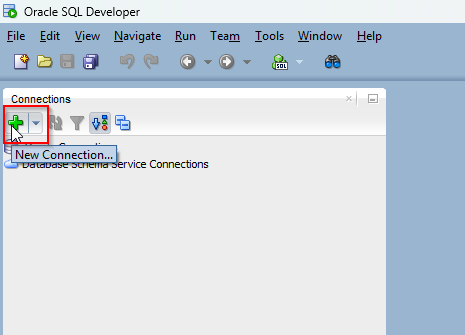
Click on New Connection.
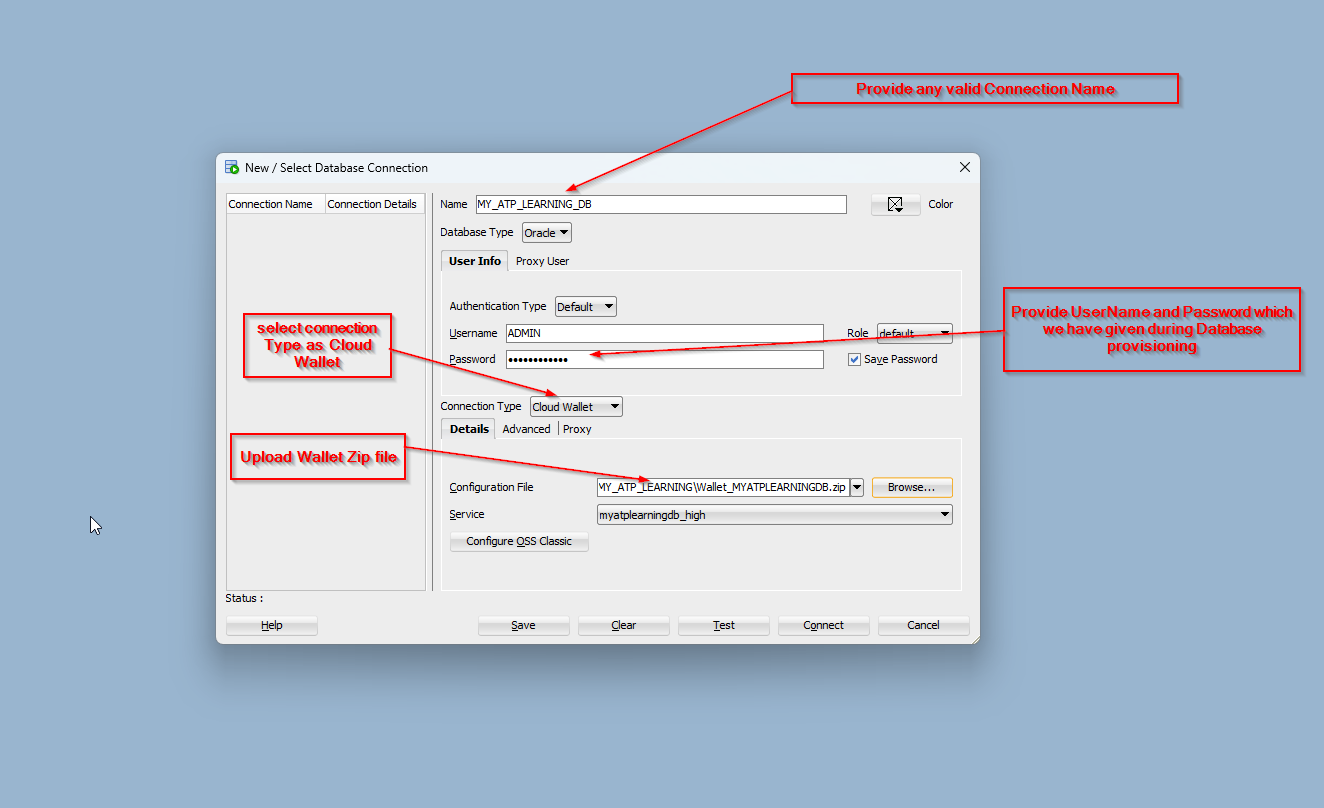
Provide required details as shown above and then Click on Test.

Status is showing as “Success” and connection is established successfully with ATP DB from SQL developer.
Click on save and then click on Connect.
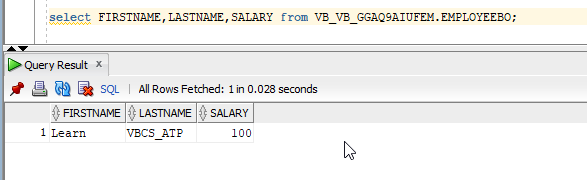
Let us test with sample SQL query.

Step4: Connect ATP DB from VBCS using wallet.
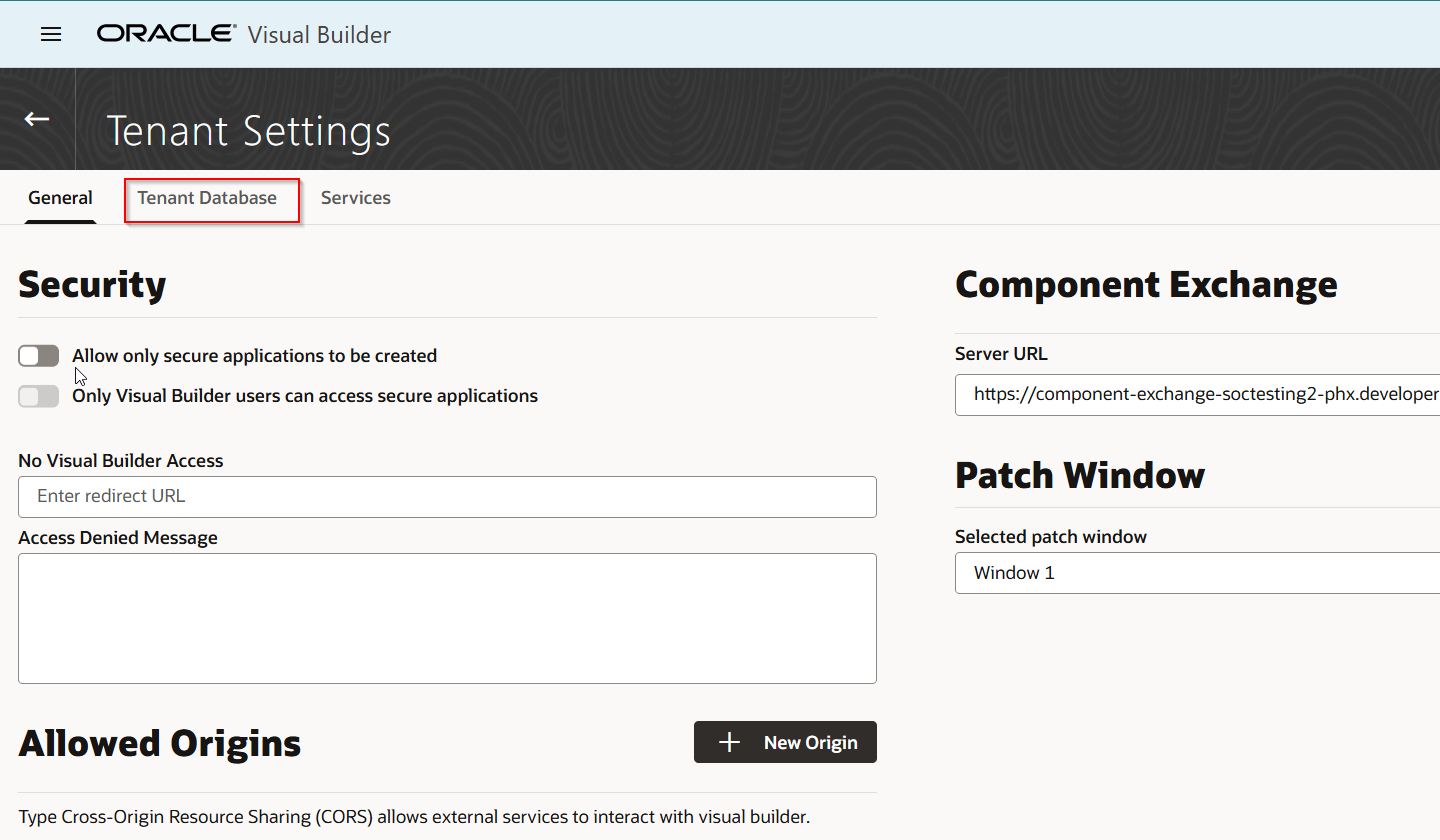
Now let us try to connect to this ATP database from VBCS tenant setting.
Navigate to VBCS application —->Settings

Select Tenant Database.
Click on “Use Different Database”

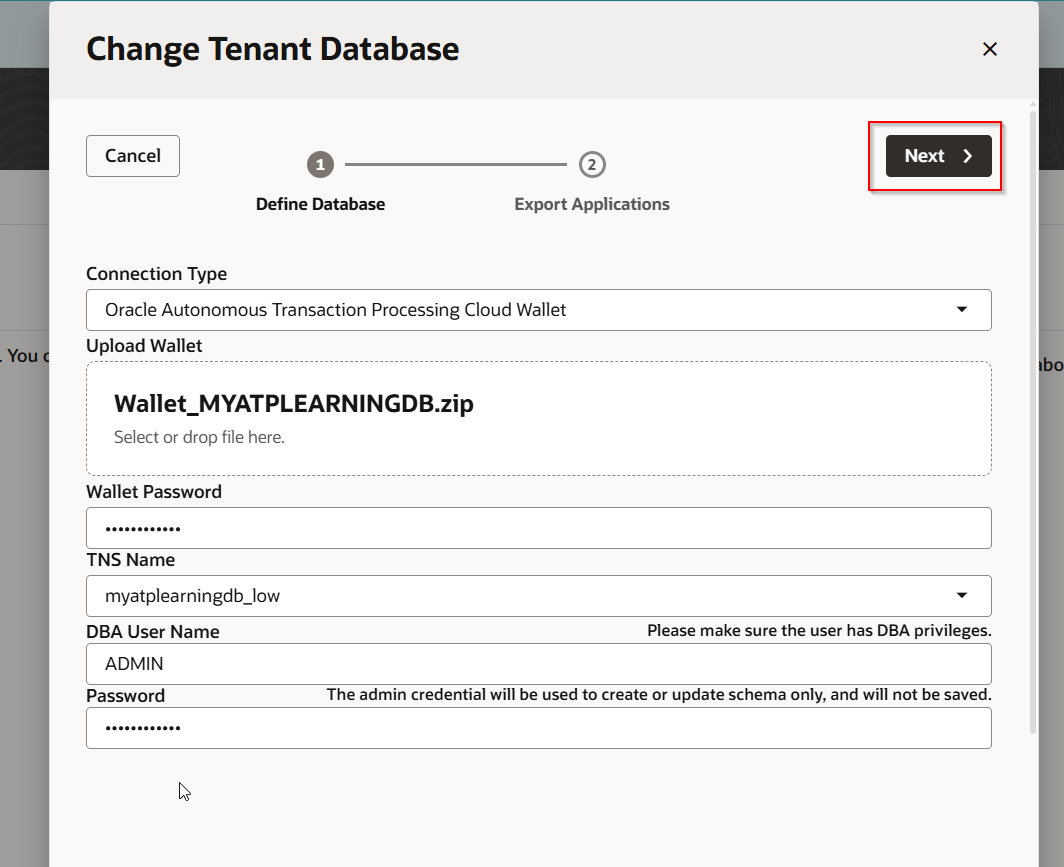
Select Connection Type as “Oracle Autonomous Transaction Processing Cloud Wallet” and upload database wallet.
Also provide wallet zip file and Admin user password and click Next.
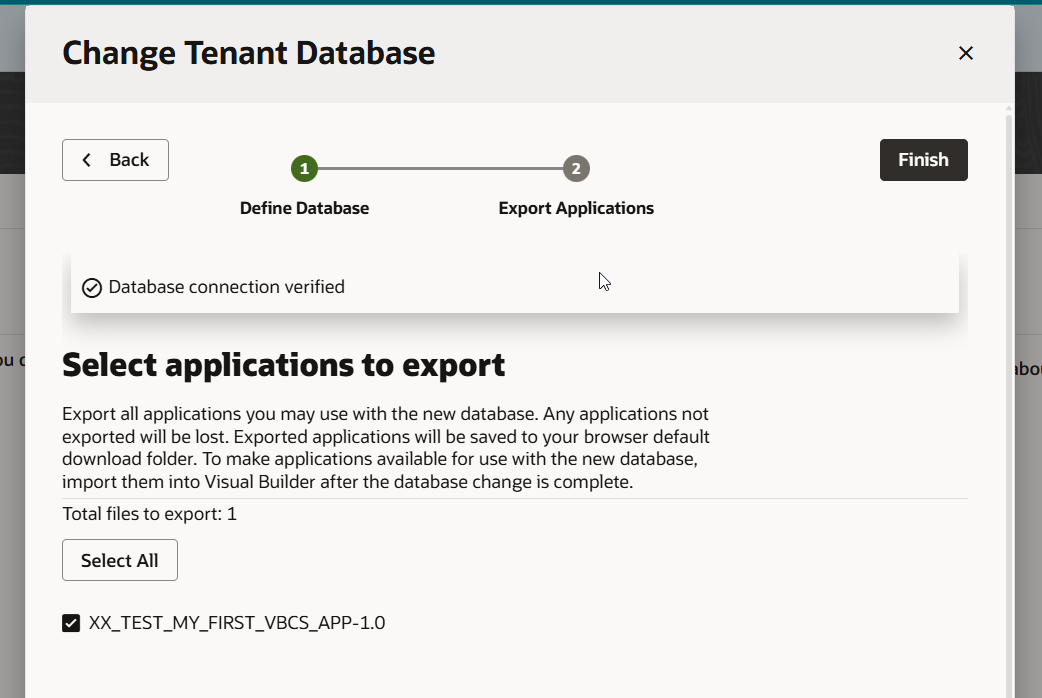
Click on Finish.
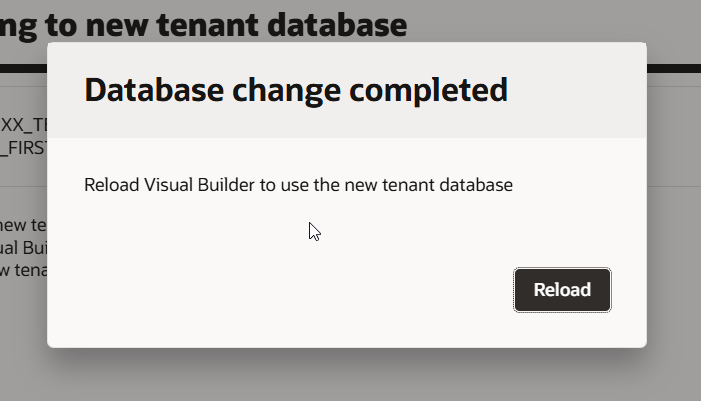
Click on Reload.
ATP database is now connected with VBCS.
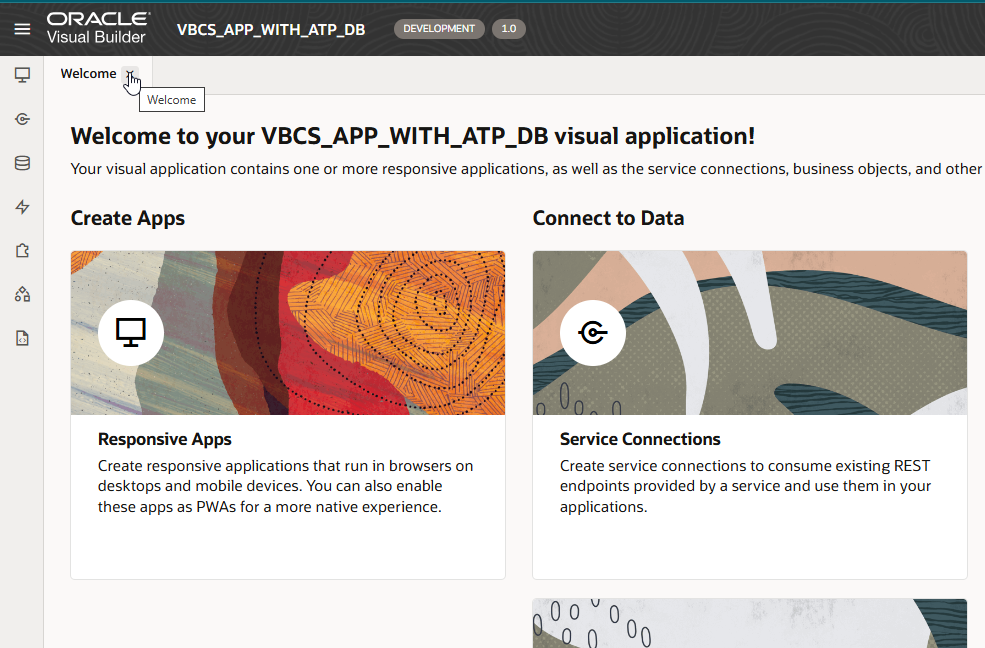
Step5: Create VBCS Business Object with ATP Database.
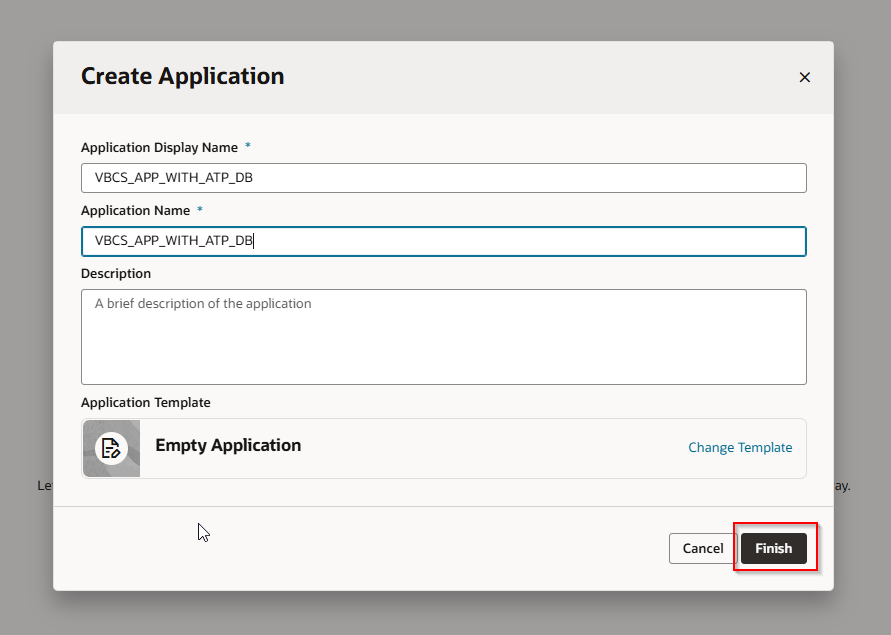
Click on “New Application”.
Provide Application Name and click on Finish.
Now click on Business Objects
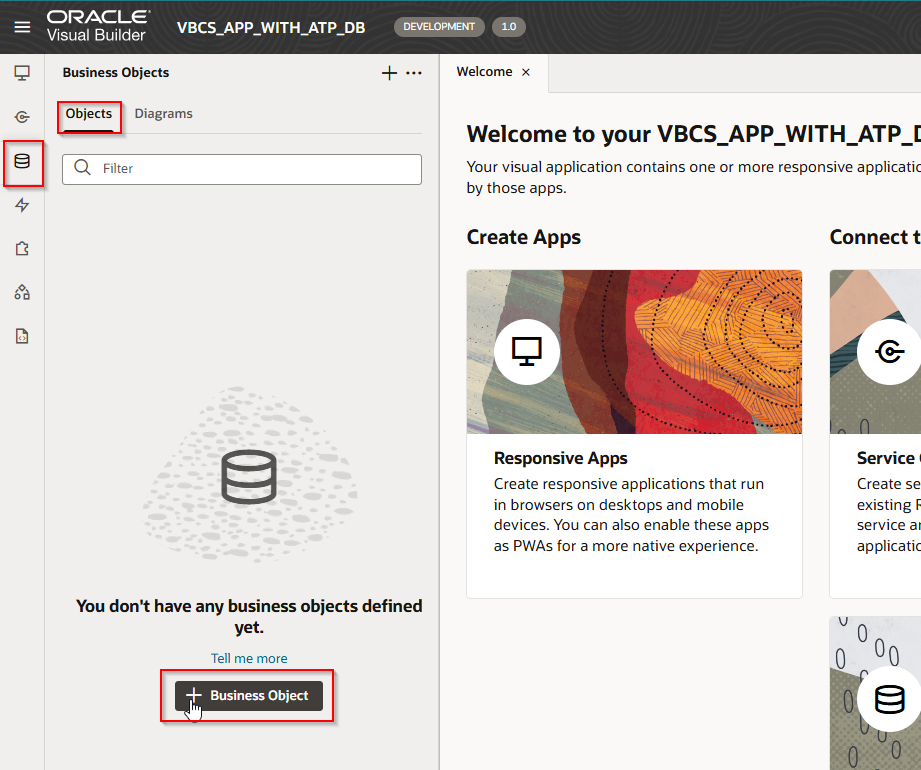
Click on Business Object to create new Business Object.
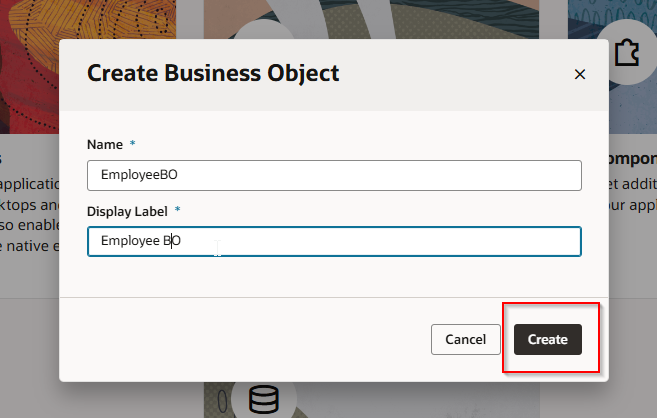
Provide Business Object name and Click on Create.
Business Object is created successfully.
Now click on +Field to add new fields to this EmployeeBO.
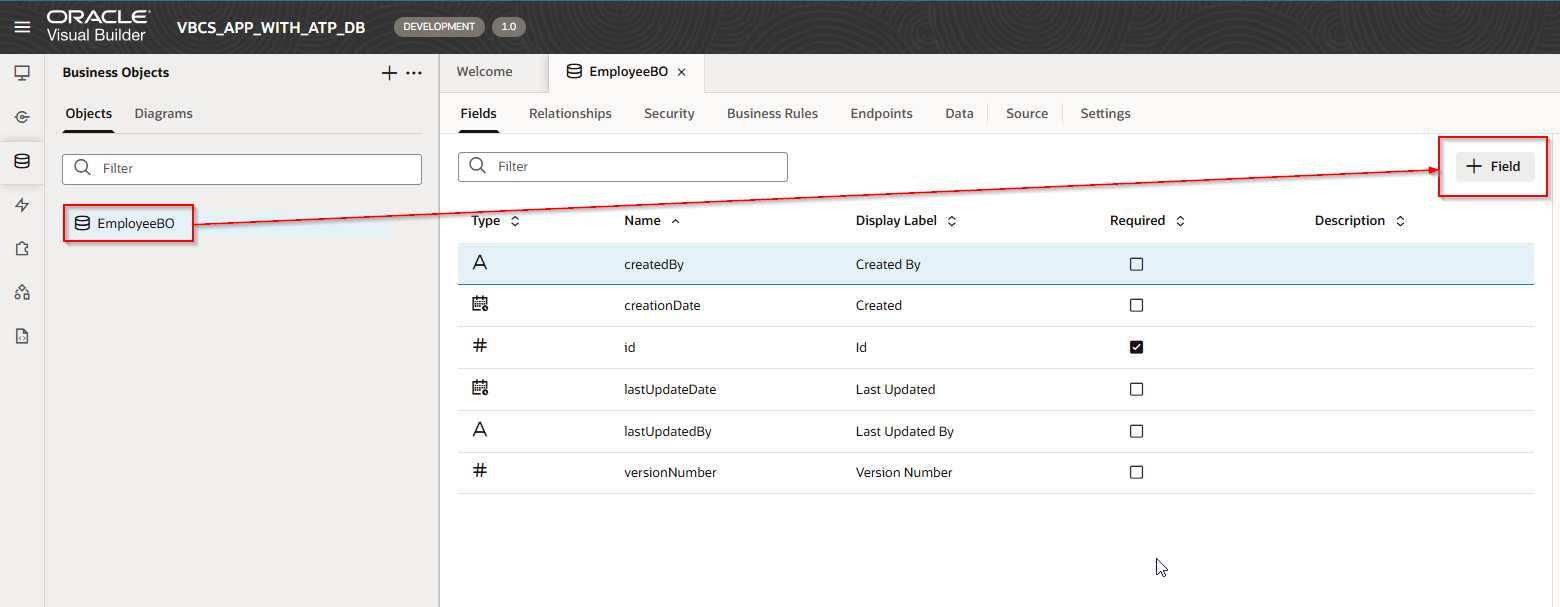

FirstName, LastName and Salary fields are added now.
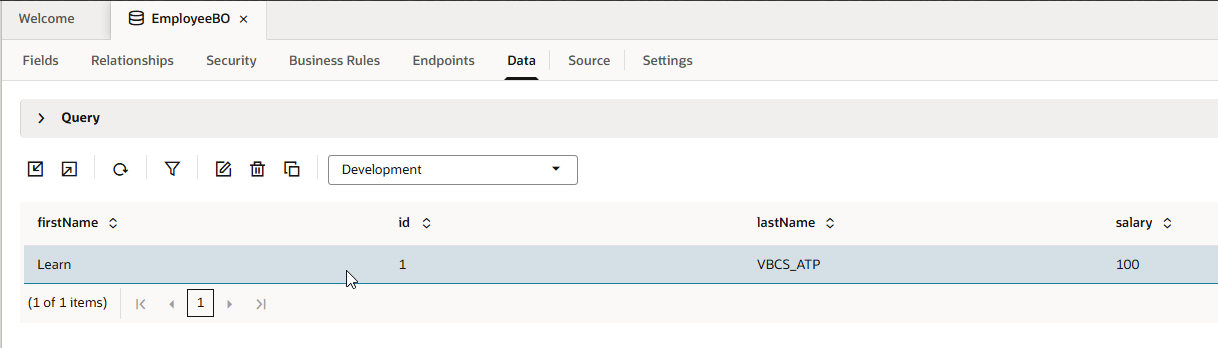
Let us add some sample data to this Business objects.
Navigate to Business Object Data and click on +Row.
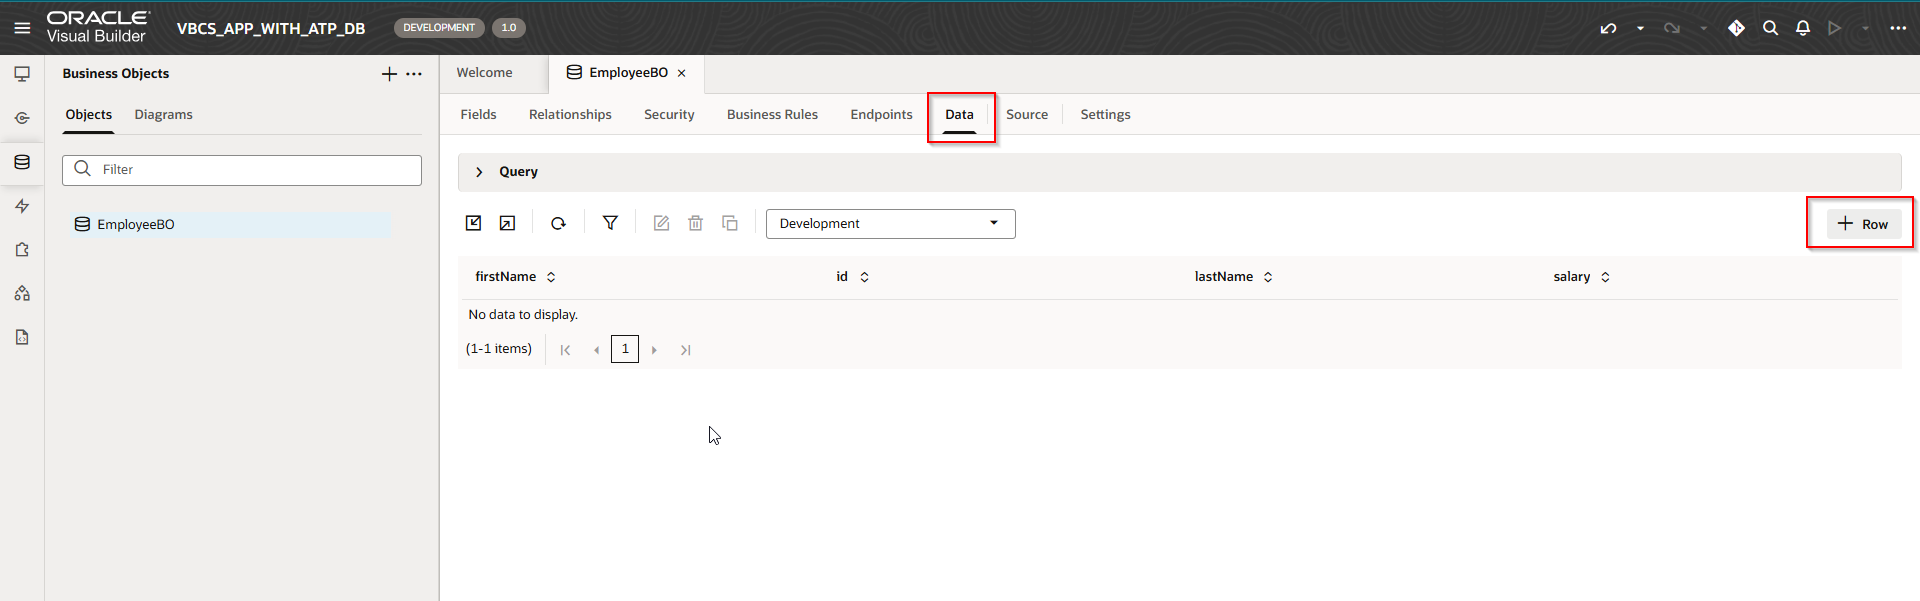
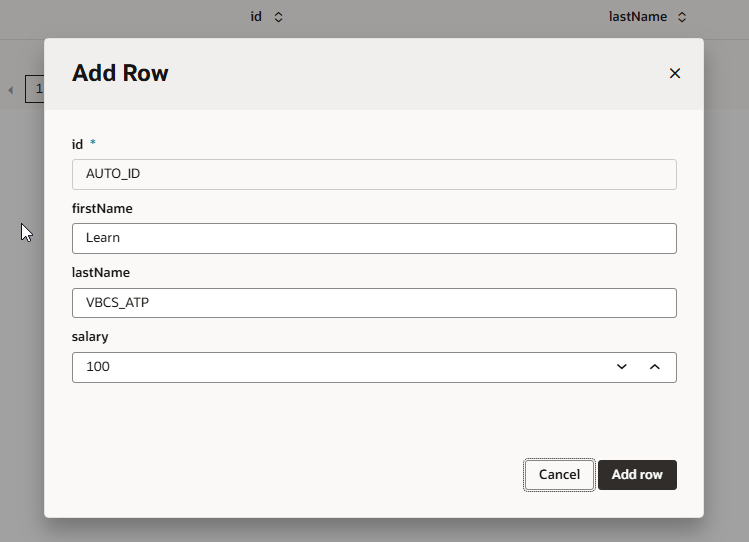
Click on Add row.
Now let us stage and publish this application.
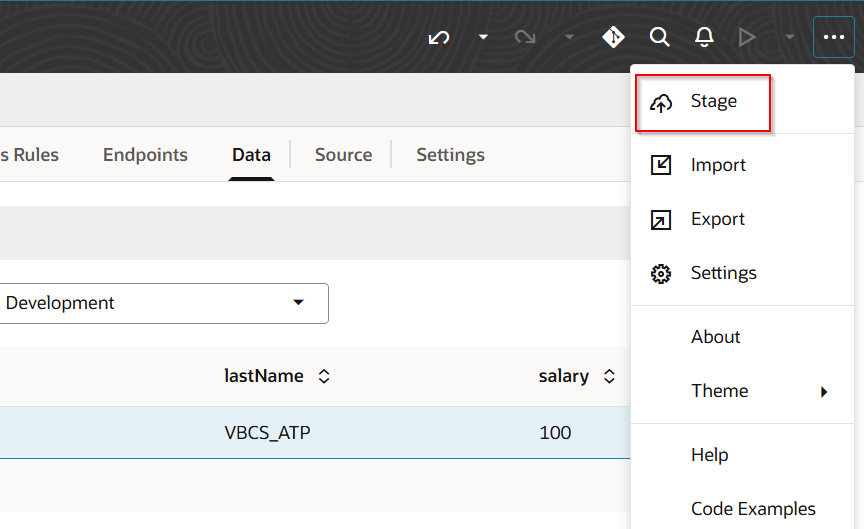
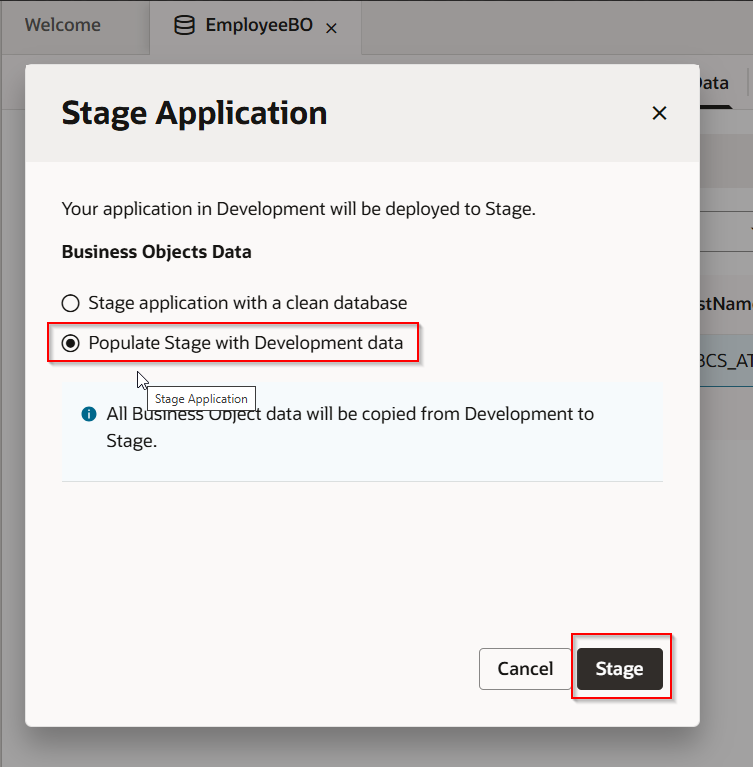
Click on Stage.
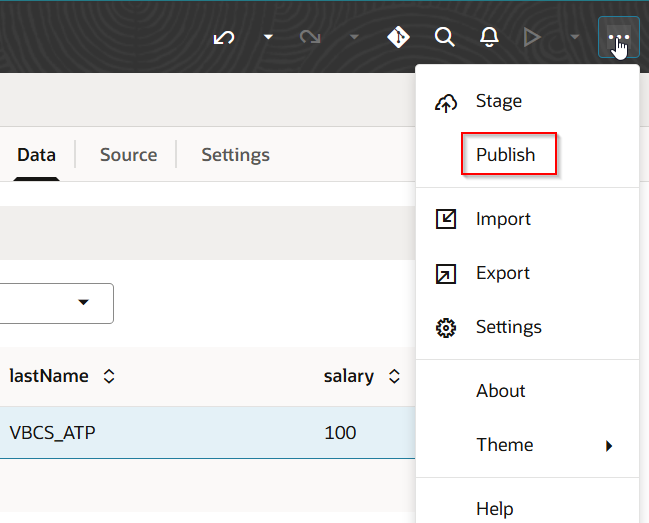
Let us publish this application.
Click on Publish as shown.
Click on Publish.

Select “Include data from Stage” and then Click on Publish.
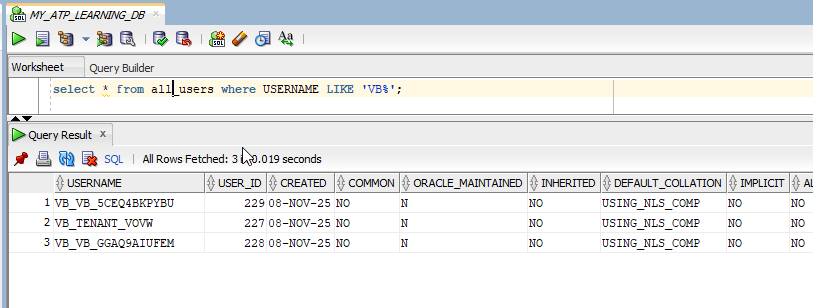
As we have integrated ATP database with VBCS, the users below are automatically created in ATP database.
Business Objects in VBCS are now created as tables in ATP database.
Run the query below to get table details.
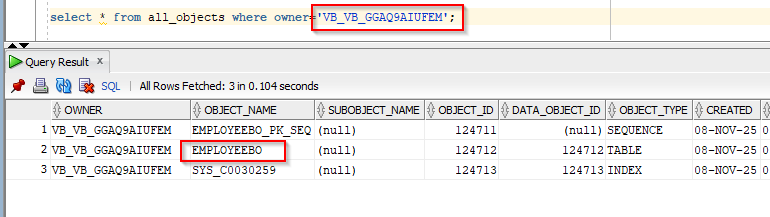
Let us run table select queries to get business object data.