How to Create Dialog Box and Display Data from Fusion REST API in VBCS
In VBCS, a dialog box is usually used to display additional information, forms or confirmations messages without navigating away from the current page.
In this post, we will see how to configure dialog box in VBCS.
Requirement:
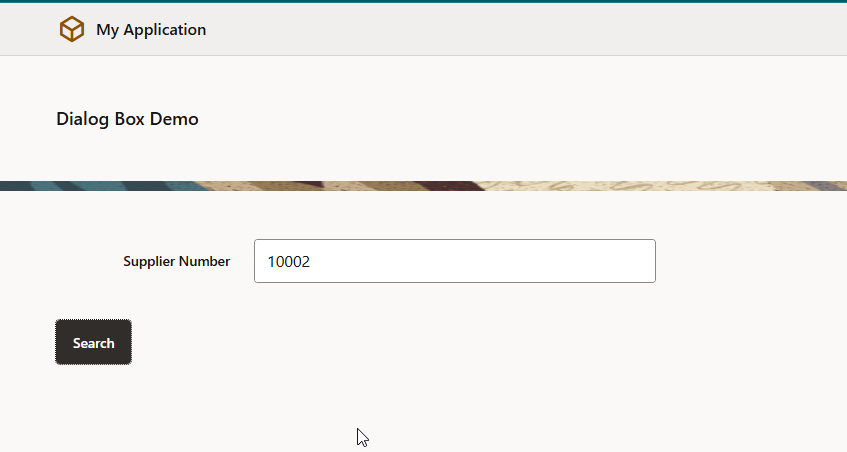
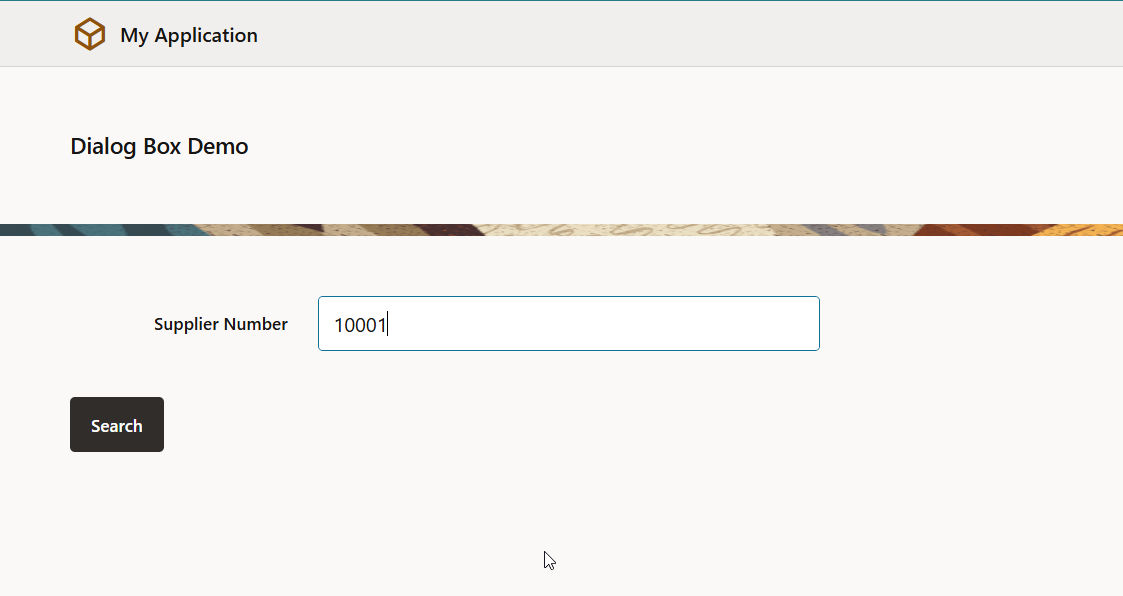
We have VBCS Page with one input Text field and one button.
We can provide Supplier Number in Input Text field and click on Search.
This will open Dialog box to display details of supplier.
Let us follow steps to achieve this.
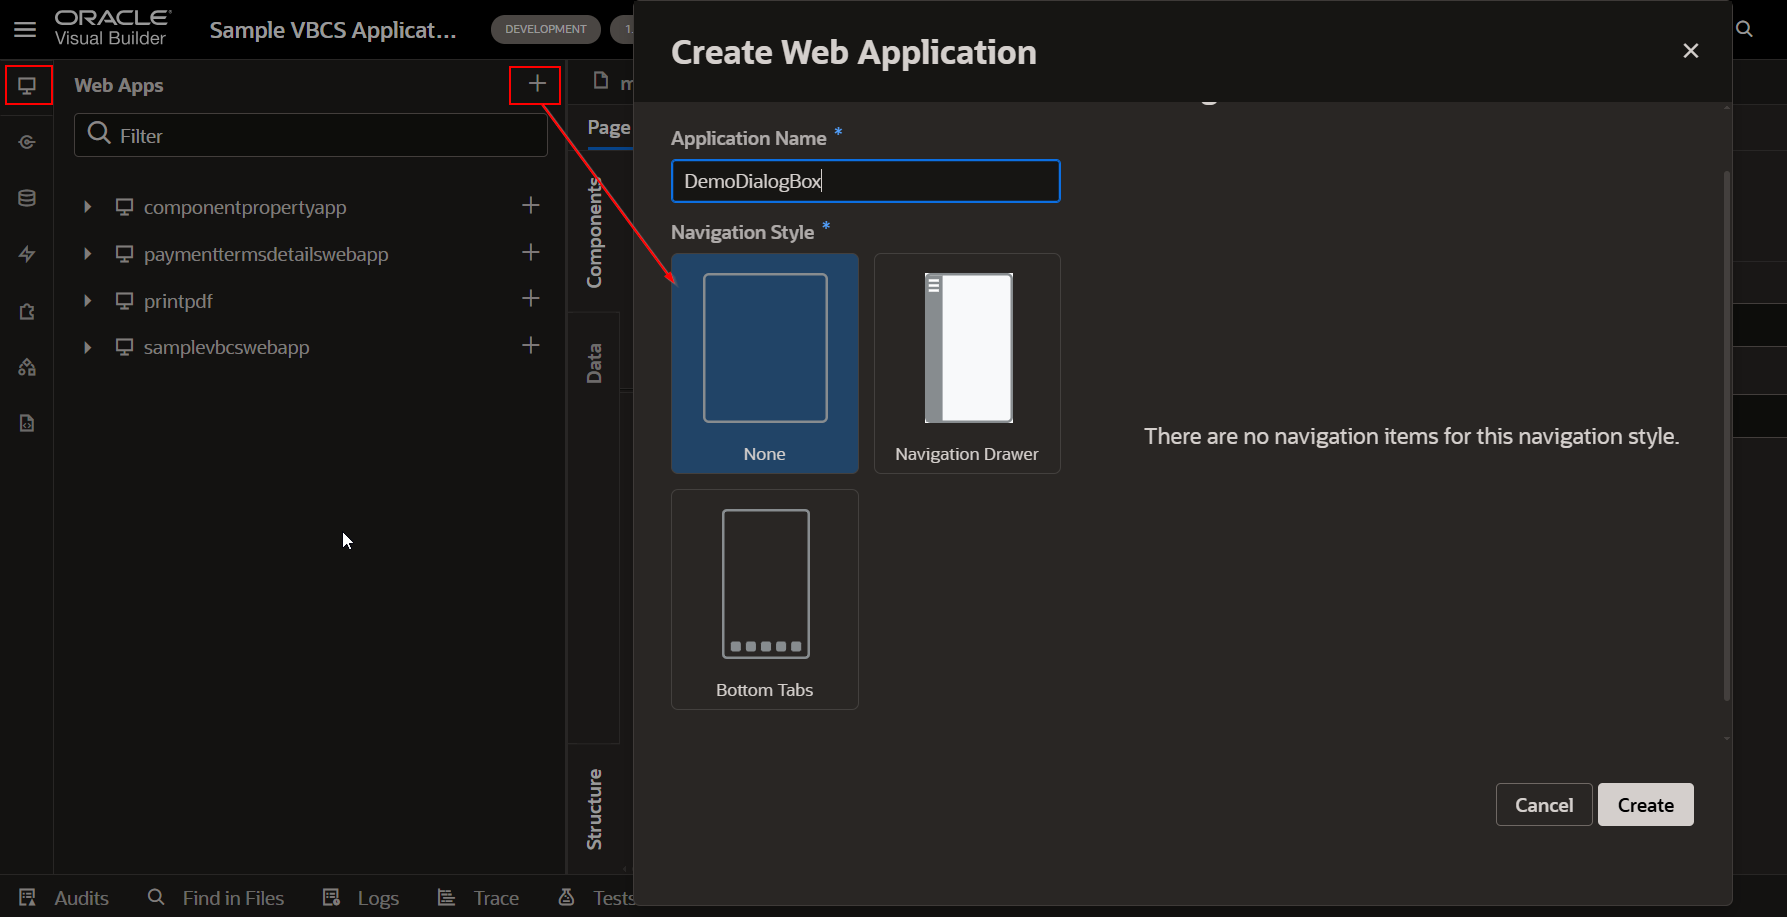
Step1: Create VBCS Web App for Search Page.
Navigate to Web Apps—>Create Web Application.
Provide valid Application Name as shown and click on Create.
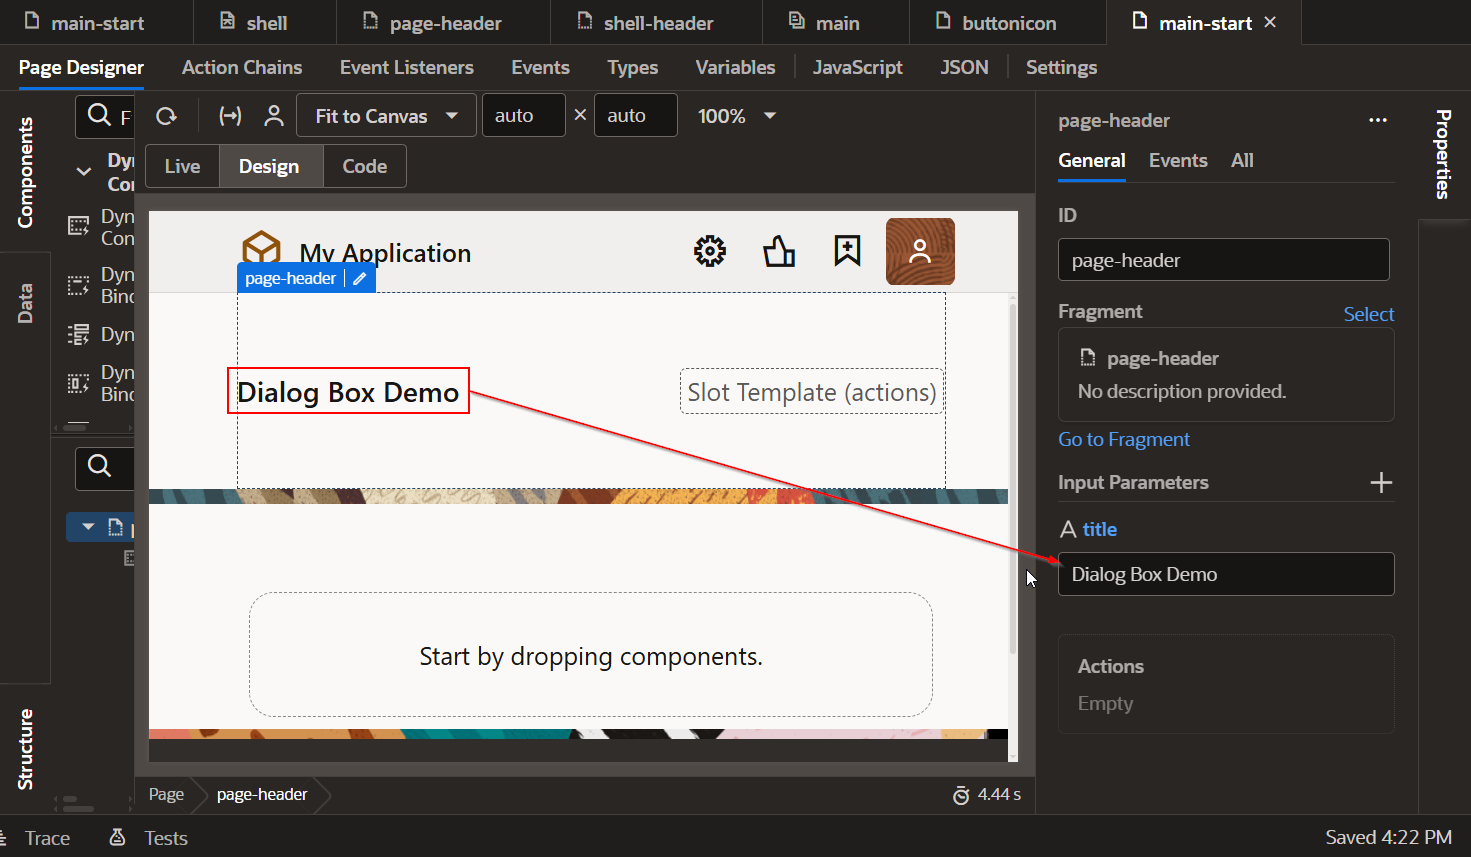
Rename the page heading.
Add form Layout region to create search input Text field for Supplier.
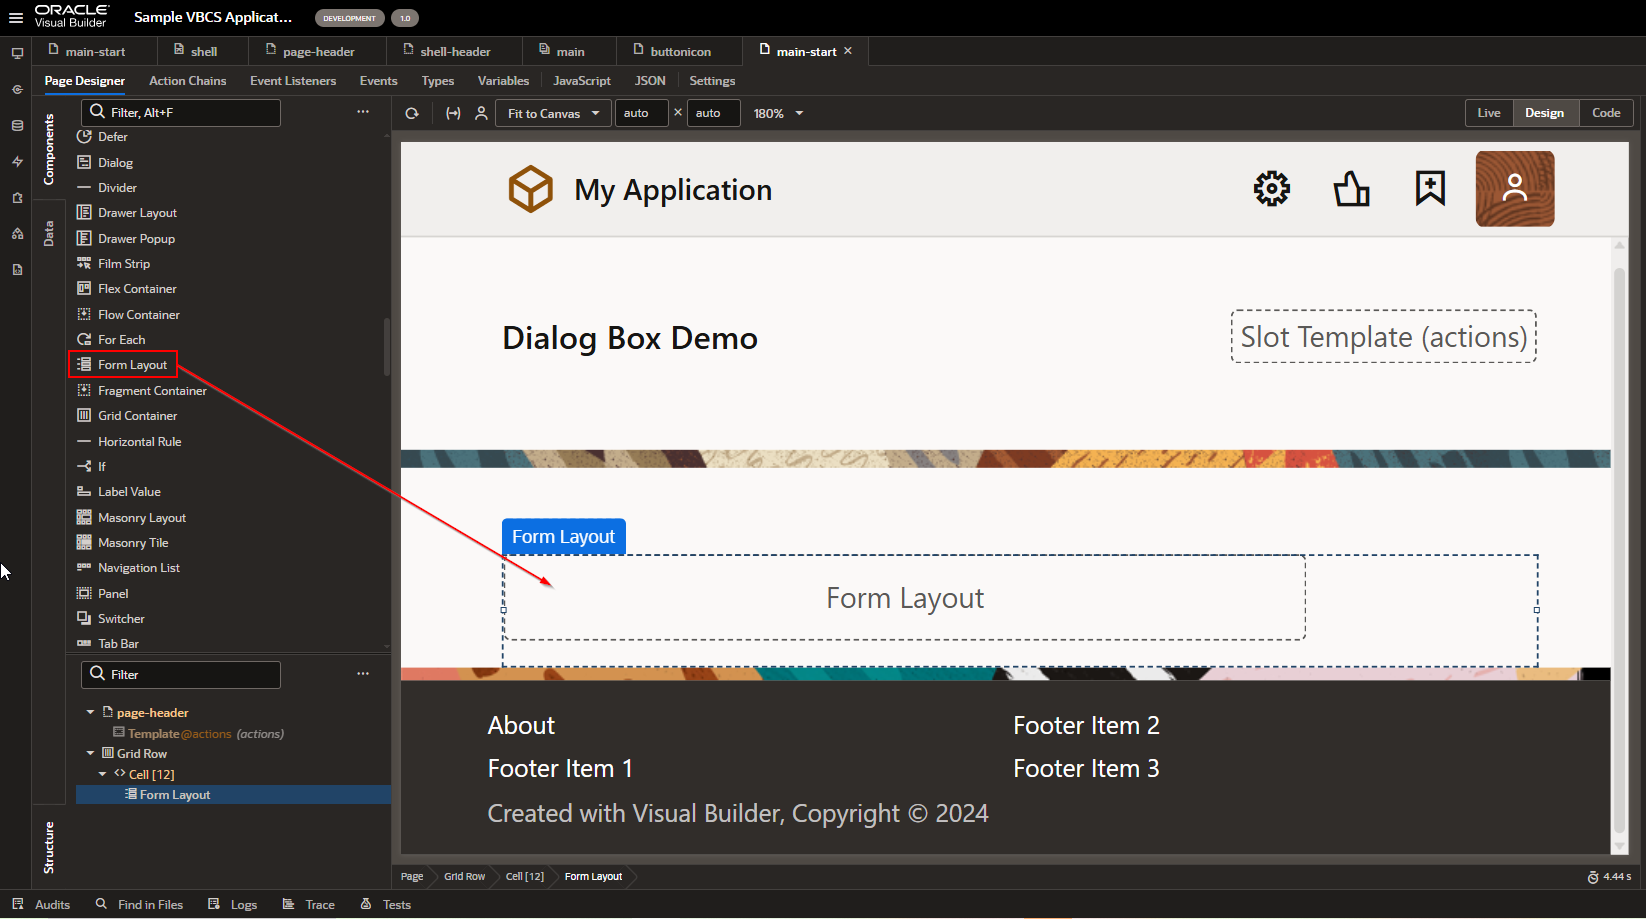
Set the properties of Form Layout Region.
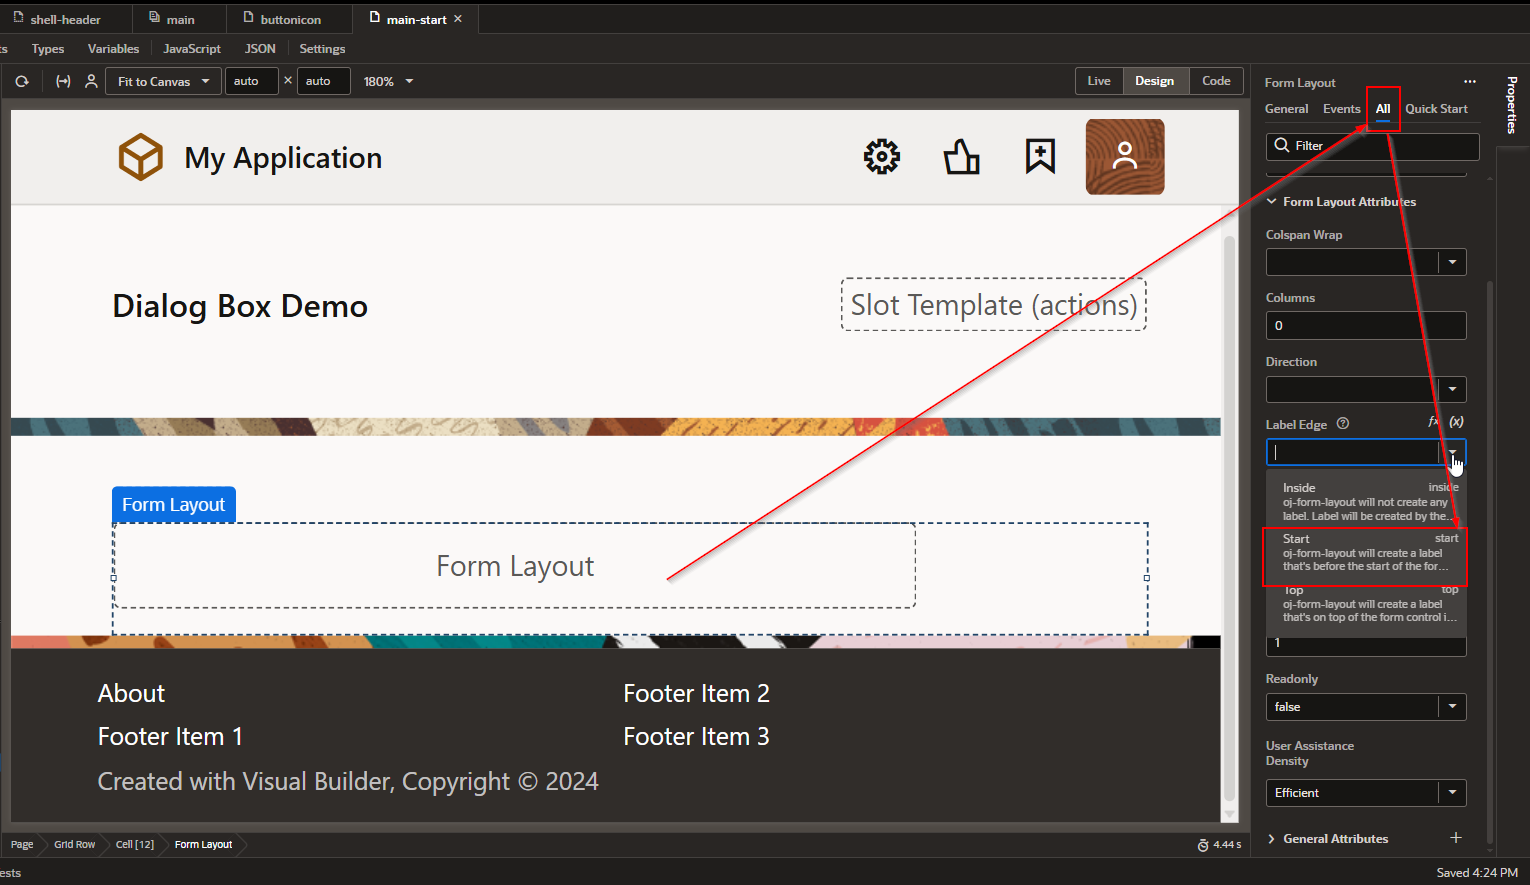
This property will set Label of inside text field at start.
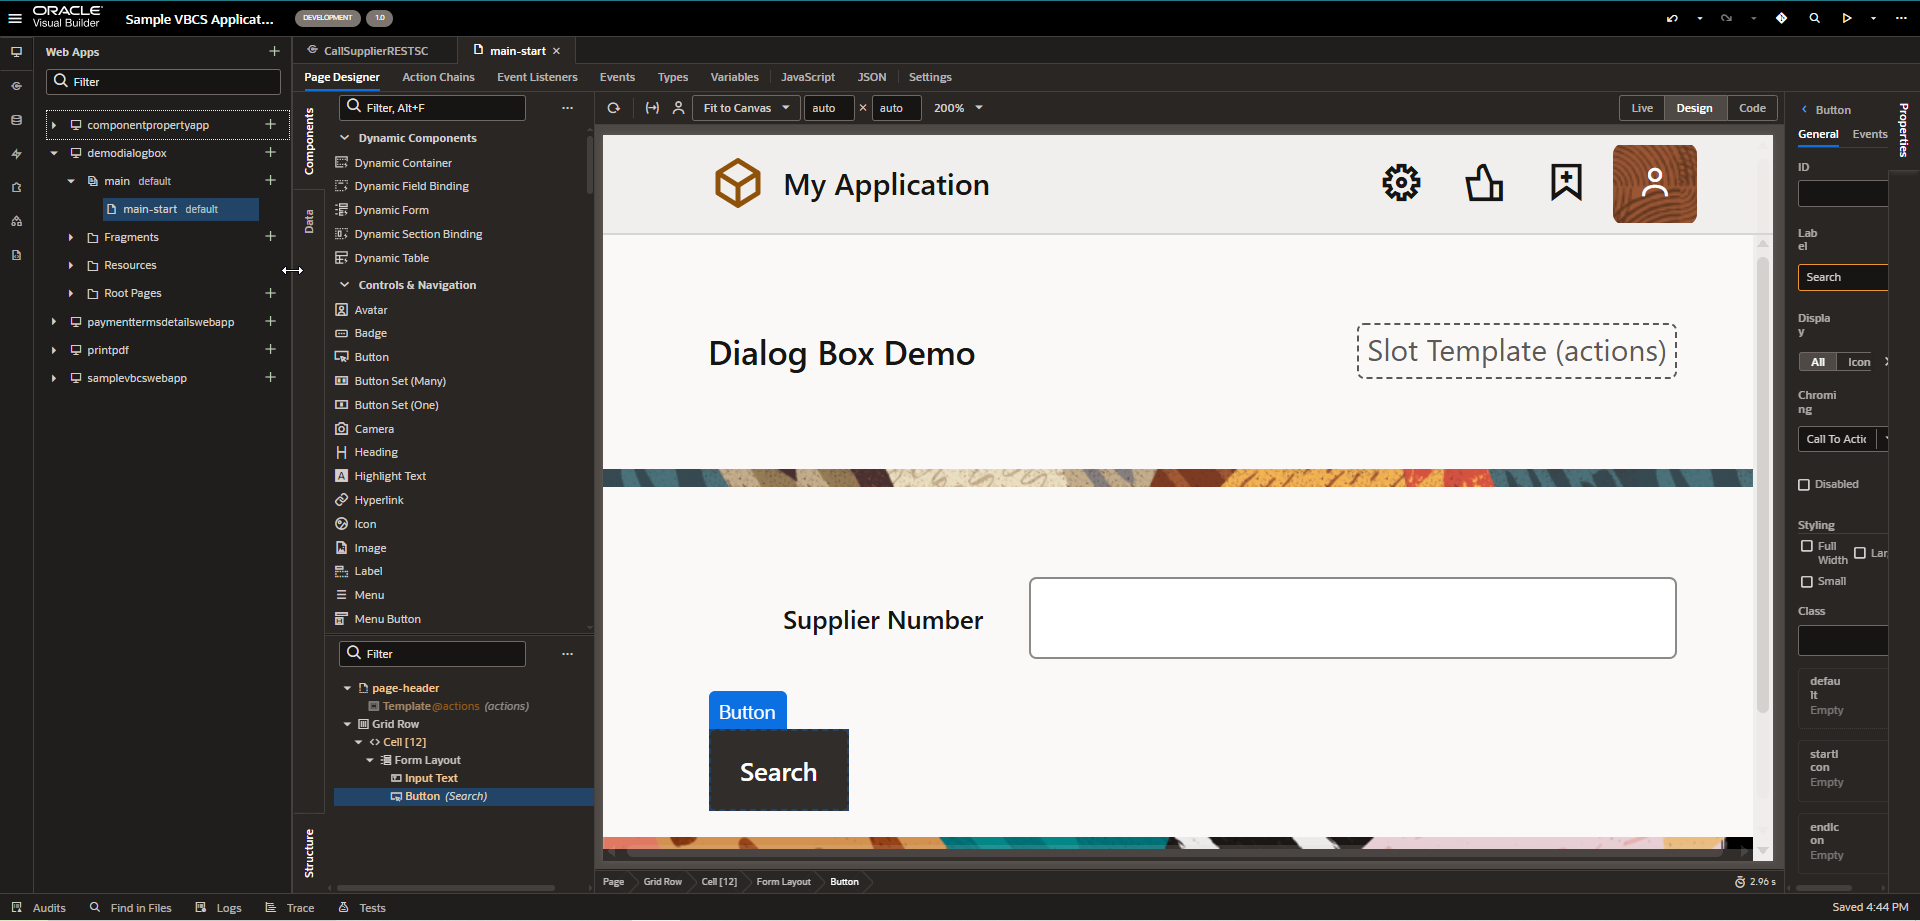
Now let us drop Input Text field for providing Supplier Number.
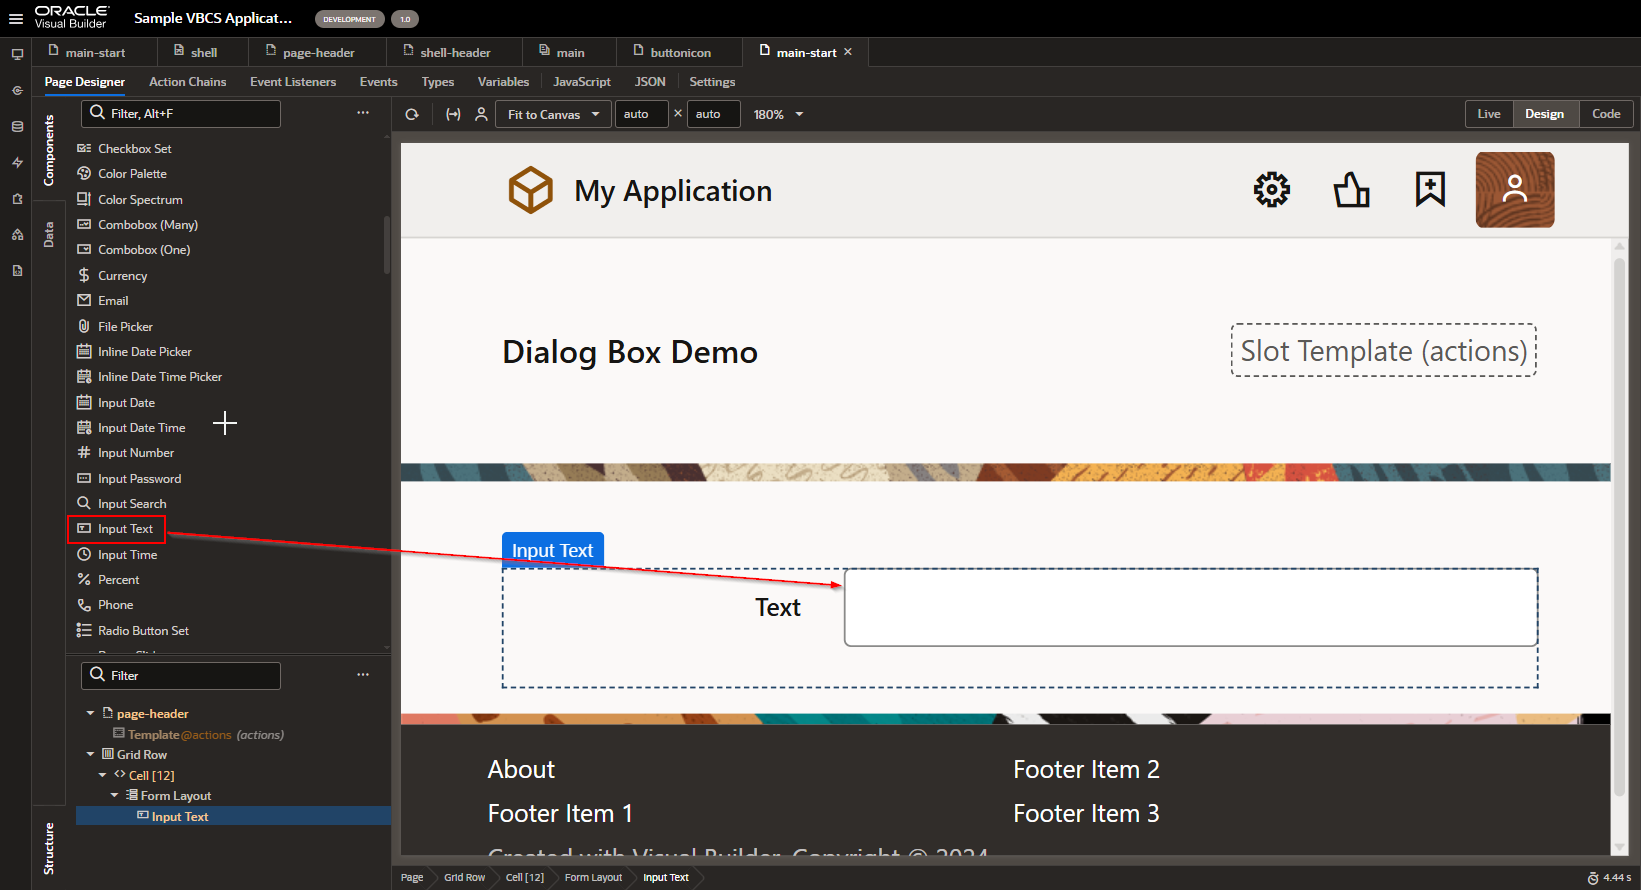
Change the label to “Supplier Number”

Drag and drop Button to call Dialog box.
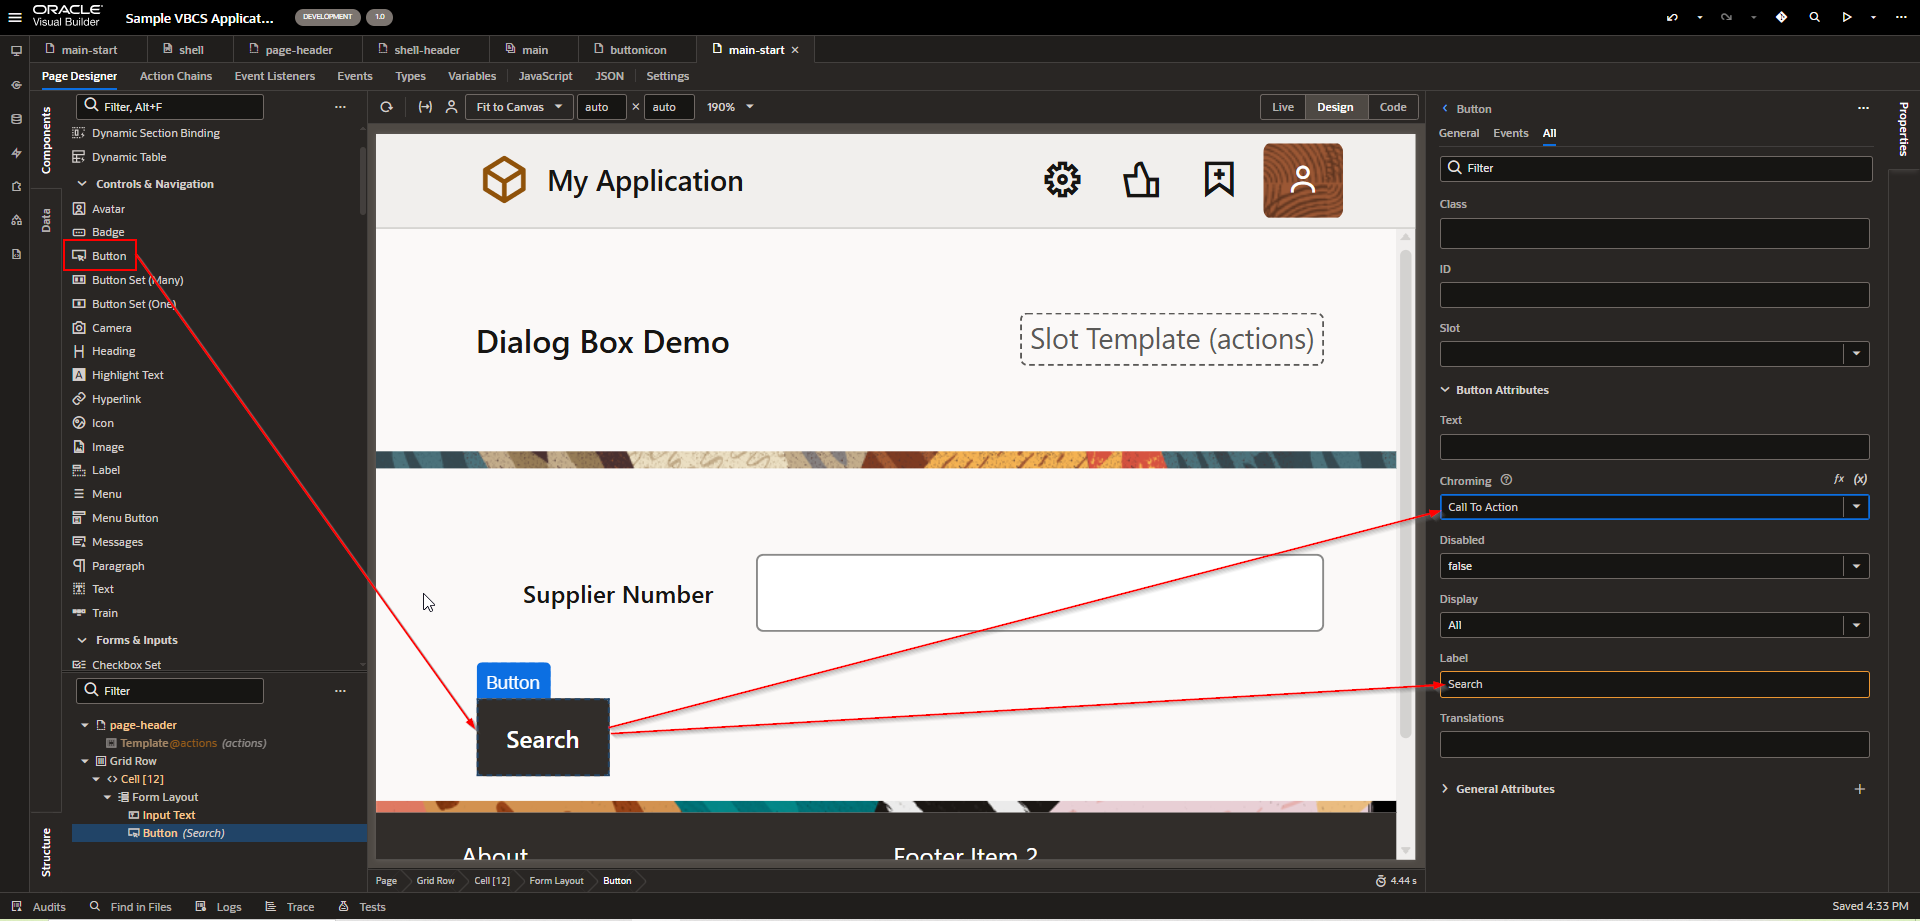
Set Label property and chroming property to “Call To Action”.
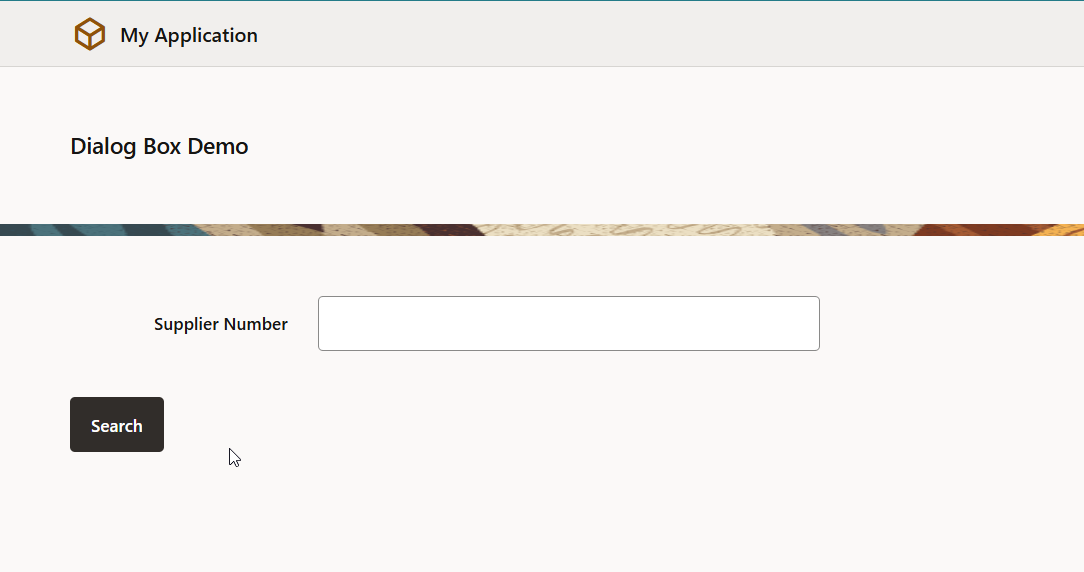
Run the application.
Step2: Create Service Connection to Call Supplier REST API.
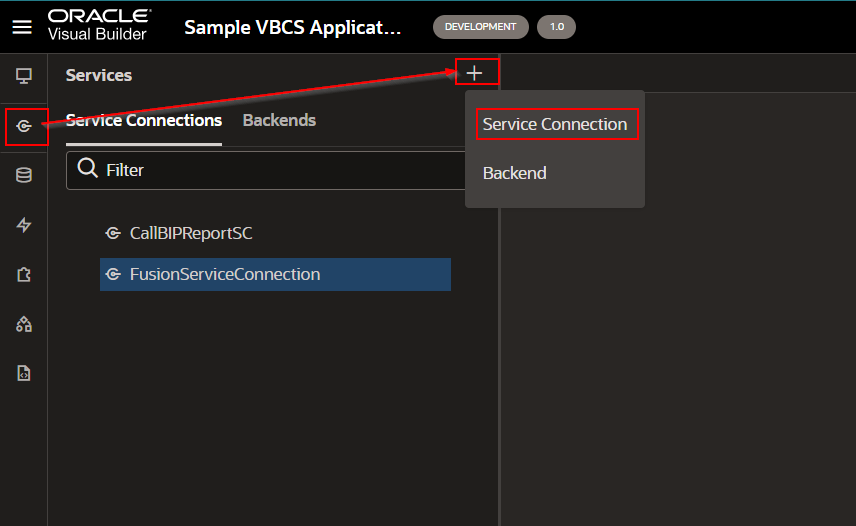
Navigate to Service Connection —->Create New Service Connection.
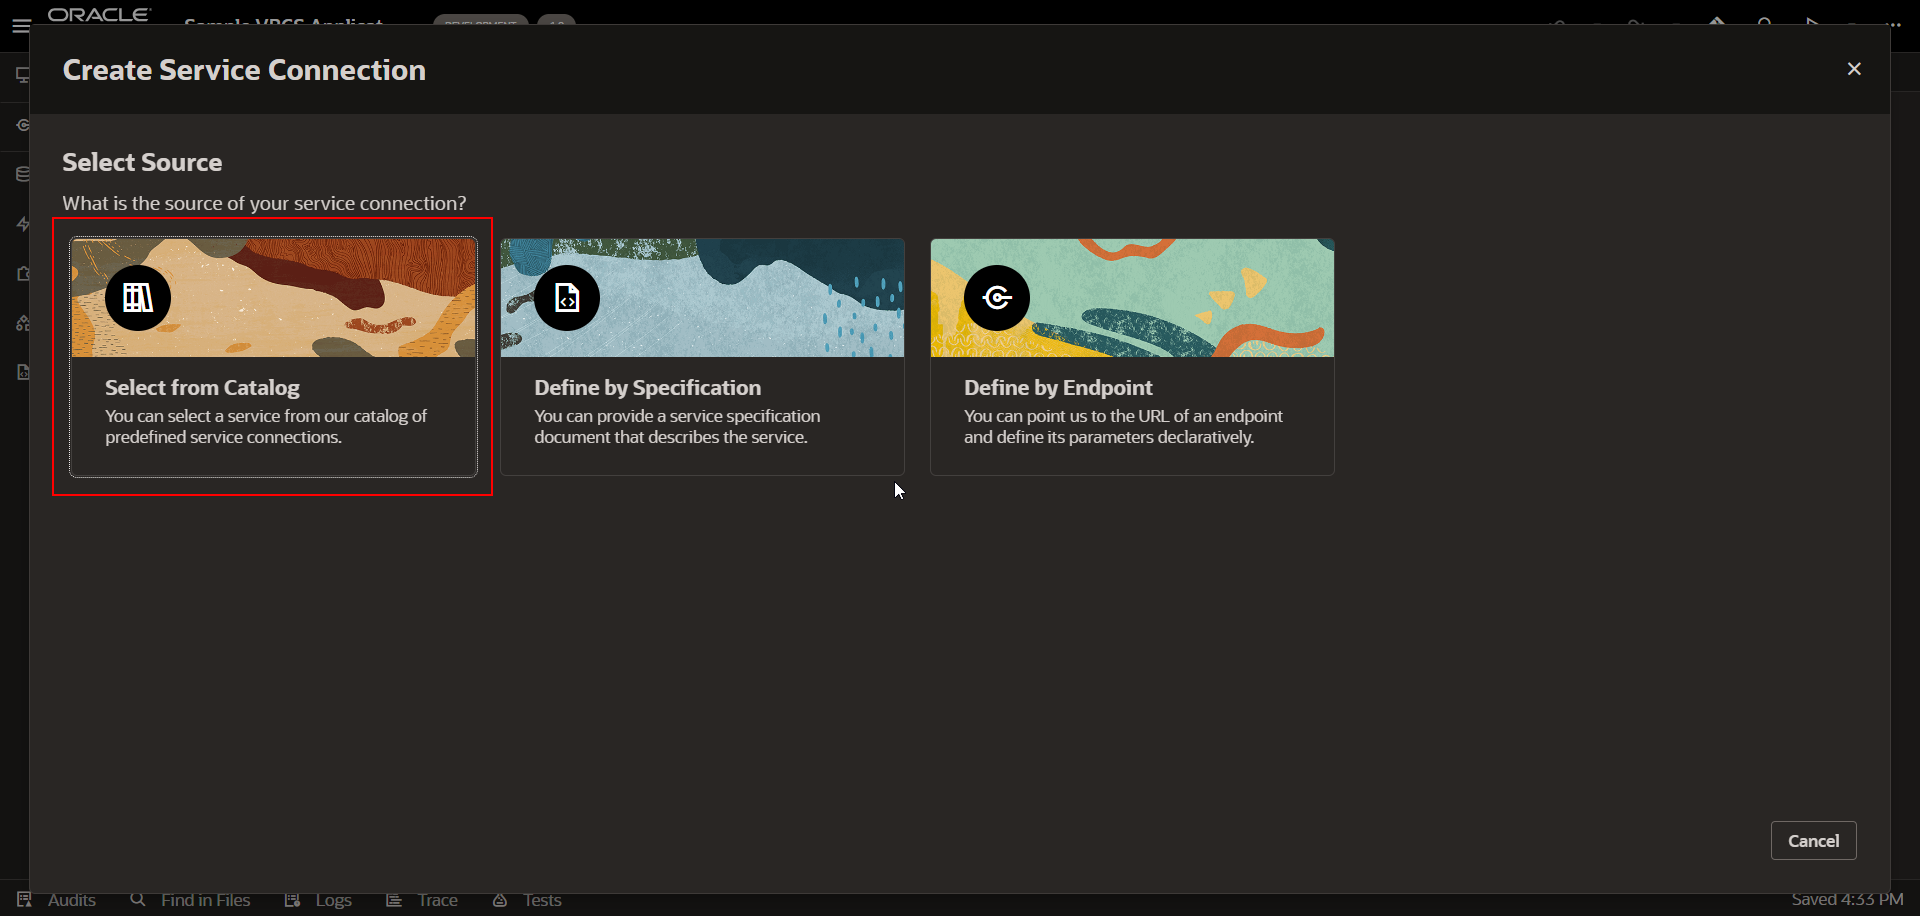
Select “Select from Catalog” option.
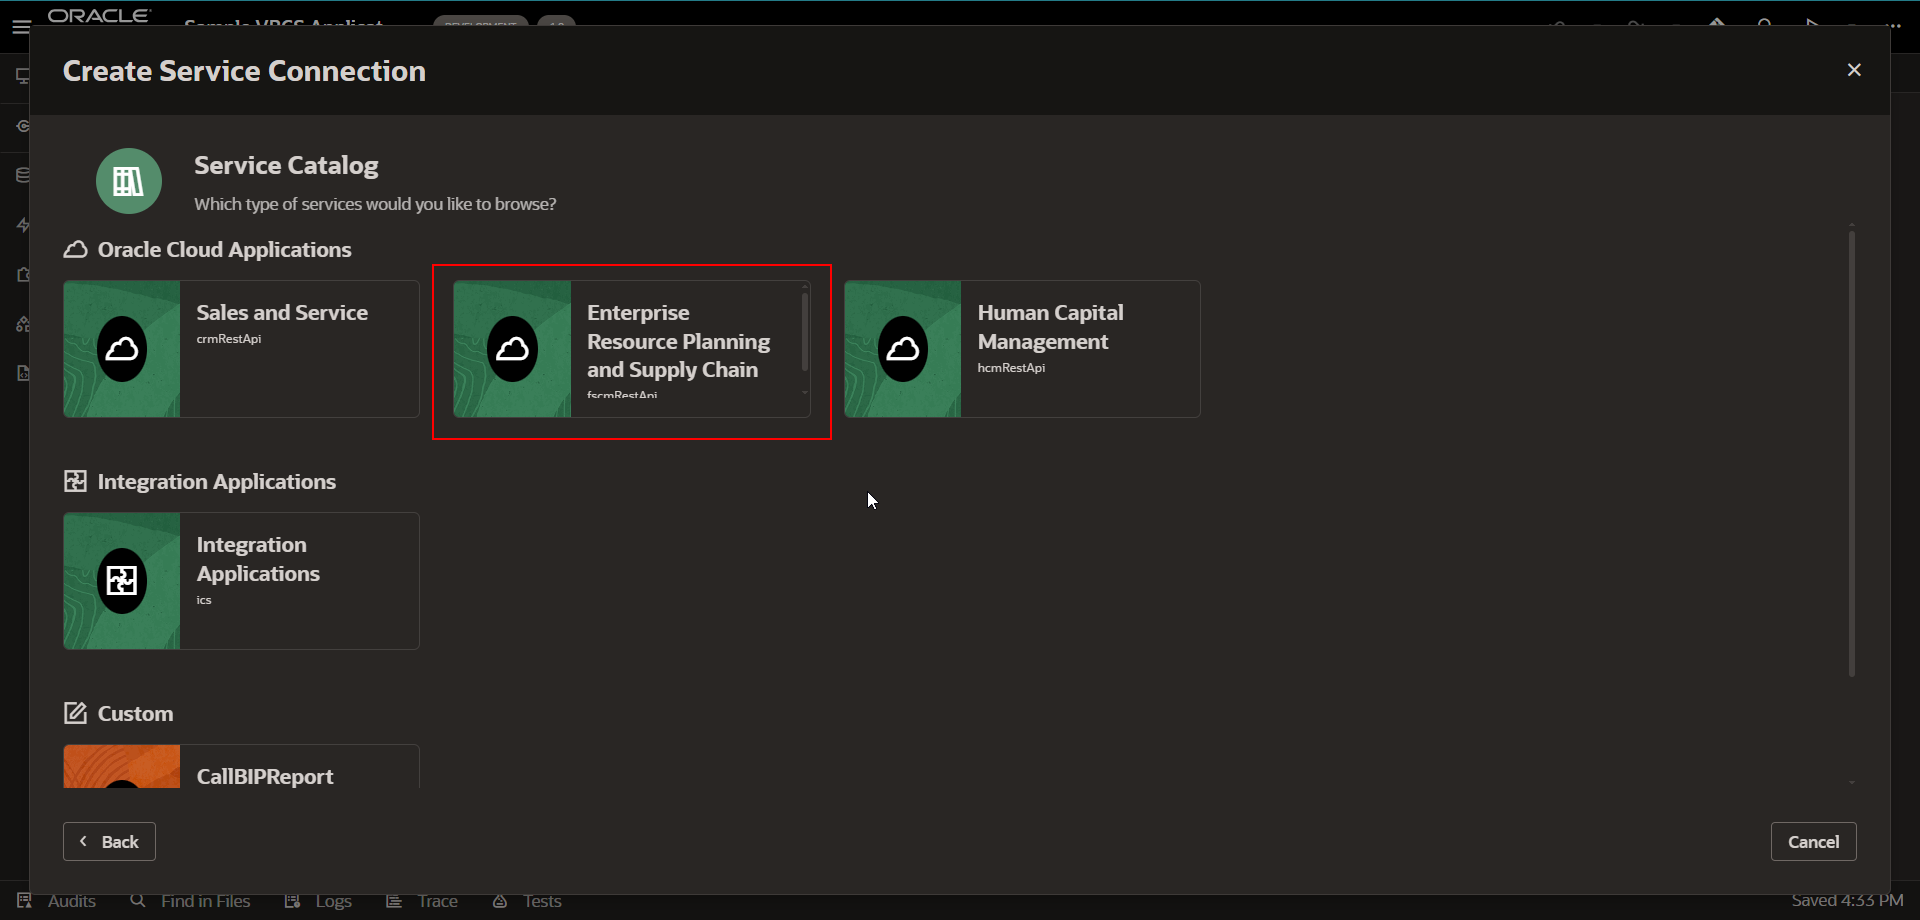
Select “Enterprise Resource Planning and Supply Chain”
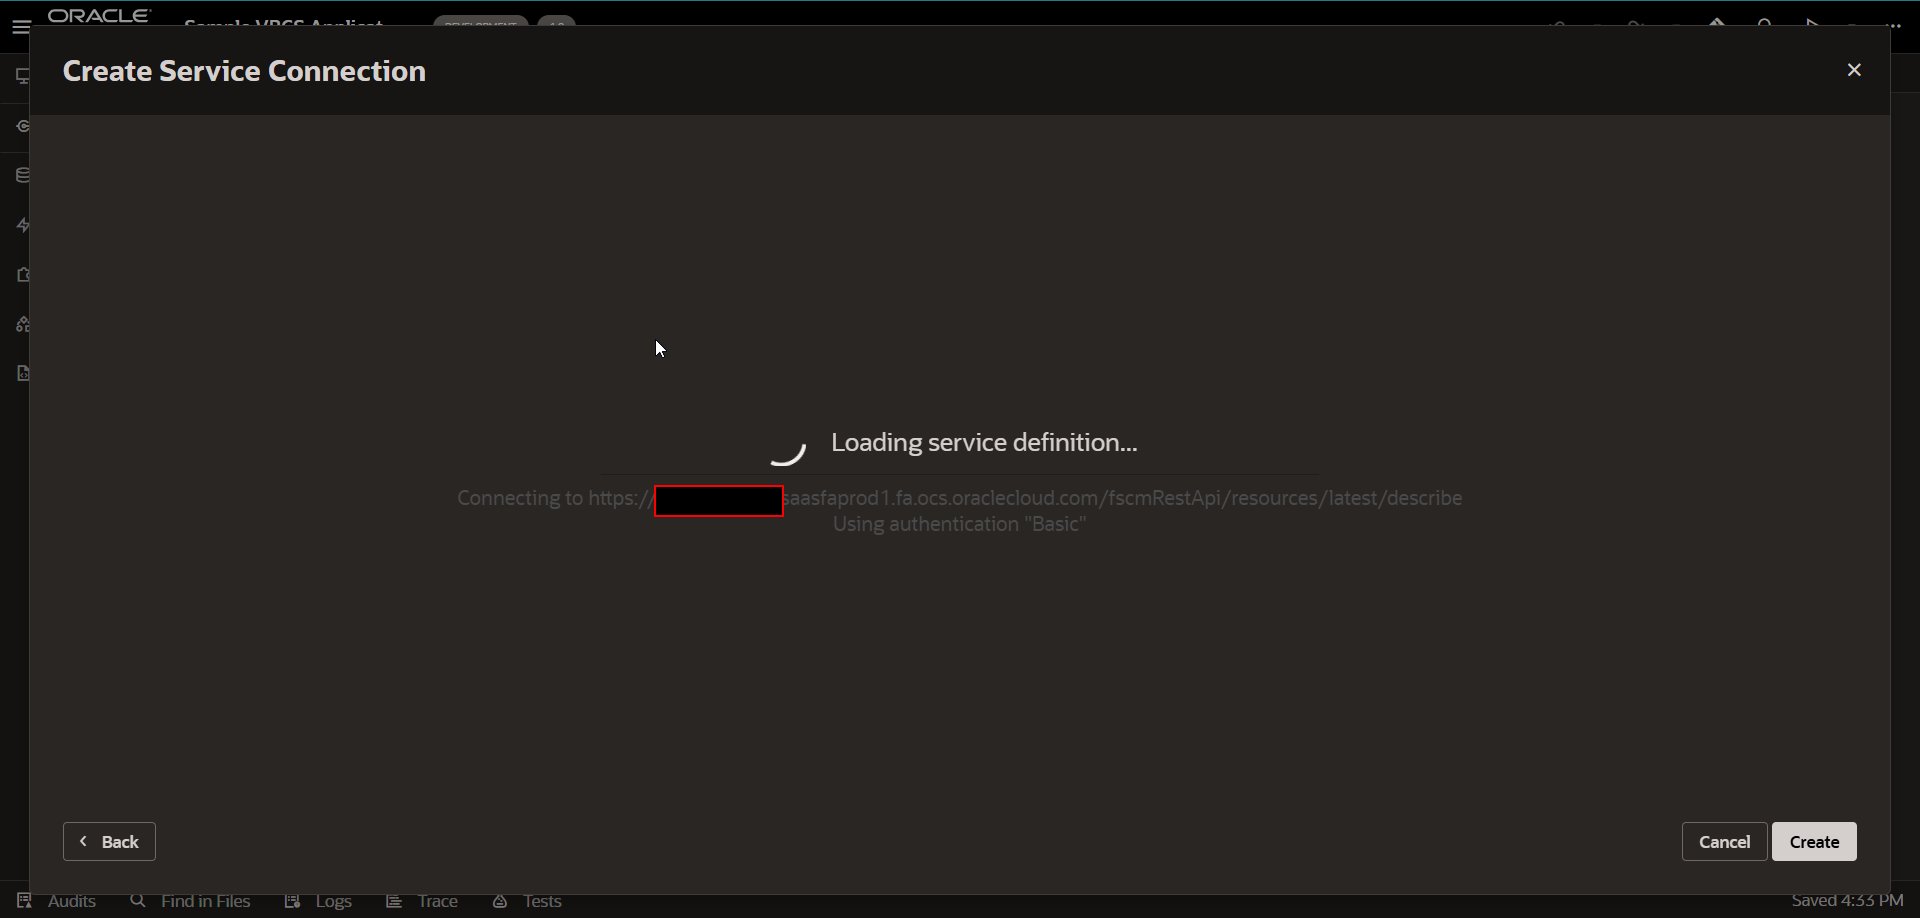
This will start loading all the REST endpoints from Fusion.
Provide valid Service connection Name and select Supplier Rest Endpoint as shown below.
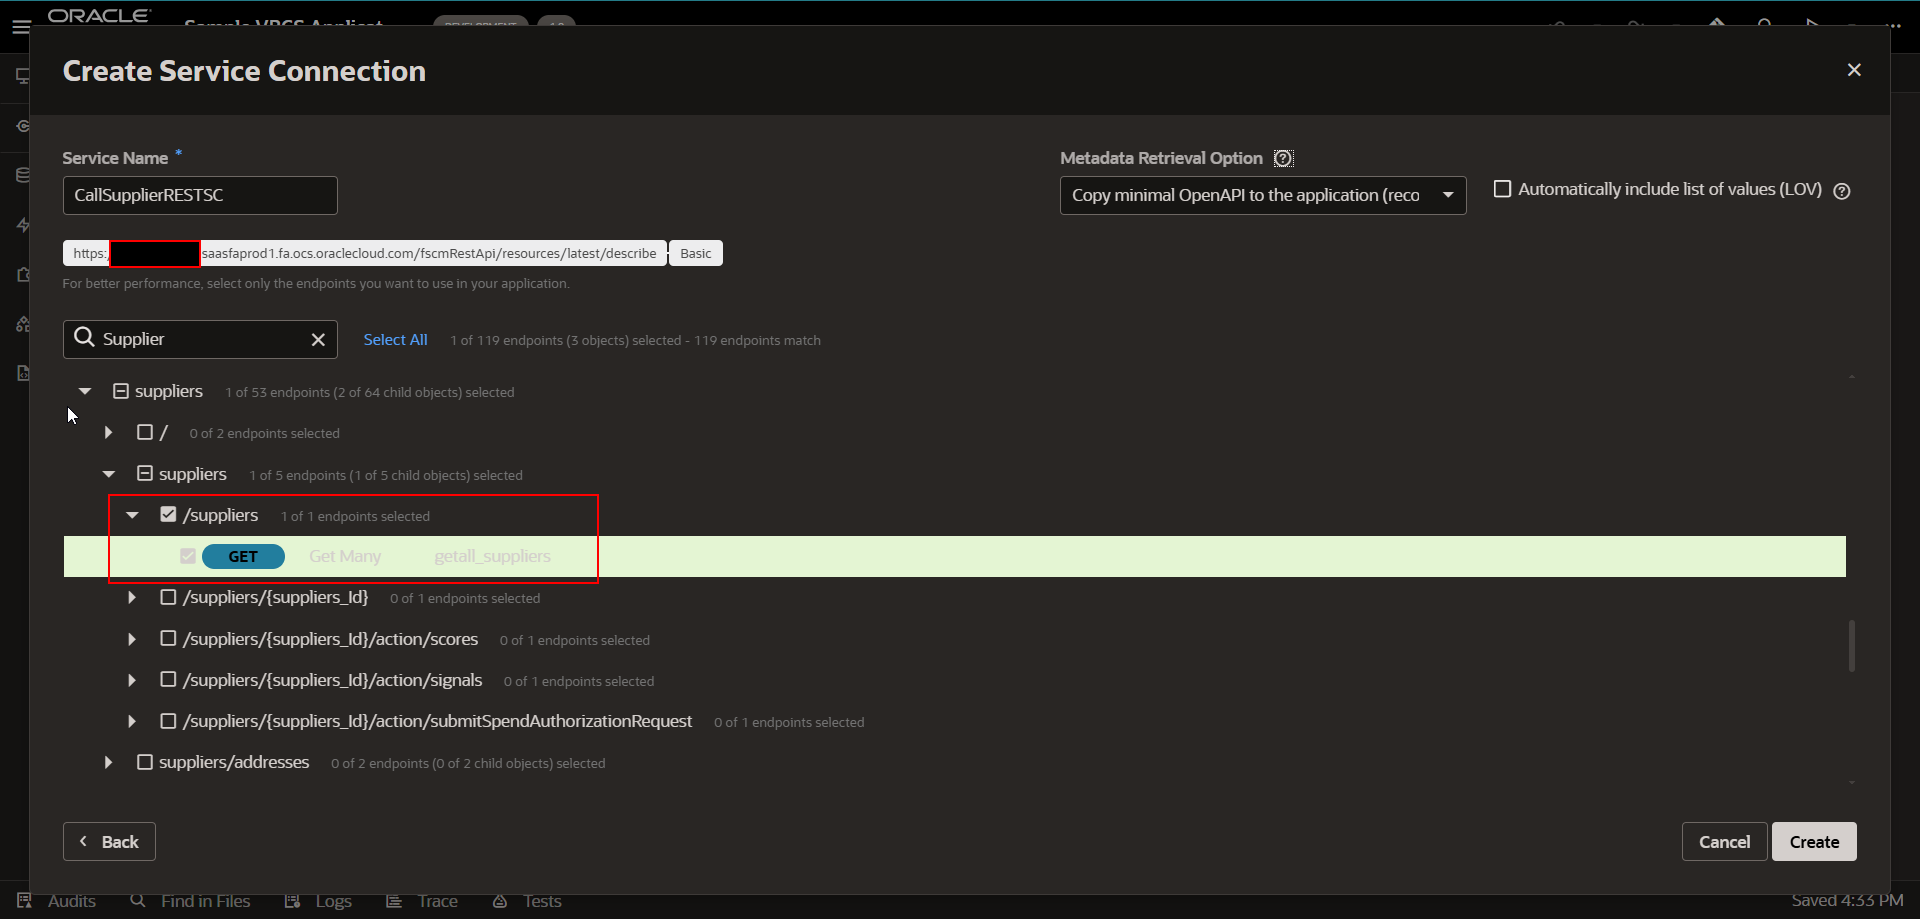
Click on Create.
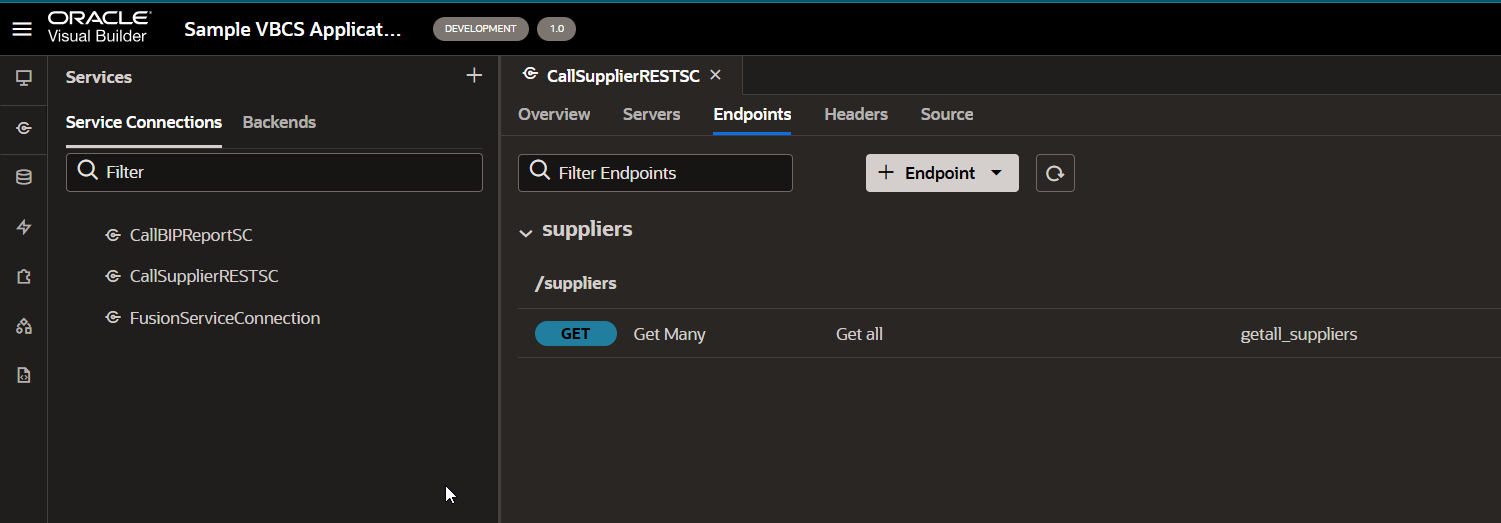
Service connection is created successfully.
Step3: Create Dialog Box to display supplier details.
Navigate to page designer.
Drag and drop Dialog box region to page designer grid region.
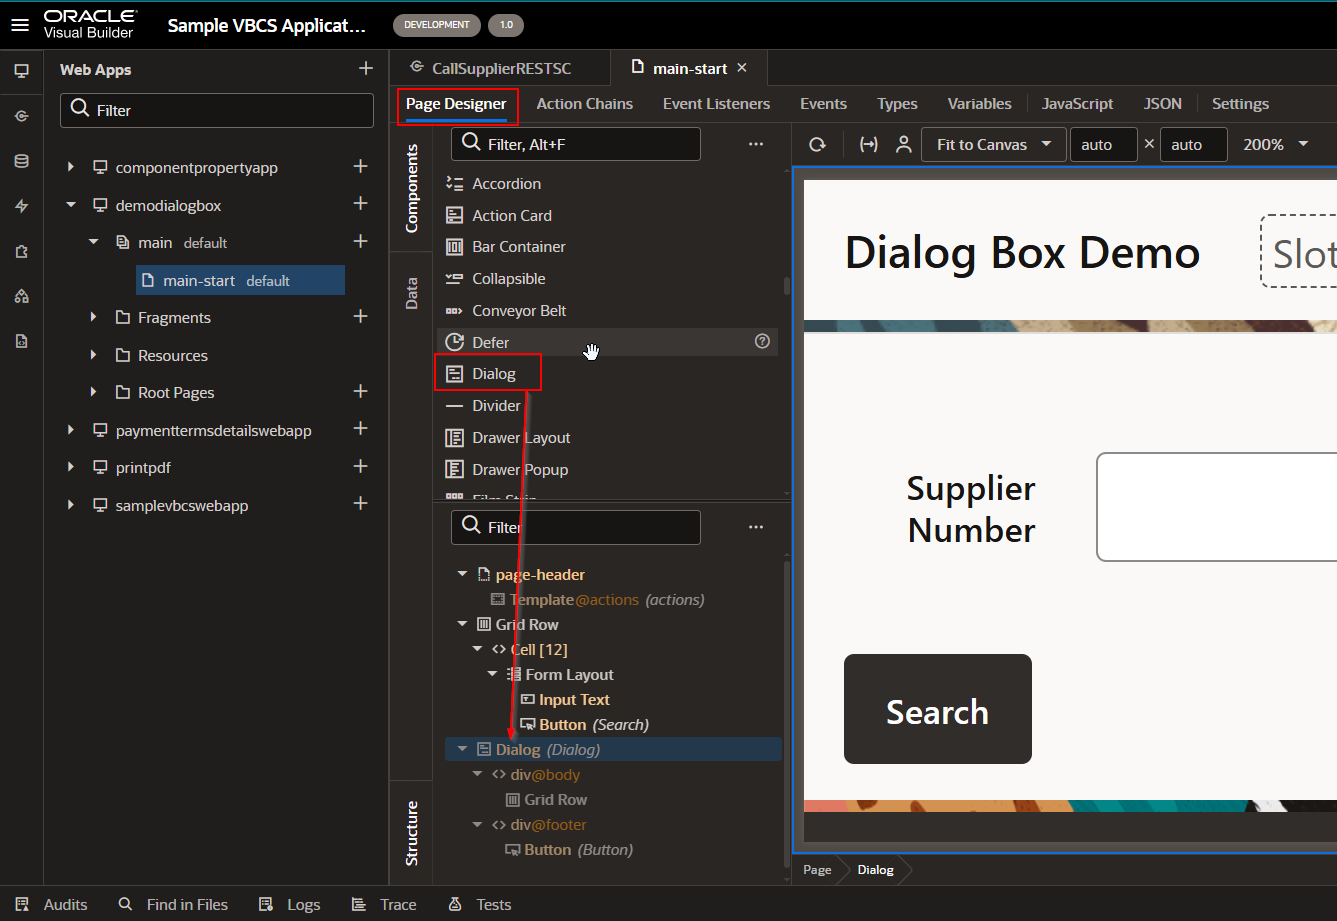
Set property of this dialog box.
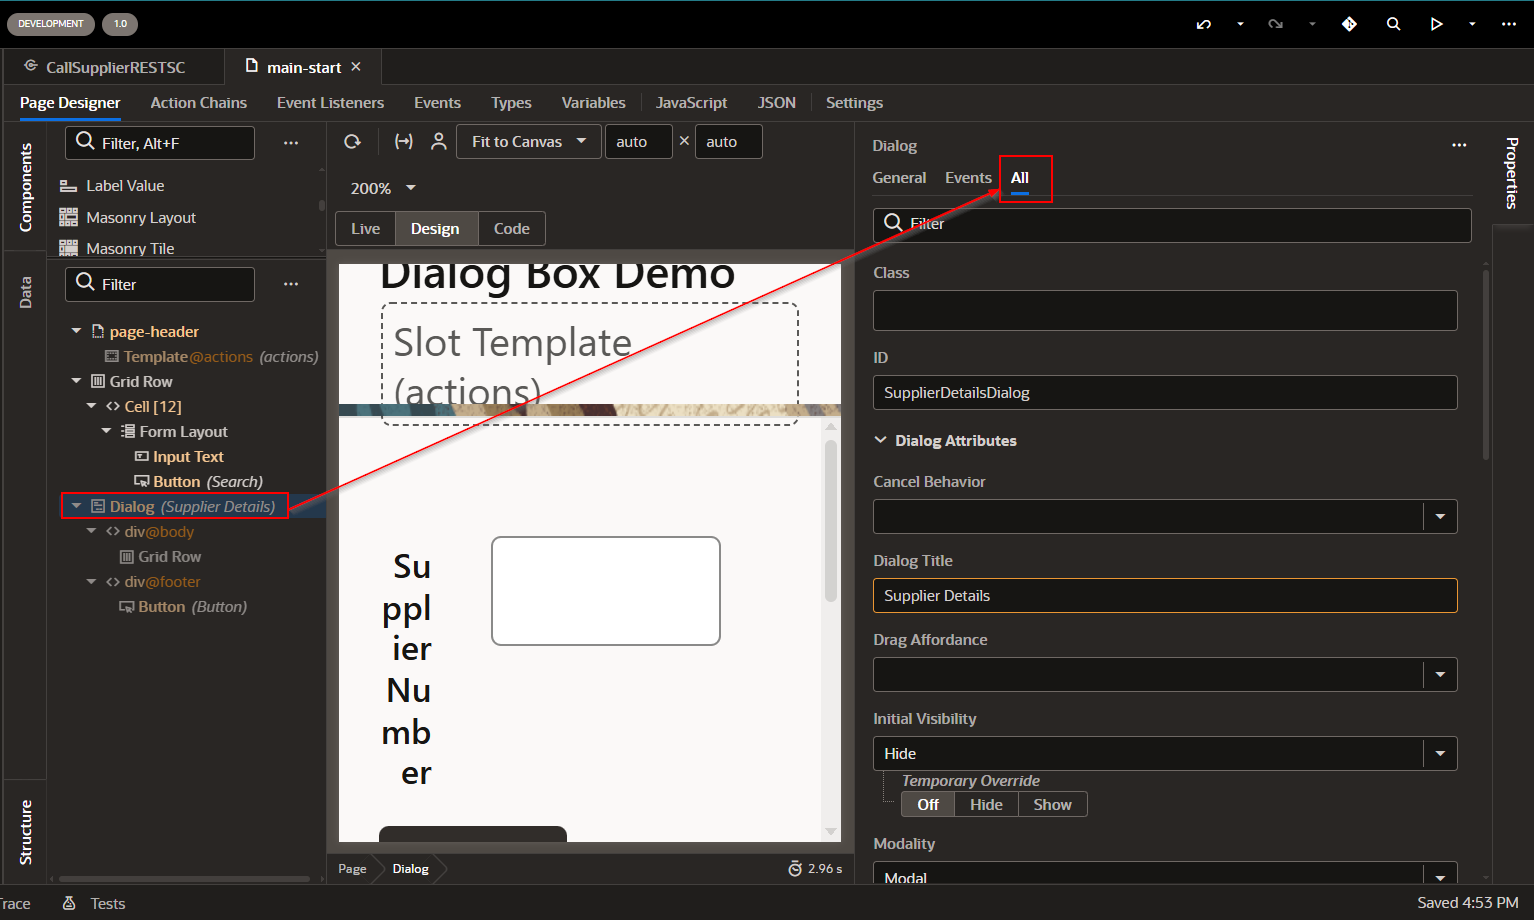
Property | Value |
ID | SupplierDetailsDialog |
Dialog Title | Supplier Details |
Drag Affordance | Title-bar |
Initial Visibility | Hide |
Temporary Override | Off |
Modality | Modal |
Draggable | True |
Hidden | False |
Spellcheck | False |
Title | Supplier Details |
Cancel Behaviour | Icon |
Width | 100vh |
Height | 100vh |
Min-Width | 100vh |
Min-Height | 100vh |
Max- Width | 100vh |
Max-Height | 100vh |
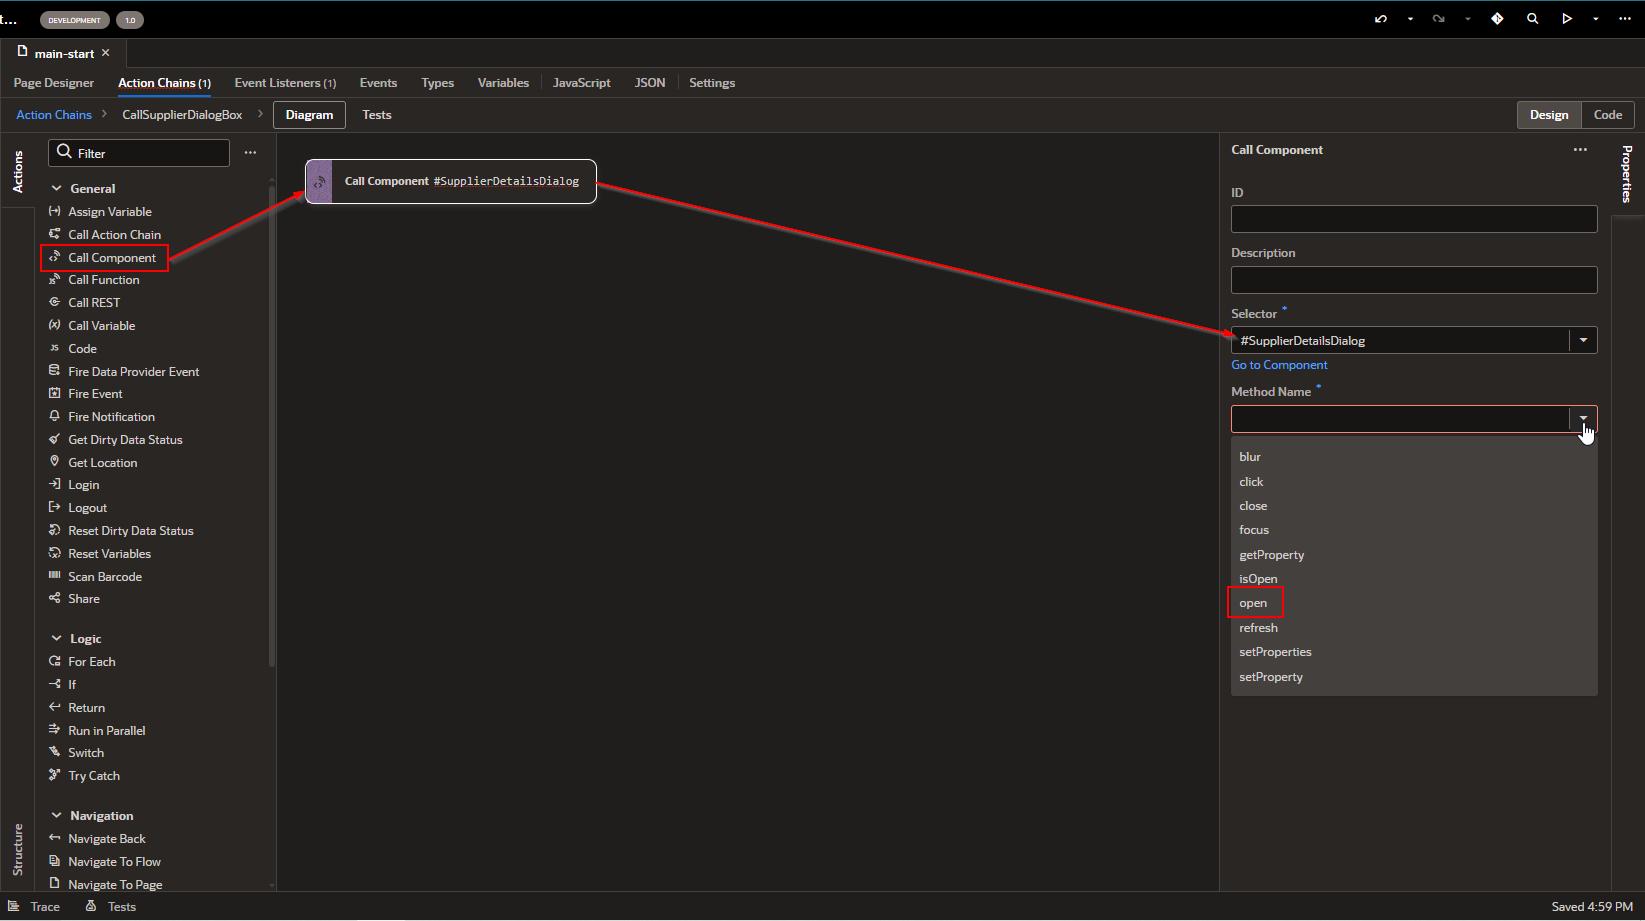
Now, create action chain on button to call this Dialog Box.

This will create new action chain.

To call Dialog box in action chain, we need to drag and drop “Call Component” action and select earlier created dialog in selector.
Also set Method as “Open”.
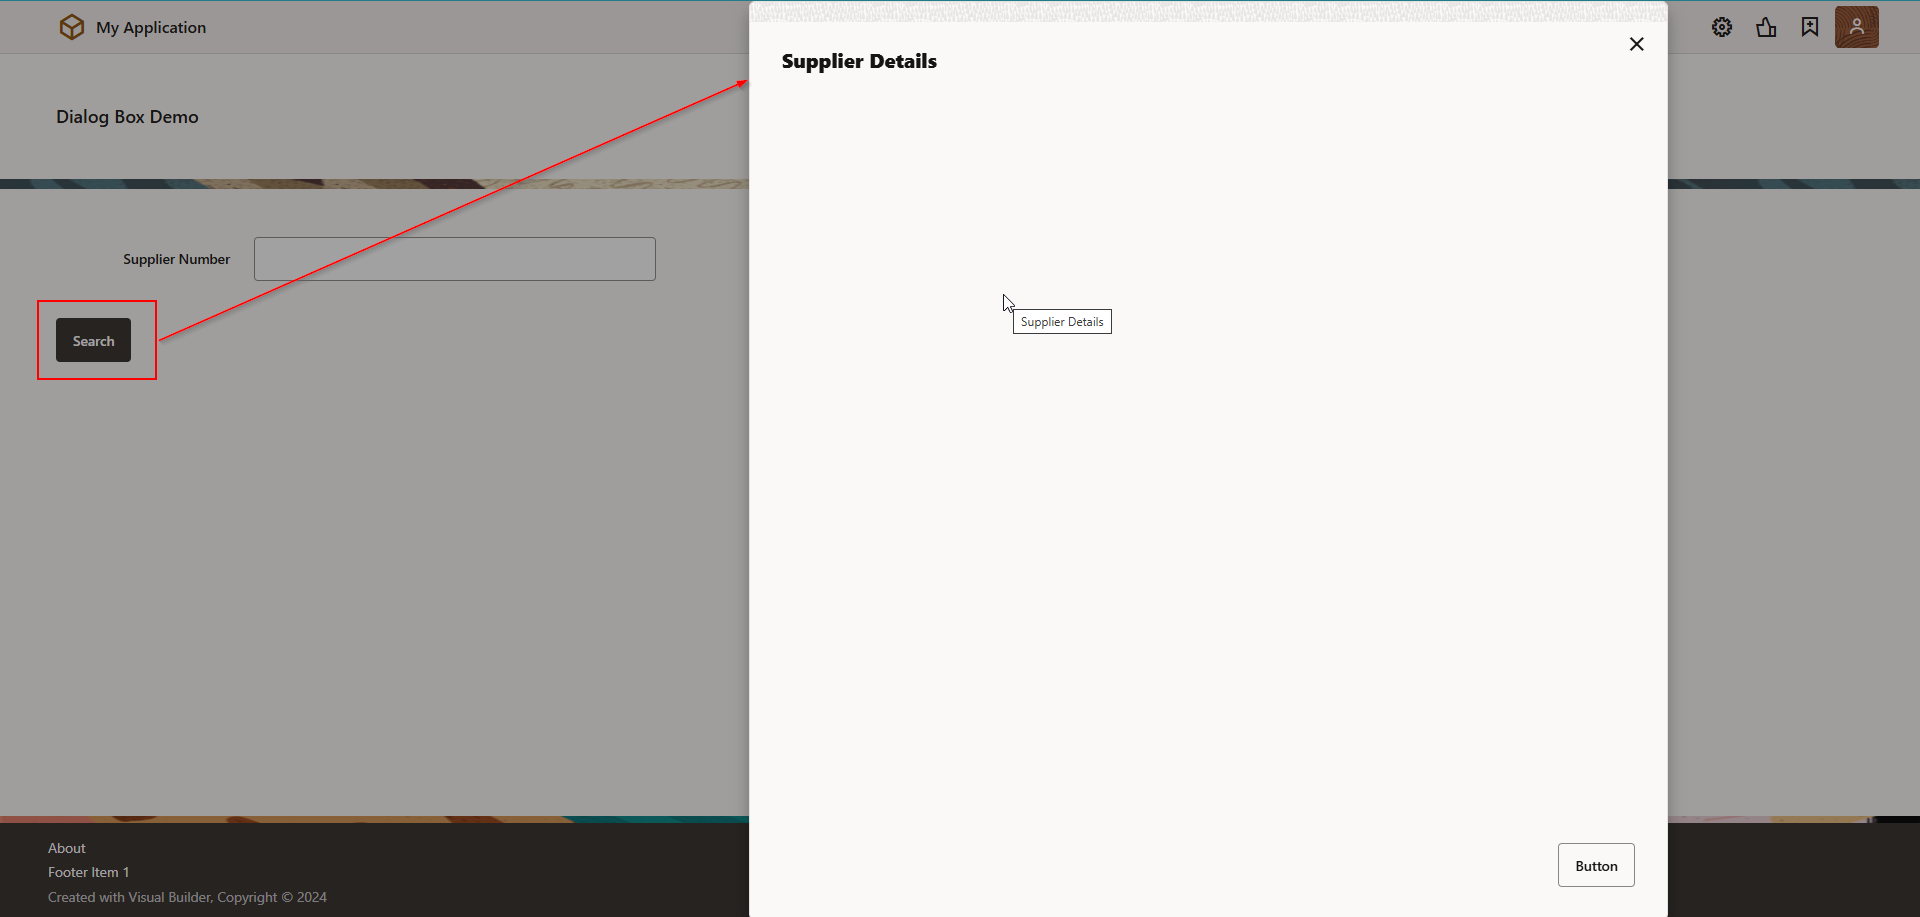
Now run the application.
Once clicked on Search button, it will open Supplier Details Dialog box.
Step4: Design Dialog Box.
Now let us design this dialog box to show Supplier data from Supplier REST.
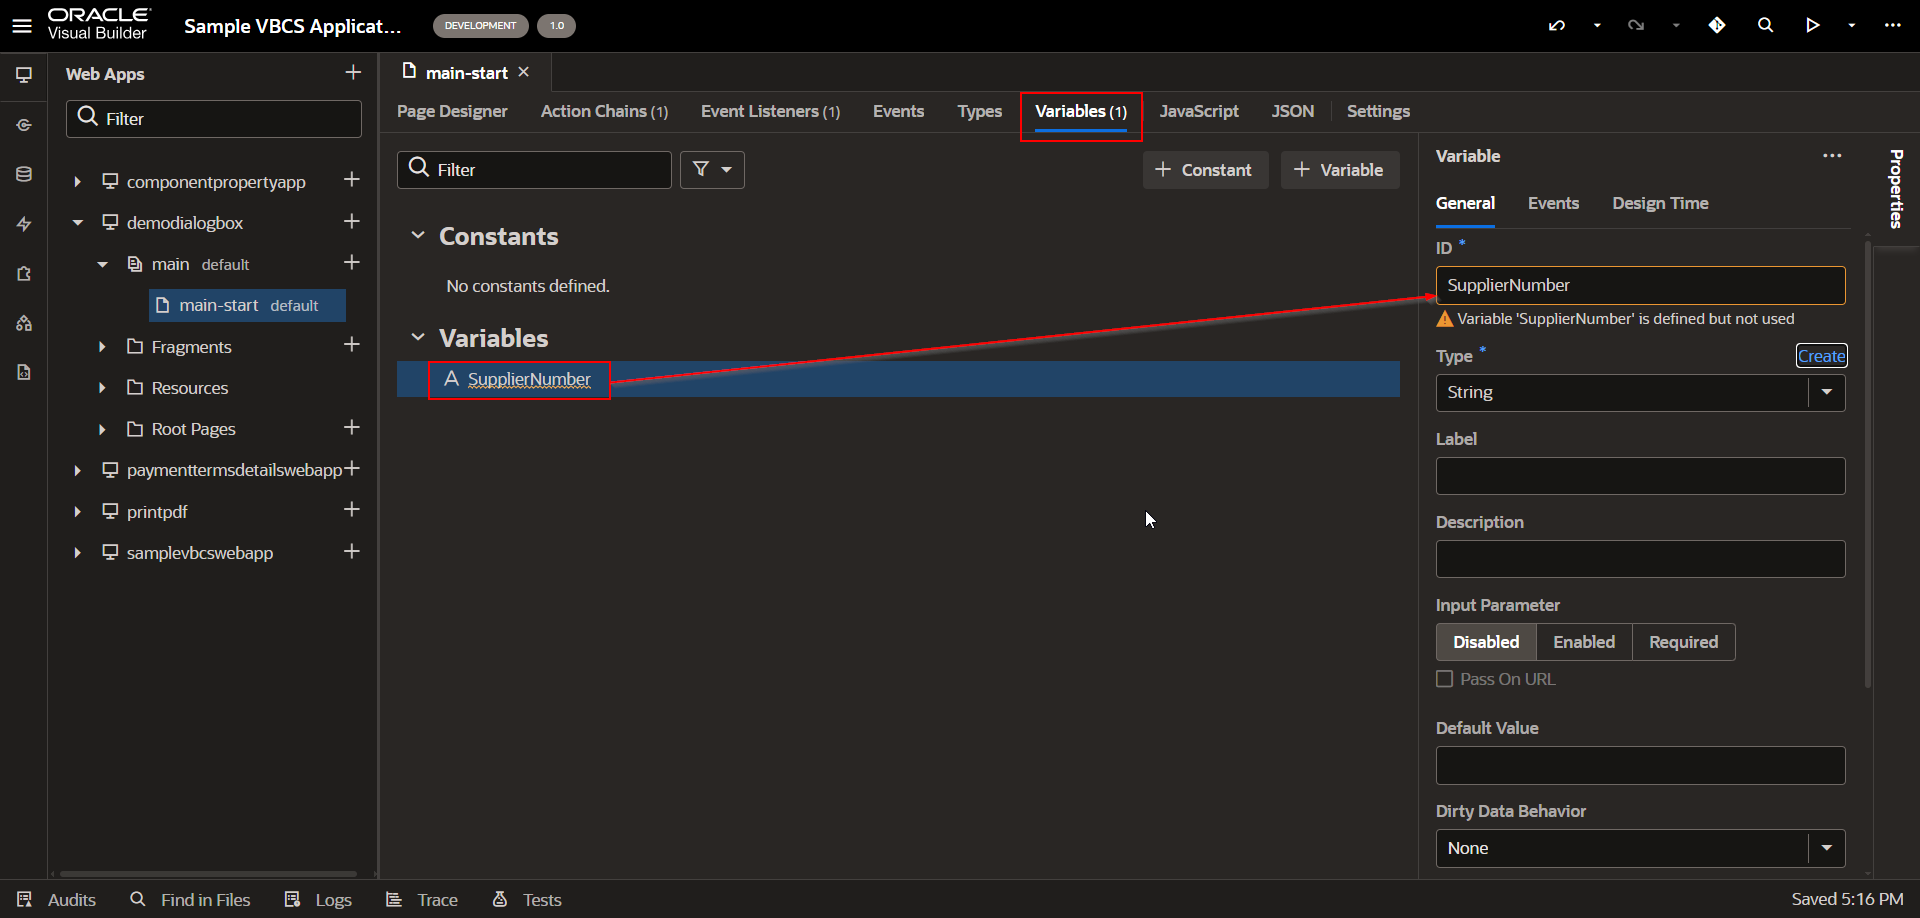
Create variable to store Supplier Number from Parent main page.
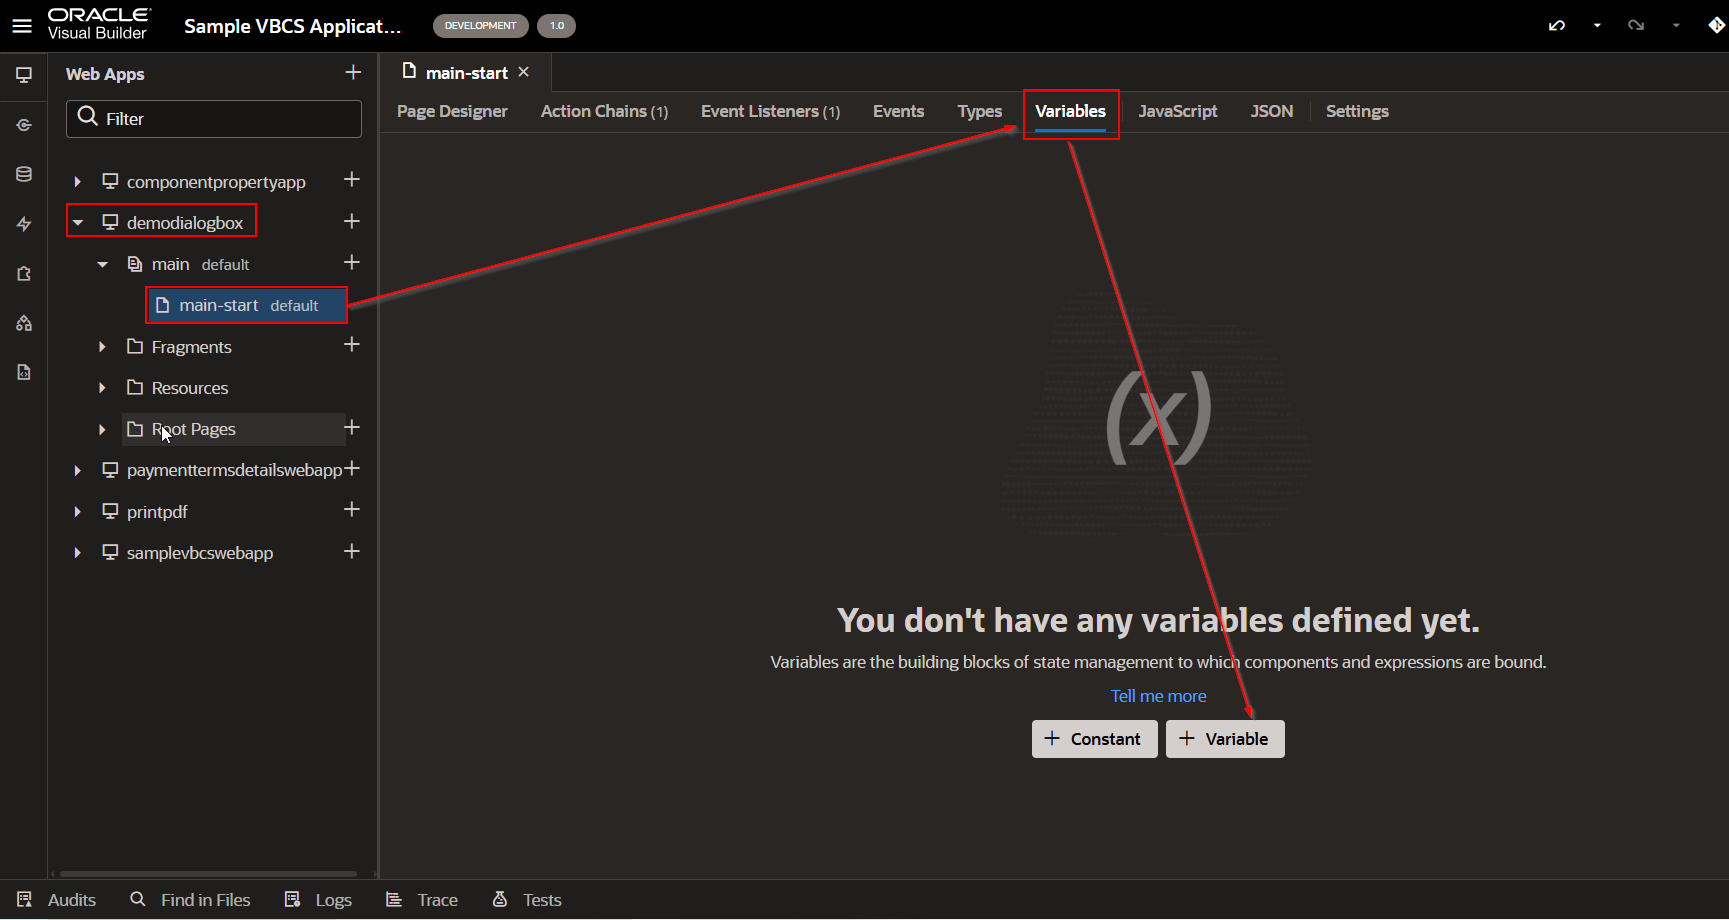
Click on variable.
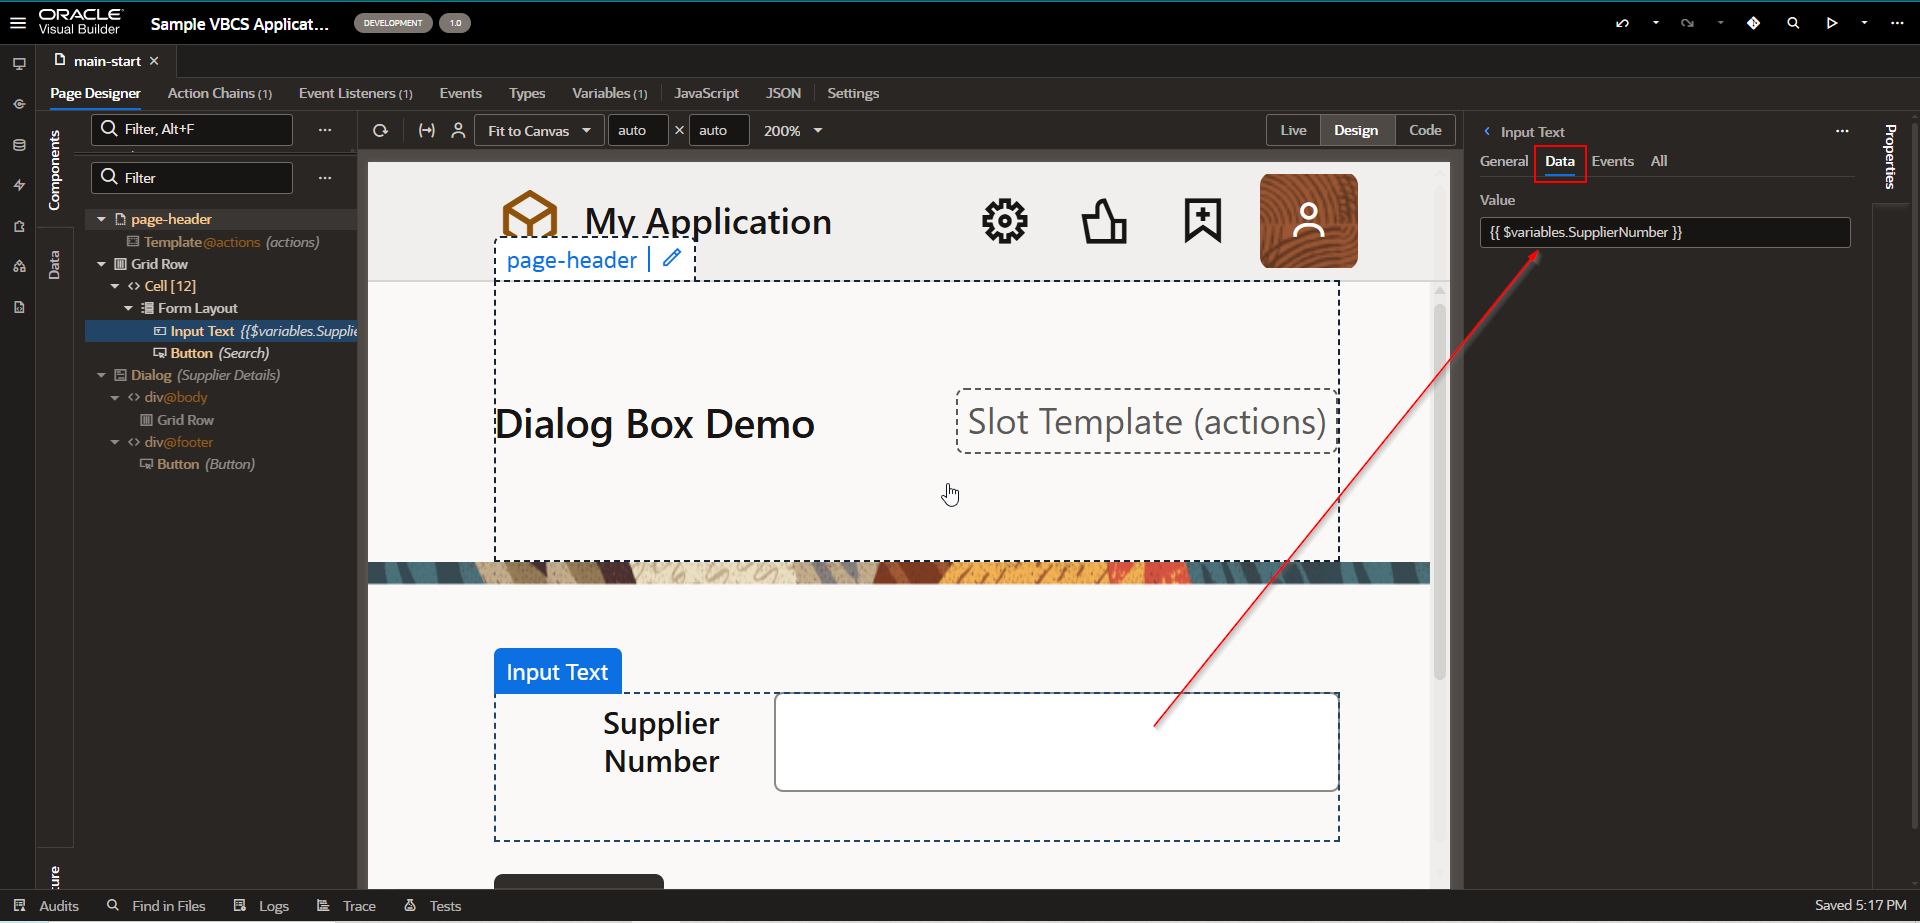
Assign this variable to Supplier Number field.
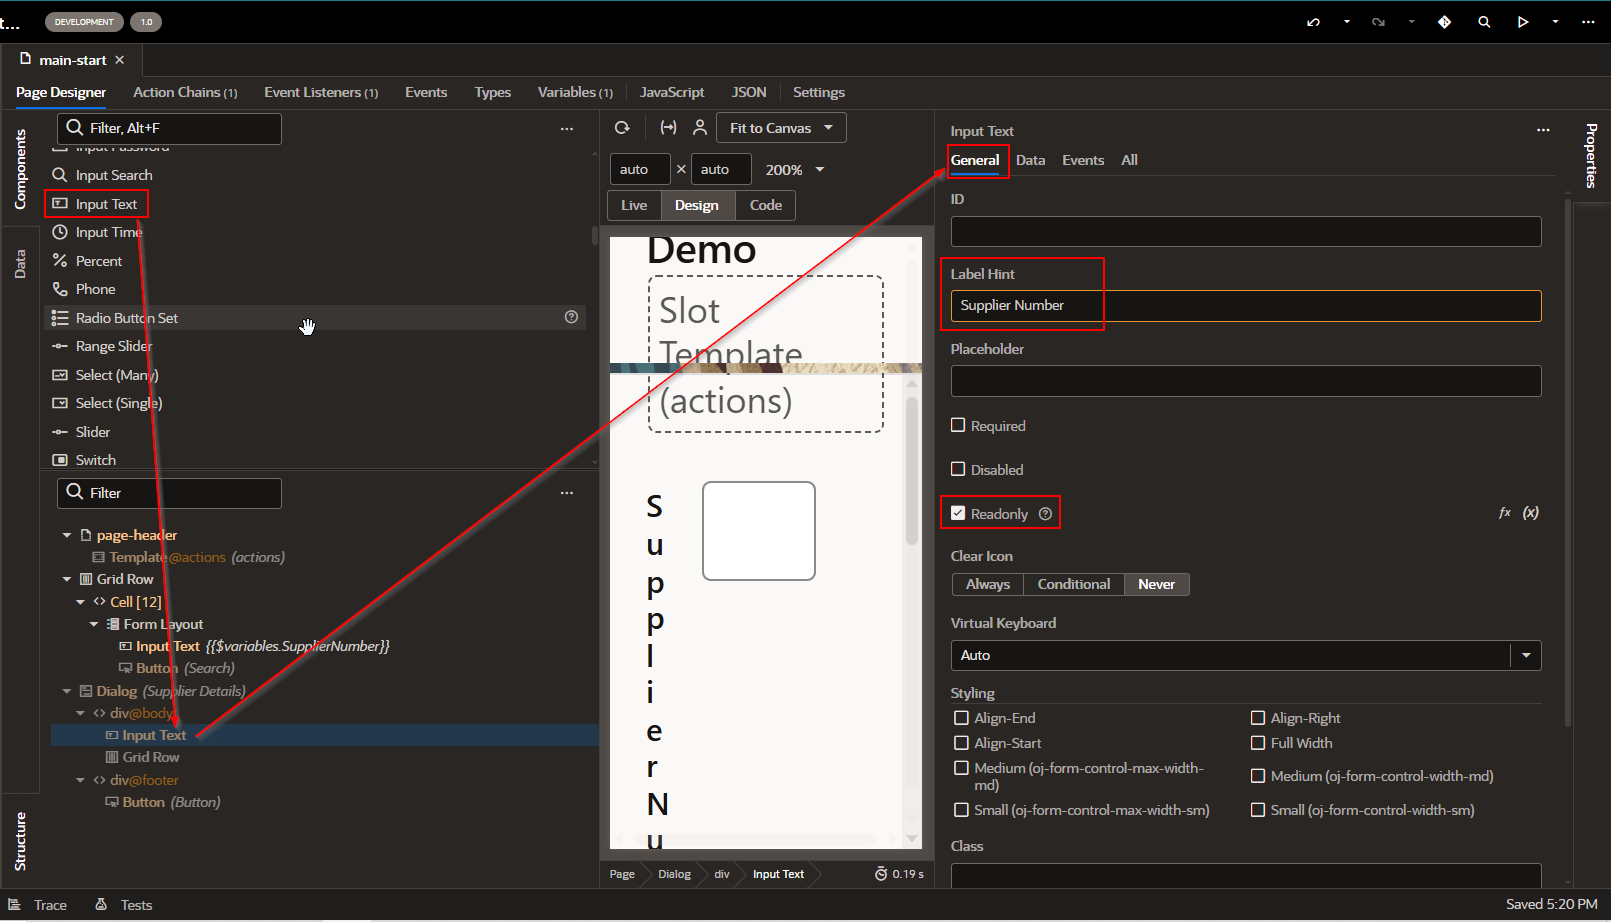
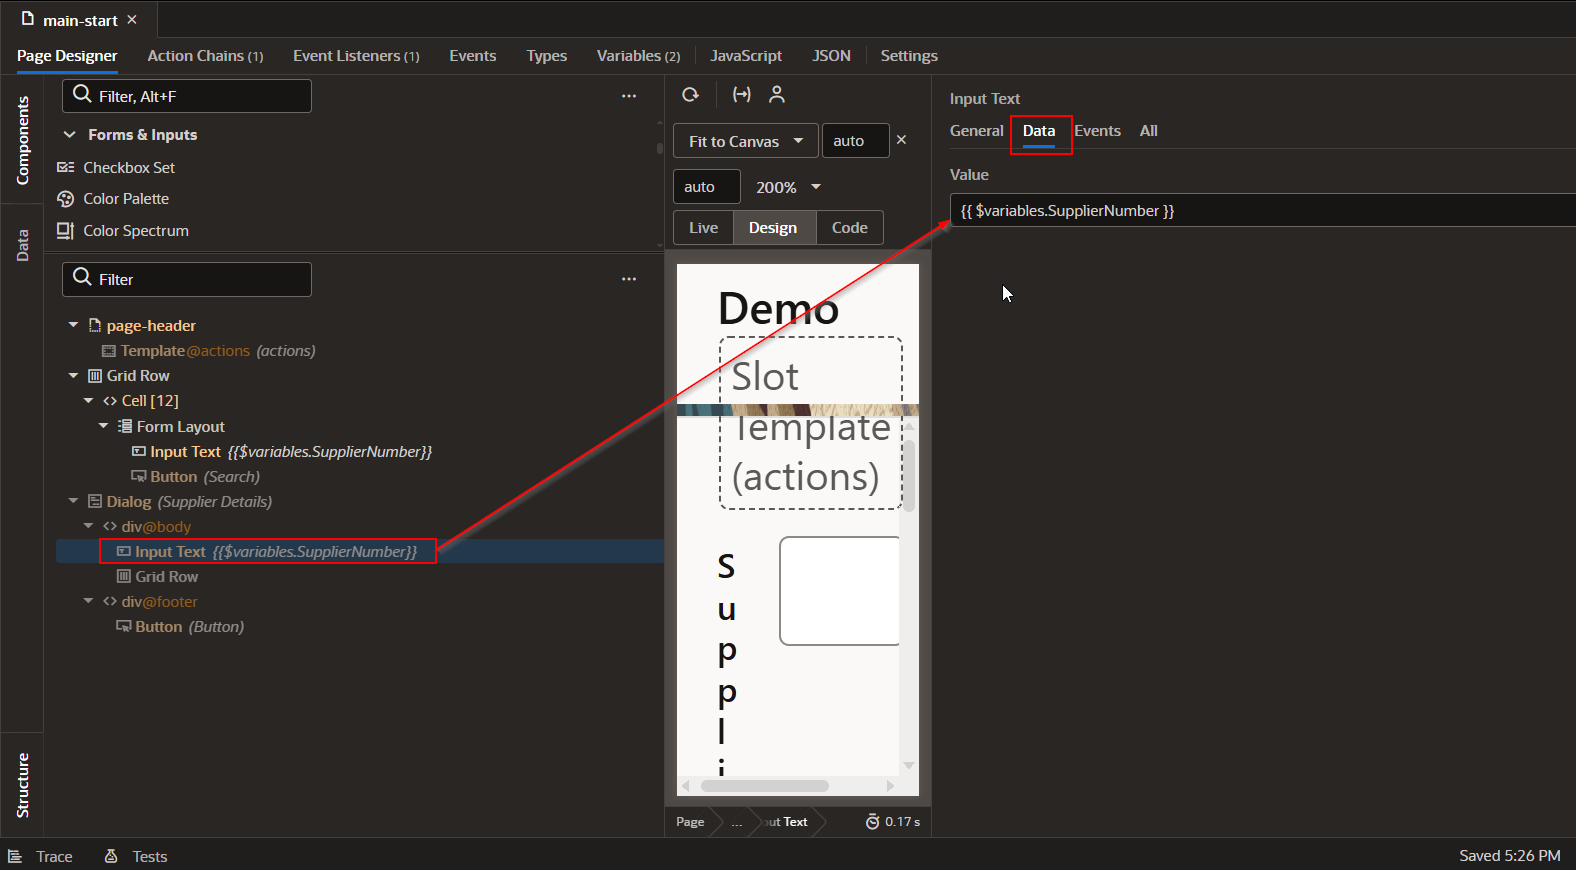
Add Read only Text Field on Dialog Box to display this supplier Number.
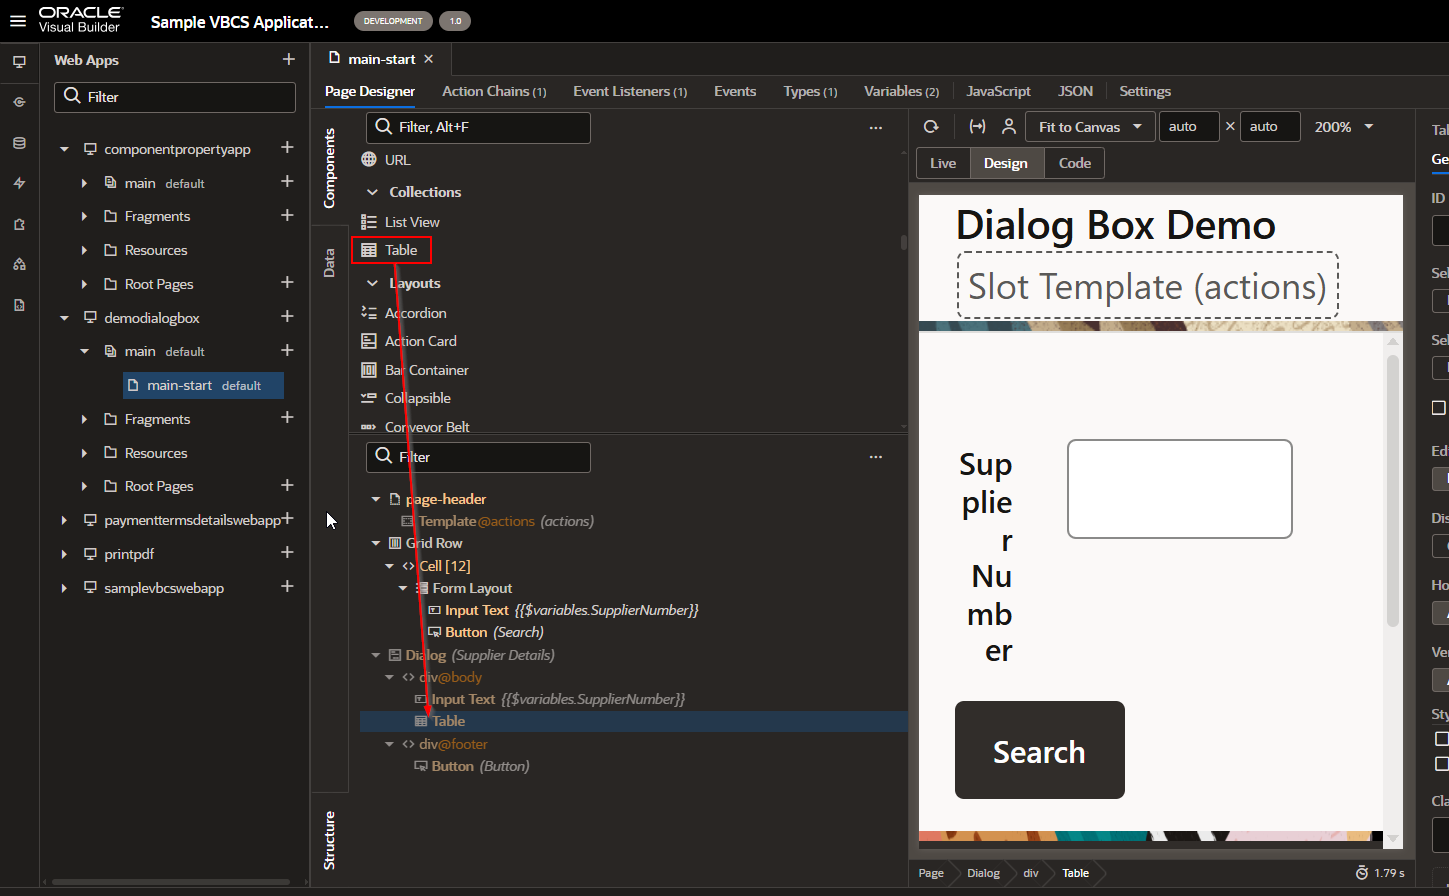
Also add Table to display the Supplier REST Result.
Now navigate to Data and assign same variable created earlier.
Drag and Drop Table on Dialog box.
Let us create Type and ADP variable and assign to this table.
Navigate to Type—>Create from Endpoint.
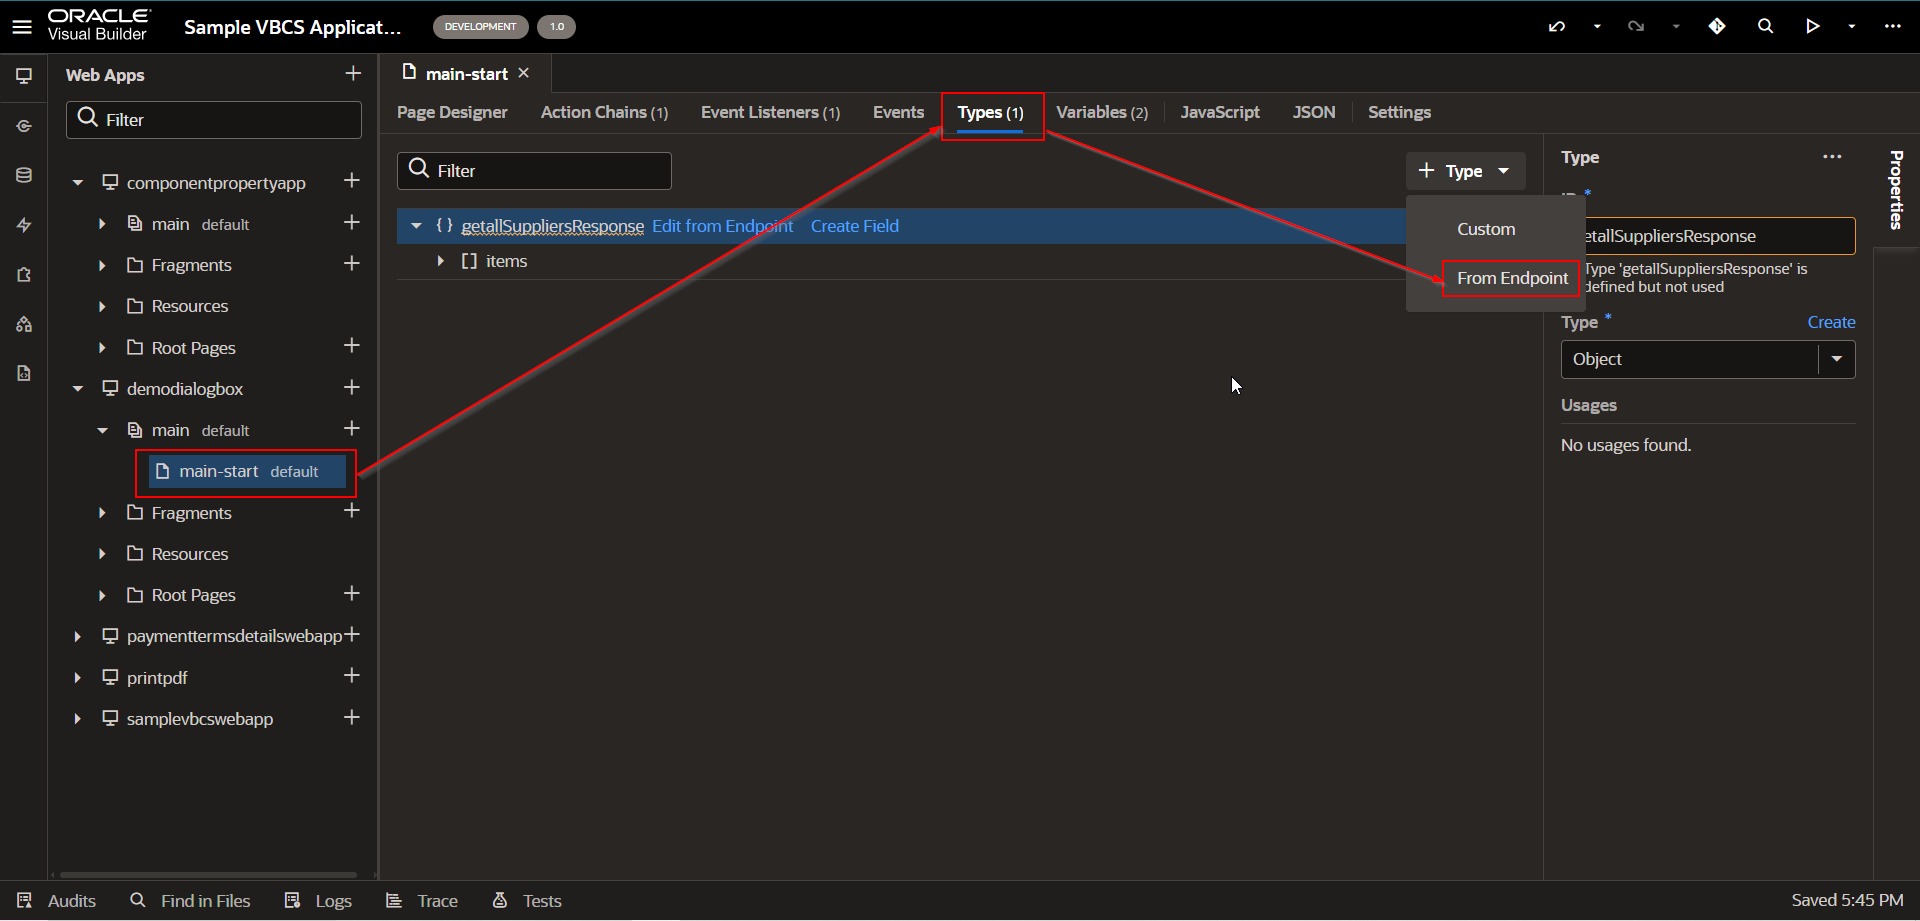
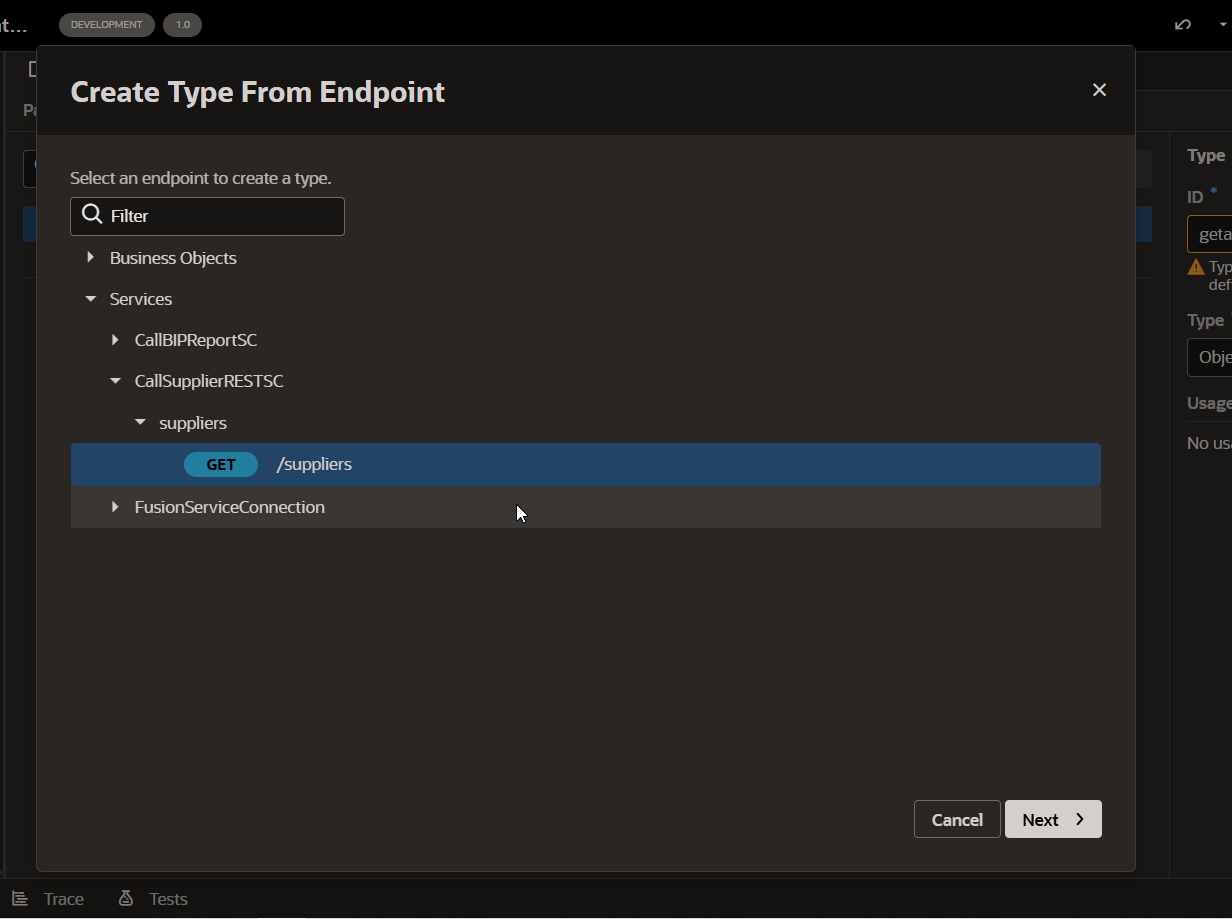
Click on Next.
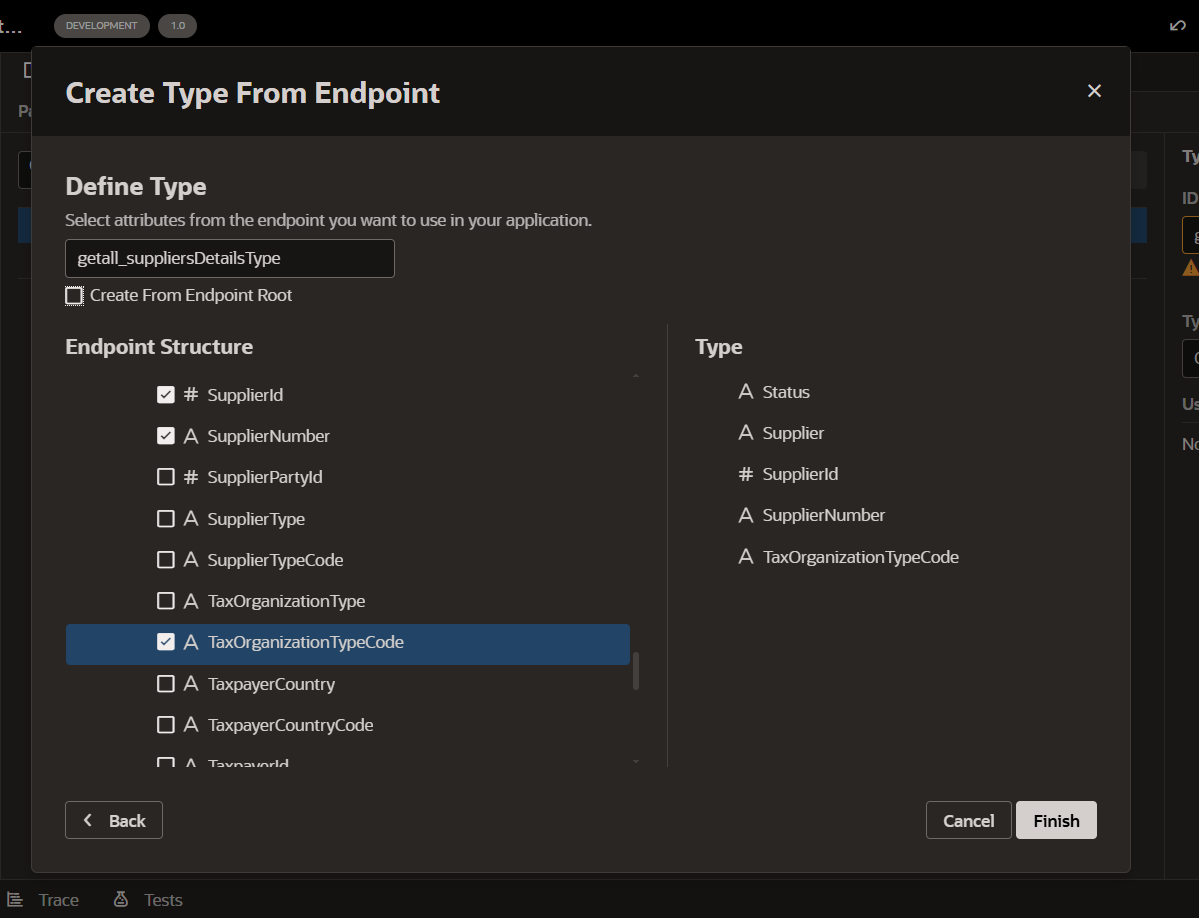
Provide valid Name and select required fields and click on Finish.
Navigate to Variable and Click new Variable with type as “Array Data Provider”.
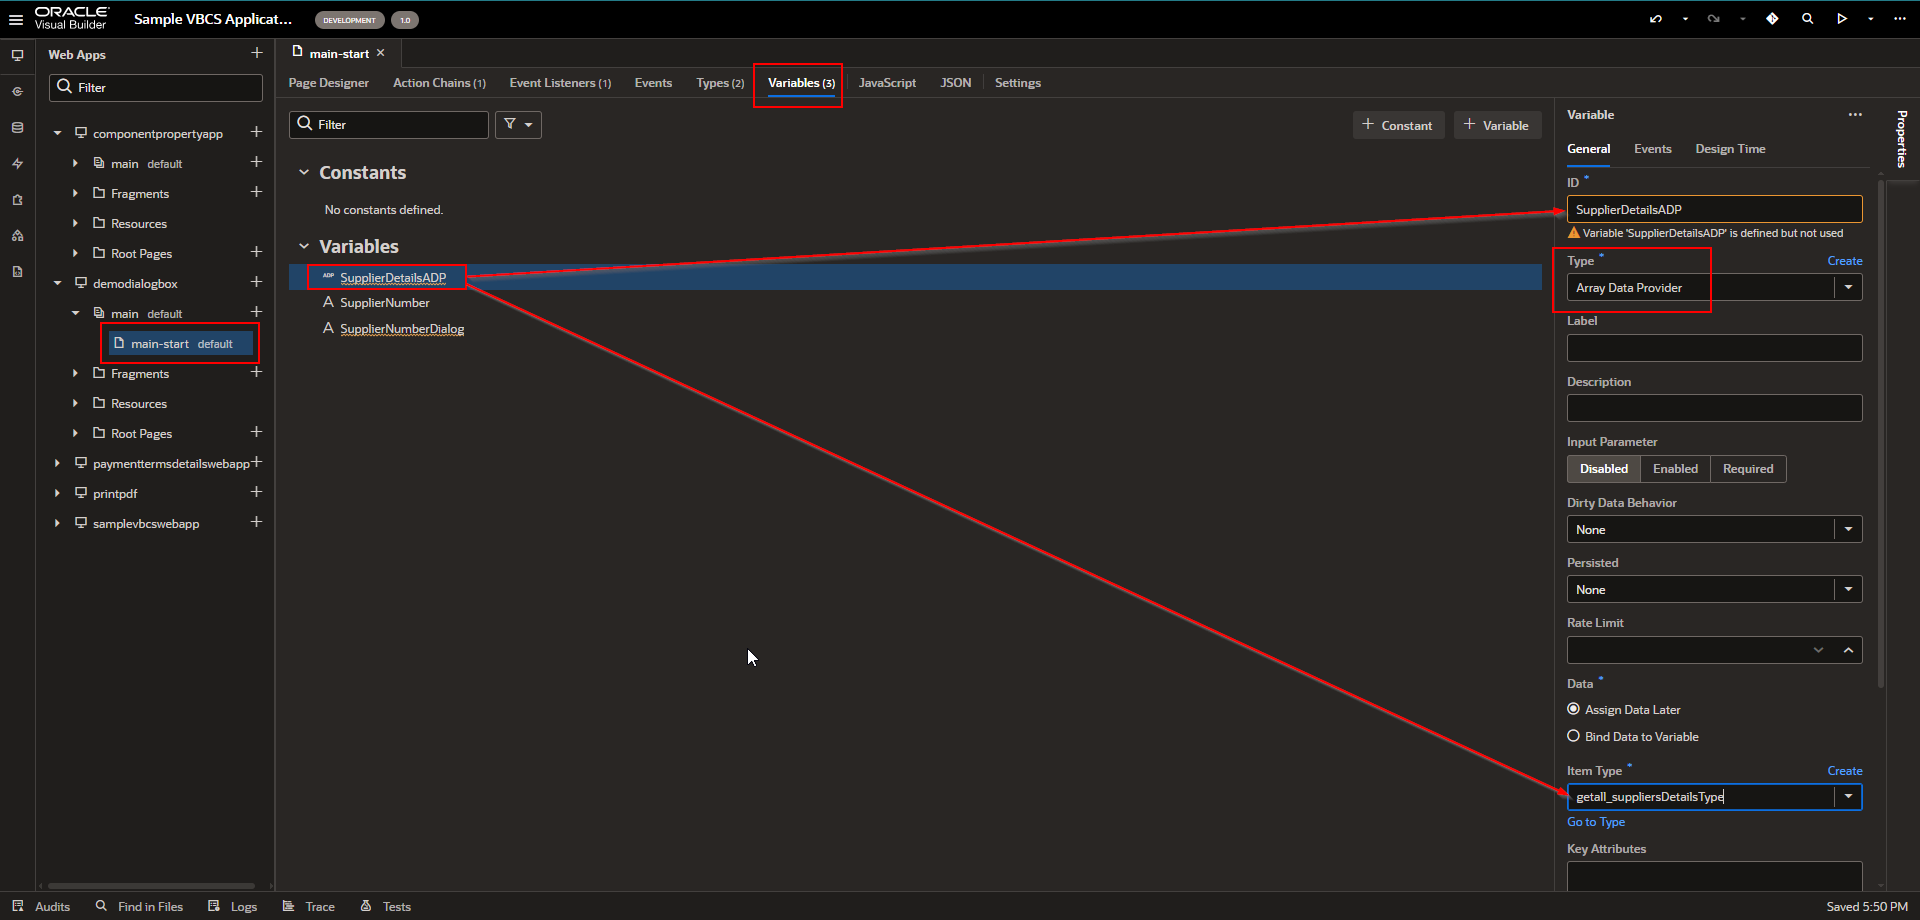
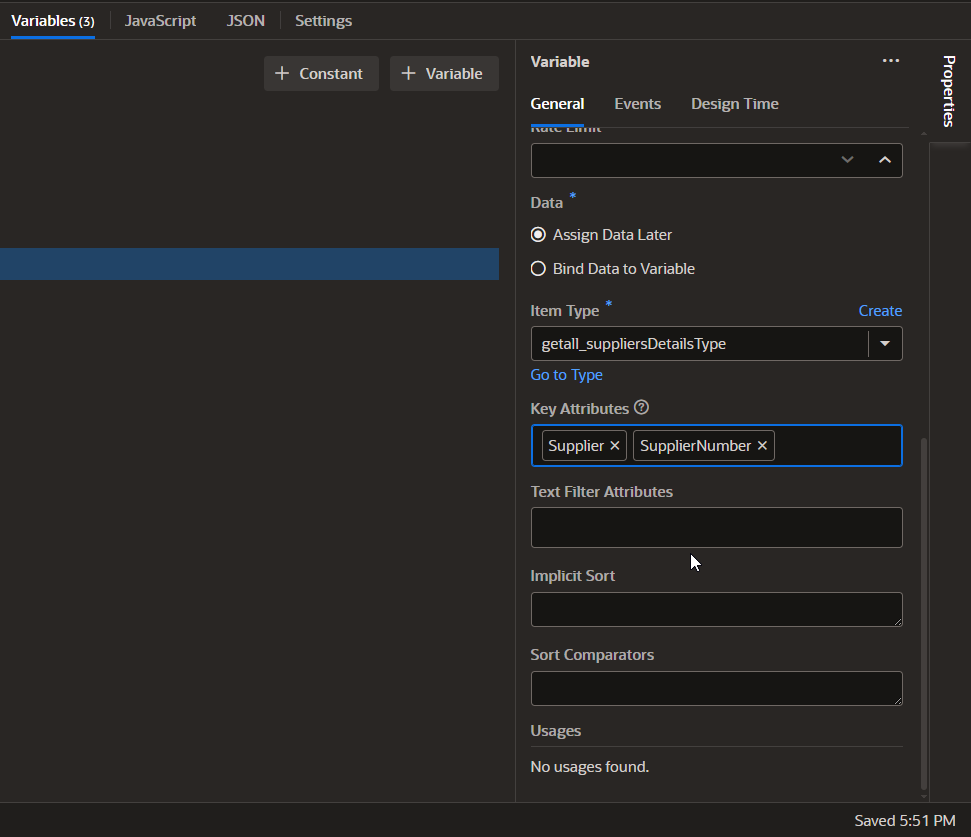
Select Key Attributes as shown below:
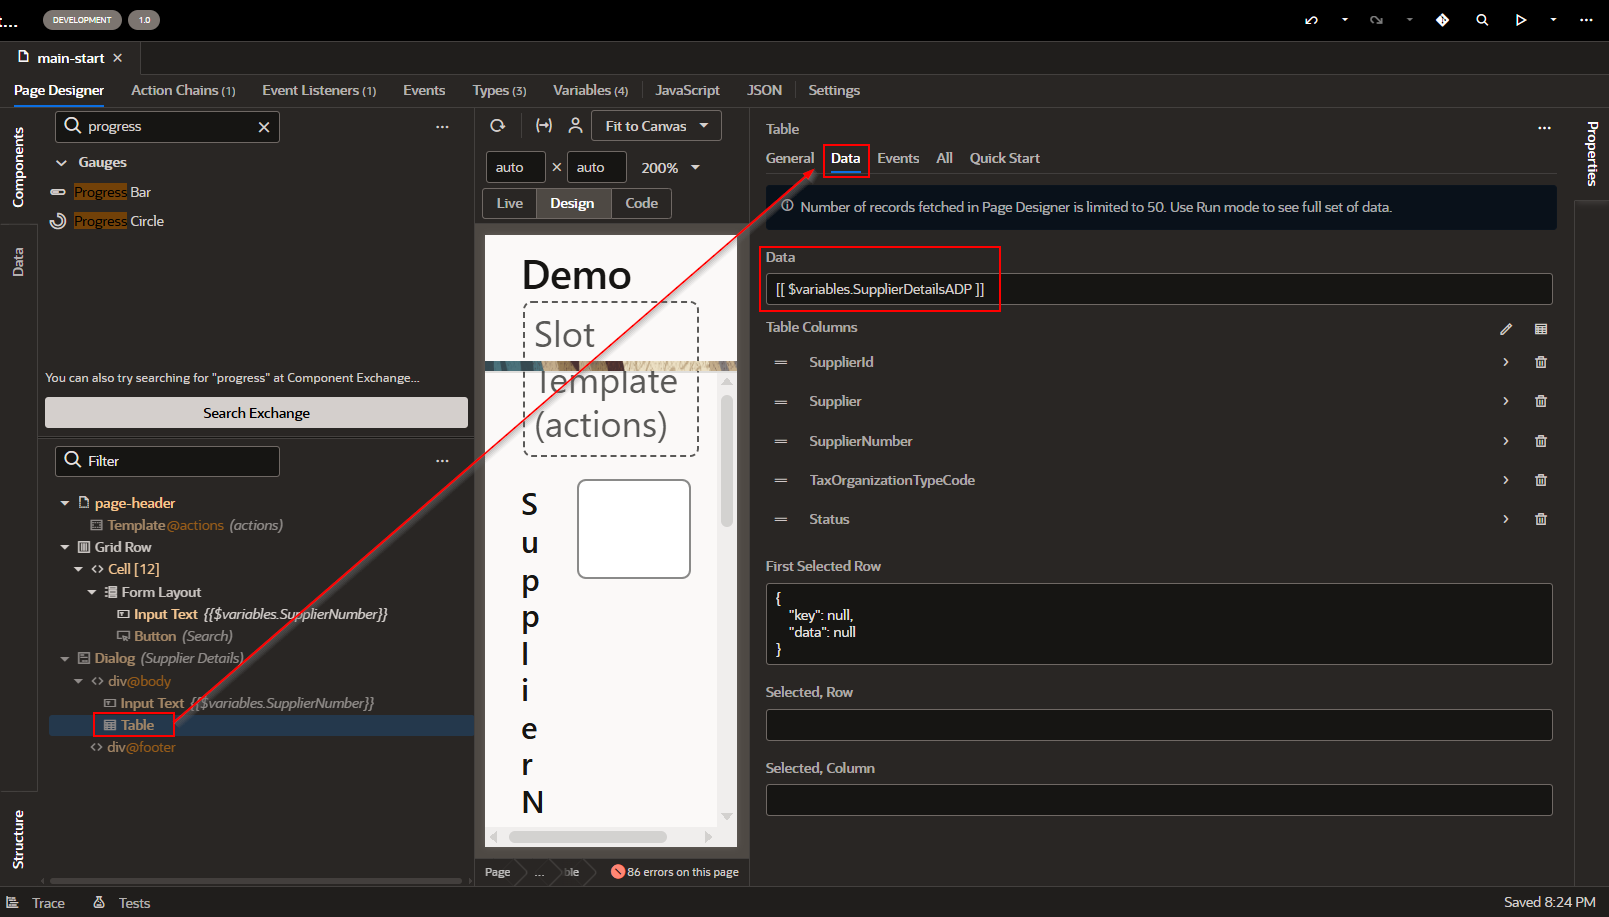
Assign this ADP variable to Table.
We will call REST API and populate this ADP variable in action chain.
Navigate to action chain and drag and drop “Call REST” component.
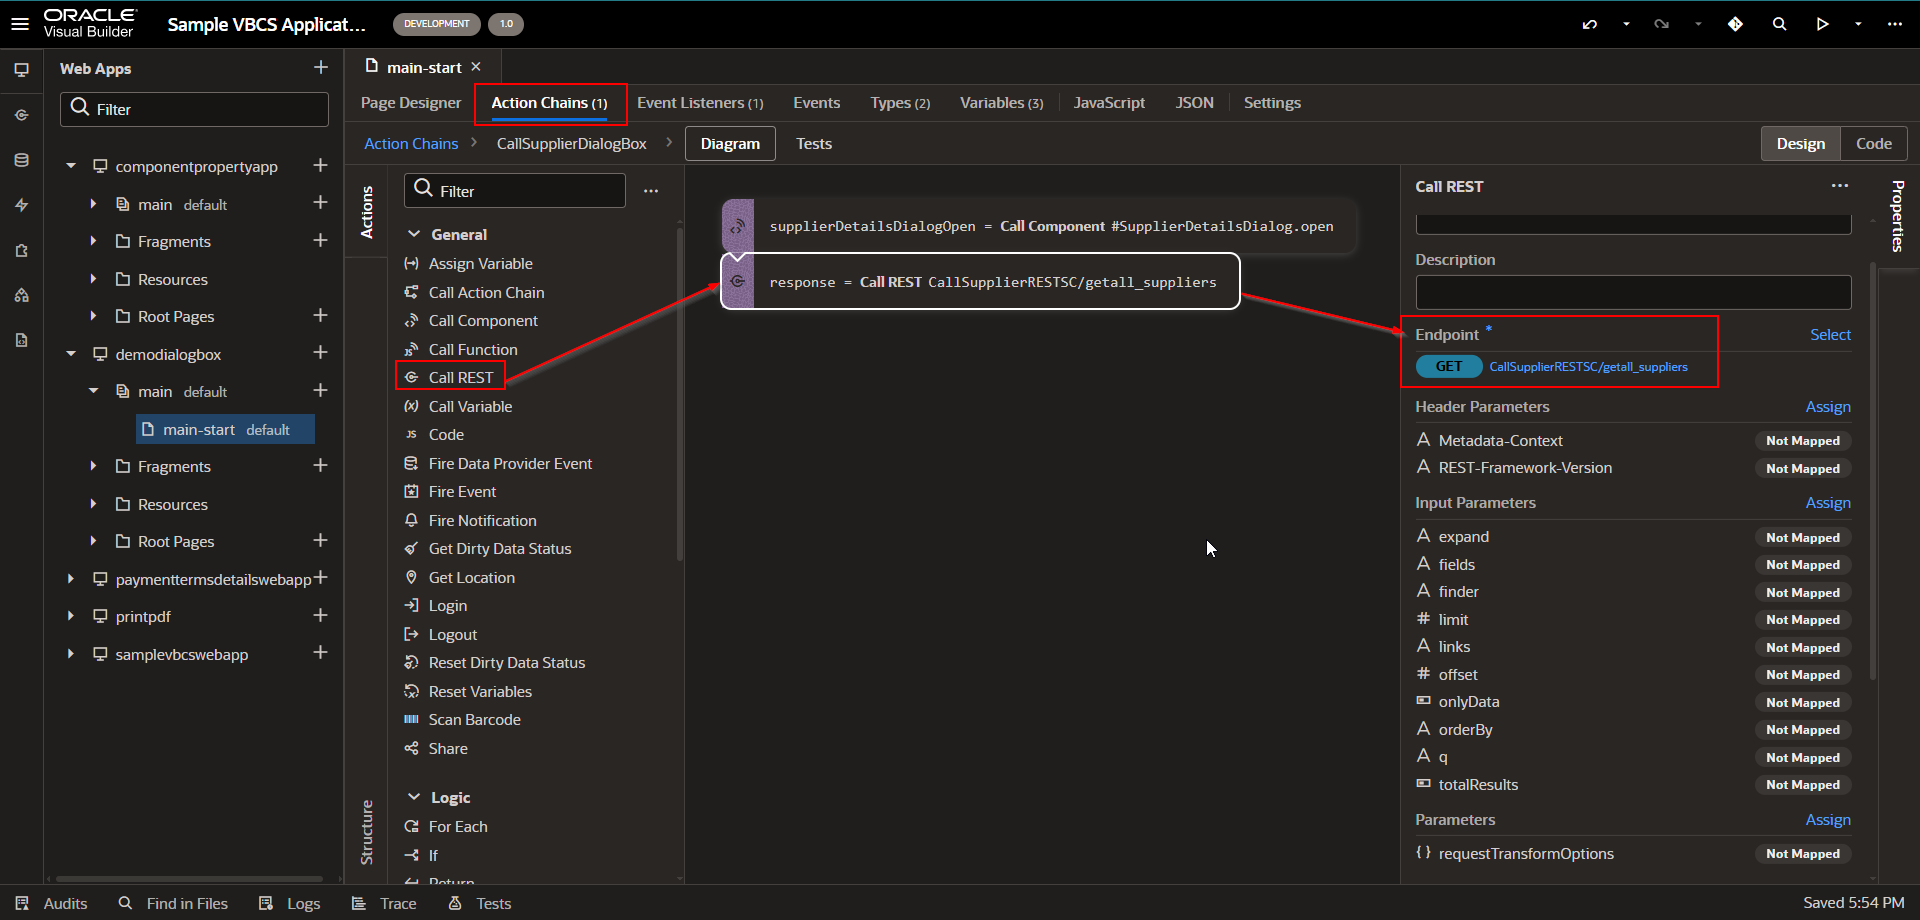
Set query parameter.
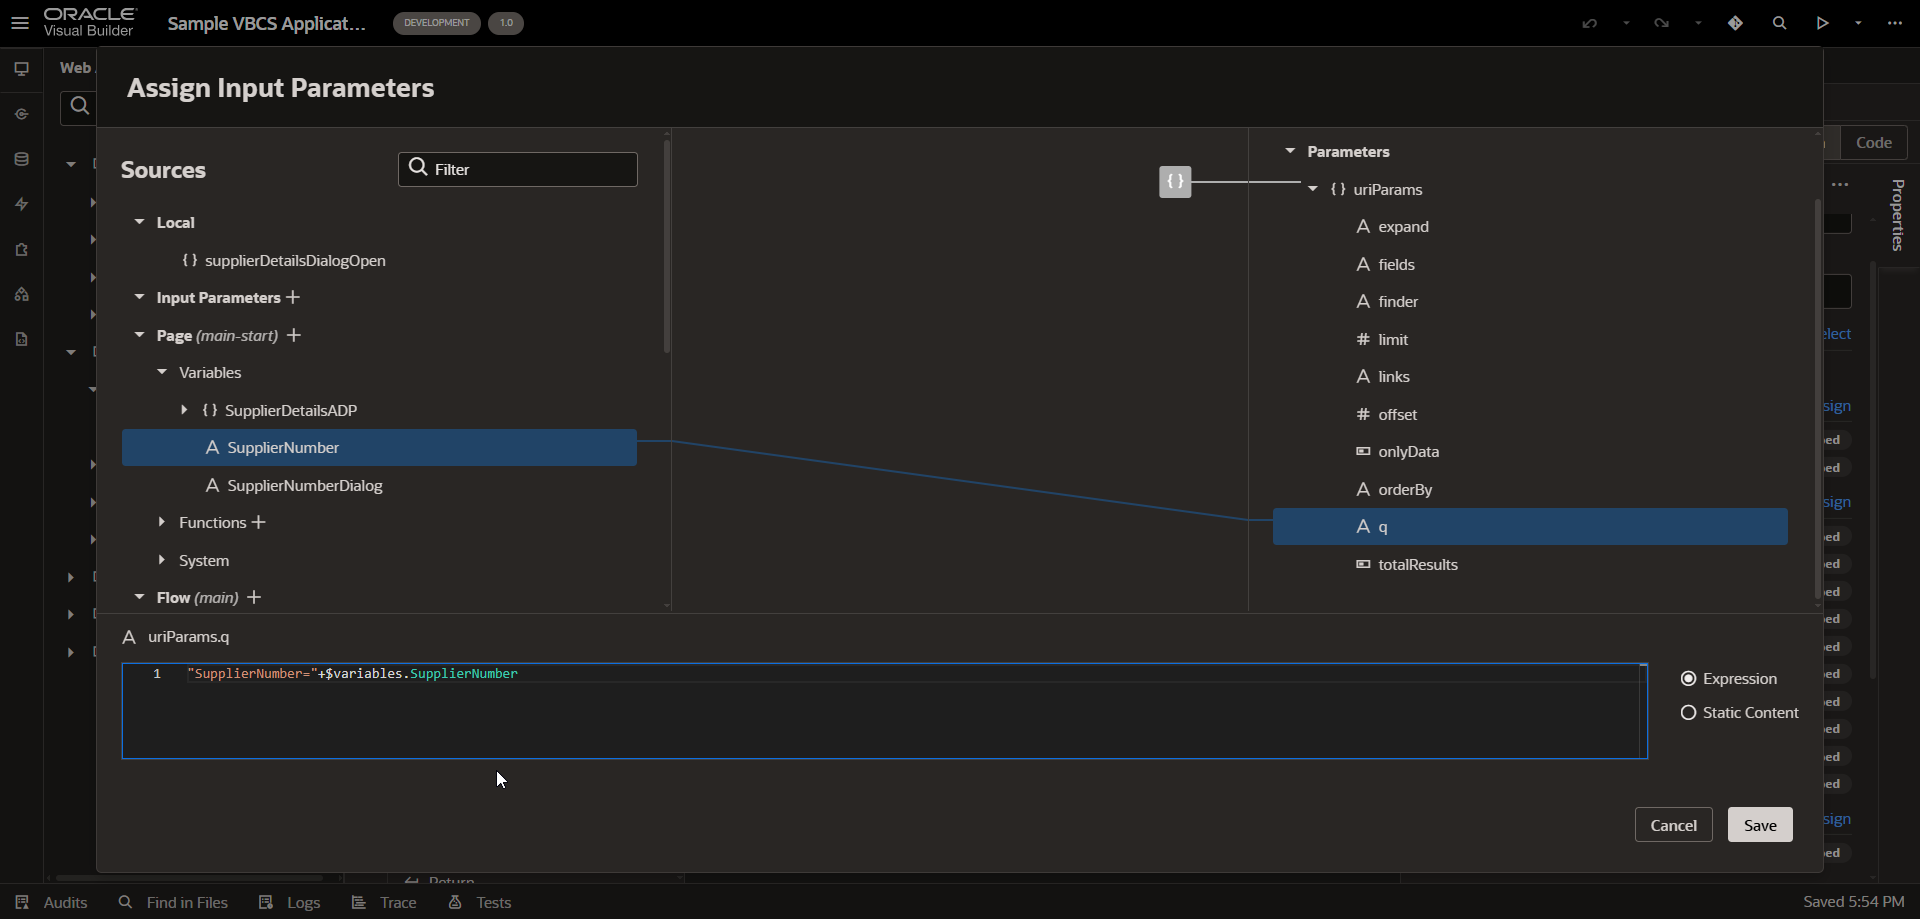
Click on Save.
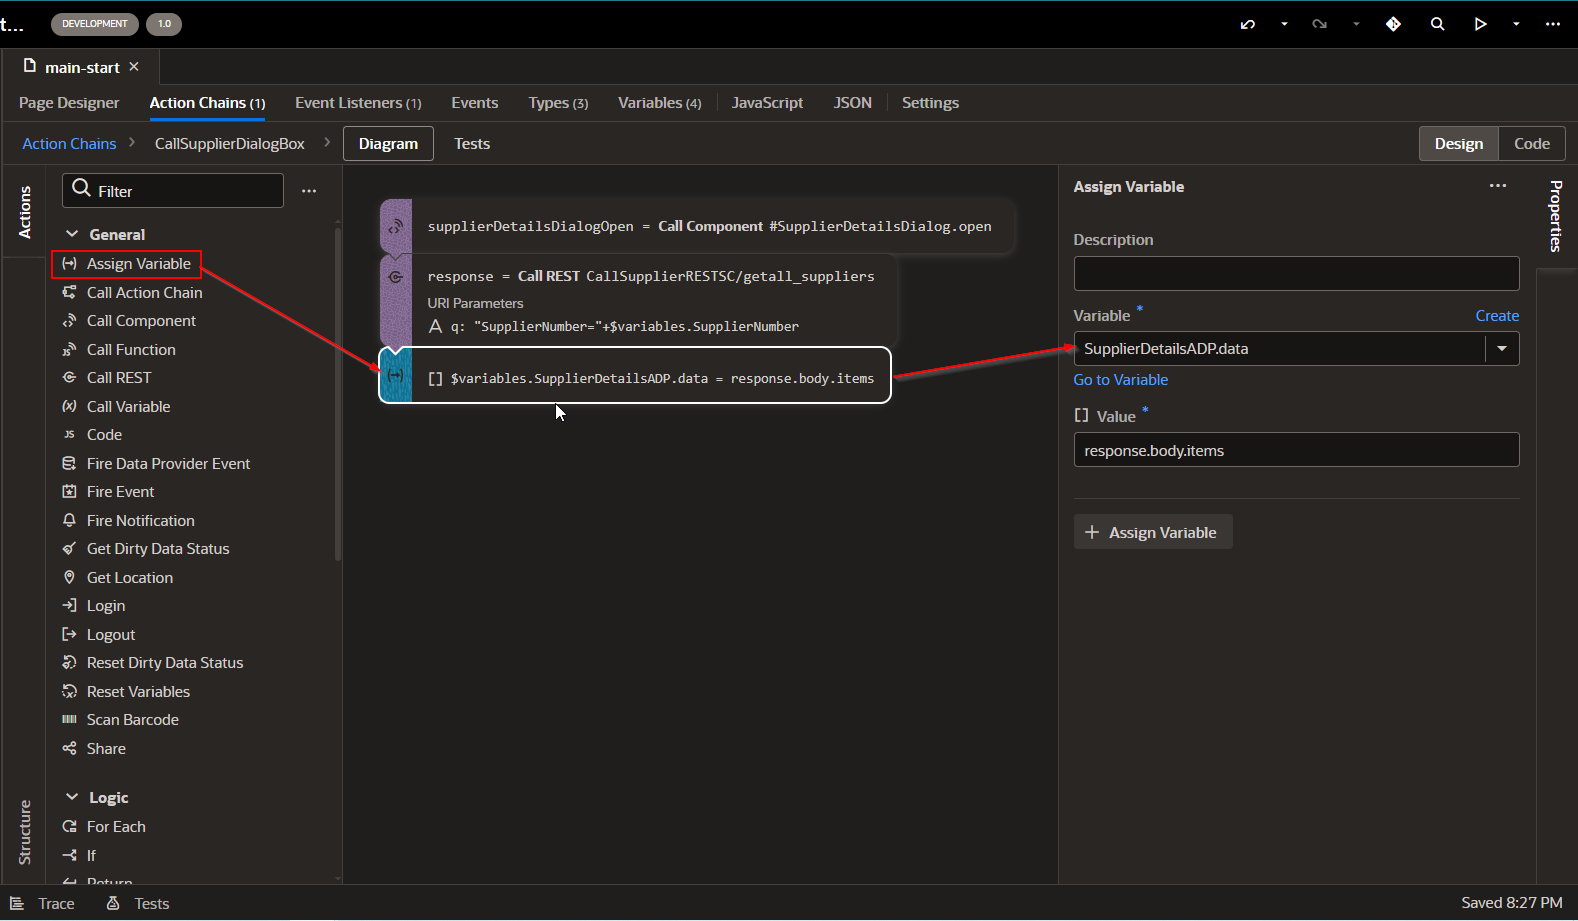
Now assign result to ADP variable.
Run the application.
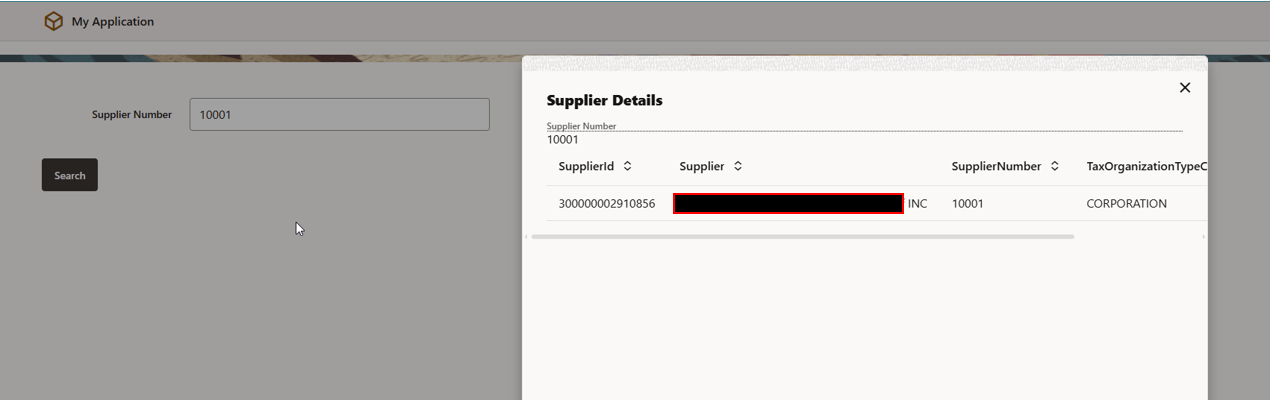
Click on Search.
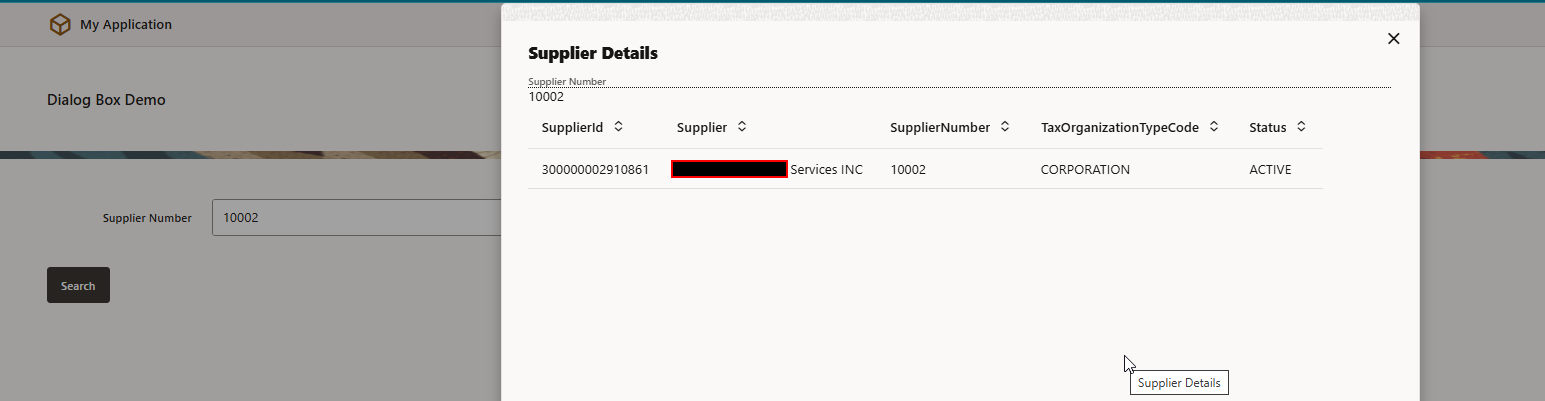
Dialog box is populated with respective supplier details.
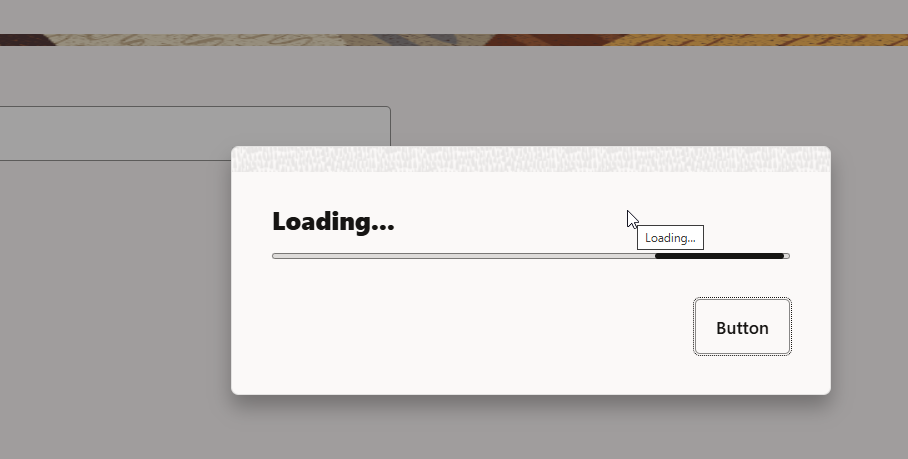
Step5: Add Progress Bar for Dialog Box.
We can add progress bar prior to dialog Box so that we can show loading while getting REST API response.
Follow below steps to implement progress bar:
Create another Dialog Box to add progress bar.
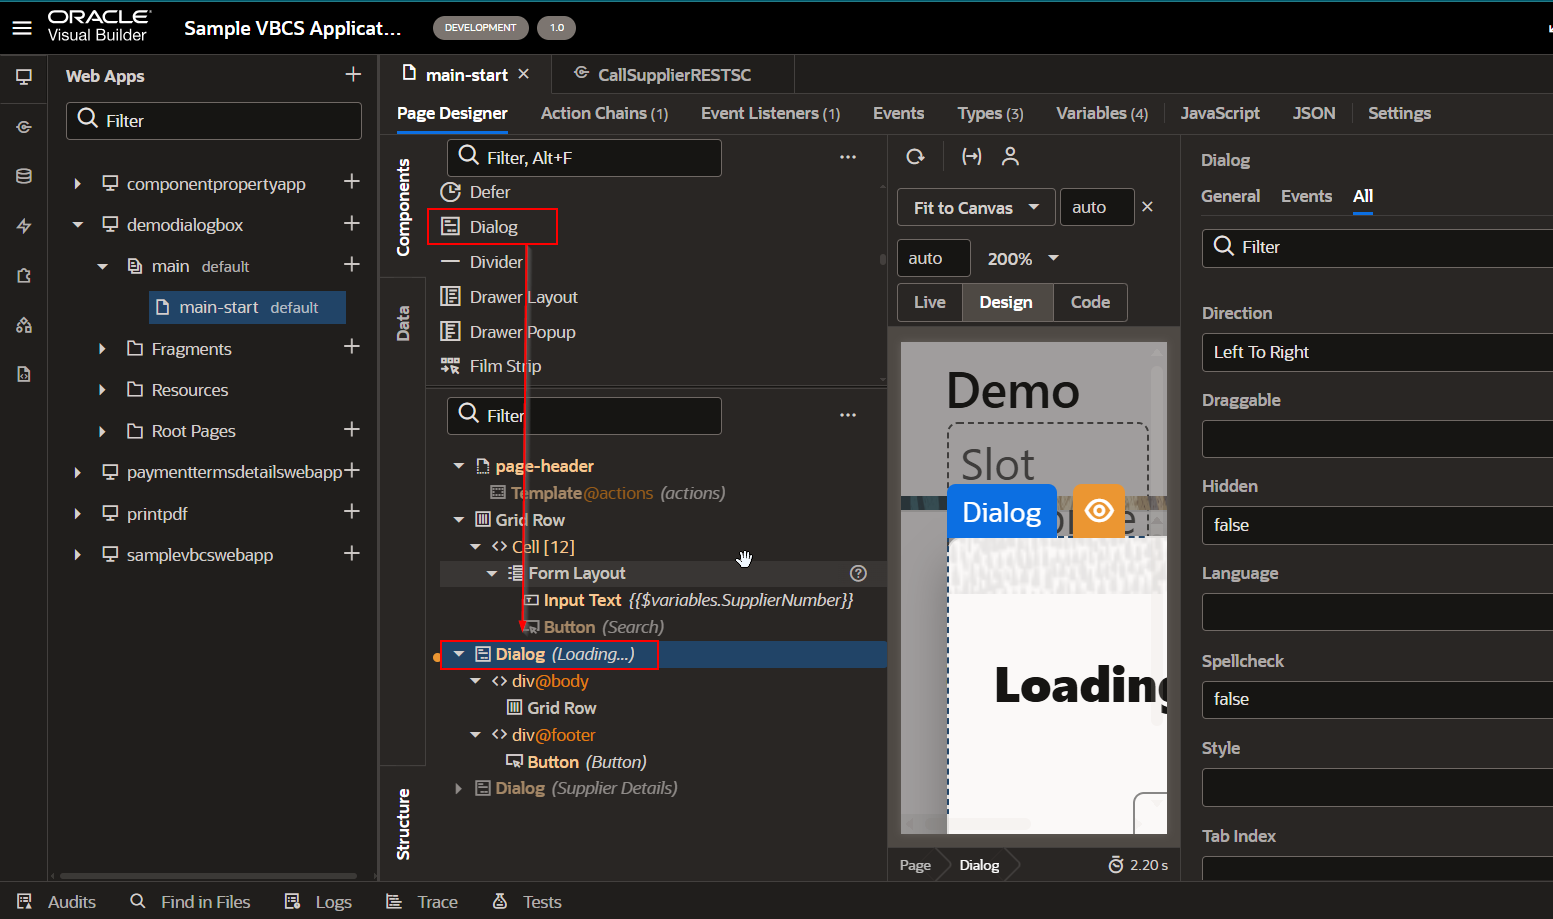
Set below properties for this dialog box:
|
|
Dialog Title | Loading… |
Title | Loading… |
Initial Visibility | Hide |
Temporary Override | Show |
ID | ProgressBarDialog |
Hidden | False |
Drag and drop progress bar on Grid row of dialog box.
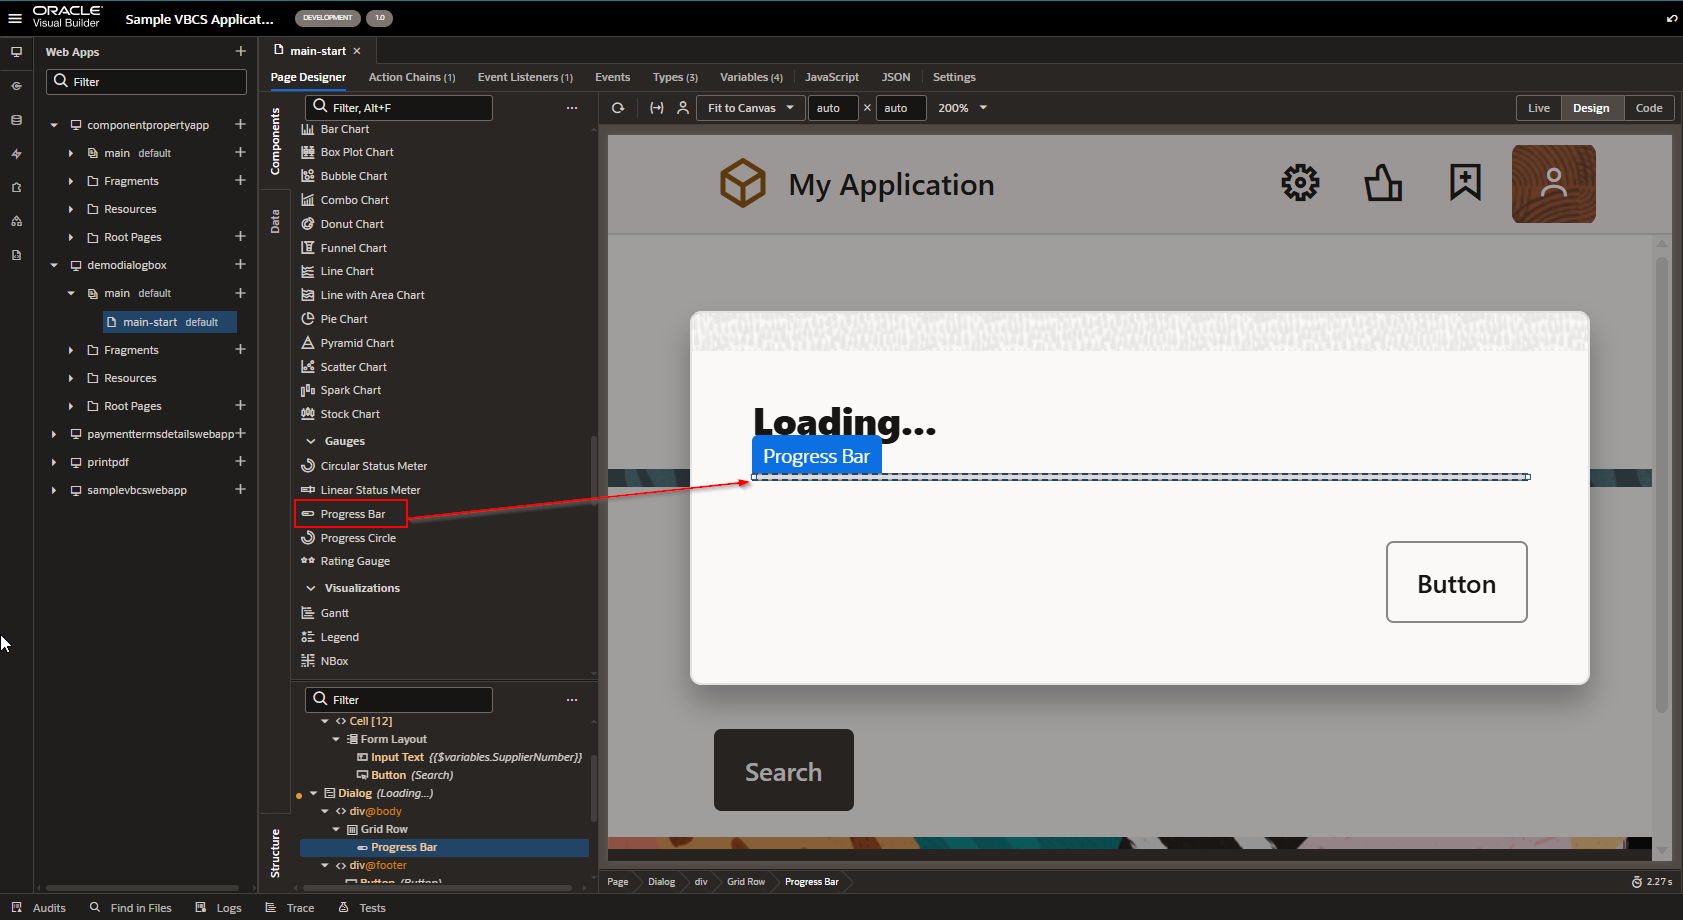
Set progress bar properties as below:

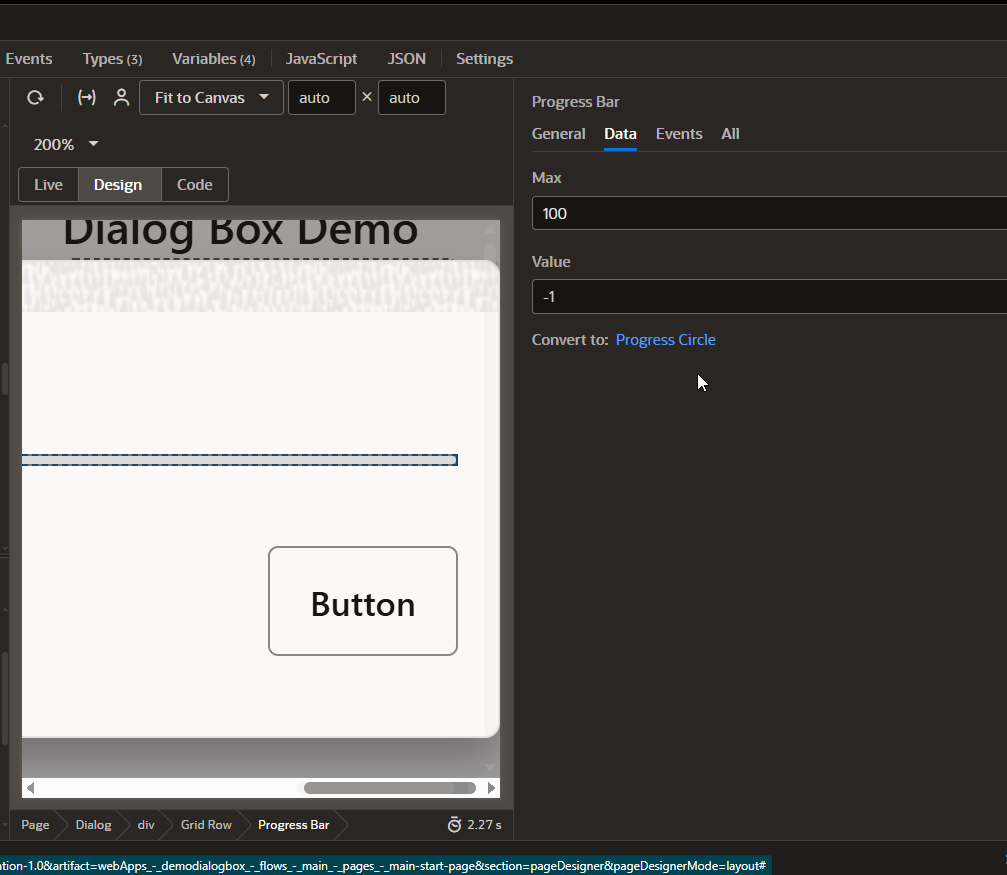
Value must be -1.
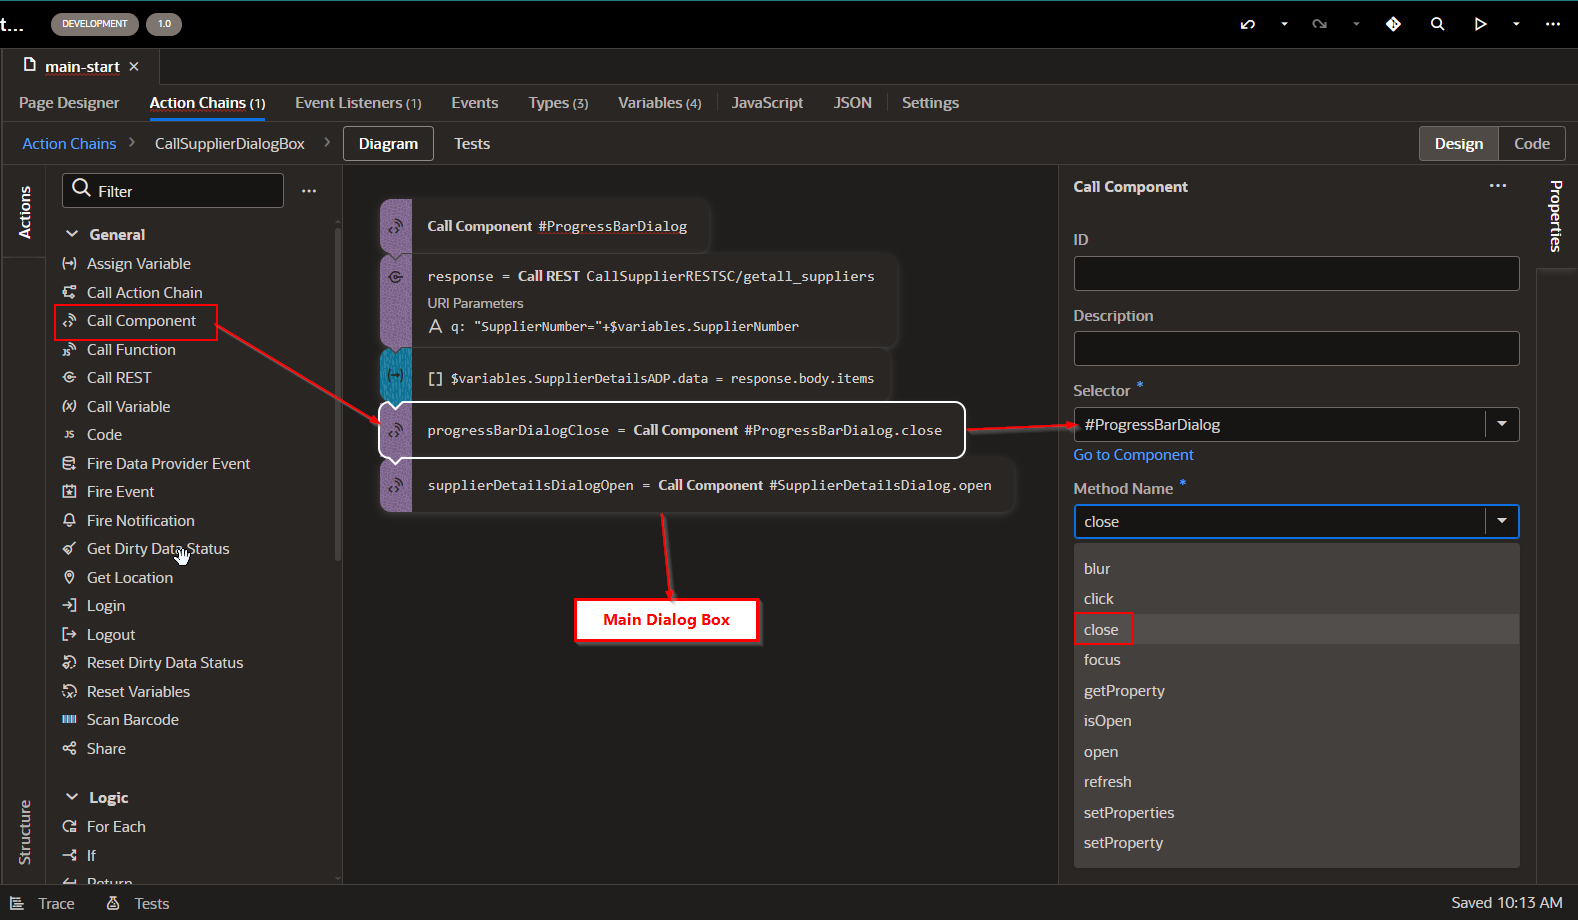
We will call this dialog box before calling Supplier Details Dialog box in action chain.
Navigate to action chain.
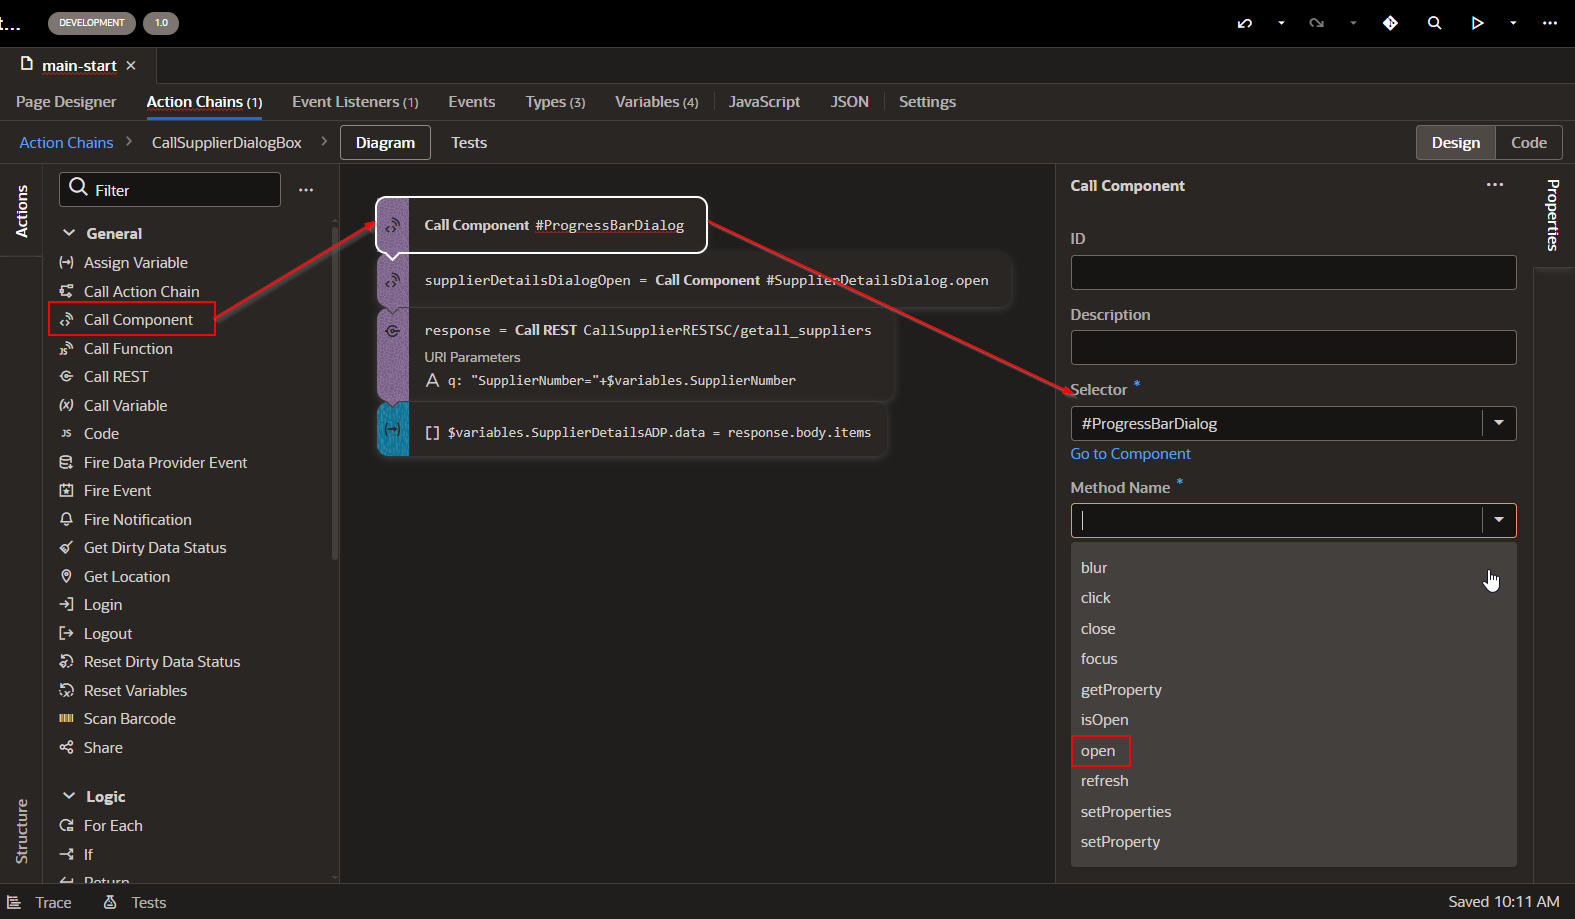
Now close this dialog box once we get reply from REST API.
Run the Application.
Click on Search.
In this way, we can use Dialog box and progress bar to provide better user experience for VBCS applications.